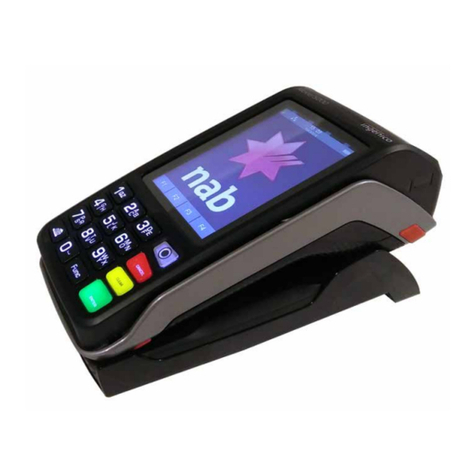
Fiserv Ingenico MOVE 5000 User manual

Technical Document
Ingenico
MOVE 5000
Terminal
User Guide
Fiserv Condential

2 | Fiserv Condential
What Are You Looking For?
Get to Know Your Terminal ��������������������������� 04
Introduction�������������������������������������������������������������������� 04
Terminal Location and PIN Privacy ������������������������������������������������ 04
Terminal Ownership ������������������������������������������������������������ 04
Your Terminal Layout������������������������������������������������������������ 05
Using the Keypad��������������������������������������������������������������� 06
Basic Functions ���������������������������������������������������������������� 07
Integration With Your Point-of-Sale (POS) ����������������������������������������� 08
Transaction Processing Options �������������������������������������������������� 09
Loading Receipt Paper ���������������������������������������������������������� 10
Communication Set-Up ������������������������������ 11
Broadband Internet (Ethernet Set-Up) ��������������������������������������������� 12
Broadband Internet (Wi-Fi Set-Up) ������������������������������������������������ 13
Bluetooth Set-Up (Pair Base to Terminal) ������������������������������������������ 15
Switching Communication Options ����������������������������������������������� 17
Communication Status ���������������������������������������������������������� 18
Operating Your Eftpos Terminal����������������������� 20
How to Complete a Sale��������������������������������������������������������� 20
Cash Out Transaction ����������������������������������������������������������� 21
Cash Out Transaction With Purchase ������������������������������������������� 21
Cash Out Only Transaction ���������������������������������������������������� 22
Tipping ������������������������������������������������������������������������ 24
How to Process a Refund�������������������������������������������������������� 24
Void Last Transaction ����������������������������������������������������������� 26
Preauthorisation Processing ����������������������������������������������������� 28
Part One: Preauthorisation ���������������������������������������������������� 28
Part Two: Completion �������������������������������������������������������� 28

3 | Fiserv Condential
Processing a Preauthorisation Transaction �������������������������������������� 29
Processing a Preauthorisation Completion �������������������������������������� 31
Surcharge ��������������������������������������������������������������������� 33
Enabling/Disabling Surcharge�������������������������������������������������� 33
Surcharge Report ������������������������������������������������������������ 34
Mail Order Telephone Order (MOTO)��������������������������������������������� 35
Dynamic Currency Conversion (DCC) ��������������������������������������������� 38
How to Print Last Receipt ������������������������������������������������������� 41
Reprint Specic Transaction Record (Invoice) �������������������������������������� 42
Settlement �������������������������������������������������������������������� 43
Manual Settlement����������������������������������������������������������� 43
Print Settlement Totals (Pre-Settlement)���������������������������������������� 44
Print Settlement Totals (Last Settlement) ��������������������������������������� 45
View Batch Details on the Screen���������������������������������������������� 46
Batch Totals ����������������������������������������������������������������� 47
Transaction List�������������������������������������������������������������� 47
How to Enable Transaction List ������������������������������������������������ 48
How to Print The Transaction List ���������������������������������������������� 49
Ofine Transaction Processing ��������������������������������������������������� 50
Card Rules������������������������������������������������������������������� 50
Electronic Fallback ������������������������������������������������������������ 50
Additional Terminal Functions ���������������������������������������������������� 51
Where to Get Help ����������������������������������� 52

Get to Know Your Terminal
4 | Fiserv Condential
Introduction
Your EFTPOS terminal from Fiserv allows to accept credit, debit and charge card transactions
electronically as a means of payment. Customers can access their cheque, savings or credit
accounts for purchases and refunds. Customers can also request cash out from cheque and
savings accounts.
Terminal Location and PIN Privacy
The physical location of an EFTPOS terminal is important in protecting a customer’s PIN privacy.
When your new terminal is installed or relocated within the premises, you must take care
toensure:
The EFTPOS terminal is in a position that allows the customer to enter their PIN so it cannot
be observed by employees or other customers
The EFTPOS PIN pad has an adequate length of terminal connection cord to allow customers
to enter their PIN privately
If in a xed position, the EFTPOS PIN pad has not been placed at an angle or height that
prevents customers from shielding their PIN entry
The placement of mirrors and other reective materials do not allow the customer’s PIN entry
to be observed through reection
Security cameras cannot make a visual record of a customer’s PIN entry
Communicate these guidelines to staff members who process EFTPOS transactions using the
terminal. It is also important to remind staff members that customers should never be asked to
disclose a PIN.
Terminal Ownership
All physical equipment provided to the merchant by Fiserv remains the property of Fiserv. This can
include but is not limited to EFTPOS terminals, PIN pads, power packs, phone line cables and any
additional hardware provided at the time of installation.

Get to Know Your Terminal
5 | Fiserv Condential
Your Terminal Layout
Your mobile integrated EFTPOS terminal is supplied with:
Power pack
Contactless card reader
3G/4G modem
Docking/Base station
Integrated Contactless Reader
Magnetic Stripe Reader
Menu
Cancel
Clear
Enter
Chip Reader
Receipt Printer

Get to Know Your Terminal
6 | Fiserv Condential
Using the Keypad
The grey Menu key on the keypad accesses different application menus
The red Cancel key on the keypad cancels the procedure in process
The yellow Clear key on the keypad cancels the last character
The green Enter key on the keypad validates input and powers on
the terminal
The Function button on the keypad is used to perform advanced functions
on the terminal
F2 on the touchscreen scrolls down menu options
F3 on the touchscreen scrolls up menu options
F2
F3

Get to Know Your Terminal
7 | Fiserv Condential
Basic Functions
Press the green Enter key on the keypad
Remove the terminal from its base and any power source
Press and hold the Func and yellow Clear keys together
Press the red Cancel button on the keypad
The terminal will return to the home screen if there is no activity for
60 seconds
Power on
Power off
Cancel an
action
Idle state

Get to Know Your Terminal
8 | Fiserv Condential
Integration With Your Point-of-Sale (POS)
The EFTPOS terminal can integrate with your POS to process credit, debit and charge card
transactions. When the card payment option is selected, the POS integration software provided by
Linkly (formerly PC EFTPOS), interacts with the EFTPOS terminal to process the transaction. The
outcome of the transaction is then automatically updated in your POS solution, making it easy for
you to reconcile the payments and shorten payment processing time.
EFTPOS terminals are designed to work with your Linkly (formerly PC EFTPOS)-certied POS
system. The POS system sends the total amount to the EFTPOS terminal to nalise the payment.
For all transaction types, the merchant initiates the transaction on the POS system and follows the
system prompts displayed on the POS screen. The customer follows the prompts displayed on the
terminal to process the payment.
Your EFTPOS terminal and base are paired through Bluetooth. This enables the terminal to continue
to operate normally when it is separated from the base.
You can also choose to have all transaction receipts printed directly from your POS system or have
the terminal print the transaction receipt.

Get to Know Your Terminal
9 | Fiserv Condential
Chip Card Reader
All chip cards must be inserted into the chip card reader located in
front of the terminal, below the keyboard.
Insert the credit card into the card reader with the gold
contact pad facing upward
Leave the chip card in the reader until the transaction
is completed
Remove the card when prompted by the terminal
The terminal screen prompts will guide you through the
transaction process
Contactless Reader
The contactless reader is located on top of the receipt roll around
the display.
If the card is capable of performing a contactless transaction,
place the card over the contactless reader
When the terminal is powered on, the rst LED willblink on
and off while the terminal is in Idle/Ready state
All four status LEDs will be illuminated from the time the
card reader is activated until completion of the contactless
transaction
Magnetic Stripe Reader
The magnetic stripe card reader is located on the right hand side
of the terminal.
If the card does not have a chip or contactless capability, you can
process transactions by swiping themagnetic stripe through the
terminal. The magnetic stripe should face down and against the
side of theterminal.
Transaction Processing Options
The EFTPOS terminal has a chip card reader, a magnetic stripe reader and an integrated
contactless reader for processing transactions.

Get to Know Your Terminal
10 | Fiserv Condential
Loading Receipt Paper
Open the printer cover by gently pulling the
printercover’s latch, then lift the cover away from
the printer.
Load a roll of thermal paper into the printer
Pull the paper up to the top of the terminal
Maintain the paper and close the cover
Press simultaneously on both upper corners of
the paper compartment until it clips into position
Use the serrated bar to tear off any excess paper
Correct paper position
Lift latch up
Pull cover open
Important
Always store thermal paper for your terminal in a dry, dark area.
Handle thermal paper carefully. Impact, friction, temperature, humidity and oils can affect
the colour and storage characteristics of the paper.
Never load a roll of paper that has folds, wrinkles, tears or holes at the edges of the
printarea.
Please call our Merchant help desk 1800-234-444 for stationery orders.

Communication Set-Up
11 | Fiserv Condential
Terminal communication conguration will be completed during the installation process.
Allcommunication options are available on new terminals and it is possible to switch
communication congurations.
If required, please contact the Merchant help desk on 1800-243-444 if you need assistance.
The EFTPOS terminal has the following communication options available:
Broadband internet (Ethernet Set-Up)
Broadband internet (Wi-Fi Set-Up)
Mobile 4G/3G
Integrated – Linkly (formerly PC EFTPOS) (USB and Rs232 connectivity with 4G/3G backup)
Bluetooth (pair base to terminal)

Communication Set-Up
12 | Fiserv Condential
Broadband Internet (Ethernet Set-Up)
Please ensure you have broadband internet available at your merchant site and have an Ethernet
cable supplied by Fiserv. Please contact your internet service provider to help set up broadband
internet if not available. Please ensure the terminal and base have been paired for Bluetooth (refer
section Bluetooth Set-Up (pair base to terminal) page 19).
Step 1
Plug the Ethernet cable
into the back of the
base.
Step 2
Press the Menu key.
Step 5
Select ETH to switch
the communications
option to Ethernet.
Step 3
Press 4 to select
Terminal.
Step 4
Press 4 to select
Host Comms.
Note: If Ethernet was not setup during technician visit at time of install, please contact Merchant
Services at 1800-243-444 and select terminal support for guidance on steps to setup Ethernet.

Communication Set-Up
13 | Fiserv Condential
Broadband Internet (Wi-Fi Set-Up)
Please ensure you have access to a Wi-Fi network. Please contact your internet service provider
to help Set-Up if not available.
Step 1
Press the Menu key.
Step 4
Press 4 to select
4. Settings.
Step 5
Choose Option
1. Wi-Fi
2. Bluetooth
Press 1 for Wi-Fi.
Step 2
Press 4 to select
Terminal.
Step 3
Press 3 to select
Others.
Step 7
Select Scan
networks to nd
available hotspots.

Communication Set-Up
14 | Fiserv Condential
Step 8
Select the required
network.
Step 9
Use the keypad to
enter the Password
for the selected Wi-Fi
hotspot, then tap the
green button to Enter.
Step 10
When the Password is
entered correctly, the
message “New Prole
OK” displays. The Wi-Fi
symbol in the status
header of the terminal
will turn green.

Communication Set-Up
15 | Fiserv Condential
Bluetooth Set-Up (Pair Base to Terminal)
Step 1
Press the Menu key.
Step 4
Press 4 to select 4.
Settings.
Step 5
Choose Option
1. Wi-Fi
2. Bluetooth
Press 2 for Bluetooth.
Step 2
Press 4 to select
Terminal.
Step 3
Press 3 to select
Others.
Note: Your password will be set up at the time of terminal installation. If you’re unsure of your
password, please contact the Merchant help desk at 1800-243-444.
Step 8
Select Base.

Communication Set-Up
16 | Fiserv Condential
Step 12
The idle screen
re-displays with the
Bluetooth symbol in
the status header of
the terminal.
Step 10
Select New base.
Step 11
A message displays on
the terminal to warn that
the terminal will reboot.
Step 9
Select Association.

Communication Set-Up
17 | Fiserv Condential
Switching Communication Options
Step 1
Press the Menu key.
Step 2
Press 4 to select
Terminal.
Step 3
Press 4 to select
Host Comms.
Note: There will be a slight delay while the terminal connects to the new communication network.
Step 4
Use the F2 and F3
buttons to scroll to the
communication option
and press Enter.

Communication Set-Up
18 | Fiserv Condential
Communication Status
Header Bar
When the terminal is powered on, the screen displays a status header bar consisting
offoursegments:
Segment 1: Indicates status of 4G/3G connectivity and signal strength, if enabled
Segment 2: Displays Ethernet status
Segment 3: Shows status of Bluetooth or Wi-Fi connectivity and signal strength, if enabled
Segment 4: Provides terminal information such as System Date and Time, Power and
Batteryconditions
Is displayed when the terminal is powered on to indicate 4G/3G
communications is supported.
As the terminal attempts to register with the mobile communications
provider, this icon is displayed.
When the terminal registers with the network provider, it will display
this icon. A 4G/3G signal strength indicator is also displayed.
Other 4G/3G conditions that may be displayed: SIM card not detected;
SIM card locked and entry of code is required.
4G/3G
When GPRS communications is enabled, the status of the modem is displayed in Segment1:

Communication Set-Up
19 | Fiserv Condential
Ethernet is congured but not enabled.
Ethernet communications enabled.
Ethernet
The status of ‘Ethernet’ communications is displayed in Segment 3:
Bluetooth
The EFTPOS terminal supports Bluetooth communications to pass and receive data with the
base/docking station.
The status of the Bluetooth will be displayed in the statusheader:
If the terminal exceeds the maximum operating range from its base,
this icon will be displayed to indicate the Bluetooth link is broken.
When the terminal is within range of its base and the Bluetooth link
has been interrupted, this icon will be displayed until the connection is
reestablished.
When the terminal has established a Bluetooth link with its base, this
icon will be displayed.
Note: Bluetooth Connectivity complies with Bluetooth v2.1 EDR (Enhanced Data Rate) – Class.
Operating range is subject to site location and prevailing conditions: Indoor, up to 70m typically;
Outdoor, up to 250m with clear line of sight.

Operating Your EFTPOS Terminal
20 | Fiserv Condential
How to Complete a Sale
Step 1
Enter the sale amount
from idle/home screen
and press Enter. If cash
out on a sale is enabled,
a CASH button will
appear. If TIP is enabled,
a TIP button will appear.
Step 4
If prompted, allow
customer to enter their
PIN and press Enter.
Note: Contactless
transactions do not
require a PIN or
signature for amounts
under $100*.
Step 2
Ask customer to
Tap, Insert or Swipe
theircard.
Step 5
Once approved,
remove card if inserted
and press Yes to print
a customer receipt,
if requested.
Step 3
If prompted ask
customer to select
their account type:
Cheque, Savings
or Credit.
Table of contents
Other Fiserv Payment Terminal manuals
Popular Payment Terminal manuals by other brands
First Data
First Data FD130 Quick reference guide
Quest Engineering
Quest Engineering CT400 Getting started guide
VeriFone
VeriFone P400 Activation guide
Global Payments
Global Payments V400m quick start guide
Global Payments
Global Payments Desk/5000 Quick reference guide
Optomany
Optomany axept S900 user guide
