Optomany axept S900 User manual

axept® S900
Quick Start Guide

www.123send.net
123 - axept® S900 Quick Start Guide
1
Contents
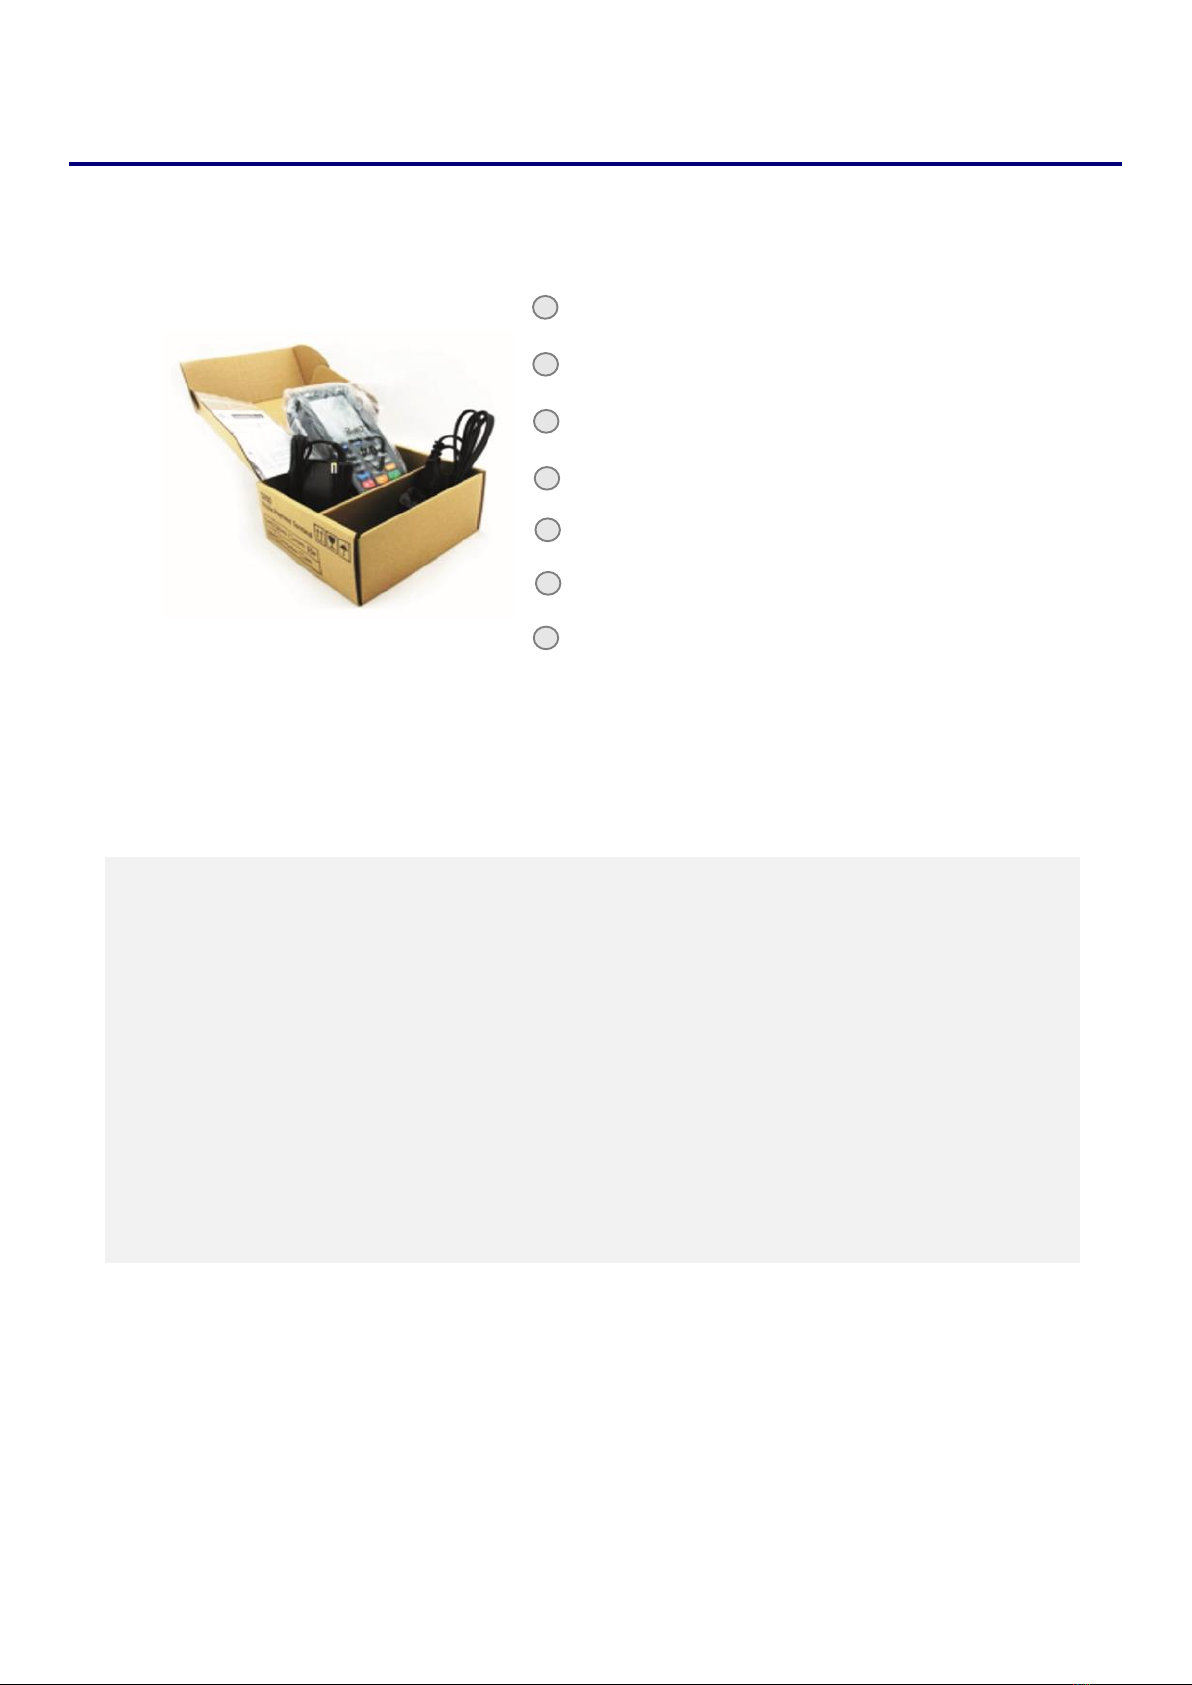
1Initial Setup ...............................................................................................................................................3
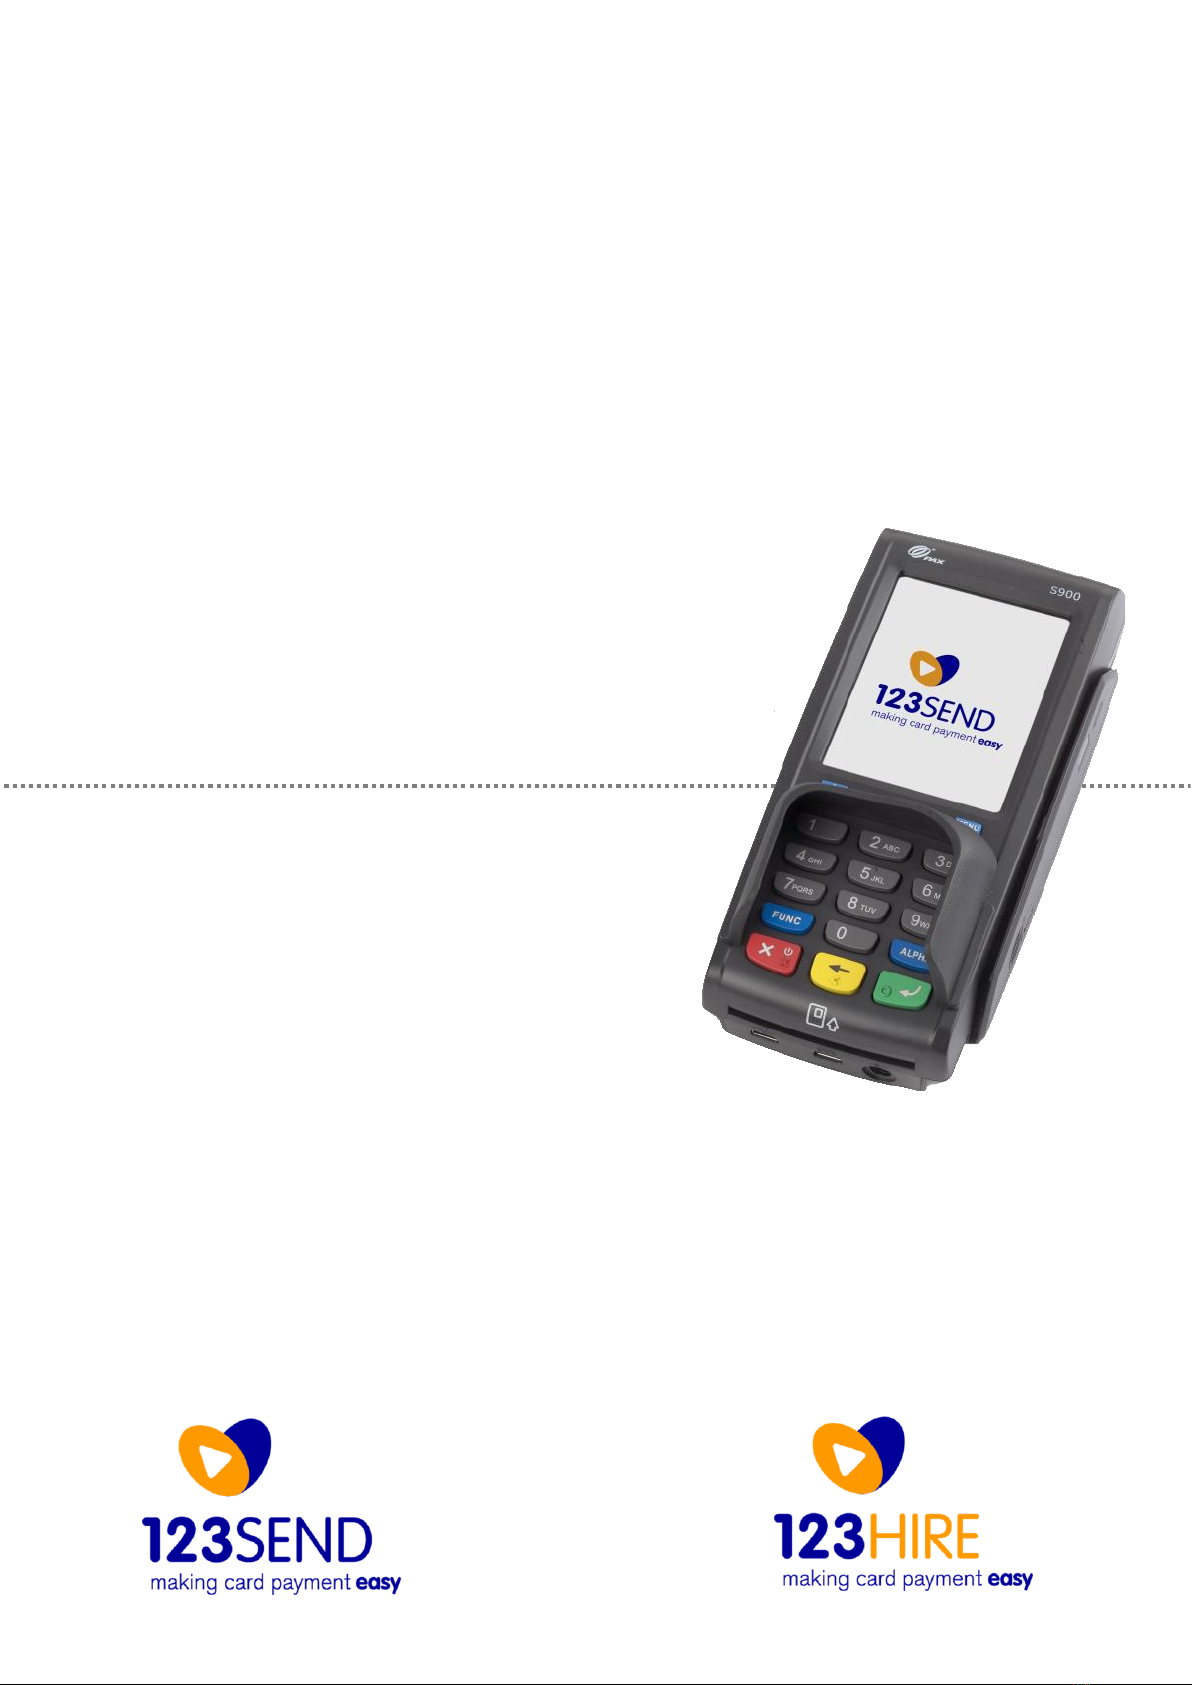
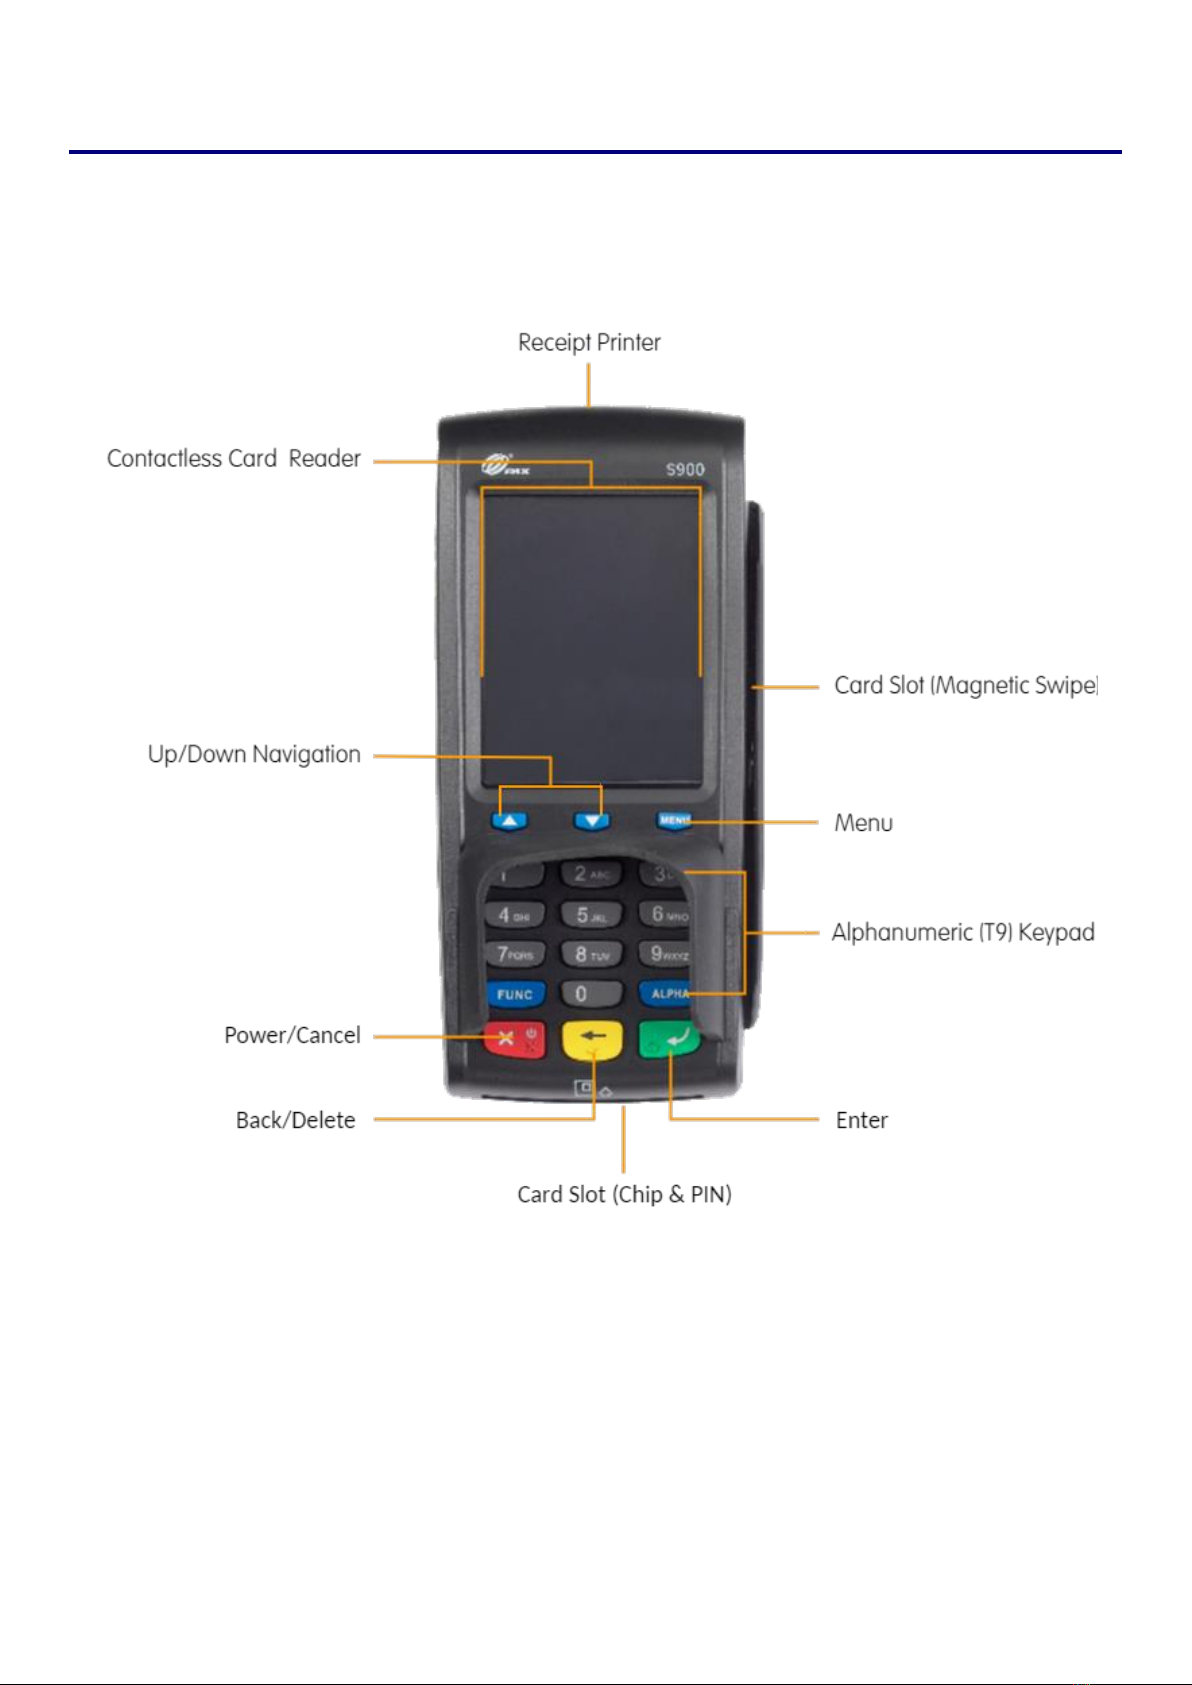
1.1 Terminal Overview ....................................................................................................................................4
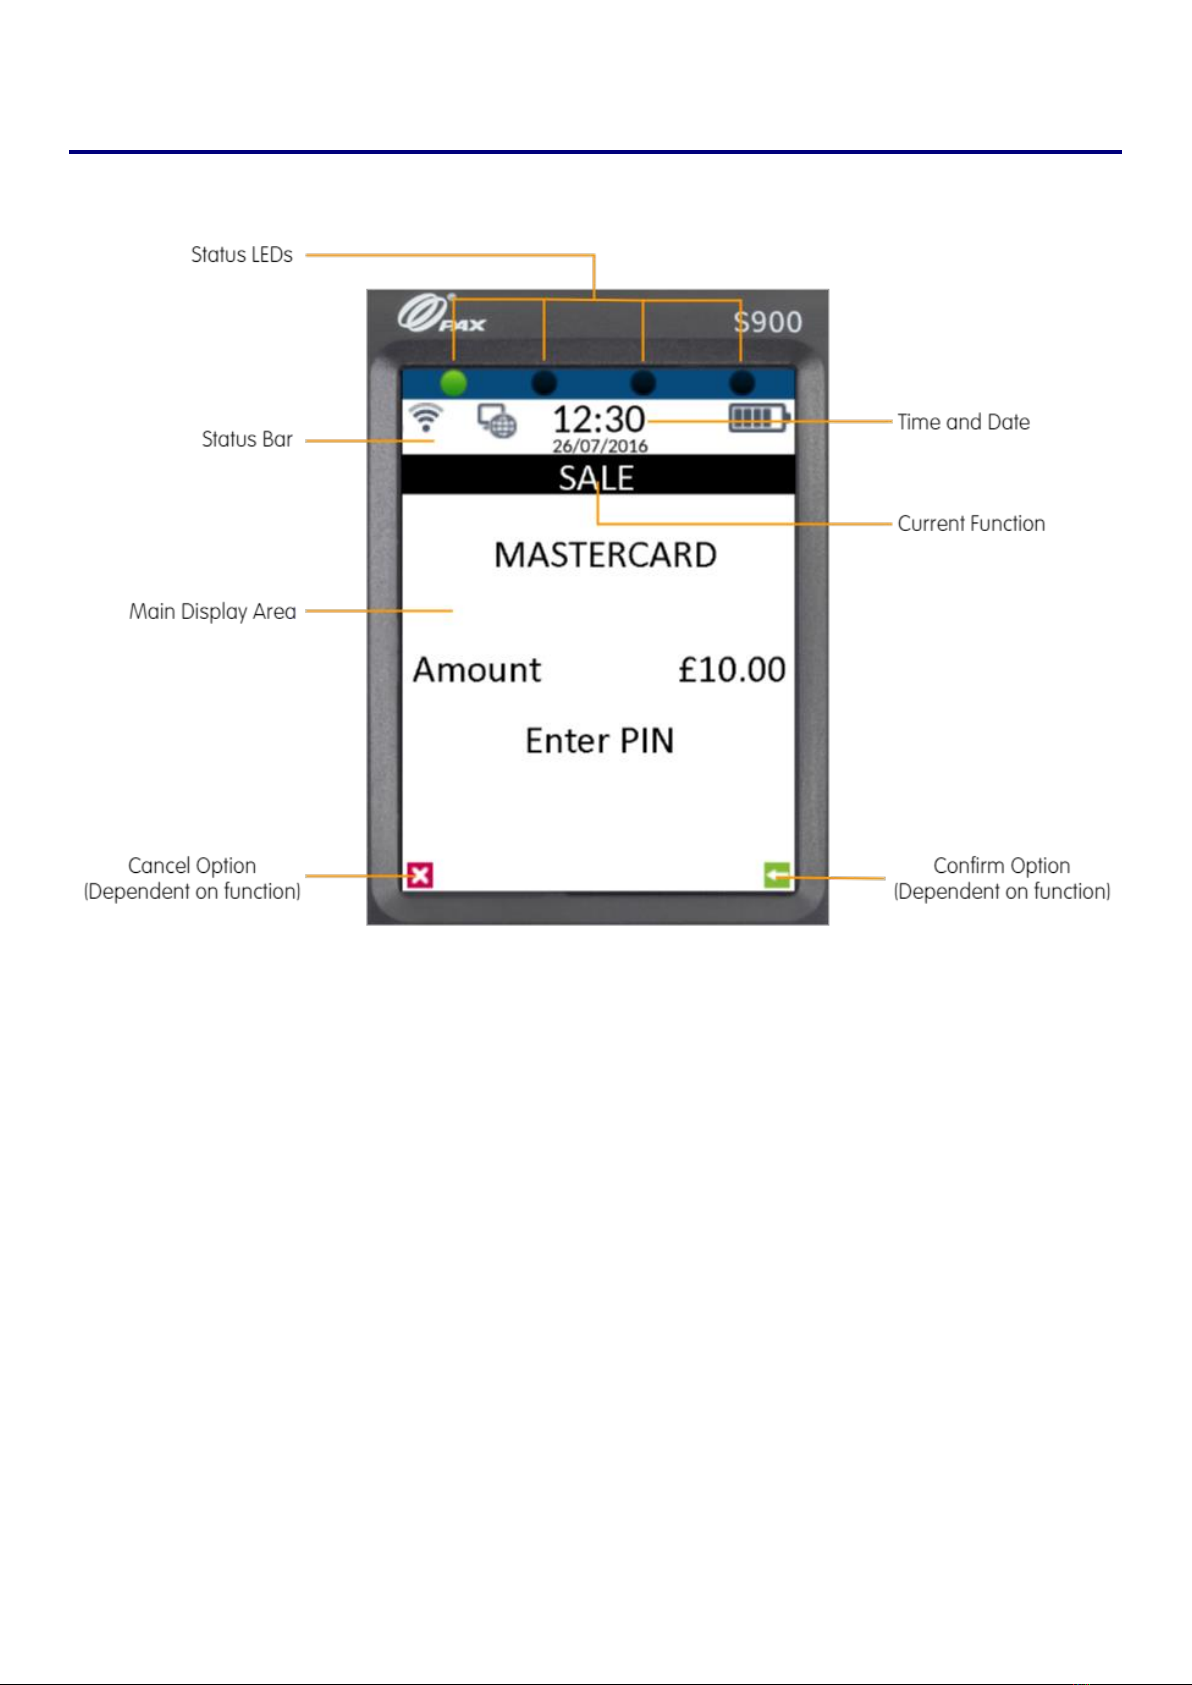
1.2 Screen Overview.......................................................................................................................................5
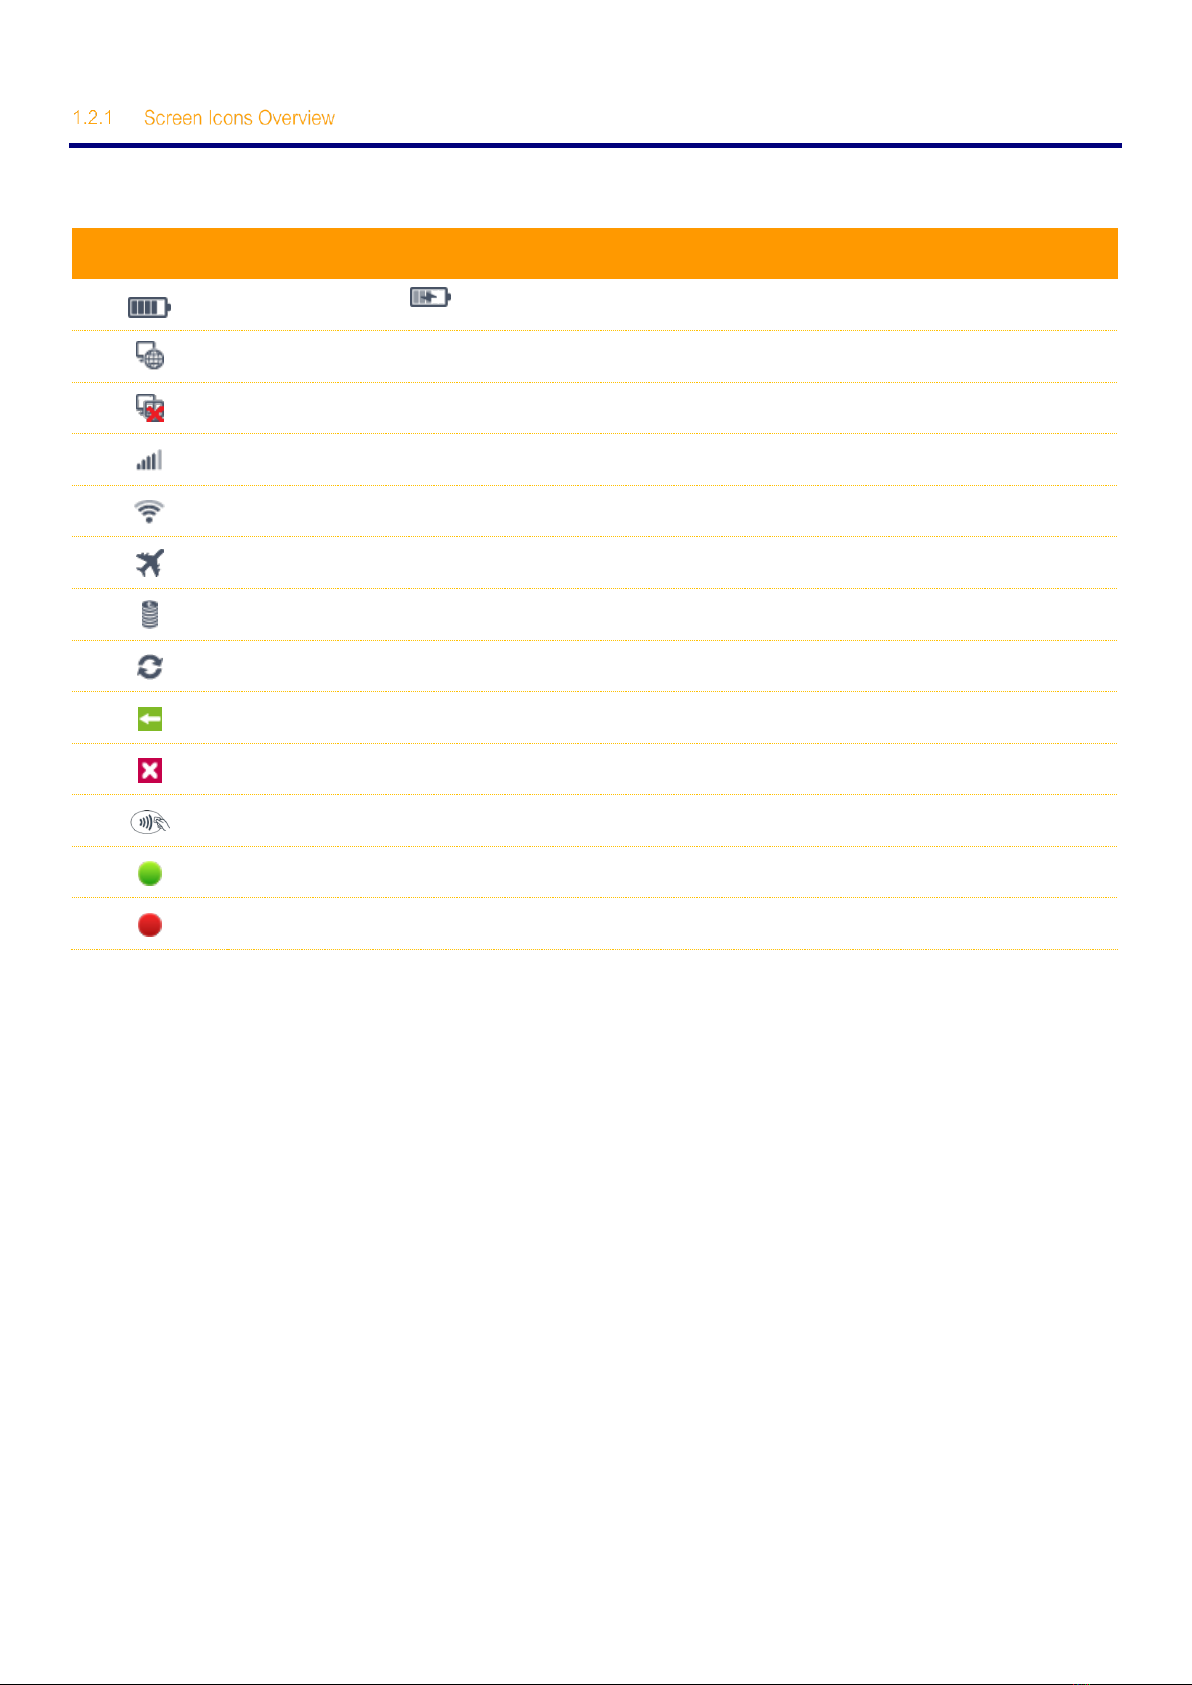
1.2.1 Screen Icons Overview.............................................................................................................................6
1.3 Connecting to the Network.......................................................................................................................7
1.3.1 Wi-Fi ..........................................................................................................................................................7
1.3.1.1 Automatically Configure Wi-Fi Settings ....................................................................................................8
1.3.1.2 Manually Configuring Wi-Fi Settings ........................................................................................................10
1.3.2 GPRS.........................................................................................................................................................12
2Logging On...............................................................................................................................................13
3Processing a Sale (Chip & PIN)................................................................................................................15
4Processing a Sale (Contactless) ..............................................................................................................20
5Useful Information.....................................................................................................................................24
5.1 Inserting Paper Roll ..................................................................................................................................24
5.2 Inserting the Battery..................................................................................................................................25
Contact Details
........................................................................................................................................................26

www.123send.net
123 - axept® S900 Quick Start Guide
2
Welcome
Thank you for choosing your axept® S900 terminal from 123 Send/123 Hire.
The axept® S900 is designed to process transactions as quickly as possible whilst providing valuable
reporting and other functionality supported by the Optomany Control Centre (OCC) web portal.
This quick-start guide is designed to provide users of the axept® S900 with
everything needed to set-up, register and process your first transaction.
Should you have any questions on anything in this guide, please do not hesitate to contact 123’s Customer
Support Team using the details on page 26.

www.123send.net
123 - axept® S900 Quick Start Guide
3
1Initial Setup
Before starting to use the axept® S900, please take a few moments to check the contents of the box; you should have received the following:
axept®
S900 Terminal
External AC Power Adapter
External AC Power Cable
Thermal Paper Roll
Battery (inside terminal)
SIM Card (inside terminal)
Quick Start Guide (this document)
IMPORTANT
PLEASE CONFIRM THAT THE TAMPER BAG AND TERMINAL SERIAL NUMBER MATCHES THOSE
SENT TO YOU IN YOUR ORDER EMAIL NOTIFICATION(S) FROM 123.
If anything is missing or damaged or you experience any issues, please contact 123 on 0800 54 24

www.123send.net
123 - axept® S900 Quick Start Guide
4
1.1 Terminal Overview
An overview of the axept® S900 terminal.

www.123send.net
123 - axept® S900 Quick Start Guide
5
1.2 Screen Overview
An overview of the axept® S900 screen.

www.123send.net
123 - axept® S900 Quick Start Guide
6
Descriptions of the axept® S900 screen icons.
Icon
Description
Battery strength indicator ( indicates battery is charging)
Internet connection present
No internet connection present
GPRS signal indicator
Wi-Fi signal indicator
Flight mode enabled
Transaction data stored on the terminal (not displayed once data uploaded)
Terminal configuration download required
Confirmation option
Cancel option
Ready for card (Chip and PIN, Contactless or Swipe)
Green contactless LED (blinks when idle, incrementally lights up if card is being read)
Contactless LED (unable to read card)

www.123send.net
123 - axept® S900 Quick Start Guide
7
1.3 Connecting to the Network
Power on the axept® S900 by pressing and holding the key on the keypad for a few seconds until the terminal screen lights up (the start-up process
may take a few minutes).
The following steps describe the process for configuring the Wi-Fi Network Settings.
01
Once the loading process is complete, the Network Configuration menu will appear.
Highlight ‘WIFI’ using the and keys on the keypad and press the key on the
keypad to continue.
02
axept® S900 will ask if manual configuration of Wi-Fi settings is required.
Press the key on the keypad to manually configure the settings or the key on the keypad
to automatically configure the settings.

www.123send.net
123 - axept® S900 Quick Start Guide
8
The following steps describes the process for automatically configuring the Wi-Fi Network Settings.
01
If the option to manually configure Wi-Fi was not selected, axept® S900 will start to scan for available Wi-Fi
networks.
02
The Wi-Fi networks available are displayed.
Using the and keys on the keypad, select the network required and press the
key on the keypad to continue.
03
Enter the Wi-Fi password.
(To use alpha characters, press the numeric key containing the alpha character required multiple times until it
is displayed)
Press the key on the keypad to continue.
04
axept® S900 supports Dynamic Host Configuration Protocol (DHCP) which automatically obtains all network
settings.
To use DHCP, press the key on the keypad to continue.
If a fixed IP address is required rather than using DHCP, please refer to the axept® S900 User Guide for
more information (See Further Reading –Page 26).

www.123send.net
123 - axept® S900 Quick Start Guide
9
INFO
123 recommend that the Wi-Fi network used is secure and requires authentication as this will adhere to PCI DSS guidelines.
axept® S900 supports WPA2 PSK encryption. WPA2 PSK is a method of securing your network using WPA2 with the use of the Pre-Shared
Key (PSK) authentication.
axept® S900 supports the use of the 802.11 B/G/N (2.4GHz) Wi-Fi Bands.
05
Please wait whilst the connection is validated.
06
If all the settings are valid, a confirmation that the network configuration has successfully completed will briefly
be displayed.
axept® S900 will return to the ‘Select Networking Type’ screen.

www.123send.net
123 - axept® S900 Quick Start Guide
10
The following steps describe the process for manually configuring the Wi-Fi Network Settings.
01
If the option to manually configure the network settings was selected, the Service Set Identifier (SSID) for the
network will be required. Enter the SSID using the terminal’s keypad.
(To use alpha characters, press the numeric key containing the alpha character required multiple times until it
is displayed).
Press the key on the keypad to continue.
02
Use the and keys on the keypad to highlight the network security type required.
Press the key on the keypad to continue.
03
Enter the Wi-Fi password.
(To use alpha characters, press the numeric key containing the alpha character required multiple times until it
is displayed)
Press the key on the keypad to continue.
04
If the network security type selected is ‘WEP’, enter the key index value (this step is not required if other network
security types are used).
Press the key on the keypad to continue.

www.123send.net
123 - axept® S900 Quick Start Guide
11
INFO
123 recommend that the Wi-Fi network used is secure and requires authentication as this will adhere to PCI DSS guidelines.
axept® S900 supports WPA2 PSK encryption. WPA2 PSK is a method of securing your network using WPA2 with the use of the Pre-Shared
Key (PSK) authentication.
axept® S900 supports the use of the 802.11 B/G/N (2.4GHz) Wi-Fi Bands.
05
axept® S900 supports Dynamic Host Configuration Protocol (DHCP) which automatically obtains all network
settings.
To use DHCP, press the key on the keypad to continue.
If a fixed IP address is required rather than using DHCP, please refer to the axept® S900 User Guide for
more information (See Further Reading –Page 26).
06
Please wait whilst the connection is validated.
07
If all the settings are valid, a confirmation that the network configuration has successfully completed will briefly
be displayed.
axept® S900 will return to the ‘Select Networking Type’ screen.

www.123send.net
123 - axept® S900 Quick Start Guide
12
To use a GPRS connection, either as a back-up for Wi-Fi or in place of, configure the axept® S900 using the procedure outlined below.
01
Once the loading process is complete, the Network Configuration menu will appear.
Highlight ‘GPRS’ using the and keys on the keypad and press the key on the
keypad to continue.
02
Please wait whilst the connection is validated.
03
axept® S900 confirms that the GPRS network configuration is successfully completed.

www.123send.net
123 - axept® S900 Quick Start Guide
13
2Logging On
01
Once axept® S900 has completed the start-up process, it will prompt for confirmation of the Department ID.
Press the key on the keypad to continue.
If the Department ID needs to be changed, press the key on the keypad and enter the new
Department ID.
02
Enter the User ID using the keypad and press the key on the keypad to continue.
03
Enter the password using the keypad and press the key on the keypad to continue.
04
Please wait whilst axept® S900 processes the log on details.

www.123send.net
123 - axept® S900 Quick Start Guide
14
INFO
To Logon using a different Department ID, press the key on the keypad on the Logon confirmation screen in step
01
Enter the new Department ID using the keypad and press the key on the keypad to continue.
05
Once the log on has been completed, the main menu will be displayed.

www.123send.net
123 - axept® S900 Quick Start Guide
15
3Processing a Sale (Chip & PIN)
Once the logging on process has been completed, axept® S900 is ready to process transactions. The following describes the end-to-end operation of a Chip &
PIN sale:
01
From the main menu, select option 1: Sale
(Press the key on the keypad).
Alternatively, ask the cardholder to insert their card into (with the Chip of the card on top, facing towards you)
into the Chip and PIN card slot at the base of the terminal.
02
Enter the amount of the sale using the keypad.
(axept® S900 will automatically enter the decimal place for you, for example: for £10.00, enter 1000)
Press the key on the keypad to continue.

www.123send.net
123 - axept® S900 Quick Start Guide
16
03
If required, enter the reference for the transaction. If a reference is not needed, press the key on the
keypad to skip.
(To use alpha characters, press the numeric key containing the alpha character required multiple times until it
is displayed)
Press the key on the keypad to continue.
04
If the card holder’s card has been previously inserted, skip to Step
06
, otherwise axept® S900 will prompt
for the card to be presented.
05
Insert the card (with the Chip of the card on top, facing towards you) into the Chip and PIN card slot at the
base of the terminal.
06
Once the card is inserted, axept® S900 will process the card.
Please wait and do not remove the card whilst this is in progress.

www.123send.net
123 - axept® S900 Quick Start Guide
17
07
Press the key on the keypad to confirm cashback is required or the key on the keypad to
skip.
Only Merchants offering cashback and have this option setup will have the cashback facility.
Skip to step
10
if cashback is not required.
08
If cashback is required, enter the cashback amount using the keypad.
(axept® S900 will automatically enter the decimal place for you)
Press the key on the keypad to continue.
09
The total amount of the sale and cashback will be displayed. Press the key on the keypad to confirm
the amount is correct or press the key on the keypad to cancel.
10
On the Enter PIN screen, pass the axept® S900 terminal to the cardholder and ask them to enter their PIN.
After the PIN has been keyed in, the cardholder will then need to press the key on the keypad to
continue.

www.123send.net
123 - axept® S900 Quick Start Guide
18
11
axept® S900 will provide a PIN OK confirmation if the PIN has been correctly entered.
12
axept® S900 will attempt to authorise the transaction with your chosen Merchant Services Provider.
13
axept® S900 will confirm that the payment is complete if authorisation is successful.
14
Once the payment is complete, axept® S900 will prompt for the card to be removed.

www.123send.net
123 - axept® S900 Quick Start Guide
19
15
Once the card is removed, the Merchant Receipt will begin printing.
16
Tear off the receipt (after printing has completed) from the axept® S900 terminal and press the
key on the keypad to continue.
17
The cardholder receipt will then begin printing and can be torn off once printing has completed.
18
The payment processing procedure is now complete and axept® S900 will return to the main menu.
Other manuals for axept S900
4
Table of contents
Other Optomany Payment Terminal manuals