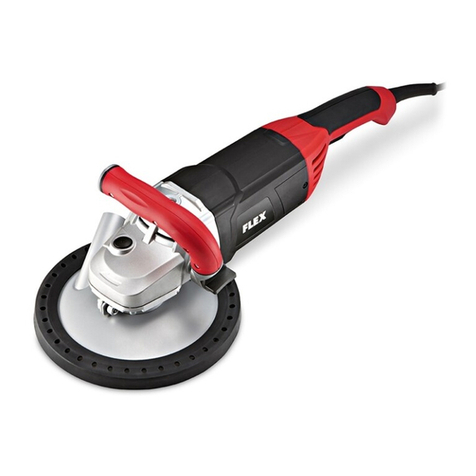
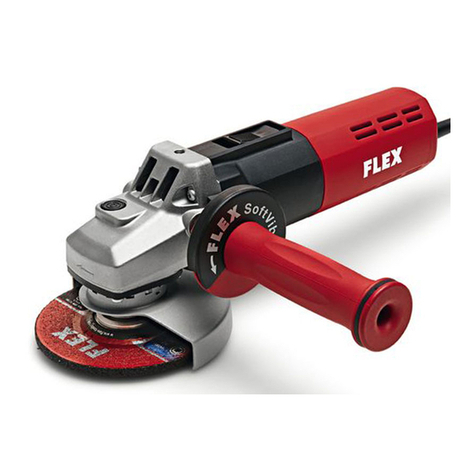
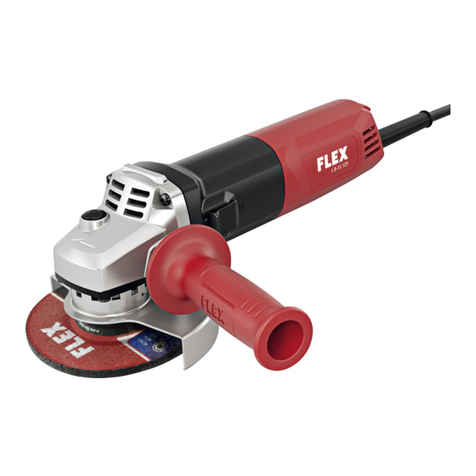
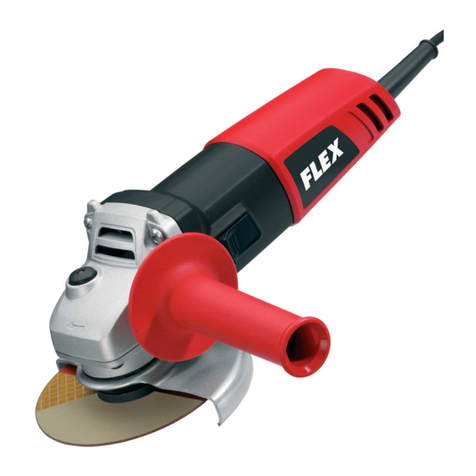
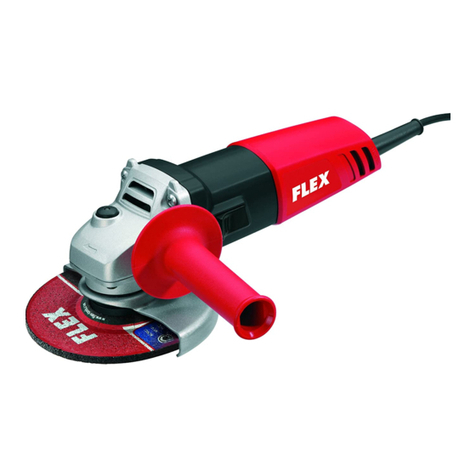
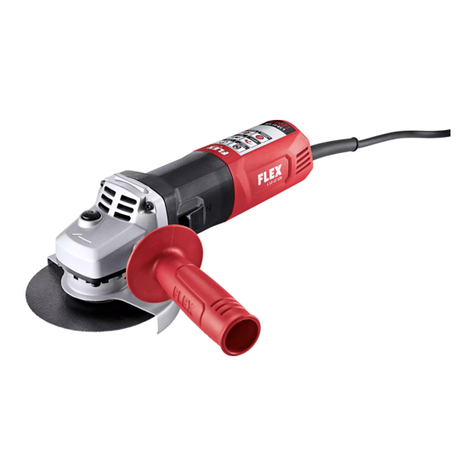
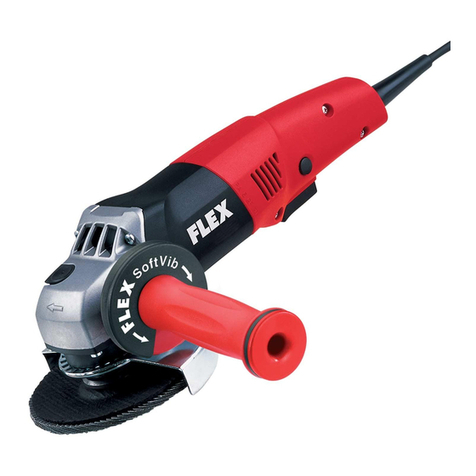
Flex L 7-12 115 User manual

L 7-12 115
L 8-11 125
L 10-11 125
L 14-11 125
LE 14-11 125

Instruction manual.....................................3
Instrucciones de funcionamiento ............16
Notice d'utilisation ...................................31
466.379_L 7-12_L 8-11_L 10-11_L 14-11_LE 14-11-125.book Seite 2 Montag, 19. März 2018 2:04 14

L 7-12 115 / L 8-11 125 / L 10-11 125 / L 14-11 125 / LE 14-11 125 Instruction manual
3
Contents
Meanings of signal words . . . . . . . . . . . . 3
Important safety informations . . . . . . . . . 3
GENERAL POWER TOOL SAFETY
WARNINGS . . . . . . . . . . . . . . . . . . . . . . 4
SPECIFIC SAFETY RULES AND
SYMBOLS . . . . . . . . . . . . . . . . . . . . . . . . 6
Technical specifications . . . . . . . . . . . . . 9
Overview . . . . . . . . . . . . . . . . . . . . . . . . 10
Operating instructions . . . . . . . . . . . . . . 11
Maintenance and care . . . . . . . . . . . . . . 14
Warranty . . . . . . . . . . . . . . . . . . . . . . . . 15
Meanings of signal words
WARNING
WARNING indicates a potentially
hazardous situations which, if ignored,
could result in death or serious injury.
CAUTION
CAUTION indicates a potentially hazardous
situations which, if not avoided, may result
in minor or moderate injury, or may cause
machine damage.
NOTE
NOTE emphasizes essential information.
Important safety informations
Read and understand all of the safety
precautions, warnings and operating
instructions in the Instruction manual before
operating or maintaining this power tool.
Most accidents that result from power tool
operation and maintenance are caused by
the failure to observe basic safety rules or
precautions.
An accident can often be avoided by
recognizing a potentially hazardous
situation before it occurs, and by observing
appropriate safety procedures.
Basic safety precautions are outlined in the
“SAFETY” section of this Instruction
manual and in the sections which contain
the operation and maintenance instructions.
Hazards that must be avoided to prevent
bodily injury or machine damage are
identified by WARNINGS on the power tool
and in this Instruction manual.
NEVER use this power tool in a manner that
has not been specifically recommended by
FLEX.
Intended use
The power tools L 7-12 115, L 8-11 125,
L 10-11 125, L 14-11 125 und LE 14-11 125
are designed
Ófor industrial applications,
Ófor dry grinding metal and stone,
Ófor use with tools and accessories which
are indicated in these instructions or
recommended by the manufacturer and
which are permitted to be used at a speed
of at least 12,000; 11,500; 11,500;
11,500; 2,800 - 11,500 r.p.m..
Not permitted are e.g. chain cutting wheels,
saw blades.
466.379_L 7-12_L 8-11_L 10-11_L 14-11_LE 14-11-125.book Seite 3 Montag, 19. März 2018 2:04 14

Instruction manual L 7-12 115 / L 8-11 125 / L 10-11 125 / L 14-11 125 / LE 14-11 125
4
GENERAL POWER TOOL SAFETY WARNINGS
==WARNING:
Read all safety warnings and all instructions.
Failure to follow the warnings and instructions may result in electric
shock, fire and/or serious injury.
Save all warnings and instructions for future reference.
The term “power tool” in all of the warnings refers to your mains-operated
(corded) power tool or battery-operated (cordless) power tool.
1. Work area safety
(a) Keep work area clean and well lit.
Cluttered and dark areas invite accidents.
(b) Do not operate power tools in explosive
atmospheres, such as in the presence of
flammable liquids, gases or dust.
Power tools create sparks which may ignite
the dust or fumes.
(c) Keep children and bystanders away
while operating a power tool.
Distractions can cause you to lose control.
2. Electrical safety
(a) Power tool plugs must match the outlet.
Never modify the plug in any way. Do not
use any adapter plugs with earthed
(grounded) power tools.
Unmodified plugs and matching outlets will
reduce risk of electric shock.
(b) Avoid body contact with earthed or
grounded surfaces such as pipes, radiators,
ranges and refrigerators.
There is an increased risk of electric shock
if your body is earthed or grounded.
(c) Do not expose power tools to rain or wet
conditions.
Water entering a power tool will increase
the risk of electric shock.
(d) Do not abuse the cord. Never use the
cord for carrying, pulling or unplugging the
power tool. Keep cord away from heat, oil,
sharp edges or moving parts.
Damaged or entangled cords increase the
risk of electric shock.
(e) When operating a power tool outdoors,
use an extension cord suitable for outdoor
use. Use of a cord suitable for outdoor use
reduces the risk of electric shock.
(f) If operating a power tool in a damp
location is unavoidable, use a Ground Fault
Circuit Interrupter (GFCI) protected supply.
Use of a GFCI reduces the risk of electric
shock.
3. Personal safety
(a) Stay alert, watch what you are doing and
use common sense when operating a
power tool. Do not use a power tool while
you are tired or under the influence of drugs,
alcohol or medication. A moment of
inattention while operating power tools may
result in serious personal injury.
(b) Use personal protective equipment.
Always wear eye protection.
Protective equipment such as dust mask,
non-skid safety shoes, hard hat, or hearing
protection used for appropriate conditions
will reduce personal injuries.
(c) Prevent unintentional starting. Ensure
the switch is in the off-position before
connecting to power source and/or battery
pack, picking up or carrying the tool.
Carrying power tools with your finger on the
switch or energizing power tools that have
the switch on invites accidents.
(d) Remove any adjusting key or wrench
before turning the power tool on.
A wrench or a key left attached to a rotating
part of the power tool may result in personal
injury.
466.379_L 7-12_L 8-11_L 10-11_L 14-11_LE 14-11-125.book Seite 4 Montag, 19. März 2018 2:04 14

L 7-12 115 / L 8-11 125 / L 10-11 125 / L 14-11 125 / LE 14-11 125 Instruction manual
5
(e) Do not overreach. Keep proper footing
and balance at all times.
This enables better control of the power tool
in unexpected situations.
(f) Dress properly. Do not wear loose
clothing or jewellery. Keep your hair,
clothing and gloves away from moving
parts. Loose clothes, jewellery or long hair
can be caught in moving parts.
(g) If devices are provided for the connec-
tion of dust extraction and collection
facilities, ensure these are connected and
properly used. Use of dust collection can
reduce dust-related hazards.
4. Power tool use and care
(a) Do not force the power tool. Use the
correct power tool for your application. The
correct power tool will do the job better and
safer at the rate for which it was designed.
(b) Do not use the power tool if the switch
does not turn it on and off.
Any power tool that cannot be controlled
with the switch is dangerous and must be
repaired.
(c) Disconnect the plug from the power
source and/or the battery pack from the
power tool before making any adjustments,
changing accessories, or storing power
tools. Such preventive safety measures
reduce the risk of starting the power tool
accidentally.
(d) Store idle power tools out of the reach of
children and do not allow persons unfamiliar
with the power tool or these instructions to
operate the power tool. Power tools are
dangerous in the hands of untrained users.
(e) Maintain power tools. Check for
misalignment or binding of moving parts,
breakage of parts and any other condition
that may affect the power tools operation.
If damaged, have the power tool repaired
before use. Many accidents are caused by
poorly maintained power tools.
(f) Keep cutting tools sharp and clean.
Properly maintained cutting tools with sharp
cutting edges are less likely to bind and are
easier to control.
(g) Use the power tool, accessories and tool
bits etc., in accordance with these
instructions and in the manner intended for
the particular type of power tool, taking into
account the working conditions and the
work to be performed.
Use of the power tool for operations
different from those intended could result in
a hazardous situation.
5. Service
(a) Have your power tool serviced by a
qualified repair person using only identical
replacement parts.
This will ensure that the safety of the power
tool is maintained.
(b) Preventative maintenance performed by
unauthorized personnel may result in
misplacing of internal wires and components
which could cause serious hazard.
We recommend that all tool service be
performed by a FLEX Factory Service
Center or Authorized FLEX Service Station.
466.379_L 7-12_L 8-11_L 10-11_L 14-11_LE 14-11-125.book Seite 5 Montag, 19. März 2018 2:04 14

Instruction manual L 7-12 115 / L 8-11 125 / L 10-11 125 / L 14-11 125 / LE 14-11 125
6
SPECIFIC SAFETY RULES AND SYMBOLS
1. Safety Warnings Common for
Grinding Operations
L 7-12 115, L 8-11 125, L 10-11 125,
L 14-11 125, LE 14-11 125:
(a) These power tools are intended to
function as a grinder. Read all safety
warnings, instructions, illustrations and
specifications provided with this power tool.
Failure to follow all instructions listed below
may result in electric shock, fire and/or
serious injury.
(b) Operations such as grinding, sanding,
wire brushing, polishing or cutting-off tool
are not recommended to be performed with
this power tool.
Operations for which the power tool was not
designed may create a hazard and cause
personal injury.
(c) Do not use accessories which are not
specifically designed and recommended
by the tool manufacturer.
Just because the accessory can be attached
to your power tool, it does not assure safe
operation.
(d) The rated speed of the accessory must
be at least equal to the maximum speed
marked on the power tool.
Accessories running faster than their rated
speed can break and fly apart.
(e) The outside diameter and the thickness
of your accessory must be within the
capacity rating of your power tool.
Incorrectly measured insertion tools cannot
be adequately shielded or controlled.
(f) The arbor size of wheels, flanges,
backing pads or any other accessory must
properly fit the spindle of the power tool.
Insertion tools, which do not fit exactly on
the grinding spindle of the electric power
tool, rotate unevenly, vibrate violently and
may result in loss of control.
(g) Do not use a damaged accessory.
Before use, always check insertion tools for
splinters and cracks, sanding pad
for cracks, wear and severe abrasion.
If power tool or accessory is dropped,
inspect for damage or install an un-
damaged accessory. After inspecting and
installing an accessory, position yourself
and bystanders away from the plane of the
rotating accessory and run the power tool at
maximum no-load speed for one minute.
Damaged accessories will normally break
apart during this test time.
(h) Wear personal protective equipment.
Depending on application, use face shield,
safety goggles or safety glasses.
If appropriate, wear a dust mask, hearing
protection, protective gloves and/or
a special apron which protect you from
small sanding and material particles.
The eye protection must be capable of stop-
ping flying debris generated by various
operations. The dust mask or respirator must
be capable of filtrating particles generated by
your operation. Prolonged exposure to high
intensity noise may cause hearing loss.
(i) Keep bystanders a safe distance
away from work area. Anyone entering the
work area must wear personal protective
equipment.
Fragments of workpiece or of a broken
accessory may fly away and cause injury
beyond immediate area of operation.
(j) Hold power tool by insulated gripping
surfaces only, when performing an
operation where the cutting accessory may
contact hidden wiring or its own cord.
Cutting accessory contacting a “live” wire
may make exposed metal parts of the power
tool “live” and shock the operator.
(k) Position the cord clear of the spinning
accessory.
If you lose control, the cord may be cut
or snagged and your hand or arm may
be pulled into the spinning accessory.
466.379_L 7-12_L 8-11_L 10-11_L 14-11_LE 14-11-125.book Seite 6 Montag, 19. März 2018 2:04 14
L 7-12 115 / L 8-11 125 / L 10-11 125 / L 14-11 125 / LE 14-11 125 Instruction manual
7
(l) Never lay the power tool down until the
accessory has come to a complete stop.
The spinning accessory may grab
the surface and pull the power tool
out of your control.
(m) Do not run the power tool while carrying
it at your side.
Accidental contact with the spinning
accessory could snag your clothing,
pulling the accessory into your body.
(n) Regularly clean the power tool's air vents.
The motor's fan will draw the dust inside the
housing and excessive accumula-tion of
powdered metal may cause electrical
hazards.
(o) Do not operate the power tool near flam-
mable materials.
Sparks could ignite these materials.
(p) Do not use accessories that require
liquid coolants.
Using water or other liquid coolants may
result in electrocution or shock.
2. Kickback and Related Warnings
Kickback is a sudden reaction to a pinched
or snagged rotating wheel, backing pad,
brush or any other accessory. Pinching or
snagging may cause a rotating insertion tool
to stop abruptly. For example, if an abrasive
wheel is snagged or pinched by the
workpiece, the edge of the wheel that is
entering into the pinch point can dig into the
surface of the material causing the wheel to
climb out or kick out. The wheel may either
jump toward or away from the operator,
depen-ding on direction of the wheel's
movement at the point of pinching. Abrasive
wheels may also break under these
conditions.
For example, if a sanding disc is snagged
or pinched by the workpiece, the edge of the
sanding disc which is entering
the workpiece may become caught and
cause the sanding disc to break off or kick
back. The sanding disc then moves towards
or away from the operator, depending
on the direction in which the disc is rotating
at the point of pinching. Sanding discs may
also break under these conditions.
A recoil occurs if the electric power tool
is used incorrectly or improperly.
A recoil can be prevented by appropriate
precautions as described below.
(a) Maintain a firm grip on the power tool
and position your body and arm to allow you
to resist kickback forces. Always use
auxiliary handle, if provided, for maximum
control over kickback or torque reaction
during start-up.
The operator can control torque reactions or
kickback forces, if proper precautions are
taken.
(b) Never place your hand near the rotating
accessory.
Accessory may kickback over your hand.
(c) Do not position your body in the area
where power tool will move if kickback
occurs.
Kickback propels the electric power tool in
the direction opposite to the movement of
the sanding disc at the point of pinching.
(d) Use special care when working corners,
sharp edges etc. Avoid bouncing and
snagging the accessory.
Corners, sharp edges or bouncing have
a tendency to snag the rotating accessory
and cause loss of control or kickback.
This causes a loss of control or kickback.
(e) Do not attach a saw chain woodcarving
blade or toothed saw blade. Such blades
create frequent kickback and loss of control.
3. Special safety instructions for
grinding
(a)
Use only wheel types that are recommend-
ed for your power tool and the specific guard
designed for the selected wheel.
Wheels for which the power tool was not
designed cannot be adequately guarded
and are unsafe.
(b) The guard must be attached securely
to the electric power tool and adjusted
to ensure maximum safety, i.e. the smal-
lest possible part of the sanding tool
is exposed to the operator.
The guard should protect the operator from
fragments and accidental contact with the
sanding tool.
466.379_L 7-12_L 8-11_L 10-11_L 14-11_LE 14-11-125.book Seite 7 Montag, 19. März 2018 2:04 14

Instruction manual L 7-12 115 / L 8-11 125 / L 10-11 125 / L 14-11 125 / LE 14-11 125
8
(c) Wheels must be used only for
recommended applications. For example:
do not grind with the side of cut-off wheel.
Abrasive cut-off wheels are intended for
peripheral grinding, side forces applied to
these wheels may cause them to shatter.
(d) Always use undamaged clamping
flanges in the correct size and shape for the
grinding disc you have selected.
Suitable flanges support the grinding
disc and therefore reduce the risk of the
grinding disc breaking. Flanges for cutting-
off wheels may differ from the flanges for
other grinding discs.
(e) Do not use worn grinding discs from
larger electric power tools.
Grinding discs for larger electric power tools
are not designed for the higher speeds of
smaller electric power tools and may burst.
4. Additional Warnings
Some dust created by power sanding,
sawing, grinding, drilling, and other
construction activities contains chemicals
known to cause cancer, birth defects or
other reproductive harm. Some examples of
these chemicals are:
Ólead from lead-based paints,
Ócrystalline silica from bricks and cement
and other masonry products, and
Óarsenic and chromium from chemically
treated lumber.
Your risk from these exposures varies,
depending on how often you do this type of
work. To reduce your exposure to these
chemicals: work in a well ventilated area,
and work with approved safety equipment,
such as those dust masks that are specially
designed to filter out microscopic particles.
5. Definitions for symbols used on
this tool
V ..............volts
~..............alternating current
Hz ...........hertz
A..............amperes
n ..............rated speed
min-1........revolutions per minute
............double insulation
..........Wear safety goggles!
6. Double insulation for safer
operation
To ensure safer operation of this power tool,
FLEX has adopted a double insulation
design. “Double insulation” means that two
physically separated insulation systems
have been used to insulate the electrically
conductive materials connected to the
power supply from the outer frame handled
by the operator. Therefore, either the symbol
or the words “Double insulation” appear
on the power tool or on the nameplate.
Although this system has no external
grounding, you must still follow the normal
electrical safety precautions given in this
Instruction Manual, including not using the
power tool in wet environments.
To keep the double insulation system
effective, follow these precautions:
ÓOnly FLEX AUTHORIZED SERVICE
CENTER should disassemble or
assemble this power tool, and only
genuine FLEX replacement parts should
be installed.
ÓClean the exterior of the power tool only
with a soft cloth moistened with soapy
water, and dry thoroughly.
ÓNever use solvents, gasoline or thinners
on plastic components; otherwise the
plastic may dissolve.
SAVE THESE INSTRUCTIONS AND MAKE THEM AVAILABLE
TO OTHER USERS AND OWNERS OF THIS TOOL!
WARNING - to reduce risk of
injury, user must read instruction
manual.
466.379_L 7-12_L 8-11_L 10-11_L 14-11_LE 14-11-125.book Seite 8 Montag, 19. März 2018 2:04 14

L 7-12 115 / L 8-11 125 / L 10-11 125 / L 14-11 125 / LE 14-11 125 Instruction manual
9
Technical specifications
L 7-12 115 L 8-11 125
Max. grinding tool Ø 4 1/2"5"
Grinding tool thickness 1/16" - 1/4"
Tool hole diameter 7/8"
Spindle thread 5/8" - 11
Speed
r.p.m.
12,000 11,500
Power input
AMP
67.5
Weight according to “EPTA
Procedure 01/2003”
(without power cord)
kg
1.4 2.0
Protection class II/
L 10-11 125 L 14-11 125 LE 14-11 125
Max. grinding tool Ø 5"
Grinding tool thickness 1/16" - 1/4"
Tool hole diameter 7/8"
Spindle thread 5/8"-11
Speed
r.p.m.
11,500 11,500
2,800 - 11,500
Power input
AMP
912
Weight according to “EPTA
Procedure 01/2003”
(without power cord)
kg
2.1 2.3
Protection class II/
466.379_L 7-12_L 8-11_L 10-11_L 14-11_LE 14-11-125.book Seite 9 Montag, 19. März 2018 2:04 14

Instruction manual L 7-12 115 / L 8-11 125 / L 10-11 125 / L 14-11 125 / LE 14-11 125
10
Overview
Different electric power tools are described in these instructions.
The illustrated electric power tool may differ in detail from the one that you purchased.
1 Spindle
a Retaining nut
b Clamping flange
2 Safety guard
Can be adjusted without a tooä=through
360° by means of 24 notches.
a) 115 mm (L 7-12 115)
b) 125 mm
3 Gear head
With air outlet and direction-of-rotation
arrow.
4 Handle
Handle can be fitted to the left or right.
5 Spindle lock
Secures the spindle when the tool
is changed.
6 Gear head
With air outlet and direction-of-rotation
arrow.
7 Switch rocker
Switches the power tool on and off.
With notched position for continuous
operation.
8 Rear handle
9 Dial for preselecting the speed
(only LE 14-11 125)
10 4.0 m power cord with plug
11 Rating plate (not illustrated)
12 Pin wrench
466.379_L 7-12_L 8-11_L 10-11_L 14-11_LE 14-11-125.book Seite 10 Montag, 19. März 2018 2:04 14

L 7-12 115 / L 8-11 125 / L 10-11 125 / L 14-11 125 / LE 14-11 125 Instruction manual
11
Operating instructions
WARNING
Risk of electric shock! Before carrying out
any work on the power tool, always
disconnect the tool from the power supply.
Before switching on the power
tool
Unpack the power tool and check that there
are no missing or damaged parts.
Assembly
Attach the guard
WARNING
Risk of injury!=When using the angle grinder
for roughing or cutting, never work without
the guard. A special cutting guard must be
used for cutting.
See manufacturer’s accessories catalogue
for the appropriate cutting guard.
1. Disconnect the tool from the power
supply.
2. Attach the guard (1.). Lugs on the guard
hood must be located in the flange
recesses.
3. Turn guard hood clockwise (2.).
Rotation is possible in one direction only!
4. Remove in reverse order.
Attach the side handle
NOTE
It is not permitted to operate the power tool
without the handle.
Handle can be fitted to the left or right of the
tool.
Attaching/changing the grinding
wheel
Attach the grinding wheel
1. Disconnect the tool from the power
supply.
2. Press and hold down the spindle lock (1.).
466.379_L 7-12_L 8-11_L 10-11_L 14-11_LE 14-11-125.book Seite 11 Montag, 19. März 2018 2:04 14

Instruction manual L 7-12 115 / L 8-11 125 / L 10-11 125 / L 14-11 125 / LE 14-11 125
12
3. Using the pin wrench, loosen the clamping
nut on the spindle in a counter-clockwise
direction and remove the clamping nut (
2.
).
4. Insert the grinding wheel in the correct
position.
5. Screw the clamping nut, with flange
face up, onto the spindle.
6. Press and hold down the spindle lock.
7. Tighten the clamping nut with the pin
wrench.
8. Carry out a test run to check that the
tool is clamped in the center.
Test run
1. Connect the tool to a power source.
2. Switch on the angle grinder with the
switch (without engaging it) and run the
angle grinder for approx. 30 seconds.
Check for imbalances and vibrations.
3. Switch off the angle grinder.
Switching on and off
Brief operation without engaged
switch rocker
1. Push the switch rocker forward and hold
it in position.
2. To switch off the power tool; release
the switch rocker.
Continuous operation with engaged
switch rocker
NOTE
Following a power failure, the switched on
power tool does not restart.
1. Push the switch rocker forwards (1.) and
engage by pressing on the front end (2.).
2. To switch off the power tool, release the
switch rocker by pressing the rear end.
Preselecting the speed
(LE 14-11 125)
CAUTION
Risk of injury due to destruction of the tool.
Use the appropriate tool for the job.
NOTE
If an overload or overheating occurs during
continuous operation, the power tool auto-
matically reduces the speed until the power
tool has cooled down adequately.
466.379_L 7-12_L 8-11_L 10-11_L 14-11_LE 14-11-125.book Seite 12 Montag, 19. März 2018 2:04 14

L 7-12 115 / L 8-11 125 / L 10-11 125 / L 14-11 125 / LE 14-11 125 Instruction manual
13
To set the operating speed, move the dial
to the required value.
Adjusting the guard
CAUTION
Risk of injury! Wear protective gloves.
To adjust the tool to the task at hand, the
guard hood can be adjusted without a tool
among 12 notches on 360°.
1. Disconnect the tool from the power
supply.
2. Turn the guard hood opposite to the
direction-of-rotation arrow on the gear
head to the required position.
Work instructions
NOTE
When the power tool is switched off, the
grinding tool will continue to run briefly.
Rough-grinding
WARNING
Never use cutting-off wheels for rough-
grinding.
ÓMaintain the wheel at an angle between 20°
and 40° for best cutting performance.
ÓApplying moderate pressure, move the
angle grinder backwards and forwards.
This will prevent, the workpiece from
becoming too hot and there will be no
discoloration; nor will there be any
grooves.
Cut-off grinding
WARNING
A special cutting guard must be used for
cutting.
See manufacturer’s accessories catalogue
for the appropriate cutting guard.
ÓDo not press, tilt or oscillate the power tool.
ÓThe angle grinder must always be moved
backwards when cutting.
Otherwise, there is a risk of the angle
grinder jumping uncontrollably out of the
groove.
ÓAdjust the feed to the material which is to
be cut: the harder the material, the slower
the feed.
For further information on the manufac-
turer’s products go to www.flex-tools.com.
466.379_L 7-12_L 8-11_L 10-11_L 14-11_LE 14-11-125.book Seite 13 Montag, 19. März 2018 2:04 14

Instruction manual L 7-12 115 / L 8-11 125 / L 10-11 125 / L 14-11 125 / LE 14-11 125
14
Maintenance and care
WARNING
Risk of electric shock! Before carrying out
any work on the power tool, always
disconnect the tool from the power supply.
Cleaning
WARNING
Risk of electric shock! If metals are ground
or cut over a prolonged period, conductive
dust may become deposited inside the
housing. Impairment of the protective
insulation!
Operate the power tool via a residual-
current-operated circuit-breaker (tripping
current 30 mA).
Regularly clean the power tool and venti-
lation slots. Frequency of cleaning is depen-
dent on the material and duration of use.
Regularly blow out the housing interior and
motor with dry compressed air.
CAUTION
Risk of injury!=Wear safety glases while
using compressed air.
All plastic parts should be cleaned with soft
damp cloth. NEVER use solvents to clean
plastic parts. They could possibly dissolve
or otherwise damage the material.
Gear housing
The gear housing should never be loosened
or opened, except by a FLEX authorized
service center. Doing so will void the
product warranty.
Brush inspection and lubrication
For your continued safety and electrical
protection, brush inspection and
replacement on this tool should ONLY be
performed by an authorized service center
for FLEX Power Tools.
At approximately 100 hours of use, take or
send your tool to your nearest authorized
service center for FLEX Power Tools to be
thoroughly cleaned and inspected; worn
parts replaced; and when necessary,
relubricated with fresh lubricant if required;
reassembled with new brushes; and
performance tested.
Any loss of power before the above
maintenance check may indicate the need
for immediate servicing of your tool. DO
NOT CONTINUE TO OPERATE TOOL
UNDER THIS CONDITION. lf proper
operating voltage is present, return your tool
to a FLEX authorized service center for
immediate service.
Repairs
All quality tools will eventually require
servicing or replacement of parts due to
wear from normal use. These operations,
including brush inspection and replacement,
should ONLY be performed by an
authorized service center for FLEX Power
Tools. All repairs made by these agencies
are fully guaranteed against defective
material and workmanship.
We cannot guarantee repairs made or
attempted by anyone other than these
agencies.
Should you have any questions about your
tool, feel free to write us at any time. In any
communications, please give all information
shown on the nameplate of your tool (model
number, type, serial number, etc.).
Spare parts and accessories
For further accessories, in particular
grinding tools, see the manufacturer’s
catalogues.
Exploded drawings and spare-part lists
can be found on our homepage:
www.flex-tools.com
466.379_L 7-12_L 8-11_L 10-11_L 14-11_LE 14-11-125.book Seite 14 Montag, 19. März 2018 2:04 14

L 7-12 115 / L 8-11 125 / L 10-11 125 / L 14-11 125 / LE 14-11 125 Instruction manual
15
Warranty
FLEX North America limited one
year Warranty
FLEX North America warrants its Profes-
sional Power Tools for a period of one year
from the date of original purchase. We will
repair or replace at our option, any part or
parts of the product and accessories
covered under this warranty, which, after
examination, prove(s) to be defective in
workmanship or material during the warran-
ty period. For repair or replacement, return
the complete tool or accessory, transporta-
tion prepaid, to your nearest Authorized
Service Station. Proof of purchase may be
required. This warranty does not apply to
repair or replacement due to misuse, abuse,
normal wear and tear or repairs attempted
or made by someone other than our
Authorized Service Stations.
ANY IMPLIED WARRANTY, INCLUDING
THE IMPLIED WARRANTIES OF
MERCHANTABILITY AND FITNESS FOR
PARTICULAR PURPOSE, WILL LAST
ONLY FOR ONE (1) YEAR FROM THE
DATE OF PURCHASE.
To obtain information on warranty
performance, please write to:
Chervon North America
1203 East Warrenville Road
Naperville, IL 60563
Phone number: 402.933.7759
THE FOREGOING OBLIGATION IS FLEX
NORTH AMERICA'S SOLE LIABILITY
UNDER THIS OR ANY IMPLIED WARRAN-
TY AND UNDER NO CIRCUMSTANCES
SHALL FLEX NORTH AMERICA BE
LIABLE FOR ANY INCIDENTAL OF
CONSEQUENTIAL DAMAGES.
Some states do not allow limitations on how
long an implied warranty lasts or the
exclusion or limitation of incidental or
consequential damages, so the above
limitation or exclusion may not apply to you.
This warranty gives you specific legal rights
and you may also have other legal rights,
which vary from state to state.
466.379_L 7-12_L 8-11_L 10-11_L 14-11_LE 14-11-125.book Seite 15 Montag, 19. März 2018 2:04 14

Instrucciones de funcionamiento L 7-12 115 / L 8-11 125 / L 10-11 125 / L 14-11 125 / LE 14-11 125
16
Índice
Símbolos empleados . . . . . . . . . . . . . . . 16
Informaciones importantes de seguridad . 16
INSTRUCCIONES GENERALES DE
SEGURIDAD . . . . . . . . . . . . . . . . . . . . . 17
INSTRUCCIONES DE SEGURIDAD
ESPECÍFICAS Y SÍMBOLOS . . . . . . . . 19
Especificaciones técnicas . . . . . . . . . . . 23
De un vistazo . . . . . . . . . . . . . . . . . . . . . 24
Empuñadura posterior . . . . . . . . . . . . . . 24
Mantenimiento y cuidado . . . . . . . . . . . 29
Garantía . . . . . . . . . . . . . . . . . . . . . . . . 30
Símbolos empleados
ADVERTENCIA
ADVERTENCIA indica una situación
posiblemente peligrosa que puede causar
la muerte o lesiones serias en caso de
ignorarla.
CUIDADO
CUIDADO indica una situación
potencialmente peligrosa que puede causar
lesiones leves o menores o bien daños en la
máquinas, en caso de incumplimiento.
NOTA
NOTA enfatiza informaciones esenciales.
Informaciones importantes
de seguridad
Lea y entienda todas las medidas de
precaución, de seguridad, advertencias
e instrucciones de funcionamiento antes
de poner en marcha esta herramienta
eléctrica.
La mayoría de los accidentes resultantes
del uso o el mantenimiento de herramientas
eléctricas, son causados por el
incumplimiento en la observación de las
reglas básicas de seguridad o precauciones.
Muchas veces puede evitarse un accidente,
reconociendo de antemano una situación
potencialmente peligrosa y observando las
medidas de seguridad apropiadas.
Las precauciones básicas de seguridad se
detallan en la sección «SEGURIDAD»
contenida en estas instrucciones de
funcionamiento y en la sección que contiene
las instrucciones de mantenimiento.
Los peligros que deben evitarse a fin de
evitar lesiones o daños en la máquina,
se marcan a través de ADVERTENCIAS
sobre la herramienta eléctrica y en estas
instrucciones de funcionamiento.
NUNCA utilice esta herramienta eléctrica de
alguna manera que FLEX no haya
recomendada específicamente.
Utilización adecuada a su función
La herramienta eléctrica L 7-12 115,
L 8-11 125, L 10-11 125, L 14-11 125,
LE 14-11 125 fue diseñada
Ópara el uso industrial,
Ópara el molido y cortado en seco de metal
y piedras,
Ópara su uso con herramientas de pulido
y amolado que se indican en este manual
o que el fabricante recomienda y que estén
aprobados para su uso a velocidades de
giro de un mínimo de 12.000, 11.500,
11.500, 11.500, 2.800 - 11.500 U.P.M.
No se permite el uso de ruedas de cadena
u hojas de sierra.
466.379_L 7-12_L 8-11_L 10-11_L 14-11_LE 14-11-125.book Seite 16 Montag, 19. März 2018 2:04 14

L 7-12 115 / L 8-11 125 / L 10-11 125 / L 14-11 125 / LE 14-11 125 Instrucciones de funcionamiento
17
INSTRUCCIONES GENERALES DE SEGURIDAD
ADVERTENCIA:
Lea todas las indicaciones de seguridad y las instrucciones.
Omisiones en el cumplimiento de las indicaciones de seguridad pueden ser
causa de descargas eléctricas, incendios y/o lesiones de gravedad.
Conserve todas las advertencias e instrucciones de seguridad para el futuro.
El término herramienta eléctrica empleado en las siguientes advertencias de
peligro se refiere a herramientas eléctricas de conexión a la red (con cable de red)
y a herramientas eléctricas accionadas por acumulador (o sea, sin cable de red).
1. Seguridad del puesto de trabajo
(a) Mantenga limpio y bien iluminado su
puesto de trabajo.
El desorden o una iluminación deficiente en
las áreas de trabajo pueden provocar
accidentes.
(b) No utilice la herramienta eléctrica en un
entorno con peligro de explosión, en el que
se encuentren combustibles líquidos, gases
o material en polvo.
Las herramientas eléctricas producen
chispas que pueden llegar a inflamar los
materiales en polvo o vapores.
(c) Mantenga alejados a los niños y otras
personas de su puesto de trabajo al
emplear la herramienta eléctrica.
Una distracción le puede hacer perder el
control sobre la herramienta eléctrica.
2. Seguridad eléctrica
(a) El enchufe de la herramienta eléctrica
debe corresponder a la toma de corriente
utilizada. No es admisible modificar el
enchufe en forma alguna. No emplear
adaptadores en herramientas eléctricas
dotadas con una toma de tierra.
Los enchufes sin modificar adecuados a las
respectivas tomas de corriente reducen el
riesgo de una descarga eléctrica.
(b) Evite que su cuerpo toque partes
conectadas a tierra como tuberías,
radiadores, cocinas y refrigeradores.
El riesgo a quedar expuesto a una sacudida
eléctrica es mayor si su cuerpo tiene
contacto con tierra.
(c) No exponga la herramienta eléctrica a la
lluvia y evite que penetren líquidos en su
interior. Existe el peligro de recibir una
descarga eléctrica si penetran ciertos
líquidos en la herramienta eléctrica.
(d) No utilice el cable de red para
transportar o colgar la herramienta
eléctrica, ni tire de él para sacar el enchufe
de la toma de corriente. Mantenga el cable
de red alejado del calor, aceite, esquinas
cortantes o piezas móviles.
Los cables de red dañados o enredados
pueden provocar una descarga eléctrica.
(e) Al trabajar con la herramienta eléctrica
a la intemperie utilice solamente cables de
prolongación apropiados para su uso en
exteriores. La utilización de un cable de
prolongación adecuado para su uso en
exteriores reduce el riesgo de una descarga
eléctrica.
(f) Si fuese imprescindible utilizar la
herramienta eléctrica en un entorno
húmedo, es necesario conectarla a través
de un fusible diferencial. La aplicación de
un fusible diferencial reduce el riesgo
a exponerse a una descarga eléctrica.
3. Seguridad personal
(a) Esté atento a lo que hace y emplee la
herramienta eléctrica con prudencia.
No utilice la herramienta eléctrica si
estuviese cansado, ni tampoco después de
haber consumido alcohol, drogas o medica-
mentos. El no estar atento durante el uso de
la herramienta eléctrica puede provocarle
serias lesiones.
466.379_L 7-12_L 8-11_L 10-11_L 14-11_LE 14-11-125.book Seite 17 Montag, 19. März 2018 2:04 14
Instrucciones de funcionamiento L 7-12 115 / L 8-11 125 / L 10-11 125 / L 14-11 125 / LE 14-11 125
18
(b) Utilice un equipo de protección personal
y en todo caso unas gafas de protección.
El riesgo a lesionarse se reduce conside-
rablemente si, dependiendo del tipo y la
aplicación de la herramienta eléctrica
empleada, se utiliza un equipo de
protección adecuado como una mascarilla
antipolvo, zapatos de seguridad con suela
antideslizante, casco, o protectores
auditivos.
(c) Evite una puesta en marcha fortuita.
Asegurarse de que la herramienta eléctrica
esté desconectada antes de conectarla a la
toma de corriente y/o al montar el acumu-
lador, al recogerla, y al transportarla.
Si transporta la herramienta eléctrica
sujetándola por el interruptor de conexión/
desconexión, o si alimenta la herramienta
eléctrica estando ésta conectada, ello
puede dar lugar a un accidente.
(d) Retire las herramientas de ajuste
o llaves fijas antes de conectar la
herramienta eléctrica.
Una herramienta de ajuste o llave fija
colocada en una pieza rotante puede
producir lesiones al poner a funcionar
la herramienta eléctrica.
(e) Evite posturas arriesgadas. Trabaje
sobre una base firme y mantenga el
equilibrio en todo momento.
Ello le permitirá controlar mejor la
herramienta eléctrica en caso de
presentarse una situación inesperada.
(f) Lleve puesta una vestimenta de trabajo
adecuada. No utilice vestimenta amplia ni
joyas. Mantenga su pelo, vestimenta
y guantes alejados de las piezas móviles.
La vestimenta suelta, el pelo largo y las
joyas se pueden enganchar con las piezas
en movimiento.
(g) Siempre que sea posible utilizar unos
equipos de aspiración o captación de polvo,
asegúrese que éstos estén montados y que
sean utilizados correctamente.
El empleo de estos equipos reduce los
riesgos derivados del polvo.
4. Uso y cuidado de la herramienta
eléctrica
(a) No sobrecargue la herramienta
eléctrica. Use la herramienta eléctrica
prevista para el trabajo a realizar.
Con la herramienta adecuada podrá
trabajar mejor y más seguro dentro del
margen de potencia indicado.
(b) No utilice herramientas eléctricas con un
interruptor defectuoso.
Las herramientas eléctricas que no se
puedan conectar o desconectar son
peligrosas y deben hacerse reparar.
(c) Saque el enchufe de la red y/o desmonte
el acumulador antes de realizar un ajuste en
la herramienta eléctrica, cambiar de
accesorio o al guardar la herramienta
eléctrica.
Esta medida preventiva reduce el riesgo
a conectar accidentalmente la herramienta
eléctrica.
(d) Guarde las herramientas eléctricas
fuera del alcance de los niños. No permita la
utilización de la herramienta eléctrica
a aquellas personas que no estén familiari-
zadas con su uso o que no hayan leído
estas instrucciones.
Las herramientas eléctricas utilizadas por
personas inexpertas son peligrosas.
(e) Cuide la herramienta eléctrica con
esmero. Controle si funcionan correcta-
mente, sin atascarse, las partes móviles de
la herramienta eléctrica, y si existen partes
rotas o deterioradas que pudieran afectar al
funcionamiento de la herramienta eléctrica.
Haga reparar estas piezas defectuosas
antes de volver a utilizar la herramienta
eléctrica.
Muchos de los accidentes se deben
a herramientas eléctricas con un
mantenimiento deficiente.
(f) Mantenga los útiles limpios y afilados.
Los útiles mantenidos correctamente se
dejan guiar y controlar mejor.
(g) Utilice la herramienta eléctrica, acce-
sorios, útiles, etc. de acuerdo a estas
instrucciones, considerando en ello las
condiciones de trabajo y la tarea a realizar.
El uso de herramientas eléctricas para
trabajos diferentes de aquellos para los que
han sido concebidas puede resultar
peligroso.
466.379_L 7-12_L 8-11_L 10-11_L 14-11_LE 14-11-125.book Seite 18 Montag, 19. März 2018 2:04 14
L 7-12 115 / L 8-11 125 / L 10-11 125 / L 14-11 125 / LE 14-11 125 Instrucciones de funcionamiento
19
5. Servicio
(a) Haga que su herramienta eléctrica
reciba serviciode ajustes y reparaciones por
una persona dereparación calificada,
utilizando únicamente piezasde repuesto
idénticas. Esto asegurará que semantenga
la seguridad de la herramienta eléctrica.
(b) El mantenimiento preventivo realizado
por personalno autorizado puede tener
como resultado lacolocación incorrecta de
los cables y componentesinternos, lo cual
podría causar un peligro grave.
Recomendamos que todo el servicio de
ajustes yreparaciones de la herramienta
sea realizado por un Centro de Servicio
de Fábrica FLEX o una Estación de
Servicio FLEX Autorizada.
INSTRUCCIONES DE SEGURIDAD ESPECÍFICAS Y SÍMBOLOS
1. Advertencias de seguridad
comunes para las operaciones
de amolado
L 7-12 115, L 8-11 125, L 10-11 125,
L 14-11 125, LE 14-11 125:
(a) Esta herramienta eléctrica está
diseñada para funcionar como amoladora.
Lea todas lasadvertencias de seguridad,
instrucciones,ilustraciones
y especificaciones suministradas conesta
herramienta eléctrica.
Si no se siguen todas lasinstrucciones
que aparecen a continuación, elresultado
podría ser descargas eléctricas, incendio
y/o lesiones graves.
(b) No se recomienda realizar operaciones
tales como esmerilado, lijado, cepillado
metálico, pulido o corte de herramienta con
esta herramienta eléctrica.
Usos para los cuales es inadecuado el
equipo eléctrico, pueden causar peligros
y lesiones.
(c) Utilizar exclusivamente accesorios que
hayan sido aprobadas específicamente por
el fabricante, para su uso con esta
herramienta eléctrica.
El solo hecho de poder sujetar el accesorio en
la herramienta eléctrica, no garantiza que su
uso presente la seguridad necesaria.
(d) La velocidad de giro de la herramienta
utilizada debe ser como mínimo del valor
que aquella indicada en el equipo eléctrico.
Accesorios que giran a velocidades
superiores que las permitidas, pueden
destrozarse, haciendo volar los trozos por
los alrededores.
(e) Las dimensiones externas y el espesor
de la herramienta utilizada debe
corresponder a las medidas indicadas en el
equipo eléctrico.
Herramientas de aplicación mal dimensio-
nadas, no pueden protegerse o controlarse
de modo suficiente.
(f) El tamaño del eje de ruedas, bridas,
discos de apoyo o cualquier otro accesorio
debe adecuarse perfectamente al eje de
rotación de la herramienta eléctrica.
Herramientas de aplicación que no calzan
correctamente sobre el husillo de
la herramienta eléctrica, giran de forma
irregular, vibran con fuerza y pueden
conducir a la perdida del control.
(g) No utilizar accesorios dañados.
Controlar antes de cada uso la herramienta
de aplicación, a fin de determinar si
presenta desprendimientos, fisuras y en el
caso de los platos amoladores la presencia
de fisuras, desgaste abusivo. Si la
herramienta eléctrica o bien la herramienta
de aplicación caen al suelo, controlar si se
ha dañado o bien utilizar una herramienta
sin daños. Una vez controlada y colocada la
herramienta de aplicación, mantenerse
a sí mismo y a otras personas fuera del
plano de rotación, dejando el equipo en
marcha durante un minuto a su velocidad
máxima. Herramientas dañadas general-
mente se destrozan en este tiempo.
(h) Usar equipo de protección personal.
Utilice protección facial integral, protección
para los ojos o gafas protectoras según la
aplicación. Si hiciera falta, utilice una
máscara contra el polvo, protección para el
oído, guantes de protección, calzado
especial o un delantal que mantenga
alejadas de su persona las pequeñas
466.379_L 7-12_L 8-11_L 10-11_L 14-11_LE 14-11-125.book Seite 19 Montag, 19. März 2018 2:04 14

Instrucciones de funcionamiento L 7-12 115 / L 8-11 125 / L 10-11 125 / L 14-11 125 / LE 14-11 125
20
partículas producto del amolado. Los ojos
deben estar protegidos contra cuerpos
extraños que puedan producirse durante las
diversas aplicaciones. La máscara contra el
polvo o para la respiración debe filtrar el
polvo que se genera durante el amolado.
Si se está expuesto a ruidos fuertes durante
un tiempo prolongado, puede producirse la
pérdida de la audición.
(i) Cuide que otras personas en su cercanía
se encuentren fuera de su zona de trabajo.
Toda persona que acceda a la zona de
trabajo debe estar provista con el
equipamiento de protección adecuado.
Pueden volar trozos de la pieza en proceso
o de la herramienta destrozada,
produciendo lesiones en zonas aún
externas a la zona de trabajo.
(j) Sujetar el equipo de las superficies
aisladas correspondientes cuando
la herramienta de aplicación puede incidir
en conductores eléctricos ocultos o cables
pertenecientes a la red eléctrica.
El contacto con conductores bajo tensión
puede hacer que las partesmetálicas de la
herramienta eléctrica le provoquen una
descarga eléctrica.
(k) Mantener el cable de alimentación
alejado de partes de la herramienta que se
encuentren en movimiento. Si se pierde el
control sobre el equipo, puede cortarse o
ser tomado el cable de alimentación de red,
entrando la mano o el brazo en contacto
con la herramienta de aplicación que está
girando.
(l) Nunca asentar la herramienta eléctrica
antes que la herramienta de aplicación se
haya parado completamente.
La herramienta de aplicación puede entrar en
contacto con la superficie de asiento, lo que
lleva a la pérdida de control sobre el equipo.
(m) No dejar la herramienta eléctrica
en marcha mientras se la lleva de un sitio
aotro.
La indumentaria del operador puede entrar
casualmente en contacto con la herramienta
de aplicación, penetrando la herramienta de
aplicación en el cuerpo del mismo.
(n) Limpiar con regularidad las rendijas de
ventilación de la herramienta eléctrica.
El ventilador del motor aspira polvo hacia el
interior de la carcasa y una cantidad
suficiente de polvo metálico dentro de ésta,
puede ser causa de peligros de descargas
eléctricas.
(o) No utilizar la herramienta eléctrica
en la cercanía de sustancias inflamables.
Las chispas pueden producir la ignición de
estas sustancias.
(p) No utilizar herramientas de aplicación
que requieran de refrigerantes líquidos.
La utilización de agua u otros agentes
refrigerantes líquidos puede ser causa de
descargas eléctricas.
2. Retroceso y medidas de
seguridad correspondientes
El rebote es una reacción repentina a una
escobilla, disco de apoyo, rueda giratoria
o cualquier otro accesorio aplastado
o enganchado. Un bloqueo conduce a un
paro repentino de la herramienta de
aplicación que se encuentra en rotación.
Esto causa la aceleración descontrolada
del equipo eléctrico en el punto de bloqueo,
en sentido de giro opuesto a aquél
de la herramienta. Si por ejemplo un disco
amolador se traba o bloquea en la pieza
a procesar, puede quebrarse un trozo del
disco amolador que está penetrando en la
pieza a procesar o bien producir un
contragolpe. El disco amolador se mueve
entonces en dirección al operario o
alejándose de él, según el sentido de giro
del disco en el punto de bloqueo.
Esto también puede ser causa para que
el disco amolador se quiebre.
Un contragolpe es la consecuencia de un uso
incorrecto o deficiente de la herramienta
eléctrica. Puede evitárselo mediante
medidas preventivas, según se describe
a continuación.
466.379_L 7-12_L 8-11_L 10-11_L 14-11_LE 14-11-125.book Seite 20 Montag, 19. März 2018 2:04 14
This manual suits for next models
4
Table of contents
Languages:
Other Flex Grinder manuals

Flex
Flex L3309 Series User manual

Flex
Flex XC3401VRG User manual

Flex
Flex L 21-6 230 User manual

Flex
Flex LD 24-6 180 User manual

Flex
Flex L 1503 VR User manual

Flex
Flex L 1506 VR User manual

Flex
Flex MT 18.0-EC C User manual

Flex
Flex FS 3403 VRG User manual

Flex
Flex WST 1000 FV User manual

Flex
Flex LD 16-8 125 R User manual

Flex
Flex LE 9-11 125 User manual

Flex
Flex L 2200 User manual

Flex
Flex L 3709-125 User manual

Flex
Flex L 8-11 125 User manual

Flex
Flex LBE 125 18.0-EC User manual

Flex
Flex SE 125 18.0-EC User manual

Flex
Flex LLK 1503 VR User manual

Flex
Flex L 21-6 230 User manual

Flex
Flex LD 15-10 125 User manual

Flex
Flex L 810 125 User manual