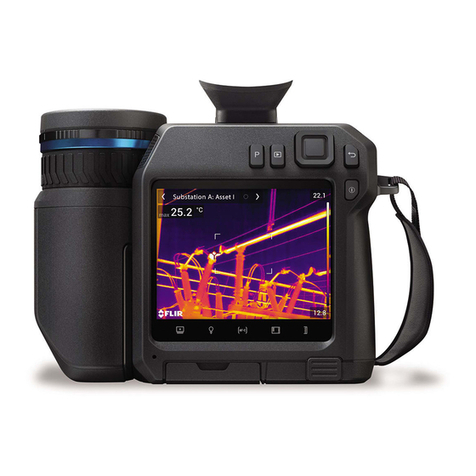
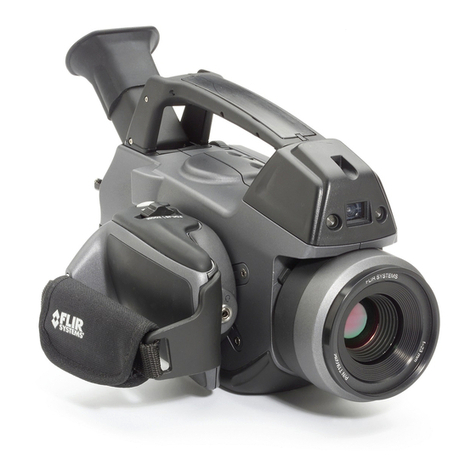
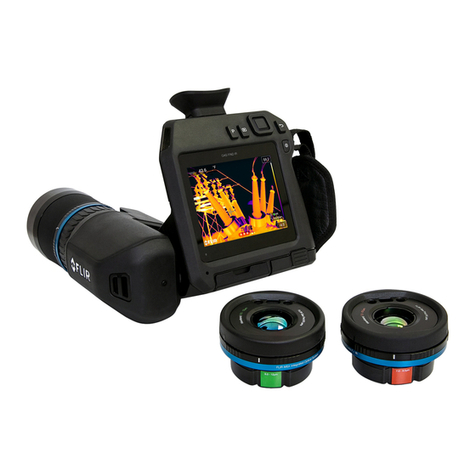
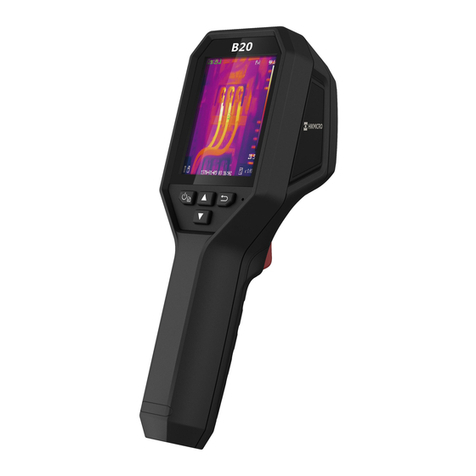
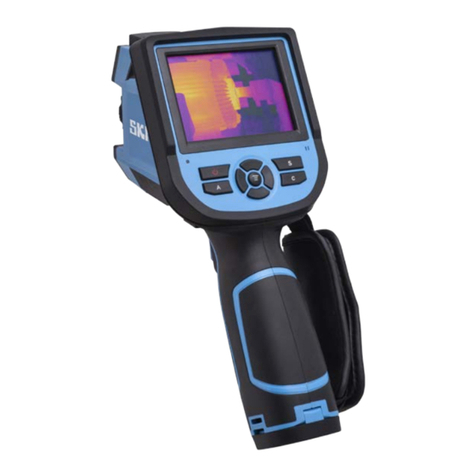
FLIR A500 Series User manual

User’s manual
FLIR A400/A500/A700
series

Important note
Before operating the device, you must read, understand, and follow all instructions, warnings, cautions, and legal disclaimers.
Důležitá poznámka
Před použitím zařízení si přečtěte veškeré pokyny, upozornění, varování a vyvázání se ze záruky, ujistěte se, že jim rozumíte, a řiďte
se jimi.
Vigtig meddelelse
Før du betjener enheden, skal du du læse, forstå og følge alle anvisninger, advarsler, sikkerhedsforanstaltninger og
ansvarsfraskrivelser.
Wichtiger Hinweis
Bevor Sie das Gerät in Betrieb nehmen, lesen, verstehen und befolgen Sie unbedingt alle Anweisungen, Warnungen,
Vorsichtshinweise und Haftungsausschlüsse
Σημαντική σημείωση
Πριν από τη λειτουργία της συσκευής, πρέπει να διαβάσετε, να κατανοήσετε και να ακολουθήσετε όλες τις οδηγίες,
προειδοποιήσεις, προφυλάξεις και νομικές αποποιήσεις.
Nota importante
Antes de usar el dispositivo, debe leer, comprender y seguir toda la información sobre instrucciones, advertencias, precauciones y
renuncias de responsabilidad.
Tärkeä huomautus
Ennen laitteen käyttämistä on luettava ja ymmärrettävä kaikki ohjeet, vakavat varoitukset, varoitukset ja lakitiedotteet sekä
noudatettava niitä.
Remarque importante
Avant d'utiliser l'appareil, vous devez lire, comprendre et suivre l'ensemble des instructions, avertissements, mises en garde et
clauses légales de non-responsabilité.
Fontos megjegyzés
Az eszköz használata előtt figyelmesen olvassa el és tartsa be az összes utasítást, figyelmeztetést, óvintézkedést és jogi
nyilatkozatot.
Nota importante
Prima di utilizzare il dispositivo, è importante leggere, capire e seguire tutte le istruzioni, avvertenze, precauzioni ed esclusioni di
responsabilità legali.
重要な注意
デバイスをご使用になる前に、あらゆる指示、警告、注意事項、および免責条項をお読み頂き、その内容を理解して従ってくだ
さい。
중요한 참고 사항
장치를 작동하기 전에 반드시 다음의 사용 설명서와 경고,주의사항,법적 책임제한을 읽고 이해하며 따라야 합니다.
Viktig
Før du bruker enheten, må du lese, forstå og følge instruksjoner, advarsler og informasjon om ansvarsfraskrivelse.
Belangrijke opmerking
Zorg ervoor dat u, voordat u het apparaat gaat gebruiken, alle instructies, waarschuwingen en juridische informatie hebt
doorgelezen en begrepen, en dat u deze opvolgt en in acht neemt.
Ważna uwaga
Przed rozpoczęciem korzystania z urządzenia należy koniecznie zapoznać się z wszystkimi instrukcjami, ostrzeżeniami,
przestrogami i uwagami prawnymi. Należy zawsze postępować zgodnie z zaleceniami tam zawartymi.
Nota importante
Antes de utilizar o dispositivo, deverá proceder à leitura e compreensão de todos os avisos, precauções, instruções e isenções de
responsabilidade legal e assegurar-se do seu cumprimento.
Важное примечание
До того, как пользоваться устройством, вам необходимо прочитать и понять все предупреждения, предостережения и
юридические ограничения ответственности и следовать им.
Viktig information
Innan du använder enheten måste du läsa, förstå och följa alla anvisningar, varningar, försiktighetsåtgärder och
ansvarsfriskrivningar.
Önemli not
Cihazı çalıştırmadan önce tüm talimatları, uyarıları, ikazları ve yasal açıklamaları okumalı, anlamalı ve bunlara uymalısınız.
重要注意事项
在操作设备之前,您必须阅读、理解并遵循所有说明、警告、注意事项和法律免责声明。
重要注意事項
操作裝置之前,您務必閱讀、了解並遵循所有說明、警告、注意事項與法律免責聲明。

Table of contents
1 Disclaimers ......................................................................................1
1.1 Legal disclaimer ....................................................................... 1
1.2 U.S. Government Regulations......................................................1
1.3 Patents...................................................................................1
1.4 Quality assurance ..................................................................... 1
1.5 Third-party licenses...................................................................1
1.6 Usage statistics ........................................................................ 1
1.7 Copyright ................................................................................1
2 Safety information .............................................................................2
3 Notice to user ...................................................................................4
3.1 Register your camera.................................................................4
3.2 Calibration...............................................................................4
3.3 Accuracy ................................................................................4
3.4 Disposal of electronic waste ........................................................ 4
3.5 Training ..................................................................................4
3.6 Documentation updates .............................................................5
3.7 Important note about this manual.................................................. 5
3.8 Note about authoritative versions.................................................. 5
4 Customer help ..................................................................................6
4.1 General ..................................................................................6
4.2 Submitting a question ................................................................ 6
4.3 Downloads ..............................................................................6
5 Introduction......................................................................................7
5.1 Example system overviews ......................................................... 8
5.1.1 Early fire detection.......................................................... 8
5.1.2 Quality assurance ........................................................ 10
5.1.3 Condition monitoring..................................................... 11
5.1.4 Research & development ............................................... 12
6 Camera parts ..................................................................................13
7 Camera installation.......................................................................... 14
8 Mechanical installation .................................................................... 15
9 RTSP Streams.................................................................................16
10 Camera web interface ...................................................................... 17
10.1 Supported browsers ................................................................ 17
10.2 Login.................................................................................... 17
10.3 Navigation............................................................................. 17
10.4 Camera tab ........................................................................... 18
10.4.1 Working with measurement tools ..................................... 18
10.4.2 Working with alarms...................................................... 22
10.4.3 Changing object parameters........................................... 24
10.4.4 Working with image modes............................................. 25
10.4.5 Colorizing the image ..................................................... 26
10.4.6 Auto-adjust region ........................................................ 28
10.4.7 Calibrating the camera .................................................. 28
10.4.8 Using the camera lamp.................................................. 29
10.4.9 Changing the temperature range ..................................... 29
10.4.10 Adjusting the temperature scale ...................................... 29
10.4.11 Flipping the image ........................................................ 30
10.4.12 Full screen view ........................................................... 30
10.4.13 Saving a snapshot ........................................................ 30
10.4.14 Pausing the live image stream......................................... 31
10.4.15 Hiding the overlay graphics ............................................ 31
10.4.16 Camera presets ........................................................... 31
10.5 Administration tab ................................................................... 31
#T810409; r. AH/78915/78915; en-US iii
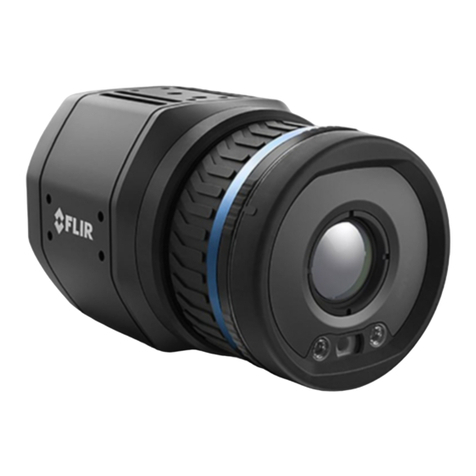
Table of contents
10.5.1 Firewall ...................................................................... 31
10.5.2 SSL certificates ........................................................... 31
10.5.3 Services..................................................................... 31
10.5.4 Web protocols ............................................................. 32
10.5.5 User management........................................................ 32
10.5.6 Regional settings ......................................................... 32
10.5.7 Network settings .......................................................... 33
10.5.8 System and firmware .................................................... 33
10.5.9 SNMP settings............................................................. 34
10.5.10 Multicast settings ......................................................... 34
10.6 Settings tab ........................................................................... 34
10.6.1 General settings........................................................... 34
10.6.2 Alarm recipients ........................................................... 35
10.6.3 Scheduler................................................................... 35
10.6.4 MQTT........................................................................ 36
10.6.5 Modbus ..................................................................... 36
10.7 Library tab............................................................................. 37
10.7.1 Managing images......................................................... 37
10.7.2 Managing videos.......................................................... 37
10.7.3 Managing logs............................................................. 38
11 Pin configurations ........................................................................... 39
11.1 Ethernet connector and cable .................................................... 39
11.2 Power/Digital I/O connector and cable ......................................... 40
11.3 RS232/RS485 connector .......................................................... 41
12 A-series connection board................................................................ 42
12.1 Connection examples .............................................................. 44
13 Software supported by FLIR A400/A500/A700 series cameras .............. 50
14 Mechanical drawings ....................................................................... 51
15 EU Declaration of conformity ............................................................ 55
16 Indicator LEDs and factory reset button ............................................. 57
16.1 Power/error indicator LED and factory reset button ......................... 57
16.2 Power/error indicator LED and power modes ................................ 57
16.3 Wired Ethernet connection........................................................ 57
17 Cleaning the camera ........................................................................ 58
17.1 Camera housing, cables, and other items..................................... 58
17.2 Infrared lens .......................................................................... 58
18 About calibration............................................................................. 59
18.1 Introduction ........................................................................... 59
18.2 Definition—what is calibration? .................................................. 59
18.3 Camera calibration at FLIR Systems ........................................... 59
18.4 The differences between a calibration performed by a user and
that performed directly at FLIR Systems....................................... 60
18.5 Calibration, verification and adjustment........................................ 60
18.6 Non-uniformity correction.......................................................... 61
18.7 Thermal image adjustment (thermal tuning) .................................. 61
19 About FLIR Systems ........................................................................ 62
19.1 More than just an infrared camera .............................................. 63
19.2 Sharing our knowledge ............................................................ 63
19.3 Supporting our customers......................................................... 64
#T810409; r. AH/78915/78915; en-US iv

Disclaimers
1
1.1 Legal disclaimer
For warranty terms, refer to https://www.flir.com/warranty.
1.2 U.S. Government Regulations
This product may be subject to U.S. Export Regulations. Send any inquiries to export-
questions@flir.com.
1.3 Patents
This product is protected by patents, design patents, patents pending, or design patents
pending. Refer to the FLIR Systems’ patent registry:
https://www.flir.com/patentnotices
1.4 Quality assurance
The Quality Management System under which these products are developed and manu-
factured has been certified in accordance with the ISO 9001 standard.
FLIR Systems is committed to a policy of continuous development; therefore we reserve
the right to make changes and improvements on any of the products without prior notice.
1.5 Third-party licenses
Information about third-party licenses is available in the user interface of the product.
1.6 Usage statistics
FLIR Systems reserves the right to gather anonymous usage statistics to help maintain
and improve the quality of our software and services.
1.7 Copyright
© 2021 FLIR Systems, Inc. All rights reserved worldwide. No parts of the software in-
cluding source code may be reproduced, transmitted, transcribed or translated into any
language or computer language in any form or by any means, electronic, magnetic, opti-
cal, manual or otherwise, without the prior written permission of FLIR Systems.
The documentation must not, in whole or part, be copied, photocopied, reproduced,
translated or transmitted to any electronic medium or machine readable form without pri-
or consent, in writing, from FLIR Systems.
Names and marks appearing on the products herein are either registered trademarks or
trademarks of FLIR Systems and/or its subsidiaries. All other trademarks, trade names
or company names referenced herein are used for identification only and are the prop-
erty of their respective owners.
#T810409; r. AH/78915/78915; en-US 1

Safety information
2
WARNING
Applicability: Class B digital devices.
This equipment has been tested and found to comply with the limits for a Class B digital device, pur-
suant to Part 15 of the FCC Rules. These limits are designed to provide reasonable protection against
harmful interference in a residential installation. This equipment generates, uses and can radiate radio
frequency energy and, if not installed and used in accordance with the instructions, may cause harmful
interference to radio communications. However, there is no guarantee that interference will not occur in
a particular installation. If this equipment does cause harmful interference to radio or television recep-
tion, which can be determined by turning the equipment off and on, the user is encouraged to try to cor-
rect the interference by one or more of the following measures:
• Reorient or relocate the receiving antenna.
• Increase the separation between the equipment and receiver.
• Connect the equipment into an outlet on a circuit different from that to which the receiver is
connected.
• Consult the dealer or an experienced radio/TV technician for help.
WARNING
Applicability: Digital devices subject to 15.19/RSS-GEN.
NOTICE: This device complies with Part 15 of the FCC Rules and with Industry Canada licence-exempt
RSS standard(s). Operation is subject to the following two conditions:
1. this device may not cause harmful interference, and
2. this device must accept any interference received, including interference that may cause undesired
operation.
WARNING
Applicability: Digital devices subject to 15.21.
NOTICE: Changes or modifications made to this equipment not expressly approved by FLIR Systems
may void the FCC authorization to operate this equipment.
WARNING
Applicability: Digital devices subject to 2.1091/2.1093/KDB 447498/RSS-102.
Radiofrequency radiation exposure Information: The radiated output power of the device is far be-
low the FCC radio frequency exposure limits. Nevertheless, the device should be used in such a man-
ner that the potential for human contact during normal operation is minimized.
WARNING
Do not use screws that are too long. The depth of the holes in the camera is 4.0 mm (0.16 in) and 5.5
mm (0.22 in), see 14 Mechanical drawings, page 51. Damage to the camera will occur if you use screws
that are too long.
CAUTION
Do not point the infrared camera (with or without the lens cover) at strong energy sources, for example,
devices that cause laser radiation, or the sun. This can have an unwanted effect on the accuracy of the
camera. It can also cause damage to the detector in the camera.
CAUTION
Do not use the camera in ambient temperatures higher than +40°C (+122°F), unless other information
is specified in the user documentation or technical data. High temperatures can cause damage to the
camera.
CAUTION
The surface of the camera becomes hot. Use protective equipment when handling the camera in ambi-
ent temperatures higher than +40°C (+122°F).
#T810409; r. AH/78915/78915; en-US 2

Safety information
2
CAUTION
Do not apply solvents or equivalent liquids to the camera, the cables, or other items. For cleaning, refer
to 17 Cleaning the camera.
CAUTION
Do not use too much force when you clean the infrared lens. Damage to the infrared lens or to the anti-
reflective coating of the lens can occur. For cleaning, refer to 17 Cleaning the camera.
CAUTION
Applicability: Cameras where you can remove the lens and expose the infrared detector.
Do not use compressed air of lower quality than “Process air” when you remove dust from the detector.
Air of lower quality than “Process air” can contain high levels of contaminants. Damage to the detector
can occur.
CAUTION
Applicability: Cameras with an automatic shutter that can be disabled.
Do not disable the automatic shutter in the camera for a long time period (a maximum of 30 minutes is
typical). This can have an unwanted effect on the accuracy of the camera.
CAUTION
Do not look into the camera torch LED when you operate it. Injury to your eyes and skin can occur.
Note The encapsulation rating is only applicable when all the openings on the camera
are sealed with their correct covers, hatches, or caps. This includes the compartments
for data storage, batteries, and connectors.
#T810409; r. AH/78915/78915; en-US 3

Notice to user
3
3.1 Register your camera
Register your camera to receive an extended warranty and other related benefits.
To register the camera, go to www.flir.com/register.
To access the registration form, you must log in to your FLIR account or sign up for a new
account.
You will also need the serial number of your camera, which is available on the calibration
certificate. You can also find the serial number by doing one of the following:
• Power off the camera. Carefully remove the lens without touching the detector window.
A label with the serial number is available on the camera body under the lens.
• Log in to the camera web interface. Navigate to Administration >System and firmware.
The serial number is available in the right pane.
3.2 Calibration
FLIR Systems recommends that you verify your calibration yearly. You can verify the cali-
bration yourself or with the help of a FLIR Systems Partner. If preferred, FLIR Systems of-
fers a calibration, adjustment, and general maintenance service.
3.3 Accuracy
For very accurate results, we recommend that you wait 5 minutes after you have started
the camera before measuring a temperature.
3.4 Disposal of electronic waste
Electrical and electronic equipment (EEE) contains materials, components and substan-
ces that may be hazardous and present a risk to human health and the environment
when waste electrical and electronic equipment (WEEE) is not handled correctly.
Equipment marked with the below crossed-out wheeled bin is electrical and electronic
equipment. The crossed-out wheeled bin symbol indicates that waste electrical and elec-
tronic equipment should not be discarded together with unseparated household waste,
but must be collected separately.
For this purpose all local authorities have established collection schemes under which
residents can dispose waste electrical and electronic equipment at a recycling centre or
other collection points, or WEEE will be collected directly from households. More de-
tailed information is available from the technical administration of the relevant local
authority.
3.5 Training
For training resources and courses, go to http://www.flir.com/support-center/training.
#T810409; r. AH/78915/78915; en-US 4

Notice to user3
3.6 Documentation updates
Our manuals are updated several times per year, and we also issue product-critical notifi-
cations of changes on a regular basis.
To access the latest manuals, translations of manuals, and notifications, go to the Down-
load tab at:
http://support.flir.com
In the download area you will also find the latest releases of manuals for our other prod-
ucts, as well as manuals for our historical and obsolete products.
3.7 Important note about this manual
FLIR Systems issues generic manuals that cover several cameras within a model line.
This means that this manual may contain descriptions and explanations that do not apply
to your particular camera model.
3.8 Note about authoritative versions
The authoritative version of this publication is English. In the event of divergences due to
translation errors, the English text has precedence. Any late changes are first imple-
mented in English.
#T810409; r. AH/78915/78915; en-US 5

Customer help
4
4.1 General
Do not hesitate to contact our Customer Support Center if you experience problems or
have any questions.
For customer help, go to http://support.flir.com.
4.2 Submitting a question
To submit a question to the customer help team, you must be a registered user. It only
takes a few minutes to register online. If you only want to search the knowledgebase for
existing questions and answers, you do not need to be a registered user.
When you want to submit a question, make sure that you have the following information
to hand:
• The camera model.
• The camera serial number.
• The communication protocol, or method, between the camera and your device (e.g.,
SD card reader, HDMI, Ethernet, USB, or FireWire).
• Device type (PC/Mac/iPhone/iPad/Android device, etc.).
• Version of any programs from FLIR Systems.
• Full name, publication number, and revision number of the manual.
4.3 Downloads
On the customer help site you can also download the following, when applicable for the
product:
• Firmware updates for your infrared camera.
• Program updates for your PC/Mac software.
• Freeware and evaluation versions of PC/Mac software.
• User documentation for current, obsolete, and historical products.
• Mechanical drawings (in *.dxf and *.pdf format).
• CAD data models (in *.stp format).
• Application examples.
• Technical datasheets.
#T810409; r. AH/78915/78915; en-US 6

Introduction
5
The Smart Sensor and Image Streaming cameras of the FLIR A400/A500/A700 series
offer unmatched power and flexibility to tailor effective thermal monitoring that improves
quality, productivity, maintenance, and safety.
• The Smart Sensor cameras analyze the images and then deliver a result to the user.
Use Modbus TCP, Ethernet /IP, or ONVIF to integrate the cameras into industrial sys-
tems (HMI/SCADA, VMS, NVR), or use the REST API to transfer data from the cam-
era to a web interface or to an application on the internet.
• The Image Streaming cameras deliver images with all related information to a com-
puter where the user can analyze the images and then decide what to do next.
Use the GigE Vision and GeniCam compatibility to integrate the cameras into your
own system.
Typical applications where the Smart Sensor and Image Streaming cameras of the FLIR
A400/A500/A700 series can be used are:
• Early fire detection
• Quality assurance
• Condition monitoring
For system installation examples, see 5.1 Example system overviews, page 8.
#T810409; r. AH/78915/78915; en-US 7

Introduction
5
5.1 Example system overviews
5.1.1 Early fire detection
MQTT
Figure 5.1 Hot spot detection, self-combustible material on conveyor belt
1. Coal mine conveyor belt.
2. FLIR A400/A500/A700 Smart Sensor camera.
3. Ethernet connector, X-coded.
4. Power I/O connector, A-coded.
5. Digital output to a programmable logic controller (PLC).
6. Separate DIN rail power supply for galvanic isolation (18–56 V DC).
7. Laptop used for set up of the camera using the web interface.
8. Ethernet switch.
9. MQTT output connected to a third-party cloud service.
10. Example thermal image.
#T810409; r. AH/78915/78915; en-US 8

Introduction
5
TCP
REST API
ONVIF
WAN
Figure 5.2 Hot spot detection, self-combustible material in storage areas
1. Computer running VMS or HMI/SCADA software.
2. CAT-6 Ethernet cable.
3. Industrial Power over Ethernet (PoE) switch.
4. FLIR A400/A500/A700 Smart Sensor cameras.
5. Industrial process to be monitored, e.g. a coal pile.
6. Example of thermal image.
7. WAN connection to third party cloud service.
#T810409; r. AH/78915/78915; en-US 9

Introduction
5
5.1.2 Quality assurance
7
Figure 5.3 Checking hot glue on cardboard boxes
1. Computer running custom-made software.
2. CAT-6 Ethernet cables.
3. Industrial Power over Ethernet (PoE) switches with fiber-optic posts.
4. Fiber-optic cable.
5. FLIR A400/A500/A700 Image Streaming cameras.
6. Industrial process to be monitored, e.g. items on a conveyor belt.
7. Example of thermal image.
#T810409; r. AH/78915/78915; en-US 10

Introduction
5
5.1.3 Condition monitoring
6
Figure 5.4 24/7 monitoring of critical assets
1. Computer running custom-made software.
2. CAT 6 Ethernet cable.
3. Industrial power over Ethernet (PoE) switch.
4. FLIR A400/A500/A700 Image Streaming cameras.
5. Industrial process to be monitored, e.g., a gasifier.
6. Example thermal image.
#T810409; r. AH/78915/78915; en-US 11

Introduction
5
5.1.4 Research & development
1
2
3
4
Figure 5.5 Checking heat dissipation on PCB during development
1. Computer running FLIR science software, e.g., FLIR Research Studio.
2. CAT 6 Ethernet cable.
3. Laboratory setup with a FLIR A400/A500/A700 Advanced Image Streaming camera.
4. Example thermal image.
#T810409; r. AH/78915/78915; en-US 12

Camera parts
6
Figure 6.1 View from the rear
Figure 6.2 View from the front
1. Power/error indicator LED (blue/red).
For details, see section 16 Indicator LEDs and factory reset button, page 57.
2. Ethernet communication indicator LED (green).
3. Ethernet/PoE connector, X-coded.
4. Power-I/O connector, A-coded.
5. Antenna.
6. RS232/485 connector, A-coded.
7. Factory reset button.
8. Infrared sensor.
9. Visual camera.
10. LED lamps.
#T810409; r. AH/78915/78915; en-US 13

Camera installation
7
Prior to installing the camera, the recommendation is to set it up on an existing network
with a DHCP server, and then use the FLIR IP Config software to detect the camera on
that network. The FLIR IP Config scans for cameras automatically and you can identify
your camera by the MAC address printed on a label on the back of the camera. The cam-
era is then configured from a web browser.
Note Use the latest version of FLIR IP Config.
You can power the camera by using either the Power-I/O connector (18–56 V DC) or the
Ethernet/Power over Ethernet (PoE) connector (36–56 V DC) of the camera. See Figure
6.1 View from the rear, page 13 and 11 Pin configurations, page 39.
To install the camera, follow this procedure:
1. On the computer to be used for managing the camera, download FLIR IP Config from
http://support.flir.com, and then install it.
2. Connect the camera to power and the network. Do one of the following:
a. Connect the power cable between the camera and a power source (for pin config-
urations, refer to the user manual of the FLIR A400/A500/A700 series). Connect
the network cable to the camera, and then either directly to the computer or to an
Ethernet switch on the same network as the computer.
b. Connect the PoE cable to the camera, and then to a PoE switch on the same net-
work as the computer.
3. The camera is set to use DHCP. On the computer, use FLIR IP Config to identify the
camera on the network, and change the IP settings if necessary.
4. On the computer, do one of the following:
a. Double-click on the camera in FLIR IP Config.
b. Type the IP address of your camera into the address bar of a web browser.
This displays the login view.
5. Log in using the username and password available on the camera calibration certifi-
cate. This displays the web interface of the camera.
6. Use the web interface to configure the camera. For Smart Sensor cameras, use the
web interface to also add measurements and set alarms. For Image Streaming cam-
eras, use a GigE Vision SDK to control the camera and receive a radiometric image
stream.
#T810409; r. AH/78915/78915; en-US 14

Mechanical installation
8
The camera unit has been designed to allow it to be mounted in any position. It has
mounting interfaces on all sides, but not on front or back. For details, see 14 Mechanical
drawings, page 51.
WARNING
Do not use screws that are too long. Damage to the camera will occur if you use screws that are too
long.
The camera generates a considerable amount of heat during operation. This is normal.
In order to transfer this heat, it is recommended that the camera is mounted on a bracket
or heat sink made of a material with a high capacity to transfer heat, e.g., aluminum. The
use of a cooling bracket or a heat sink is also strongly recommended in order to minimize
the temperature drift of the infrared detector in the camera.
For further information regarding mounting recommendations, contact FLIR Systems.
#T810409; r. AH/78915/78915; en-US 15

RTSP Streams
9
It is possible to establish streaming sessions with the Smart Sensor, the Advanced Smart
Sensor, and the Advanced Image Streaming cameras of the FLIR A400/A500/A700
series.
The following URLs can be used:
• rtsp://<IP>/avc/
• rtsp://<IP>/mpeg4/
• rtsp://<IP>/mjpg/
• rtsp://<IP>/avc/ch1
• rtsp://<IP>/mpeg4/ch1
• rtsp://<IP>/mjpg/ch1
The section after IP address refers to the encoding:
• /avc = H264 encoding
• /mpeg4 = MPEG4 encoding
• /mjpg = Motion JPEG encoding
The section after the encoding refers to the source, which can be either / or /ch1:
•/will start a streaming session giving you the identical video as seen in the web inter-
face. This can be IR, visual, MSX, or FSX, and the feed is 640 x 480 pixels.
Add the &overlay=off argument in the URL to receive a feed without overlay.
•/ch1 will start a streaming session giving you the uncropped visual image at 1280 x
960 pixels.
A radiometric 16-bit stream is also available for software supporting it.
#T810409; r. AH/78915/78915; en-US 16
This manual suits for next models
2
Table of contents
Other FLIR Thermal Camera manuals

FLIR
FLIR M-Series User manual

FLIR
FLIR C Series User manual

FLIR
FLIR BHS-Series User manual

FLIR
FLIR FC-Series S User manual

FLIR
FLIR T Series User manual

FLIR
FLIR A700 Series User manual

FLIR
FLIR ADK User manual

FLIR
FLIR D-Series C User manual

FLIR
FLIR FLIR T5 series User manual

FLIR
FLIR T10 series User manual