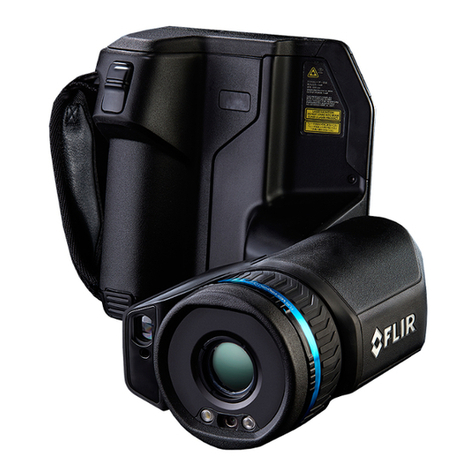
FLIR FUR GF7x Series User manual

Getting started
FLIR GF7x series


Getting started
FLIR GF7x series
#T810428; r. AB/55676/55676; mul


Table of contents
1 List of contents ............................. ... . . .. . . . . . . . . ................. . .. 1
2 Illustrations .... . ... . . . . . . . . ................. ... . . .. . . . . . . . . ................. . .. 2
3 EN-US English ..... ... . . .. . . . . . . . . ................. . .. . . . . . . . . . ................ 3
4 CS-CZ čeština................ . . . . . .................... . . . . . .... ................ 7
5 DE-DE Deutsch . . . . . .. . . ................ . ... . . . . . . . . ................. ... . . .. . .11
6 ES-ES Español. . . .. . ................ . . .. . . . . . .. . . ................ . ... . . . . . . . . .15
7 FR-FR Français ....... . . . . . .. . . ................ . ... . . . . . . . . ................. ..19
8 IT-IT Italiano .................. . . . . . .... ................ . . . . . .. . . ...............23
9 JA-JP 日本語.. .... ................ . . . . . .. . . ................ . .. . . . . . . . . . ........27
10 KO-KR 한국어. . . . . ................ ... . . .. . . . . . .. . . ................ . ... . . . . . . . . .31
11 PL-PL Polski. . . . . . ................... . . . . . . ................... . . . . . . .. . ........35
12 PT-PT Português.......... . . . . . .................... . . . . . ... ................. . .39
13 RU-RU Русский. . ................... . . . . . . ................... . . . . . . ... ........43
14 ZH-CN 简体中文 ........... . . . . . . . . ................. . .. . . . . . . . . . ...............47
15 ZH-TW 繁體中文 ........... . . . . . .................... . . . . . ... ................. . .51
#T810428; r. AB/55676/55676; mul v


1 List of contents
• Infrared camera with lens
• Accessory box I:
◦ Power supply for battery charger
◦ Power supply, 15 W/3 A
◦ Printed documentation
◦ SD card (8 GB)
◦ USB 2.0 A to USB Type-C cable
◦ USB Type-C to HDMI and PD adapter
◦ USB Type-C to USB Type-C cable (USB 2.0 standard)
• Accessory box II:
◦ Lens cap strap
◦ Lens cleaning cloth
◦ Neck strap
◦ Small eyecup
• Battery (2 ea)
• Battery charger
• Hard transport case
• Lens cap, front
Note FLIR Systems reserves the right to discontinue models, parts or acces-
sories, and other items, or to change specifications at any time without prior
notice.
#T810428; r. AB/55676/55676; mul 1

3 EN-US English
3.1 Read the manual before use
Go to the following website to read or download the
manual:
http://support.flir.com/resources/42vu
3.2 Extend your product warranty
Register your product now to get:
• 2 years camera warranty
• 10 years detector warranty
To activate your extended warranty, go to http://support.flir.com/camreg.
Note Registration must be completed within 60 days of purchase.
3.3 Download FLIR software
FLIR Systems provides freeware and licensed software for image editing, video
processing, thermal analysis, and reporting.
To download FLIR Thermography software, go to http://www.flir.com/support.
3.4 Training
For training resources and courses, go to
http://www.flir.com/support-center/training.
3.5 Customer support
Do not hesitate to contact our Customer Support Center at http://support.flir.com
if you experience problems or have any questions about your product.
#T810428; r. AB/55676/55676; mul 3

3 EN-US English
3.6 Quick start guide
3.6.1 Starting the camera for the first time
1. Charge the battery for 3 hours using the stand-alone battery charger.
2. Put the battery into the camera battery compartment.
3. Insert a memory card into the card slot.
Note Empty or use a memory card that has not previously been used in an-
other type of camera. The cameras may organize files differently on the
memory card. There is therefore a risk of losing data if the same memory
card is used in different types of cameras.
4. Push the on/off button to turn on/off the camera.
3.6.2 Detecting a gas leak
1. Aim the camera toward the object of interest.
2. Adjust the camera focus.
3. If there is a gas leak, and the gas is one of the gases that the camera can de-
tect, you will now see the leak on the screen. The leak will resemble a smoke
plume emanating from the point of the leak.
Note To obtain optimal contrast, try to find a suitable background by aiming
the camera toward the object from different angles.
4. To save an image, push the Save button.
5. To record a video clip, do the following:
5.1. Select (Recording mode) > (Video).
5.2. To start recording a video clip, push the Save button.
5.3. To stop recording a video clip, push the Save button again. The re-
cording is automatically saved.
#T810428; r. AB/55676/55676; mul 4
3 EN-US English
3.6.3 Measuring a temperature
1. Enable temperature measurement functionality: Select (Settings) > Ap-
plication options >Gas camera mode >Temperature measurements.
2. Add a spotmeter: Select (Measurement) > (Center spot).
3. Aim the camera toward the object. Make sure the spotmeter is on the point
of interest.
4. Adjust the infrared camera focus. This is very important for a correct temper-
ature measurement.
5. The spotmeter temperature is displayed on the screen.
3.7 Camera parts
3.7.1 View from the front
See Figure 2.1 View from the front, page 2.
1. Autofocus button.
2. Save button.
3. Viewfinder.
4. Knob to change the dioptric correction for the viewfinder.
5. Attachment point for the neck strap.
6. Laser receiver.
7. Laser transmitter.
8. Camera lamp (left and right sides).
9. Infrared lens.
10. Digital camera.
3.7.2 View from the rear
See Figure 2.2 View from the rear, page 2.
1. Focus ring.
2. Speaker.
3. Programmable button.
4. Image archive button.
5. Navigation pad with center push.
6. Back button.
7. On/off button.
8. Hand strap.
9. Multi-touch LCD screen.
#T810428; r. AB/55676/55676; mul 5

4 CS-CZ čeština
4.1 Před použitím si přečtěte příručku
Uživatelskou příručku si můžete přečíst nebo stáhnout
na následující webové stránce:
http://support.flir.com/resources/42vu
4.2 Prodloužení záruky výrobku
Zaregistrujte svůj produkt nyní a získáte:
• záruku na kameru 2 roky
• záruku na detektor 10 let
Prodloužení záruky si můžete aktivovat na webové stránce
http://support.flir.com/camreg.
Poznámka Registraci je nutné dokončit do 60 dní od zakoupení.
4.3 Stáhnout software FLIR
FLIR Systems poskytuje freeware a licencovaný software pro úpravu snímků,
zpracování obrazu, tepelnou analýzu a tvorbu zpráv.
Termografický software FLIR si můžete stáhnout na webové stránce
http://www.flir.com/support.
4.4 Školení
Školicí zdroje a kurzy najdete na webové stránce
http://www.flir.com/support-center/training.
4.5 Zákaznická podpora
Pokud se setkáte s problémy nebo máte nějaké dotazy ohledně výrobku, nevá-
hejte kontaktovat technickou podporu na adrese http://support.flir.com.
#T810428; r. AB/55676/55676; mul 7

4 CS-CZ čeština
4.6 Stručný návod ke spuštění kamery
4.6.1 První spuštění kamery
1. Nabíjejte baterii 3 hodiny pomocí samostatné nabíječky.
2. Vložte baterii do prostoru pro baterii v kameře.
3. Vložte paměťovou kartu do příslušného slotu pro kartu.
Poznámka Vymažte paměťovou kartu nebo použijte kartu, která předtím
nebyla použita v jiném typu kamery. Kamery mohou ukládat soubory různými
způsoby. Proto v případě použití stejné paměťové karty v různých typech ka-
mer existuje riziko ztráty dat.
4. Tlačítkem Zap/Vyp zapněte či vypněte kameru.
4.6.2 Detekování úniků plynu
1. Namiřte kameru na požadovaný objekt.
2. Nastavte zaostření kamery.
3. Při úniku plynu, jenž patří mezi plyny, které kamera dokáže detekovat, uvidíte
nyní únik na obrazovce. Únik bude vypadat jako oblak kouře vycházející z mí-
sta úniku.
Poznámka K získání optimálního kontrastu se pokuste najít vhodné pozadí
zamířením kamery na požadovaný objekt z různých úhlů.
4. Chcete-li snímek uložit, stiskněte tlačítko Uložit.
5. Pro pořízení videoklipu použijte následující postup:
5.1. Vyberte (Režim záznamu) > (Video).
5.2. Stisknutím tlačítka Uložit spustíte záznam videoklipu.
5.3. Opětovným stisknutím tlačítka Uložit záznam videoklipu ukončíte.
Záznam se automaticky uloží.
#T810428; r. AB/55676/55676; mul 8

4 CS-CZ čeština
4.6.3 Měření teploty
1. Aktivace funkce měření teploty: Vybrat (Nastavení) >Možnosti aplika-
ce>Režim kamery pro detekci plynů>Měření teploty.
2. Přidání bodového měřiče: Vyberte (Měření) > (Středový bod).
3. Namiřte kameru na objekt. Ujistěte se, že je bodový měřič namířen na poža-
dovaný bod.
4. Nastavte zaostření infračervené kamery. To je velmi důležité pro správné mě-
ření teploty.
5. Na displeji se zobrazí měřená teplota bodu.
4.7 Části kamery
4.7.1 Pohled zepředu
Viz část Figure 2.1 View from the front, strana 2.
1. Tlačítko automatického zaostření.
2. Tlačítko Uložit.
3. Hledáček.
4. Knoflík pro změnu dioptrické korekce hledáčku.
5. Poutko k uchycení popruhu pro zavěšení na krk.
6. Laserový přijímač.
7. Laserový vysílač.
8. Lampa kamery (levá a pravá strana).
9. Infračervený objektiv
10. Digitální kamera.
4.7.2 Pohled zezadu
Viz část Figure 2.2 View from the rear, strana 2.
1. Zaostřovací kroužek.
2. Reproduktor.
3. Programovatelné tlačítko.
4. Tlačítko archivu snímků.
5. Navigační ploška se středovým tlačítkem.
6. Tlačítko Zpět.
7. Tlačítko Zap/Vyp.
8. Jisticí řemínek.
9. Multidotyková obrazovka LCD.
#T810428; r. AB/55676/55676; mul 9

5 DE-DE Deutsch
5.1 Lesen Sie vor Gebrauch zunächst die Anleitung
Besuchen Sie die folgende Website, um das Benutzer-
handbuch zu lesen bzw. herunterzuladen:
http://support.flir.com/resources/42vu
5.2 Verlängern Sie die Garantie Ihres Produkts
Registrieren Sie Ihr Produkt jetzt, und erhalten Sie:
• 2 Jahre Garantie auf die Kamera
• 10 Jahre Garantie auf den Detektor
Um Ihre erweiterte Garantie zu aktivieren, besuchen Sie die Seite
http://support.flir.com/camreg.
Hinweis Die Registrierung muss innerhalb von 60 Tagen nach Kauf abge-
schlossen werden.
5.3 FLIR Software herunterladen
FLIR Systems bietet Freeware und lizenzierte Software für Bildbearbeitung, Vi-
deobearbeitung, thermische Analysen und Berichterstellung.
Um FLIR Thermografie-Software herunterzuladen, besuchen Sie die Seite
http://www.flir.com/support.
5.4 Schulung
Schulungsmaterial und Kurse finden Sie auf der Seite
http://www.flir.com/support-center/training.
5.5 Kundendienst
Wenn Probleme auftreten oder Sie Fragen zu unserem Produkt haben, wenden
Sie sich an unser Customer Support Center unter http://support.flir.com.
#T810428; r. AB/55676/55676; mul 11

5 DE-DE Deutsch
5.6 Schnelleinstieg
5.6.1 Erstmalige Inbetriebnahme der Kamera
1. Laden Sie den Akku 3 Stunden lang mit dem externen Ladegerät auf.
2. Setzen Sie den Akku in das Akkufach der Kamera ein.
3. Setzen Sie eine Speicherkarte in den Kartensteckplatz ein.
Hinweis Verwenden Sie eine Speicherkarte, die noch nie mit einem ande-
ren Kameratyp verwendet wurde. Verschiedene Kameras organisieren die
Dateien auf der Speicherkarte unter Umständen unterschiedlich. Wird die-
selbe Speicherkarte mit verschiedenen Kameratypen verwendet, kann es
daher zu Datenverlusten kommen.
4. Drücken Sie die Ein/Aus-Taste , um die Kamera ein- bzw. auszuschalten.
5.6.2 Erkennen von Gaslecks
1. Richten Sie die Kamera auf das gewünschte Objekt.
2. Stellen Sie den Kamerafokus ein.
3. Wenn es ein Gasleck gibt und das Gas zu den Gasen zählt, die von der Ka-
mera erkannt werden, sehen Sie jetzt das Leck auf dem Bildschirm. Das
Leck ähnelt einer Rauchfahne, die aus der Leckstelle austritt.
Hinweis Um einen optimalen Kontrast zu erhalten, suchen Sie einen ge-
eigneten Hintergrund, indem Sie die Kamera aus verschiedenen Blickwin-
keln auf das Objekt richten.
4. Drücken Sie zum Speichern eines Bilds die Speichern-Taste.
5. Gehen Sie wie folgt vor, um ein Video aufzuzeichnen:
5.1. Wählen Sie (Aufnahmemodus) > (Video).
5.2. Um die Aufzeichnung eines Videos zu starten, drücken Sie die Spei-
chern-Taste.
5.3. Um die Aufzeichnung eines Videos zu beenden, drücken Sie die
Speichern-Taste erneut. Die Aufnahme wird automatisch
gespeichert.
#T810428; r. AB/55676/55676; mul 12

5 DE-DE Deutsch
5.6.3 Messen einer Temperatur
1. Temperaturmessfunktion aktivieren: Wählen Sie (Einstellungen)
>Anwendungsoptionen>Gaskameramodus>Temperaturmessungen.
2. Messpunkt hinzufügen: Wählen Sie (Messung) > (Zentraler Mess-
punkt) aus.
3. Richten Sie die Kamera auf das Objekt. Achten Sie darauf, dass sich der
Messpunkt auf der relevanten Stelle befindet.
4. Stellen Sie den Fokus der Infrarotkamera ein. Dies ist für eine korrekte Tem-
peraturmessung sehr wichtig.
5. Die Messpunkttemperatur wird auf dem Kamerabildschirm angezeigt.
5.7 Kamerateile
5.7.1 Ansicht von vorn
Siehe Figure 2.1 View from the front, Seite 2.
1. Autofokus-Taste.
2. Schaltfläche Speichern.
3. Sucher
4. Knopf zur Einstellung der Dioptrien-Korrektur für den Sucher.
5. Befestigungspunkt für Tragegurt.
6. Laserempfänger
7. Lasersender
8. Kameralampe (links und rechts).
9. Infrarotobjektiv.
10. Digitalkamera
5.7.2 Rückansicht
Siehe Figure 2.2 View from the rear, Seite 2.
1. Fokusring.
2. Lautsprecher.
3. Programmierbare Taste.
4. Bildarchiv-Taste.
5. Navigationstastenfeld mit Schaltfläche in der Mitte.
6. Zurück-Taste.
7. Ein/Aus-Taste.
8. Trageschlaufe
#T810428; r. AB/55676/55676; mul 13

5 DE-DE Deutsch
9. Multitouch-LCD-Bildschirm.
10. Lichtsensor.
11. Mikrofon.
12. Befestigungspunkt für Tragegurt.
5.7.3 Ansicht von unten
Siehe Figure 2.3 View from the bottom, Seite 2.
1. Lasertaste
2. Programmierbare Taste.
3. Stativbefestigung.
4. Abdeckung für Anschlussfach
5. Akku.
#T810428; r. AB/55676/55676; mul 14
Table of contents
Other FLIR Thermal Camera manuals

FLIR
FLIR Voyager II Installation and operating instructions

FLIR
FLIR F-Series User manual

FLIR
FLIR T530 User manual

FLIR
FLIR M400 User manual

FLIR
FLIR Vue User manual

FLIR
FLIR 614004898 User manual

FLIR
FLIR Duo User manual

FLIR
FLIR T6 series User manual

FLIR
FLIR A400 Series User manual

FLIR
FLIR T4 Series User manual
Popular Thermal Camera manuals by other brands

PeakTech
PeakTech 5610 Operation manual

Chauvin Arnoux
Chauvin Arnoux C.A 1954 DiaCAm 2 quick start guide

Satir
Satir UMTI user manual

International Safety Instruments
International Safety Instruments Surveyor Owner's operation manual

Hikmicro
Hikmicro HM-TS03-15XF quick start guide

TESTO
TESTO 870 instruction manual