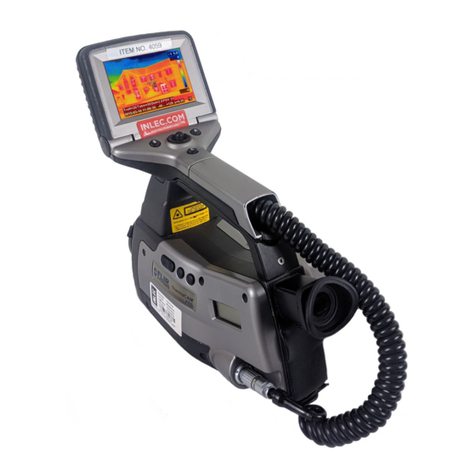
FLIR G Series User manual

User’s manual
FLIR G series

Table of contents
1 Notice to user ...................................................................................1
1.1 Safety information ..................................................................... 1
1.2 Register your camera................................................................. 1
1.3 Online documentation................................................................ 1
1.4 About this manual ..................................................................... 1
1.5 Support ..................................................................................1
1.6 Training ..................................................................................2
2 Introduction......................................................................................3
2.1 Benefits..................................................................................3
3 Getting started..................................................................................4
3.1 Safety information ..................................................................... 4
3.2 Start the camera ....................................................................... 4
3.3 Unlock the camera .................................................................... 4
3.3.1 Get unlock code............................................................. 4
3.3.2 Enter unlock code in camera.............................................5
3.4 Detect a gas leak ...................................................................... 5
3.5 Measure a temperature .............................................................. 5
4 Camera parts ....................................................................................6
4.1 View from the front ....................................................................6
4.2 View from the rear..................................................................... 7
4.3 View from the left ...................................................................... 7
4.4 Connector and battery compartment ............................................. 8
4.5 Serial number .......................................................................... 8
4.6 Laser pointer ...........................................................................9
5 User interface ................................................................................. 10
5.1 Screen elements .................................................................... 10
5.1.1 General...................................................................... 10
5.1.2 Status icons and indicators............................................. 10
5.2 Mode selection menu .............................................................. 11
5.2.1 Navigation .................................................................. 11
5.3 Main toolbar .......................................................................... 12
5.3.1 Navigation .................................................................. 12
5.4 Quick menu ........................................................................... 13
5.4.1 Navigation .................................................................. 13
5.5 Image overlay ........................................................................ 14
6 Basic operation ............................................................................... 15
6.1 Safety information ................................................................... 15
6.2 Battery ................................................................................. 15
6.2.1 Install the battery.......................................................... 15
6.2.2 Remove the battery ...................................................... 16
6.2.3 Battery indicator........................................................... 16
6.3 Battery charging ..................................................................... 17
6.3.1 Battery indicator — charging........................................... 17
6.3.2 Charge the battery using the battery charger ...................... 17
6.3.3 Charge the battery in the camera ..................................... 17
6.4 Power on/off .......................................................................... 18
6.4.1 Power on.................................................................... 18
6.4.2 Power off.................................................................... 18
6.5 Display ................................................................................. 19
6.6 Viewfinder............................................................................. 20
6.7 Ergonomics........................................................................... 21
6.8 Focus................................................................................... 22
6.8.1 Manual focus............................................................... 22
6.8.2 Autofocus ................................................................... 22
#T810605; r. AD/92464/92464; en-US ii

Table of contents
6.9 Temperature range.................................................................. 23
6.10 Mode wheel........................................................................... 24
6.11 Save and record ..................................................................... 25
6.11.1 Save an image............................................................. 25
6.11.2 Record a video ............................................................ 25
6.12 Zoom ................................................................................... 26
6.13 Programmable buttons............................................................. 27
6.14 Laser pointer ......................................................................... 28
6.15 File transfer ........................................................................... 28
6.15.1 Transfer files via USB cable ............................................ 28
6.16 Camera lamps........................................................................ 29
6.17 Knob screw ........................................................................... 29
6.18 Change the lenses .................................................................. 30
7 Thermal imaging basics ................................................................... 33
7.1 Focus................................................................................... 33
7.1.1 Adjust focus ................................................................ 33
7.2 Temperature range.................................................................. 33
7.2.1 Change the temperature range........................................ 34
7.3 Thermal image adjustment........................................................ 34
7.3.1 Manual mode .............................................................. 34
7.3.2 Manual adjustment by touching the screen ........................ 35
7.3.3 Manual adjustment using the joystick................................ 36
7.3.4 Auto adjustment region.................................................. 36
7.4 Color palettes ........................................................................ 37
7.4.1 Change the color palette ................................................ 37
8 Detecting a gas leak......................................................................... 38
8.1 Basic steps to gas detection...................................................... 38
8.2 Adjust the camera focus ........................................................... 38
8.3 Delta T ................................................................................. 38
8.4 High Sensitivity Mode (HSM)..................................................... 38
8.4.1 Using HSM ................................................................. 39
8.5 Adjust the temperature scale ..................................................... 39
8.6 Change the color palette .......................................................... 39
8.7 Change the temperature range .................................................. 39
9 Quantification ................................................................................. 41
9.1 Introduction ........................................................................... 41
9.1.1 Field equipment ........................................................... 41
9.2 User interface ........................................................................ 41
9.2.1 Quantification parameters .............................................. 41
9.2.2 Type of measurement.................................................... 42
9.2.3 Flow rate unit............................................................... 42
9.3 Perform a quantification measurement......................................... 42
9.3.1 Main steps.................................................................. 43
9.3.2 Select a measurement position ....................................... 43
9.3.3 Place the camera ......................................................... 43
9.3.4 Enter Quantification mode .............................................. 43
9.3.5 Set the quantification parameters..................................... 43
9.3.6 Ensure minimum delta temperature .................................. 43
9.3.7 Start the measurement .................................................. 44
9.3.8 Quantification results .................................................... 44
9.3.9 Transfer quantification results.......................................... 44
9.4 Practical information ................................................................ 44
9.4.1 Measurement position ................................................... 44
9.4.2 Measure Ambient Temperature ....................................... 45
9.4.3 Assessing delta temperature .......................................... 45
#T810605; r. AD/92464/92464; en-US iii
Table of contents
9.4.4 Camera temperature range ............................................ 46
9.4.5 Field of view and focus .................................................. 46
9.4.6 Leak rate versus concentration........................................ 46
9.5 Method limits ......................................................................... 46
10 Measuring temperatures .................................................................. 48
10.1 Basic steps to temperature measurements ................................... 48
10.2 Measurement tools ................................................................. 48
10.2.1 Add and remove a tool .................................................. 48
10.2.2 Edit a user preset ......................................................... 48
10.2.3 Move and resize a tool .................................................. 49
10.2.4 Display values in the result table ...................................... 50
10.2.5 Display a graph............................................................ 50
10.2.6 Set up a difference calculation ........................................ 50
10.2.7 Set up a measurement alarm .......................................... 51
10.3 Temperature range.................................................................. 52
10.4 Adjust the temperature scale ..................................................... 52
10.5 Measurement parameters......................................................... 52
10.5.1 Types of parameters ..................................................... 52
10.5.2 Recommended values................................................... 53
10.5.3 Set the measurement parameters .................................... 53
10.6 Color alarms and isotherms....................................................... 54
10.6.1 Set up a color alarm...................................................... 55
11 Working with images........................................................................ 56
11.1 Save an image ....................................................................... 56
11.1.1 Preview an image ......................................................... 56
11.2 Annotate an image .................................................................. 56
11.2.1 Text comment table ...................................................... 57
11.2.2 Voice annotation .......................................................... 59
11.3 About image files .................................................................... 59
11.3.1 File-naming convention ................................................. 59
11.3.2 Image files .................................................................. 59
12 Recording....................................................................................... 60
12.1 Record a video ....................................................................... 60
12.2 Periodic saving (time-lapse) ...................................................... 60
12.3 Multi-Rec .............................................................................. 60
12.3.1 Set up recording .......................................................... 60
12.3.2 Start recording............................................................. 61
13 Gallery — video and image archive.................................................... 62
13.1 Open the Gallery .................................................................... 62
13.2 Open video and image files ....................................................... 62
13.3 Edit an image......................................................................... 62
13.4 Add a folder........................................................................... 63
13.5 Rename a folder ..................................................................... 63
13.6 Change the active folder........................................................... 63
13.7 Move files between folders........................................................ 63
13.8 Upload files and folders............................................................ 64
13.9 Delete files and folders............................................................. 64
13.9.1 Delete folders .............................................................. 64
13.9.2 Delete a file................................................................. 64
13.9.3 Delete multiple files ...................................................... 64
13.9.4 Delete all files .............................................................. 64
14 Wireless connectivity....................................................................... 65
14.1 Wi-Fi.................................................................................... 65
14.1.1 Connect the camera to Wi-Fi .......................................... 65
#T810605; r. AD/92464/92464; en-US iv

Table of contents
14.1.2 Set up the camera as a wireless access point ..................... 65
14.2 Bluetooth .............................................................................. 65
14.2.1 Pair Bluetooth devices................................................... 65
14.3 Cloud connectivity................................................................... 66
14.3.1 Setup ........................................................................ 66
14.3.2 Create FLIR Ignite account ............................................. 66
14.3.3 Connect camera to internet ............................................ 66
14.3.4 Pair with FLIR Ignite ...................................................... 66
14.3.5 Automatic upload ......................................................... 66
14.3.6 Manual upload............................................................. 67
14.3.7 Access FLIR Ignite ....................................................... 67
14.4 Camera web interface.............................................................. 67
14.4.1 Connect the camera to the local network ........................... 67
14.4.2 Open the camera web interface ....................................... 68
14.4.3 Download files ............................................................. 68
15 Inspection Route ............................................................................. 69
15.1 General ................................................................................ 69
15.1.1 FLIR Inspection Route Solution user manual ...................... 69
15.2 User interface ........................................................................ 69
15.2.1 Drop-down menu ......................................................... 70
15.2.2 Inspection list .............................................................. 70
15.3 Performing an inspection .......................................................... 71
15.3.1 Preparation................................................................. 71
15.3.2 Capturing inspection data .............................................. 72
15.3.3 Editing inspection point data ........................................... 73
15.3.4 Saving an image .......................................................... 73
15.3.5 Recording a video clip ................................................... 73
15.3.6 Viewing and editing inspection images.............................. 73
15.3.7 Inspection list .............................................................. 74
15.3.8 Adding an inspection point ............................................. 74
15.3.9 Transferring inspection results......................................... 74
15.4 Configuration ......................................................................... 75
15.5 Creating an inspection route...................................................... 76
15.5.1 Creating an inspection route in the camera ........................ 76
15.5.2 Manually editing an XML file ........................................... 76
16 Camera settings .............................................................................. 78
16.1 FLIR Ignite ............................................................................ 78
16.2 Connections .......................................................................... 78
16.3 Multi-Rec settings ................................................................... 78
16.4 Camera temperature range ....................................................... 78
16.5 Save options & storage ............................................................ 78
16.6 Device settings....................................................................... 79
17 Maintenance and cleaning ................................................................ 81
17.1 General check........................................................................ 81
17.2 Clean the camera ................................................................... 81
17.2.1 Camera housing, cables, and other items .......................... 81
17.2.2 Infrared lens................................................................ 81
17.2.3 Infrared detector .......................................................... 82
17.3 Cooler maintenance ................................................................ 82
17.3.1 General...................................................................... 82
17.3.2 Signs to watch for......................................................... 82
17.4 Camera calibration .................................................................. 82
18 Updating the camera........................................................................ 84
18.1 Update the camera online ......................................................... 84
#T810605; r. AD/92464/92464; en-US v

Table of contents
18.2 Update via USB cable with the FLIR Camera Updater ..................... 84
18.2.1 Install the FLIR Camera Updater...................................... 84
18.2.2 Connect the camera ..................................................... 84
18.2.3 Update notifications ...................................................... 84
18.3 Update the camera manually via USB cable ................................. 84
19 Disposal of electronic waste ............................................................. 86
19.1 Battery removal ...................................................................... 86
20 Disclaimers .................................................................................... 87
20.1 Legal disclaimer ..................................................................... 87
20.2 Export controls ....................................................................... 87
20.3 Patents................................................................................. 87
20.4 Quality assurance ................................................................... 87
20.5 Third-party licenses................................................................. 87
20.6 Usage statistics ...................................................................... 87
20.7 Copyright .............................................................................. 87
#T810605; r. AD/92464/92464; en-US vi

Notice to user
1
1.1 Safety information
Before operating the camera, you must read, understand, and follow the warnings and
cautions in the Safety information publication.
For the FLIR Gx models, there is a dedicated Safety information publication, including
warnings and cautions related to explosive and hazardous locations.
The Safety information publication is supplied with the camera. It is also available at the
following internet address: https://support.flir.com/resources/b9rp.
1.2 Register your camera
Register your camera to receive an extended warranty and other benefits.
To register the camera, go to https://support.flir.com/camreg.
To access the registration form, you must log in to your FLIR account or sign up for a new
account.
You will also need the serial number of your camera. The serial number is displayed by
the registration wizard in the camera. See also section 4.5 Serial number.
To start the registration wizard, turn on the camera and select Settings >Device settings
>Camera information >Register camera.
To complete the registration, you must enter a verification code into the camera. The
code is available in your FLIR account, under My Products.
1.3 Online documentation
Our manuals are continuously updated and published online.
To access the FLIR G series user manual and other product documentation, go to
https://support.flir.com/resources/b9rp.
To access the manuals for our other products, as well as manuals for our discontinued
products, go to https://support.flir.com/resources/app.
1.4 About this manual
FLIR Systems issues generic manuals that cover several models within a camera series.
This means that this manual may contain descriptions and explanations that do not apply
to your particular camera model.
The authoritative version of this publication is English. In the event of divergences due to
translation errors, the English text has precedence. Any late changes are first imple-
mented in English.
1.5 Support
Contact our Technical Support Center if you experience problems or have any questions
about your product: https://support.flir.com.
#T810605; r. AD/92464/92464; en-US 1

Notice to user1
1.6 Training
Thermal inspection of gas leaks—including thermal image and other data acquisition,
analysis, diagnosis, prognosis, and reporting—is a highly advanced skill. It requires pro-
fessional knowledge of thermography and its applications, and is, in some countries,
subject to certification and legislation. Consequently, we strongly recommend that you
seek the necessary training before carrying out inspections.
For training and certification courses, go to https://www.flir.com/support-center/training.
#T810605; r. AD/92464/92464; en-US 2

Introduction
2
The FLIR G series is the latest addition to Optical Gas Imaging (OGI) with focus on the
digital oilfield. While maintaining best in class image quality and gas detection sensitivity,
it offers new features such as wireless connectivity and connection to the FLIR cloud.
2.1 Benefits
Newest in technology to meet today’s operator
• The most easily connectable OGI camera
• Wireless communication
• Compatible with FLIR Ignite
• Easy to integrate with LDAR software
Both see and measure the gas leak in the camera
Unmatched gas sensitivity and advanced analytics onboard camera
• Quantification inside camera (Hydrocarbon version)
• 320 and 640 options available (Hydrocarbon version)
• Compliant with existing regulations (FLIR Gx version)
Better ergonomics and easier to operate
Refreshed hardware addressing user issues but maintaining a familiar experience
• Touch LCD screen
• Field exchangeable lenses
• Improved hardware and updated GUI
#T810605; r. AD/92464/92464; en-US 3

Getting started
3
3.1 Safety information
Before operating the camera, you must read, understand, and follow the warnings and
cautions in the Safety information publication.
For the FLIR Gx models, there is a dedicated Safety information publication, including
warnings and cautions related to explosive and hazardous locations.
The Safety information publication is supplied with the camera. It is also available at the
following internet address: https://support.flir.com/resources/b9rp.
3.2 Start the camera
1. Charge the battery. The battery is fully charged when all battery indicator lights are
steady on.
2. Open the cover at the rear of the camera.
3. Push the battery into the battery compartment.
4. Insert a memory card into the card slot.
Note Empty or use a memory card that has not previously been used in another
type of camera. The cameras may organize files differently on the memory card.
There is therefore a risk of losing data if the same memory card is used in different
types of cameras.
5. Close the cover. Tighten the screw.
6. Push the On/Off button to power on the camera.
Note A mechanical cooler will start to cool down the sensor. The loud cooler sound
is fully normal. When the cooling procedure is completed, there is a distinct change
of the sound.
7. Follow the instructions on the camera screen to set up the camera according to your
preferences.
Applicable to FLIR Gx models: To make the camera fully operational, you must un-
lock the camera by entering a camera unique code. For more information, see sec-
tion 3.3 Unlock the camera.
Note You can select the settings as a part of the initial setup of the camera or later
at any time via the Settings menu.
3.3 Unlock the camera
The FLIR Gx camera is certified for use in hazardous locations. To make the FLIR Gx
camera fully operational, you must unlock the camera by entering a camera unique code.
To get the unlock code, you must log in to a FLIR account and register the camera.
Note The next time you turn on the camera, it will be fully operational from its start-up.
You do not have to go through the unlock procedure again.
3.3.1 Get unlock code
Use a computer or other device with internet access and go to
http://support.flir.com/unlock.
To access the registration form, you must log in to your FLIR account or sign up for a new
account.
You will also need the serial number of your camera. The serial number (S/N) is dis-
played by the setup wizard in the camera. See also section 4.5 Serial number.
When you have registered the camera, the unlock code will be available in your FLIR ac-
count, under My Products.
#T810605; r. AD/92464/92464; en-US 4

Getting started
3
3.3.2 Enter unlock code in camera
To enter the unlock code in the camera, do the following:
• Move the joystick up/down to select a digit.
• Move the joystick left/right to navigate to the previous/next digit.
• When the last digit has been entered, move the joystick right to select Continue. Push
the joystick to confirm.
3.4 Detect a gas leak
1. Aim the camera toward the object of interest.
2. Adjust the camera focus. If the camera is out of focus, there is a risk of missing a gas
leak.
3. If there is a gas leak, and the gas is one of the gases that the camera can detect, you
will now see the leak on the screen. The leak will look like a smoke plume coming
from the point of the leak.
Note To obtain optimal contrast, try to find a suitable background by aiming the
camera toward the object from different angles.
Using the High Sensitivity Mode (HSM) can improve the detection of gas leaks. For
more information, see section 8.4 High Sensitivity Mode (HSM).
4. To record a video clip, do the following:
4.1. Turn the mode wheel and select Video.
4.2. To start the recording, push the Record button.
4.3. To stop the recording, push the Record button again. The recording is auto-
matically saved.
5. To save an image, do the following:
5.1. Turn the mode wheel and select Camera.
5.2. To save an image, push the Record button.
3.5 Measure a temperature
Note Temperature measurement functionality is available for radiometric cameras.
1. Add a spotmeter: Tap the menu button at the bottom of the screen. On the main tool-
bar, select Measurement >Center spot.
2. Aim the camera toward the object. Make sure the spotmeter is on the point of interest.
3. Adjust the camera focus. This is very important for a correct temperature
measurement.
4. The spotmeter temperature is displayed on the screen.
#T810605; r. AD/92464/92464; en-US 5

Camera parts
4
4.2 View from the rear
1. Viewfinder
2. Diopter adjustment knob
3. Cover for the connector and battery compartment
4. Locking screw (Torx T20)
5. Attachment point for the neck strap
4.3 View from the left
1. Laser button
2. Programmable button
3. Temperature range button
4. Display
5. Mode wheel
#T810605; r. AD/92464/92464; en-US 7

Camera parts
4
4.4 Connector and battery compartment
You can connect the following external devices to the camera:
• A computer, connected using a USB cable, for file transfer and video streaming.
• A video monitor or projector, connected using an HDMI cable.
• An SD memory card.
• Power supply, to charge the battery.
1. USB port
2. HDMI port
3. Power connector
4. Battery
5. Memory card slot
4.5 Serial number
The serial number is available at the inside of the cover for the connector and battery
compartment.
The serial number is also available in the camera settings. Select Settings >Device set-
tings >Camera information.
#T810605; r. AD/92464/92464; en-US 8

User interface
5
5.1 Screen elements
5.1.1 General
1. Result table
2. Status icons and indicators
3. Spotmeter
4. Temperature scale
5. Menu button
5.1.2 Status icons and indicators
Battery level
• Green: above 75%
• Yellow: up to 75%
• Red: up to 25%
• No color: below 15%
The available storage space on the memory card is running low.
The GPS is enabled.
If the icon is grey, the camera cannot find a GPS signal.
External infrared window compensation is enabled.
The camera is paired with a FLIR Ignite account.
The camera is paired, but does not have contact with FLIR Ignite (no internet
connection).
A Bluetooth headset is connected.
The laser is on.
#T810605; r. AD/92464/92464; en-US 10

User interface
5
5.2 Mode selection menu
The camera can operate in different modes. You select the mode on the Mode selection
menu.
Figure 5.1 Mode selection menu
• Camera: Save images using the Record button.
• Video: Record videos using the Record button.
• Time-lapse: Save images periodically.
• Multi-Rec: Save recordings of video sequences in different image modes. See also
section 12.3 Multi-Rec.
• Quantification: Measure and quantify a gas leak. See also section 9 Quantification.
• Gallery: Video and image archive.
• Settings: Open the Settings menu.
Note The availability of the features on the Mode selection menu depends on the cam-
era model.
5.2.1 Navigation
To display and navigate the Mode selection menu, turn the mode wheel. Wait a short
while and the camera will enter the highlighted mode.
Note You can also display the Mode selection menu from the main toolbar, and navi-
gate by using the joystick or touch screen.
Figure 5.2 Mode wheel
#T810605; r. AD/92464/92464; en-US 11

User interface
5
5.3 Main toolbar
1. Mode selection
2. Temperature scale
3. Measurement parameters
4. Image mode
5. Measurement
6. Color
7. Delta T
5.3.1 Navigation
To navigate the user interface, you can use the touch screen and/or the joystick and Back
button.
• To display the main toolbar, do one of the following:
◦ Tap the menu button at the bottom of the screen.
◦ Push the joystick.
• To navigate the toolbars, menus, and dialog boxes, and to change values in dialog
boxes, move the joystick up/down or left/right.
• To confirm changes and settings in menus and dialog boxes, push the joystick.
• To leave dialog boxes and to go back in the menu system, push the Back button.
Figure 5.3 Back button and joystick.
#T810605; r. AD/92464/92464; en-US 12

User interface
5
5.4 Quick menu
Figure 5.4 Quick menu
1. Storage status of the memory card.
2. Battery level.
3. Enable/disable Bluetooth or open the Bluetooth settings menu. See also section 14.2
Bluetooth.
4. Enable/disable Wi-Fi or open the Wi-Fi settings menu. See also section 14.1 Wi-Fi.
5. Enable/disable automatic upload of images and videos. See also section 14.3.5 Au-
tomatic upload.
Note If the camera is not paired with a FLIR Ignite account, you will be prompted to
sign in to FLIR Ignite before you can enable automatic upload.
6. Turn on/off the camera lamps.
Note Before you can turn on the camera lamps, you need to enable the lamps. On
the Settings menu, select Device settings >Lamp & laser >Enable lamp & laser or
Enable lamp & laser + Use lamp as flash.
7. Adjust the brightness of the screen.
8. The FLIR Ignite user account that the camera is paired with. For more information,
see section 14.3.4 Pair with FLIR Ignite.
9. Storage status of the FLIR Ignite account.
5.4.1 Navigation
To display the Quick menu, swipe down from the top of the screen.
To navigate the Quick menu by using the touch screen, do the following:
• Tap to enable/disable a function.
•Bluetooth and Wi-Fi: Tap and hold to open the settings menu.
• Screen brightness: Tap the screen to adjust the screen brightness.
To navigate the Quick menu by using the joystick, do the following:
• Move the joystick up/down or left/right to highlight a function.
• Push the joystick to enable/disable the highlighted function.
•Bluetooth and Wi-Fi: Push and hold the joystick to open the settings menu.
• Screen brightness: Move the joystick up/down to adjust the screen brightness.
#T810605; r. AD/92464/92464; en-US 13

User interface
5
5.5 Image overlay
The camera saves the image information such as date, time, and items related to tem-
perature measurements to the image file. This image information can be viewed in the
image archive.
You can also choose to display selected image information items, and also lens informa-
tion, as an overlay on the image. All image overlay information displayed on the live im-
age will also be displayed on saved images.
To define what image overlay information to display, select Settings >Device settings >
Display settings >Image overlay information.
#T810605; r. AD/92464/92464; en-US 14
This manual suits for next models
1
Table of contents
Other FLIR Thermal Camera manuals