FLORABEST FGH 710 A1 Quick start guide

GARDEN CULTIVATOR FGH 710 A1
GARTENkULTIVATOR
Originalbetriebsanleitung
GARDEN CULTIVATOR
Translation of original operation manual
IAN 79160
®

GB / IE Translation of original operation manual Page
DE/ AT/ CH Originalbetriebsanleitung Seite
Before reading, unfold the page containing the illustrations and familiarise yourself with all functions
of the device.
Klappen Sie vor dem Lesen die Seite mit den Abbildungen aus und machen Sie sich anschließend
mit allen Funktionen des Gerätes vertraut.
4
14

A
D
E
B
10
9
7
8
6
5
3a
3b
4
1a 1b
2
4
14
14
14
14
15
15
3b
15
15
6
16
2
18
17
12
1211
1a 1b
13
5
5
2
3a
19
20
21
23 10
11
C
22

4
GB IE
Introduction
Congratulations on the purchase of your
new device. With it, you have chosen a
high quality product.
The operating instructions constitute part of
this product. They contain important infor-
mation on safety, use and disposal.
Before using the product, familiarise your-
self with all of the operating and safety
instructions. Use the product only as de-
scribed and for the applications specied.
Keep this manual safely and in the event
that the product is passed on, hand over
all documents to the third party.
Intended purpose
The tool is intended for breaking up and
tilling coarse soil for the purpose of mixing
in fertiliser, peat and compost in domestic
areas.
Any use other than that specically named
in this manual may lead to damage to the
tool and represents a serious injury hazard
for the operator.
The operator or user of the tool is respon-
sible for any damage or injury caused to
other persons or property.
This tool is intended for use by adults.
Children and persons unfamiliar with the
manual must not be allowed to use the
tool. Do not use the tool in rain or damp
surroundings.
The manufacturer shall not be held liable
for damage arising from improper use or
incorrect operation of the tool.
Contents
Scope of delivery ...........................5
Overview ......................................5
Functional description .....................5
Symbols on the implement ...............6
Symbols used in the manual .............6
General notes on safety ..................6
Fitting the grip tubing .......................9
Switching on and off ........................9
Operating instructions.....................10
General cleaning and
maintenance work ...........................10
Changing the tines .........................11
Storage.........................................11

5
IEGB
General description
Scope of delivery
Carefully remove the tool from the packag-
ing and check that the following parts are
complete:
• Motor housing with tines and frame
tubing
• Right-hand fork with dead-man lever
and permanently xed mains cable
• Left-hand fork grip
• Plastic cross-plate with cable guide
• Assembly tools, cable clips and belt
clip
• User manual
The major functional parts
are shown on the foldout
pages.
Overview
A
1a Right-hand fork grip with dead-man
lever, safety release catch and ca-
ble tension relief
1b Left-hand fork grip
2 Mains cable
4 Plastic cross-plate
5 Two central tubes
6 Frame tubing
3a Large cable clip
3b Small cable clip
7 Vent
8 Motor housing
9 Gearbox
10 Driveshaft
11 Tines
12 Belt clip
B
13 Bolts provided
14 Screws
15 Wing nuts
C
16 Cable tension relief
17 Safety release catch
18 Dead-man lever
D
19 Hex bolt
20 Self-locking nut
Functional description
Your hand-operated garden tiller is
equipped with a maintenance free electric
motor and a gearbox with sump lubrica-
tion.
The tool is tted with four rotating tine
wheels that automatically dig themselves
into the ground.
The aluminium frame can be folded to aid
storage.
Please refer to the following descriptions
for the function of the controls.
Technical data
Motor power input ...................... 710 W
Mains voltage .......................... 230V AC
Mains frequency ...........................50 Hz
Safety class ...................................... II
Degree of protection ........................ IP24
Working width ..........................360 mm
Max working depth ............max. 180 mm
Number of tine wheels ..........................4
Nominal rotation rate .....Approx 230 rpm
Weight .................................... 7.85 kg
Acoustic pressure level (LpA)
........................... 69,3 dB(A); KpA=1,41
Measured sound power level (LwA)
...........................89,3 dB(A); KwA=1,41
Guaranteed sound power level
............................................... 93 dB(A)
Vibration at hand grip (an)
............................ 2.7 m/s2; K=1,4 m/s2
Noise and vibration values have been
determined according to the standards and
regulations named in the declaration of
conformity.
Technical and optical alterations may be
made without notice for the purposes of
improvement. No guarantee can be given
for the accuracy of dimensions, notices

6
GB IE
and specications stated in this manual.
The manufacturer shall therefore not accept
liability for statutory claims arising from the
manual.
Safety precautions
This section deals with the basic safety
regulations while working with the electric
tiller.
Symbols
Warning!
Read the user manual
Warning! Protect from rain
and damp
Danger of injury from objects
spinning off! Keep surrounding
persons away form the hazard
area.
Warning! Switch off the tool and
disconnect it from the mains be-
fore carrying out any cleaning or
maintenance work.
Danger from damaged mains
cable. Keep mains cables away
from tines!
Danger of injury from rotating
parts. The tines will continue to
rotate after the tool has been
switched off. Wait for them to
stop moving.
93
Sound power level LWA in dB.
Safety class II
Do not dispose of electrical equip-
ment in household waste.
Warningsymbolswithin-
formationondamageand
injuryprevention.
Instruction symbols (the instruction is
explained at the place of the exclama-
tion mark) with information on prevent-
ing damage.
Help symbols with information on
improving tool handling.
General notes on safety
Warning! Improper use of this tool
may lead to serious injury. Read
this instruction manual carefully
before you start working with the
tool, and familiarise yourself with
its controls.
• Keep the manual in a safe place and
pass it on to any subsequent owner to
ensure that the information it contains
is always available.
• Remember: the user is responsible for
accidents involving other people or
their property.
Please read the following safety
guidelines in order to avoid risk of
re, electric shock, personal injury
and damage to objects:
• The equipment is to be used only by
people who are adequately trained.
• For safety reasons, do not allow chil-
dren or young people under 16 or

7
IEGB
anyone not familiarised with this in-
struction manual to use the tool.
• This appliance is not intended for use
by persons (including children) with
reduced physical, sensory or mental
capabilities, or lack of experience and
knowledge, unless they have been
given supervision or instruction concern-
ing use of the appliance by a person
responsible for their safety.
• Children should be supervised to en-
sure that they do not play with the ap-
pliance.
• Never use the tool while others, espe-
cially children or pets, are close by.
• Familiarise yourself with handling the
tool and pay attention to all possible
dangers that may be overheard while
working with the tool.
• Check the terrain on which you will
be using the tool, and remove stones,
sticks, wires or other foreign objects
that may be caught up and spun off.
• Wear proper working clothes, such as
rm footwear with non-slip soles and
strong long trousers. Do not use the
tool barefoot or wearing open-toed
sandals.
• To prevent injury from the tines, only
switch the tool on in its working posi-
tion.
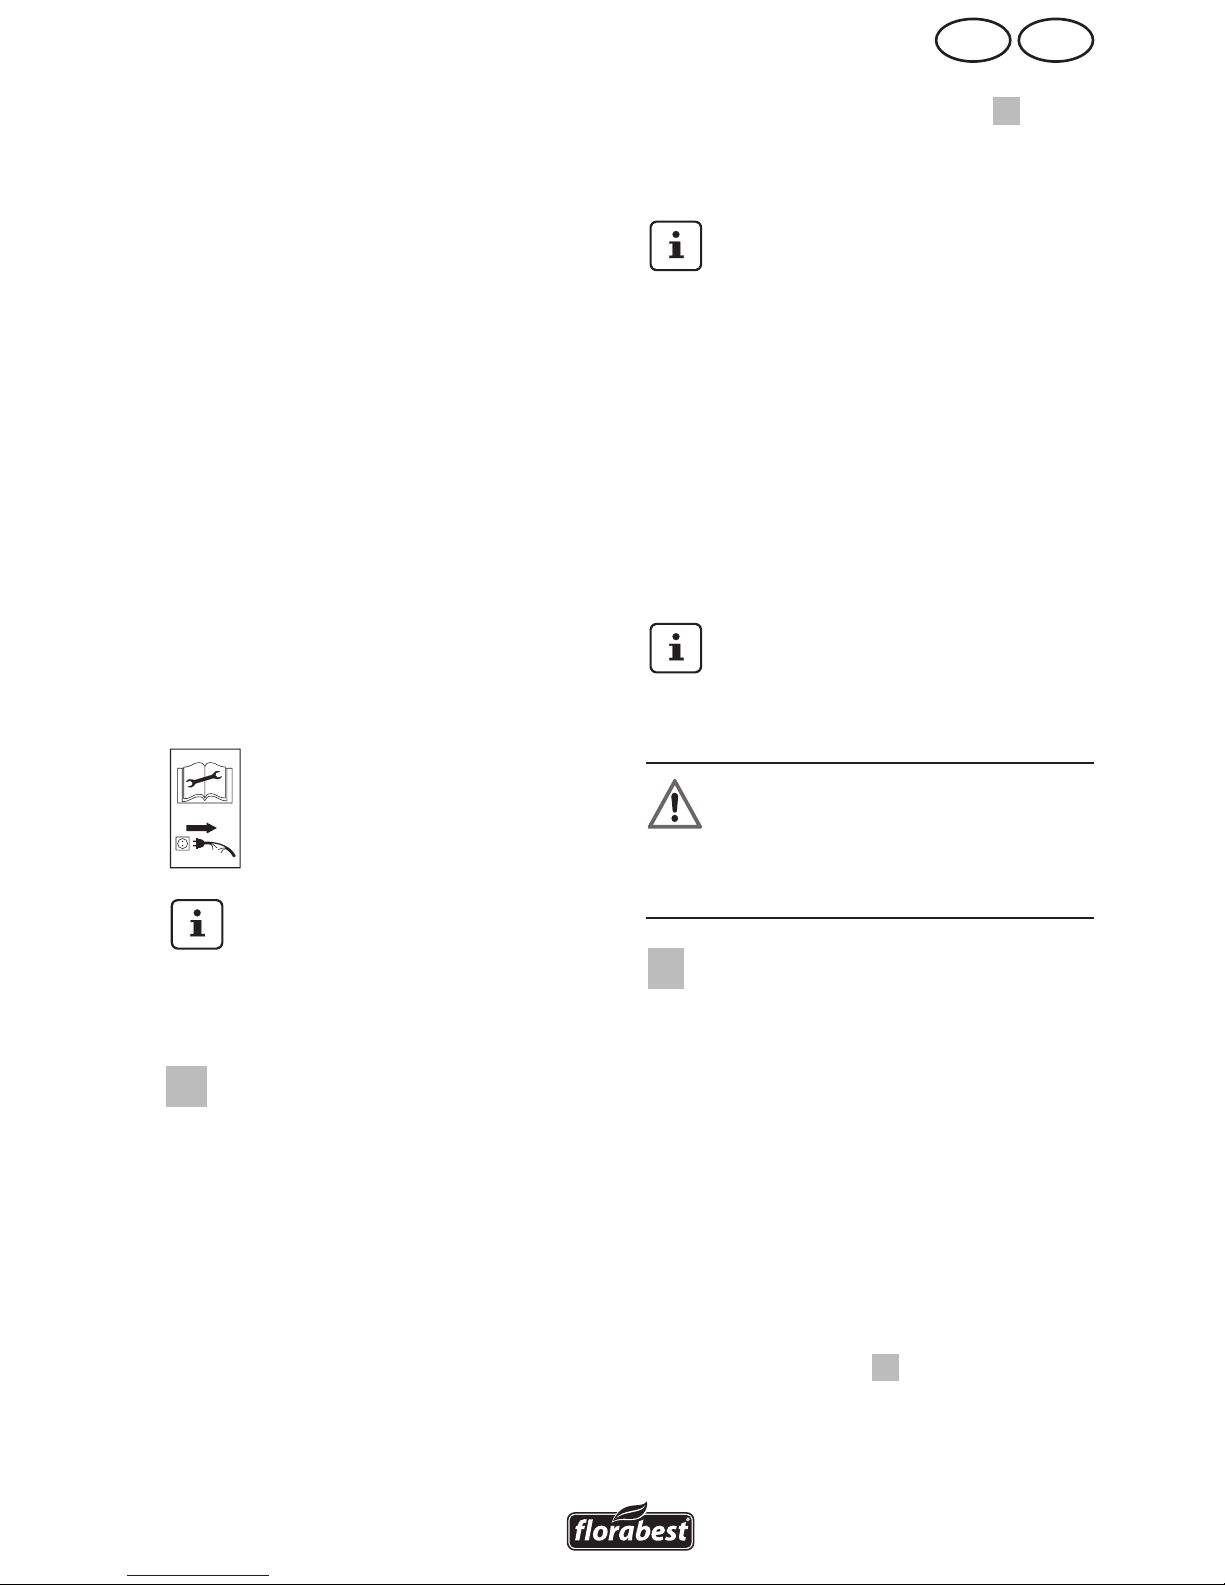
• Examine the tool beforehand every
time you use it. Do not use the tool
when the safety components (such as
the power safety catch or guard), cut-
ting parts or bolts are missing, worn
or damaged. In particular, check the
mains cable and dead-man lever for
damage.
• Only replace damaged bolts or tines in
complete sets to prevent imbalance.
• Only use replacement and accessory
parts delivered and recommended by
the manufacturer. Using foreign parts
will immediately lead to loss of guaran-
tee.
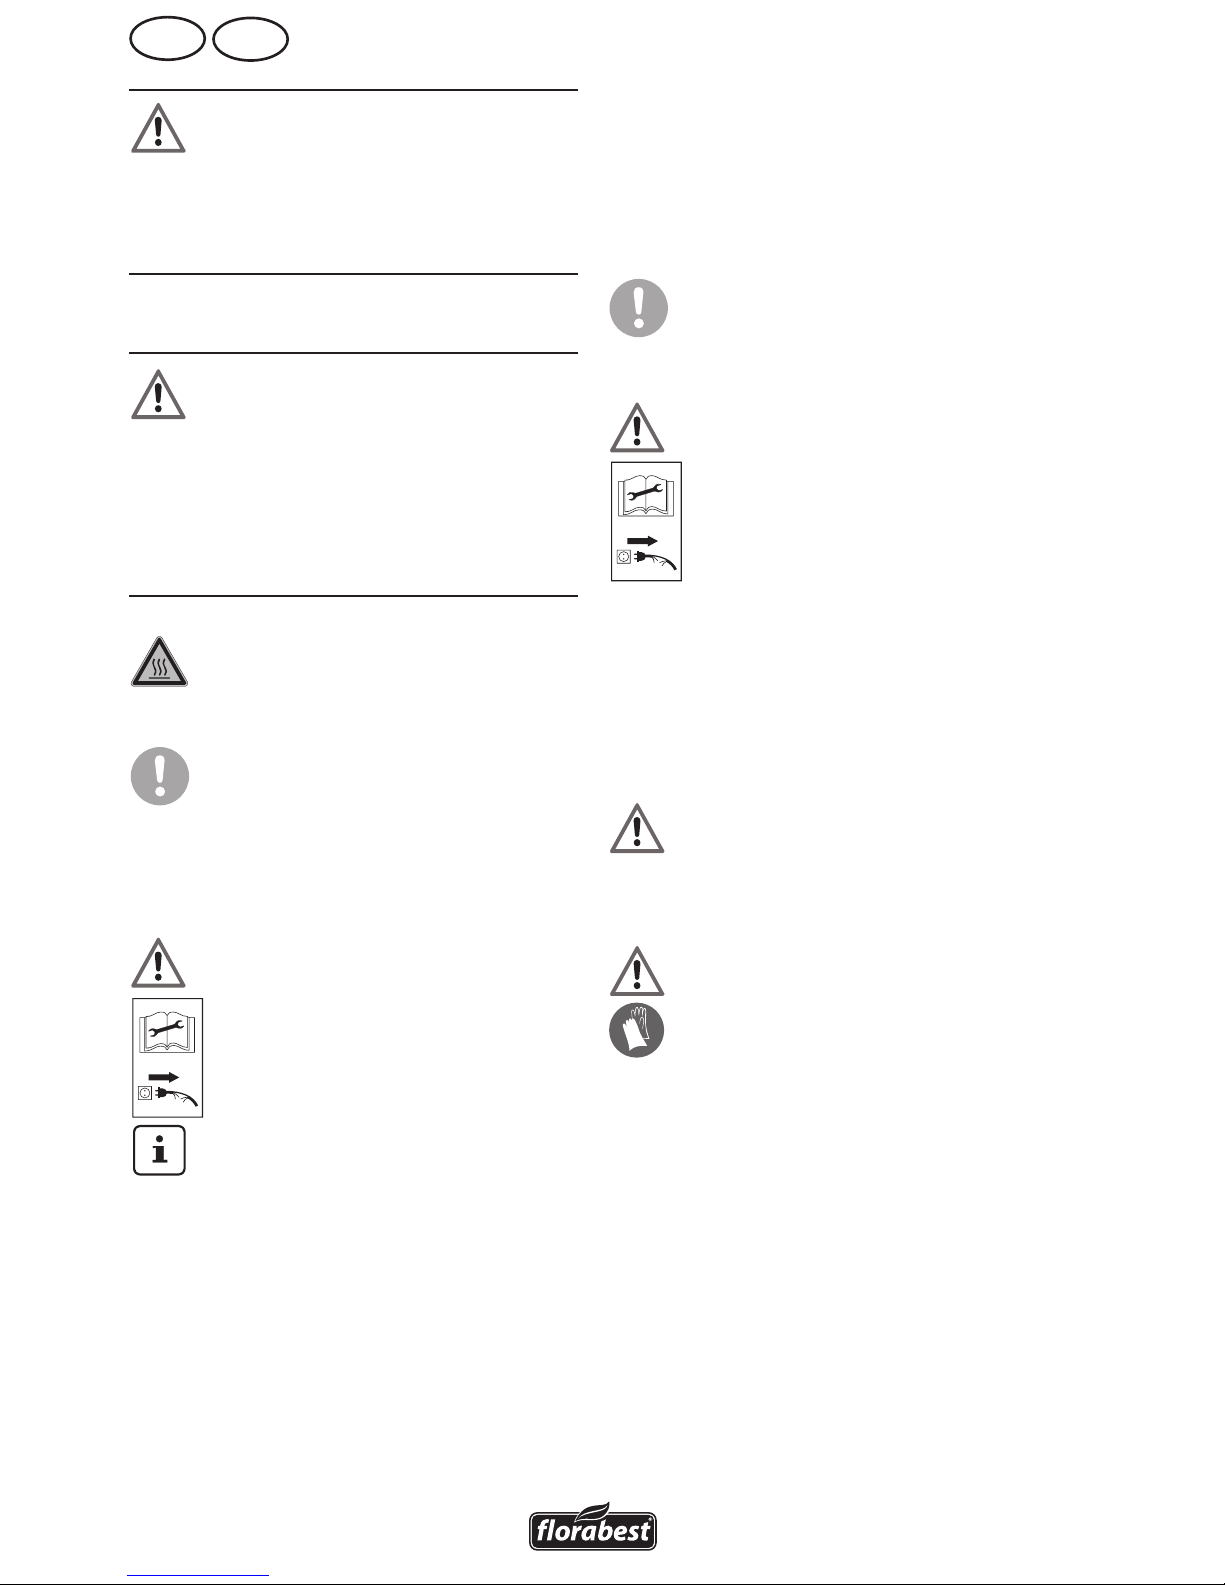
Keep your hands and feet away
from the tines while working, espe-
cially when starting up the tool – in-
jury hazard!
• Observe any noise-prevention regula-
tions and local by-laws. Using the
tool may be limited or prohibited on
certain days such as Sundays or public
holidays, or during certain times of the
day (midday, at night) or in certain
areas (such as at health spas and hos-
pitals).
• Do not use the tool to chop up stones
or till lawn soil, as such use may dam-
age the tool.
• Do not use the tool in rain, foul weath-
er or damp surroundings (such as near
garden ponds or swimming pools).
Only use in daylight or good lighting
conditions.
• Be sensible. Do not use the tool if you
are tired or easily distracted, or after
the use of alcohol or medicines. Take a
break as soon as you need one.
• Make sure that you are standing rmly
when using the tool, especially on
slopes. If working on a slope, work
along the slope, not upwards or down-
wards. Be particularly careful when
changing direction on the slope. Do
not use the tool on excessively steep
slopes.
• If there is any danger of slipping on
sloped ground, have a second person
secure the tool with a rod or cable.
The second person should stand up the
slope at a safe distance from the tool.
• Always hold the tool securely in both
hands while working with it.
• Make sure that the grips are dry and
clean. Be careful while moving back-
wards – danger of tripping over!
• Take particular care when turning or
raising the machine.
• If the chopping knife is blocked by a
foreign body, switch off the equipment

8
GB IE
and disconnect at the plug. Remove
the foreign body (e.g. root) before re-
starting the equipment.
• Do not use the tool if it is damaged,
incomplete or altered without the ap-
proval of the manufacturer. In particu-
lar, do not work with the tool if guards
or protection ttings are damaged or
missing.
• Do not overload the tool. Only work
in the performance range stated. Do
not use tools that do not have sufcient
power for heavy jobs. Do not use the
tool for any use other than that intend-
ed by the manufacturer.
• Avoid damage to the tool. Do not ap-
ply extra weight and do not drag the
tool over hard surfaces such as tiles or
steps.
Warning! The tines will continue
to turn for a few seconds after you
switch the tool off. Wait until they
have stopped moving – injury haz-
ard!
• Do not lift or transport the tool while
the motor is running. Turn the tool off
and wait for the tines to stop moving,
then disconnect the tool from the mains
before changing the area you are
working on.
• Never leave the tool unattended where
you were using it.
• Switch the tool off, wait for the tines to
stop moving and disconnect the tool
from the mains under the following cir-
cumstances:
- Always before leaving the tool.
- Before removing remnants of soil
and plants
- When the tool is not in use
- Before you conduct maintenance
or cleaning work on the tool
- If the mains cable is damaged or
caught up
- If the tool collides with an obstacle
or starts to vibrate in an unusual
manner. In this case, examine the
tool for damage, and have it
repaired if necessary.
• Use the tool away from ammable
uids or gases. Failure to do so may
result in re or explosion.
• Make sure that all nuts, bolts and
screws are tight and that the tool is in
safe working order.
• Do not attempt to repair the tool your-
self unless you are qualied to do so.
Return the tool to our service centre
to carry out any work not listed in the
user manual.
• Keep the tool in a dry place out of chil-
dren’s reach.
• Be careful in handling the tool. Keep
the tines sharp and clean to improve its
working safety and effectiveness.
• Follow the maintenance regulations.
Warning! Do not use the tool if the
mains or extension cable is dam-
aged – danger of electrical shock.
• Keep the mains cable away from the
tines. Always trail the mains cable
behind you or the person operating the
tool. If the cable becomes damaged
during use, immediately disconnect it
from the mains.
Never touch the mains cable before
unplugging it from the mains.
• Make sure that the mains voltage
matches the data on the tool’s rating
label.
• Avoid skin contact with earthed objects
such as metal fences and posts.
• Make sure that the connector on the
extension cable is protected from

9
IEGB
splash water, and is made of rubber
or has a rubber covering. Only use
extension cables that are intended for
outdoor use and are labelled as such.
Use extension cables with a cable core
diameter of at least one square mil-
limetre. Always completely unwind the
cable reel before use. Check the cable
for damage.
• Use the cable hanger tted for the pur-
pose when using an extension cable.
• Do not carry the tool by the cable. Do
not unplug the cable by tugging on it.
Keep the cable away from heat, oil
and sharp edges.
• If the power cable for this equipment
is damaged, it must be replaced with
a special power cable, which is avail-
able from the manufacturer or a cus-
tomer service agent of the same.
Assembly instructions
Always disconnect the tool from the
mains before conducting any work
on it.
While assembling the tool, make sure
that the mains cable does not be-
come caught and has enough slack.
Fitting the grip tubing
B
1. Push the two fork grips (1a/1b)
into the plastic cross-plate (4),
and screw the plate into the cor-
responding holes in the grip tub-
ing from behind using the bolts
provided (13).
2. Screw both central tubes (5) onto
the fork handles (1a/1b). To do
this, push the enclosed screws
(14) inwards through the holes
from the outside and screw them
in place with the wing nuts (15).
3. Position the handle rod with the
pipe ends to the left and right on
the lower frame tubing (
A
6) and
screw it in place with the enclosed
screws (14) and wing nuts (15).
When assembled correctly, the
handle ends point away from the
equipment front with the ventilation
slits (see 7).
4. Fasten the mains cable with the
cable clips supplied:
- Large cable clip (3a) above the
cross-plate
- Small cable clip (3b) at the
frame tubing.
Operation
Observe noise-abatement laws and
local by-laws.
Switching on and off
Note:Beforeswitchingthe
toolon,makesurethatthe
toolisnottouchinganyother
objectsandholditrmlyin
bothhands.
C
1. Plug the tool into the extension ca-
ble.
2. Loop the end of the extension cable
and hang it onto the cable tension
relief (16) to ease the tension on the
cable.
3. Plug the tool into the mains.
4. Hang the extension cable onto the
belt clip (12) and fasten it to your
trouser belt.
5. To switch on, press the safety re-
lease catch (17) and then squeeze
the dead-man lever (18). Release
the safety release catch (17).
A
6. To switch off, release the dead-man
lever (18).

10
GB IE
Warning!Thetineswillcon-
tinuetoturnforafewsec-
ondsafterthetoolhasbeen
switchedoff.Donottouch
therotatingtines–injury
hazard!
Operating instructions
Alwayskeeparmgripon
thetoolwithboothhands
andwatchyourfeet.
Thetinesmaycauseanac-
cident.
Becarefulwhilemoving
backwards–dangeroftrip-
ping!
• Never lift or drag the tool with the
motor running.
• Lift the tool while moving it over
hard surfaces such as tiles or
steps.
Switchthetooloffafterworkingwith
itandfortransport;disconnectfrom
themainsandwaitforthetinesto
stopmoving.
• Walk the tool through the soil
at normal pace and in a line as
straight as possible.
• Always work away from the
mains socket. Make sure that the
cable is kept well away from the
working area. Hanging the cable
into the belt clip included in the
package will help.
• The
motor will cut out immediately
if overloaded. The tool cannot
be used until it has completely
cooled down again.
Cleaning,
maintenance, storage
Warning! Always return the tool
to the service centre for work not
described in the manual. Only use
original parts.
Switchthetooloff,unplugitfrom
themains,andwaitforthetinesto
stopmovingbeforecarryingoutany
maintenanceorcleaningworkon
thetool.
Perform regular maintenance and cleaning
on the tool. This will ensure long, reliable
service.
General cleaning and
maintenance work
Do not spray the tool down with wa-
ter (especially not under pressure),
and do not clean it under running
water.
Wearprotectivegloveswhencarry-
ingoutmaintenanceandcleaning
workonthetooltoavoidinjuryfrom
cuts.
• Remove any soil and dirt residues stuck
to the tines, driveshaft, tool surface
and vents with a brush or dry cloth.
• Spray or rub biodegradable oil into
the tines.
• Clean soiled grips with a damp cloth.
• Always check the tool for obvious dam-
age such as loose, worn or damaged

11
IEGB
parts before using it. Check that all
nuts, bolts, and screws are tight.
• Check the covers and guards for dam-
age and correct t. Change them if
necessary.
We shall not be held responsible for any
damage caused in any of the following
ways:
- Improper repair
- Use of non-original parts
- Use other than for the intended pur-
pose
Changing the tines
The tool is tted with four tine wheels that
can easily be changed in pairs. Both of the
tine-wheel pairs can be tted on the left or
right, as required.
Alwayschangebothtinepairs
atthesametimetoavoiddam-
agetothetoolfromimbalance.
Switch the tool off, unplug it and
wait for the tines to stop turning.
D
1. Unscrew the hex bolt (19) and the
self-locking nut (20) on the tine-
wheel pair (11).
2. Slide the tine-wheel pair off the
shaft (10).
3. Clean the driveshaft
with biological oil.
4. Slide the new tines onto
the driveshaft with the
holes on the axles
aligned to the holes on
the driveshaft (21).
Make sure that the tines are set to
their proper turning direction. The
arrows on the gearbox and tines
should point the same way
(
D
No. 22).
5. Slide the hex bolt through the
hole and tighten on the self-lock-
ing nut (supplied with each new
tine wheel pair 23).
Storage
• Leave the motor to cool down before
you put the tool into a closed space.
• Keep the tool clean, dry and out of the
reach of children.
• Do not cover the tool in plastic bags as
moisture may form.
E
Unscrew the wing nuts
and fold the fork grips down to reduce the
space taken by the tool.
• The frame tubing also serves as a hook
to hang up the tool at the place of stor-
age.
Donotusethetoolwiththe
handlefoldedclosed.
Replacement parts
Use the service address or fax number
supplied to order replacement parts. Make
sure you include the order number in your
order.
Set of tines
Right/left ............... Order No. 30261000
Please contact our service address for all
other replacement part numbers.

12
GB IE
Disposal,
environmental
protection
Be environmentally friendly. Return the
tool, accessories and packaging to a recy-
cling centre when you have nished with
them.
Do not dispose of electrical appli-
ances in household waste.
Return the tool to a recycling centre. The
plastic and metal parts used can be sepa-
rated and sorted for recycling. Ask our
service centre for details.
Guarantee
Dear Customer,
This equipment is provided with a 3-year
guarantee from the date of purchase.
In case of defects, you have statutory rights
against the seller of the product. These
statutory rights are not restricted by our
guarantee presented below.
The term of the guarantee begins on the
date of purchase. Please retain the original
receipt. This document is required as proof
of purchase.
If a material or manufacturing defect
occurs within three years of the date of
purchase of this product, we will repair or
replace – at our choice – the product for
you free of charge. This guarantee requires
the defective equipment and proof of pur-
chase to be presented within the three-year
period with a brief written description of
what constitutes the defect and when it oc-
curred.
If the defect is covered by our guarantee,
you will receive either the repaired product
or a new product. No new guarantee pe-
riod begins on repair or replacement of the
product.
The guarantee period is not extended by
the guarantee service. This also applies for
replaced or repaired parts. Any damages
and defects already present at the time of
purchase must be reported immediately af-
ter unpacking. Repairs arising after expiry
of the guarantee period are chargeable.
The equipment has been carefully pro-
duced in accordance with strict quality
guidelines and conscientiously checked
prior to delivery.
The guarantee applies for all material and
manufacturing defects. This guarantee
does not extend to cover product parts that
are subject to normal wear and may there-
fore be considered as wearing parts (e.g.
lters or attachments) or to cover damage
to breakable parts (e.g. switches, batteries,
or parts made of glass).
This guarantee shall be invalid if the prod-
uct has been damaged, used incorrectly or
not maintained. Precise adherence to all of
the instructions specied in the operating
manual is required for proper use of the
product. Intended uses and actions against
which the operating manual advises or
warns must be categorically avoided.
The product is designed only for private
and not commercial use. The guarantee
will be invalidated in case of misuse or
improper handling, use of force, or inter-
ventions not undertaken by our authorised
service branch.
To ensure quick handling of you issue,
please follow the following directions:
• Please have the receipt and item
number (e.g. IAN 12345) ready as
proof of purchase for all enquiries.
• Please nd the item number on the
rating plate, an engraved plate on the

13
IEGB
front page of your manual (bottom left)
or as a sticker on the back or bottom.
• Should functional errors or other de-
fects occur, please initially contact the
service department specied below
by telephone or by e-mail. You will
then receive further information on the
processing of your complaint.
• After consultation with our customer
service, a product recorded as defec-
tive can be sent postage paid to the
service address communicated to you,
with the proof of purchase (receipt)
and specication of what constitutes
the defect and when it occurred. In or-
der to avoid acceptance problems and
additional costs, please be sure to use
only the address communicated to you.
Ensure that the consignment is not sent
carriage forward or by bulky goods,
express or other special freight. Please
send the equipment inc. all accessories
supplied at the time of purchase and
ensure adequate, safe transport pack-
aging.
Repair Service
For a charge, repairs not covered by the
guarantee can be carried out by our serv-
ice branch, which will be happy to issue a
cost estimate for you.
We can handle only equipment that has
been sent with adequate packaging and
postage.
Attention: Please send your equipment to
our service branch in clean condition and
with an indication of the defect.
Equipment sent carriage forward or by
bulky goods, express or other special
freight will not be accepted.
We will dispose of your defective devices
free of charge when you send them to us.
Service-Center
Tel.: 0871 5000 720
(£ 0.10/Min.)
E-Mail: [email protected]
Tel.: 1890 930 034
(0,08 EUR/Min., (peak))
(0,06 EUR/Min., (off peak))
E-Mail: [email protected]
Service Branch
Please note that the following address is
not a service address. Please initially con-
tact the service centre specied above.
Unit B7
Oxford Street Industrial Park
Vulcan Road
Bilston, West Midlands WV14 7LF

14
CHAT
DE
Einleitung
Herzlichen Glückwunsch zum Kauf Ihres
neuen Gerätes.
Sie haben sich damit für ein hochwertiges
Produkt entschieden. Die Betriebsanleitung
ist Bestandteil dieses Produkts. Sie enthält
wichtige Hinweise für Sicherheit , Gebrauch
und Entsorgung. Machen Sie sich vor der
Benutzung des Produkts mit allen Bedien-
und Sicherheitshinweisen vertraut. Benutzen
Sie das Produkt nur wie beschrieben und für
die angegebenen Einsatzbereiche.
Bewahren Sie die Betriebsanleitung gut
auf und händigen Sie alle Unterlagen bei
Weitergabe des Produkts an Dritte mit aus.
Bestimmungsgemäße
Verwendung
Das Gerät ist für das Hacken und Zerkleinern
grobscholligen Bodens und für die Einarbei-
tung von Dünger, Torf und Kompost im häus-
lichen Bereich bestimmt.
Jede andere Verwendung, die in dieser Be-
triebsanleitung nicht ausdrücklich zugelassen
wird, kann zu Schäden am Gerät führen
und eine ernsthafte Gefahr für den Benutzer
darstellen.
Der Benutzer ist für Unfälle oder Schäden
an anderen Menschen oder deren Eigen-
tum verantwortlich.
Das Gerät ist zum Gebrauch durch Erwachse-
ne bestimmt. Kinder sowie Personen, die mit
dieser Betriebsanleitung nicht vertraut sind,
dürfen das Gerät nicht benutzen. Die Benut-
zung des Gerätes bei Regen oder feuchter
Umgebung ist verboten. Dieses Gerät ist
nicht zur gewerblichen Nutzung geeignet.
Bei gewerblichem Einsatz erlischt die Ga-
rantie.
Der Hersteller haftet nicht für Schäden, die
durch bestimmungswidrigen Gebrauch oder
falsche Bedienung verursacht wurden.
Inhalt
Lieferumfang.................................. 15
Übersicht ...................................... 15
Funktionsbeschreibung .................... 15
Bildzeichen auf dem Gerät .............. 16
Symbole in der Betriebsanleitung ..... 16
Allgemeine Sicherheitshinweise ....... 16
Griffholme montieren ...................... 19
Ein- und Ausschalten ...................... 20
Arbeitshinweise ............................. 20
Allgemeine Reinigungs- und
Wartungsarbeiten .......................... 21
Hackmesser austauschen................. 21
Lagerung ...................................... 22

15
CHAT
DE
Allgemeine
Beschreibung
Lieferumfang
Nehmen Sie das Gerät vorsichtig aus der Pa-
ckung und prüfen Sie, ob die nachfolgenden
Teile vollständig sind:
• Motorgehäuse mit Hackmessern und Bü-
gelholm.
• 2 Mittelholme
• Rechter Gabelgriff mit Starthebel und fest
montiertem Netzkabel
• Linker Gabelgriff
• Kunststoff-Querbügel
• Montagezubehör, Kabelklemmen und
Gürtelclip
• Betriebsanleitung
Die Abbildung der wich-
tigsten Funktionsteile nden
Sie auf der Ausklappseite.
Übersicht
A
1a Rechter Gabelgriff mit Starthebel,
Entriegelungsknopf und Zugentla-
stung
1b Linker Gabelgriff
2 Netzkabel
3a große Kabelklemme
3b kleine Kabelklemme
4 Kunststoff-Querbügel
5 2 Mittelholme
6 Bügelholm
7 Lüftungsschlitze
8 Motorgehäuse
9 Getriebe
10 Antriebswelle
11 Hackmesser
12 Gürtelclip
B
13 Kreuzschlitzschrauben
14 Schrauben
15 Flügelmuttern
C
16 Zugentlastung
17 Entriegelungsknopf
18 Starthebel
D
19 Sechskantschraube
20 selbstsichernde Mutter
Funktionsbeschreibung
Der handgeführte Gartenkultivator ist mit
einem wartungsfreien Elektromotor und
einem Getriebe mit Ölbadschmierung aus-
gestattet.
Als Schneideinrichtung besitzt das Gerät 2
Paar rotierende, gehärtete Hackmesser, die
selbsttätig in den Boden eindringen.
Die Griffholme sind zur besseren Lagerung
klappbar.
Die Funktion der Bedienteile entnehmen Sie
bitte den nachfolgenden Beschreibungen.
Technische Daten
Aufnahmeleistung des Motors ....... 710 W
Netzspannung .............................230V~
Netzfrequenz ...............................50 Hz
Schutzklasse ..................................... II
Schutzart........................................ IP24
Arbeitsbreite .............................360 mm
Arbeitstiefe ........................max. 180 mm
Anzahl der Hackmesser ........................4
Arbeitsdrehzahl .............. ca. 230 U/min
Gewicht .................................... 7,85 kg
Schalldruckpegel(LpA) ............69,3 dB(A)
..................................KpA = 1,41 dB(A)
Schallleistungspegel
gemessen (LwA) .....................89,3 dB(A)
................................. KwA = 1,41 dB(A)
garantiert .................................93 dB(A)
Vibration am Handgriff (an) ........2,7 m/s2
..........................................K= 1,4 m/s2
Lärm- und Vibrationswerte wurden entspre-
chend den in der Konformitätserklärung
genannten Normen und Bestimmungen
ermittelt.

16
CHAT
DE
Technische und optische Veränderungen
können im Zuge der Weiterentwicklung
ohne Ankündigung vorgenommen werden.
Alle Maße, Hinweise und Angaben dieser
Betriebsanleitung sind deshalb ohne
Gewähr. Rechtsansprüche, die aufgrund
der Betriebsanleitung gestellt werden,
können daher nicht geltend gemacht
werden.
Sicherheitshinweise
Dieser Abschnitt behandelt die grundle-
genden Sicherheitsvorschriften bei der
Arbeit mit dem Gartenkultivator.
Bildzeichen auf dem Gerät
Achtung!
Betriebsanleitung lesen.
Achtung! Vor Regen und
Nässe schützen
Verletzungsgefahr durch wegge-
schleuderte Teile! Umstehende Per-
sonen aus dem Gefahrenbereich
fernhalten.
Achtung! Vor Reinigungs- und
Wartungsarbeiten Gerät ausschal-
ten und Netzstecker ziehen.
Gefahr durch beschädigtes Netzka-
bel. Netzkabel von den Hackmes-
sern fernhalten!
Verletzungsgefahr durch rotieren-
de Teile! Nach dem Ausschalten
laufen Hackmesser nach. Still-
stand abwarten.
dB
LWA Angabe des Schallleistungspegels
LWA in dB.
Schutzklasse II
Elektrogeräte gehören nicht in den
Hausmüll.
Symbole in der
Betriebsanleitung
GefahrenzeichenmitAnga-
benzurVerhütungvonPer-
sonen-oderSachschäden.
Gebotszeichen (anstelle des Ausru-
fungszeichens ist das Gebot erläutert)
mit Angaben zur Verhütung von Schä-
den.
Hinweiszeichen mit Informationen
zum besseren Umgang mit dem Ge-
rät.
Allgemeine
Sicherheitshinweise
Warnung! Dieses Gerät kann bei
unsachgemäßem Gebrauch ernst-
hafte Verletzungen verursachen.
Bevor Sie mit dem Gerät arbeiten,
lesen Sie sorgfältig die Betriebs-
anleitung und machen Sie sich mit
allen Bedienteilen gut vertraut.
• Bewahren Sie die Betriebsanleitung gut
auf und geben Sie sie an jeden nach-
folgenden Benutzer weiter, damit die
Informationen jederzeit zur Verfügung
stehen.
• Denken Sie daran, dass der Benutzer
für Unfälle mit anderen Personen oder
deren Eigentum verantwortlich ist.
Lesen Sie zudem folgende Sicher-
heitshinweise, um Personen- und
Sachschäden zu vermeiden:

17
CHAT
DE
• Das Gerät darf nur von ausreichend
geschulten Personen betrieben werden.
• Aus Sicherheitsgründen dürfen Kinder
und Jugendliche unter 16 Jahren sowie
Personen, die mit der Betriebsanleitung
nicht vertraut sind, das Gerät nicht be-
nutzen.
• Dieses Gerät ist nicht dafür bestimmt,
durch Personen (einschließlich Kinder)
mit eingeschränkten physischen, senso-
rischen oder geistigen Fähigkeiten oder
mangels Erfahrung und/oder mangels
Wissen benutzt zu werden; es sei denn,
sie werden durch eine für ihre Sicherheit
zuständige Person beaufsichtigt oder
erhalten von ihr Anweisungen, wie das
Gerät zu benutzen ist.
• Kinder sollten beaufsichtigt werden, um
sicherzustellen, dass sie nicht mit dem
Gerät spielen.
• Setzen Sie das Gerät niemals ein,
während Personen, besonders Kinder
und Haustiere, in der Nähe sind.
• Machen Sie sich mit Ihrer Umgebung
vertraut und achten Sie auf mögliche
Gefahren, die beim Arbeiten unter Um-
ständen überhört werden können.
• Überprüfen Sie das Gelände, auf dem
das Gerät eingesetzt wird und entfer-
nen Sie Steine, Stöcke, Drähte oder
andere Fremdkörper, die erfasst und
weggeschleudert werden können.
• Tragen Sie geeignete Arbeitskleidung
wie festes Schuhwerk mit rutschfester
Sohle und eine robuste, lange Hose.
Benutzen Sie das Gerät nicht, wenn
Sie barfuß gehen oder offene Sandalen
tragen.
• Schalten Sie zur Vermeidung von Schnitt-
verletzungen das Gerät nicht ein, wenn
es sich nicht in Arbeitsposition bendet.
• Führen Sie vor jeder Benutzung eine
Sichtprüfung des Gerätes durch. Benut-
zen Sie das Gerät nicht, wenn Sicher-
heitseinrichtungen (z.B. Einschaltsperre
oder Sicherheitsabdeckung), Teile der
Schneideinrichtung oder Bolzen fehlen,
abgenutzt oder beschädigt sind. Prüfen
Sie insbesondere die Netzanschlusslei-
tung und den Starthebel auf Beschädi-
gung.
• Zur Vermeidung einer Unwucht dürfen
beschädigte Werkzeuge und Bolzen nur
satzweise ausgetauscht werden.
• Benutzen Sie nur Ersatz- und Zubehörteile,
die vom Hersteller geliefert und empfohlen
werden. Der Einsatz von Fremdteilen führt
zum sofortigen Verlust des Garantiean-
spruches.
• Tragen Sie während der Arbeit festes
Schuhwerk.
Halten Sie Füße und Hände beim Ar-
beiten, insbesondere bei der Inbetrieb-
nahme, von den Hackmessern fern.
Es besteht Verletzungsgefahr!
• Beachten Sie den Lärmschutz und örtliche
Vorschriften. Die Benutzung des Gerätes
kann an bestimmten Tagen (z.B. Sonn-
und Feiertagen), während bestimmter Ta-
geszeiten (Mittagszeiten, Nachtruhe) oder
in besonderen Gebieten (z.B. Kurorten,
Kliniken etc.) eingeschränkt oder verboten
sein.
• Das Gerät darf nicht zum Zerkleinern
von Steinen oder zum Umgraben von
Rasenächen verwendet werden. Es
besteht die Gefahr, das Gerät zu be-
schädigen.
• Benutzen Sie das Gerät nicht bei Regen,
bei schlechter Witterung, in feuchter Um-
gebung (wie z.B. an Gartenteichen oder
Schwimmbecken). Arbeiten Sie nur bei
Tageslicht oder guter Beleuchtung.
• Gehen Sie mit Vernunft an die Arbeit.
Arbeiten Sie mit dem Gerät nicht, wenn
Sie müde oder unkonzentriert sind oder
nach der Einnahme von Alkohol oder Ta-
bletten. Legen Sie immer rechtzeitig eine
Arbeitspause ein.

18
CHAT
DE
• Achten Sie beim Arbeiten auf einen si-
cheren Stand, insbesondere an Hängen.
Arbeiten Sie immer quer zum Hang,
niemals auf- oder abwärts. Seien Sie
besonders vorsichtig, wenn Sie die Fahrt-
richtung am Hang ändern. Arbeiten Sie
nicht an übermäßig steilen Hängen.
• Besteht im hängigen Gelände die
Gefahr des Abrutschens, so ist das
Gerät von einer Begleitperson mit einer
Stange oder einem Seil zu halten. Die
Begleitperson muss sich oberhalb des
Gerätes in ausreichendem Abstand von
den Arbeitswerkzeugen benden.
• Halten Sie das Gerät während der Arbeit
immer mit beiden Händen gut fest.
• Führen Sie das Gerät nur im
Schrittempo.
• Achten Sie darauf, dass die Griffe tro-
cken und sauber sind.
Achtung beim Rückwärtsgehen. Es besteht
Stolpergefahr!
• Seien Sie besonders vorsichtig, wenn
Sie das Gerät wenden oder zu sich he-
ranziehen.
• Falls es zu einer Blockierung der
Hackmesser durch einen Fremdkörper
kommt, schalten Sie das Gerät aus und
ziehen Sie den Netzstecker. Entfernen
Sie den Fremdkörper (z.B. Wurzel),
bevor Sie das Gerät wieder in Betrieb
nehmen.
• Arbeiten Sie nicht mit einem beschä-
digten, unvollständigen oder ohne die
Zustimmung des Herstellers umgebauten
Gerät. Arbeiten Sie insbesondere nicht
mit beschädigten oder fehlenden Sicher-
heitseinrichtungen.
• Überlasten Sie Ihr Gerät nicht. Arbeiten
Sie nur im angegebenen Leistungsbe-
reich. Verwenden Sie keine leistungs-
schwachen Geräte für schwere Arbeiten.
Benutzen Sie Ihr Gerät nicht für Zwecke,
für das es nicht bestimmt ist.
• Vermeiden Sie Beschädigungen am
Gerät. Bringen Sie keine Zusatzgewichte
an und ziehen Sie das Gerät nicht über
festen Untergrund wie Fliesen oder Trep-
pen.
• Entfernen Sie regelmäßig Panzen und
Wurzelreste im Bereich der Antriebswel-
le. Sie vermeiden damit eine Überla-
stung und Beschädigung des Gerätes.
Achtung! Nach dem Ausschalten des
Gerätes drehen sich die Hackmesser
noch für einige Sekunden nach. War-
ten Sie, bis die Hackmesser stillste-
hen. Es besteht Verletzungsgefahr.
• Das Gerät darf nicht angehoben oder
transportiert werden, solange der Motor
läuft. Schalten Sie beim Wechseln des
Arbeitsbereiches das Gerät ab und warten
Sie, bis die Hackmesser stillstehen. Ziehen
Sie dann den Netzstecker.
• Hinterlassen Sie das Gerät nie unbeauf-
sichtigt am Arbeitsplatz.
• Schalten Sie das Gerät aus, warten Sie auf
den Stillstand der Hackmesser und ziehen
Sie den Netzstecker:
- immer, wenn Sie das Gerät verlassen,
- wenn Sie Boden- und Panzenteile
entfernen,
- wenn das Gerät nicht verwendet wird,
- bei allen Wartungs- und Reinigungsar-
beiten,
- wenn die Anschlussleitung beschädigt
oder verheddert ist,
- wenn das Gerät beim Arbeiten auf ein
Hindernis trifft oder wenn ungewohnte
Vibrationen auftreten. Untersuchen Sie
in diesem Fall das Gerät auf Beschädi-
gungen und lassen Sie es ggf. reparie-
ren.
• Benutzen Sie das Gerät nicht in der Nähe
von entzündbaren Flüssigkeiten oder
Gasen. Bei Nichtbeachtung besteht Brand-
oder Explo sions gefahr.

19
CHAT
DE
• Sorgen Sie dafür, dass alle Muttern,
Bolzen und Schrauben fest angezogen
sind und das Gerät in einem sicheren
Arbeitszustand ist.
• Versuchen Sie nicht, das Gerät selbst
zu reparieren, es sei denn, Sie besitzen
hierfür eine Ausbildung. Lassen Sie
sämtliche Arbeiten, die nicht in dieser
Betriebsanleitung angegeben werden,
von unserem Service-Center ausführen.
• Bewahren Sie das Gerät an einem tro-
ckenen Ort und außerhalb der Reichwei-
te von Kindern auf.
• Behandeln Sie Ihr Gerät mit Sorgfalt.
Halten Sie die Werkzeuge scharf und
sauber, um besser und sicherer arbeiten
zu können.
• Befolgen Sie die Wartungsvorschriften.
Achtung! Das Gerät darf nur bei
unbeschädigtem Anschluss- und Ver-
längerungskabel benutzt werden. Es
besteht Gefahr durch elektrischen
Schlag.
• Halten Sie die Netzanschlussleitung von
den Schneidwerkzeugen fern. Führen
Sie das Netzkabel grundsätzlich hinter
der Bedienungsperson. Wird die Leitung
während des Gebrauchs beschädigt,
trennen Sie sie sofort vom Netz.
• Achten Sie darauf, dass die Netzspan-
nung mit den Angaben des Typen-
schildes übereinstimmt.
• Vermeiden Sie Körperberührungen mit
geerdeten Teilen (z.B. Metallzäune, Me-
tallpfosten).
• Die Kupplung des Verlängerungskabels
muss vor Spritzwasser geschützt sein,
aus Gummi bestehen oder mit Gummi
überzogen sein. Verwenden Sie nur
Verlängerungskabel, die für den Ge-
brauch im Freien bestimmt sind und
entsprechend gekennzeichnet sind. Der
Litzenquerschnitt des Verlängerungska-
bels muss mindestens 2,5 mm2 betra-
gen. Rollen Sie eine Kabeltrommel vor
Gebrauch immer ganz ab. Überprüfen
Sie das Kabel auf Schäden.
• Verwenden Sie für die Anbringung des
Verlängerungskabels die dafür vorgese-
hene Zugentlastung.
• Tragen Sie das Gerät nicht am Kabel.
Benutzen Sie das Kabel nicht, um den
Netzstecker aus der Steckdose zu ziehen.
Schützen Sie das Kabel vor Hitze, Öl und
scharfen Kanten.
• Wenn die Anschlussleitung dieses Ge-
rätes beschädigt wird, muss sie durch
eine besondere Anschlussleitung ersetzt
werden, die vom Hersteller oder seinem
Kundendienst erhältlich ist.
Montageanleitung
Ziehen Sie vor allen Arbeiten an dem
Gerät den Netzstecker.
Achten Sie bei der Montage darauf,
dass das Netzkabel (2) nicht einge-
klemmt wird und genügend Spiel hat.
Griffholme montieren
B
1. Schieben Sie die beiden Gabel-
griffe (1a/1b) in den Kunststoff-
Querbügel (4). Schrauben Sie den
Querbügel mit den beiliegenden
Kreuzschlitzschrauben (13) von
hinten an den Holmen der Gabel-
griffe fest.
2. Schrauben Sie die beiden Mittel-
holme (5) an den Gabelgriffen
(1a/1b) an. Dazu schieben Sie
die beiliegenden Schrauben (14)
von außen nach innen durch die

20
CHAT
DE
Bohrungen und schrauben sie mit
den Flügelmuttern (15) fest.
3. Positionieren Sie die Griffholme mit
den Rohrenden seitlich rechts und
links am unteren Bügelholm (
A
6) und Schrauben dieses mit den
beiliegenden Schrauben (14) und
Flügelmuttern (15) fest.
Bei richtiger Montage zeigen die
Griff-Enden weg von der Gerätevor-
derseite mit den Lüftungsschlitzen
(siehe
A
7).
4. Fixieren Sie das Netzkabel (2) mit
den beiliegenden Kabelklemmen:
- Kabelklemme mit großer Öffnung
(3a) oberhalb des Querbügels,
- Kabelklemme mit kleiner Öffnung
(3b) am Holm.
Bedienung
Beachten Sie den Lärmschutz und
örtliche Vorschriften.
Ein- und Ausschalten
Vorsicht!AchtenSievordem
Einschaltendarauf,dassdas
GerätkeineGegenstände
berührtundhaltenSieesmit
beidenHändengutfest.
C
1. Schließen Sie das Verlängerungska-
bel an den Netzstecker des Gerätes
an.
2. Zur Zugentlastung formen Sie aus
dem Ende des Verlängerungska-
bels eine Schlaufe und hängen
diese in die Zugentlastung (16)
ein.
3. Schließen Sie das Gerät an die
Netzspannung an.
4. Hängen Sie das Verlängerungs-
kabel in den Gürtelclip (12) ein
und befestigen Sie diesen am
Hosengürtel.
5. Zum Einschalten drücken Sie
den Entriegelungsknopf (17)
am Gabelgriff und danach den
Starthebel (18). Lassen Sie den
Entriegelungsknopf los (17).
A
6. Zum Ausschalten lassen Sie den
Starthebel (18) los.
Achtung!NachdemAusschal-
tendesGerätesdrehensich
dieHackmesser(11)nochfür
einigeSekundennach.Berüh-
renSiedierotierendenHack-
messer(11)nicht.Esbesteht
Verletzungsgefahr.
Arbeitshinweise
HaltenSiedasGerätwährend
derArbeitimmermitbeiden
Händengutfestundachten
SieaufIhreFüße.
EsbestehtUnfallgefahrdurch
dieHackmesser(11).
AchtungbeimRückwärtsge-
hen.EsbestehtStolpergefahr!
Getriebenichtberühren-
kannnachlängeremArbeiten
heißwerden.EsbestehtVer-
brennungsgefahr!
• Heben oder ziehen Sie das Ge-
rät niemals mit laufendem Motor.
• Heben Sie das Gerät zum Trans-
port über feste Oberächen wie
Fliesen oder Treppen an.
UmVerletzungenundSchä-
denzuvermeiden:
Other manuals for FGH 710 A1
6
Table of contents
Languages:
Other FLORABEST Tiller manuals

FLORABEST
FLORABEST FGH 700/9 User manual

FLORABEST
FLORABEST FLV 1300 A2 User manual

FLORABEST
FLORABEST FGH 700 Installation and operating manual

FLORABEST
FLORABEST FGH 710 A1 Quick start guide

FLORABEST
FLORABEST FLV 1300 A1 User manual

FLORABEST
FLORABEST FGH 700/10 User manual

FLORABEST
FLORABEST FLV 1300 A1 Owner's manual

FLORABEST
FLORABEST FGH 710 A1 Owner's manual

FLORABEST
FLORABEST FGH 710 A1 Owner's manual

FLORABEST
FLORABEST FGH 700/9 User manual