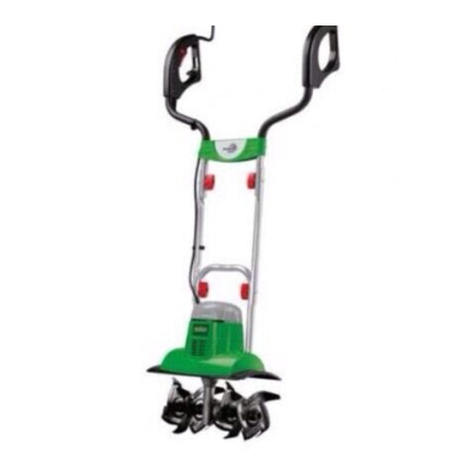
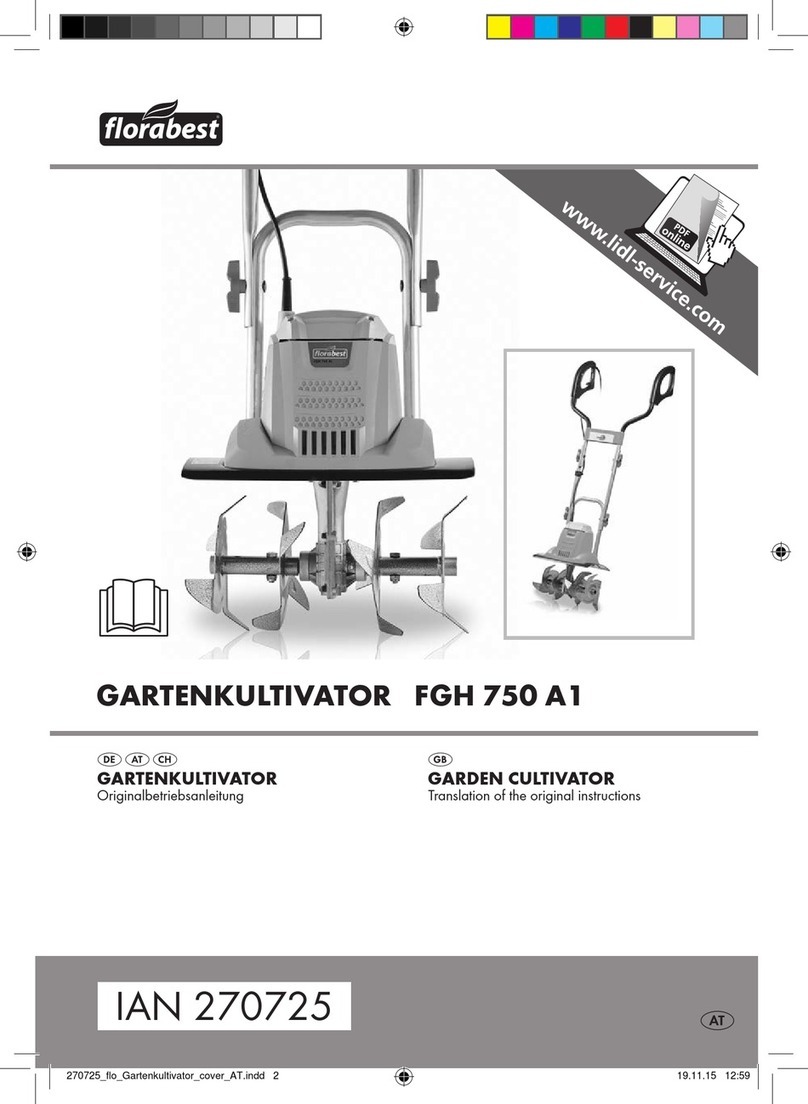
FLORABEST FGH 710 A1 Quick start guide

®
FGH 710 A1
Garden Cultivator
Translation of original operation manual
Kultivator za vrt
Prijevod originalnih uputa za uporabu
Cultivator pentru grădina
Traducerea instrucţiunilor de utilizare
originale
Градински култиватор
Превод на оригиналното ръководство за
експлоатация
Καλλιεργητής κήπου
Μετάφραση των αυθεντικών οδηγιών
λειτουργίας
Gartenkultivator
Originalbetriebsanleitung 7
68654_flo_Gartenkultivator_FGH710A1_Cover_LB7.indd 23 02.11.11 12:59

GB / CY Translation of original operation manual Page
HR Prijevod originalnih uputa za uporabu Stranica
RO Traducerea instrucţiunilor de utilizare originale Pagina
BG Превод на оригиналното ръководство за експлоатация Страница
GR / CY Μετάφραση των αυθεντικών οδηγιών λειτουργίας Σελίδα
DE/ AT/ CH Originalbetriebsanleitung Seite
Before reading, unfold the page containing the illustrations and familiarise yourself with all functions
of the device.
Prije nego što pročitate tekst, otvorite stranicu sa slikama i upoznajte se na osnovu toga sa svim
funkcijama uređaja.
Înainte de a citi instrucţiunile, priviţi imaginile şi familiarizaţi-vă cu toate funcţiile aparatului.
Преди да прочетете отворете страницата с фигурите и след това се запознайте с всички функции.
Πριν ξεκινήσετε την ανάγνωση, ανοίξτε τη σελίδα με τις εικόνες και εξοικειωθείτε με όλες τις
λειτουργίες της συσκευής.
Klappen Sie vor dem Lesen die Seite mit den Abbildungen aus und machen Sie sich anschließend
mit allen Funktionen des Gerätes vertraut.
68654_o_Gartenkultivator_FGH710A1_Cover_LB7.indd 24 02.11.11 12:59
4
13
22
32
42
52

A
D
E
B
10
9
7
8
6
5
3a
3b
4
1a 1b
2
4
14
14
14
14
15
15
3b
15
15
6
16
2
18
17
12
1211
1a 1b
13
5
5
2
3a
19
20
21
23 10
11
C
22

4
GB CY
This section deals with the basic safety
regulations while working with the electric
tiller.
Symbols on the tool
Warning!
Read the user manual
Warning! Protect from rain
and damp
Danger of injury from objects
spinning off! Keep surrounding
persons away form the hazard
area.
Warning! Switch off the tool and
disconnect it from the mains be-
fore carrying out any cleaning or
maintenance work.
Danger from damaged mains
cable. Keep mains cables away
from tines!
Danger of injury from rotating
parts. The tines will continue to
rotate after the tool has been
switched off. Wait for them to
stop moving.
93
Sound power level LWA in dB.
Safety class II
Do not dispose of electrical equip-
ment in household waste.
Safety notes .......................................... 4
Symbols ............................................. 4
General safety notes .......................... 5
Functional description ......................... 7
Functional parts .................................... 8
Intended purpose ................................ 8
Assembly instructions ......................... 8
Scope of delivery ............................... 8
Fitting the grip tubing ......................... 8
Operation ............................................... 9
Switching on and off ........................... 9
Operating instructions ........................ 9
Cleaning, maintenance, storage ....... 10
General cleaning and maintenance
work ....................................................10
Changing the tines ........................... 10
Storage .............................................11
Guarantee .............................................11
Replacement parts ..............................11
Disposal, environmental protection . 12
Technical specications .................... 12
Translation of the original EC declaration
of conformity ....................................... 62
Exploded diagram .............................. 65
Service-Center .................................... 66
Before rst using the machine,
please read this instruction manual
carefully, for your own safety and
for the safety of others. Keep the
manual in a safe place and pass it
on to any subsequent owner to en-
sure that the information contained
therein is available at all times.

5
CY
GB
Symbols in the manual
Warningsymbolswithinforma-
tionondamageandinjurypre-
vention.
Instruction symbols (the instruction
is explained at the place of the ex-
clamation mark) with information on
preventing damage.
Help symbols with information on
improving tool handling.
Warning! Improper use of this tool
may lead to serious injury. Read
this instruction manual carefully
before you start working with the
tool, and familiarise yourself with
its controls.
• Keep the manual in a safe place and
pass it on to any subsequent owner to
ensure that the information it contains
is always available.
• Remember: the user is responsible
for accidents involving other people or
their property.
Please read the following safety
guidelines in order to avoid risk of
re, electric shock, personal injury
and damage to objects:
Preparation:
• The equipment is to be used only by
people who are adequately trained.
• For safety reasons, do not allow
children or young people under 16
or anyone not familiarised with this
instruction manual to use the tool.
• This appliance is not intended for use
by persons (including children) with
reduced physical, sensory or mental
capabilities, or lack of experience and
knowledge, unless they have been giv-
en supervision or instruction concern-
ing use of the appliance by a person
responsible for their safety.
• Children must be supervised in order
to ensure that they do not play with
the equipment.
• Never use the tool while others, espe-
cially children or pets, are close by.
• Familiarise yourself with handling the
tool and pay attention to all possible
dangers that may be overheard while
working with the tool.
• Check the terrain on which you will
be using the tool, and remove stones,
sticks, wires or other foreign objects
that may be caught up and spun off.
• Wear proper working clothes, such as
rm footwear with non-slip soles and
strong long trousers. Do not use the
tool barefoot or wearing open-toed
sandals.
• To prevent injury from the tines, only
switch the tool on in its working posi-
tion.
• Examine the tool beforehand every
time you use it. Do not use the tool
when the safety components (such as
the power safety catch or guard), cut-
ting parts or bolts are missing, worn
or damaged. In particular, check the
mains cable and dead-man lever for
damage.
• Only replace damaged bolts or tines
in complete sets to prevent imbal-
ance.
• Only use replacement and accessory
parts delivered and recommended by
the manufacturer. Using foreign parts
will immediately lead to loss of guar-
antee.

6
GB CY
Working with the tool:
Keep your hands and feet away
from the tines while working, es-
pecially when starting up the tool
– injury hazard!
• Observe any noise-prevention regu-
lations and local by-laws. Using the
tool may be limited or prohibited on
certain days such as Sundays or pub-
lic holidays, or during certain times of
the day (midday, at night) or in certain
areas (such as at health spas and
hospitals).
• Do not use the tool to chop up stones
or till lawn soil, as such use may dam-
age the tool.
• Do not use the tool in rain, foul
weather or damp surroundings (such
as near garden ponds or swimming
pools). Only use in daylight or good
lighting conditions.
• Be sensible. Do not use the tool if you
are tired or easily distracted, or after
the use of alcohol or medicines. Take
a break as soon as you need one.
• Make sure that you are standing rmly
when using the tool, especially on
slopes. If working on a slope, work
along the slope, not upwards or down-
wards. Be particularly careful when
changing direction on the slope. Do
not use the tool on excessively steep
slopes.
• If there is any danger of slipping on
sloped ground, have a second person
secure the tool with a rod or cable.
The second person should stand up
the slope at a safe distance from the
tool.
• Always hold the tool securely in both
hands while working with it.
• Make sure that the grips are dry and
clean. Be careful while moving back-
wards – danger of tripping over!
• Take particular care when turning or
raising the machine.
• If the chopping knife is blocked by a
foreign body, switch off the equipment
and disconnect at the plug. Remove
the foreign body (e.g. root) before re-
starting the equipment.
• Do not use the tool if it is damaged,
incomplete or altered without the ap-
proval of the manufacturer. In particu-
lar, do not work with the tool if guards
or protection ttings are damaged or
missing.
• Do not overload the tool. Only work in
the performance range stated. Do not
use tools that do not have sufcient
power for heavy jobs. Do not use the
tool for any use other than that intend-
ed by the manufacturer.
• Avoid damage to the tool. Do not ap-
ply extra weight and do not drag the
tool over hard surfaces such as tiles
or steps.
Stopping work:
Warning! The tines will continue
to turn for a few seconds after you
switch the tool off. Wait until they
have stopped moving – injury haz-
ard!
• Do not lift or transport the tool while
the motor is running. Turn the tool off
and wait for the tines to stop mov-
ing, then disconnect the tool from the
mains before changing the area you
are working on.
• Never leave the tool unattended
where you were using it.
• Switch the tool off, wait for the tines to
stop moving and disconnect the tool
from the mains under the following
circumstances:
- Always before leaving the tool.
- Before removing remnants of soil
and plants
- When the tool is not in use
- Before you conduct maintenance
or cleaning work on the tool

7
CY
GB
- If the mains cable is damaged or
caught up
- If the tool collides with an obstacle
or starts to vibrate in an unusual
manner. In this case, examine the
tool for damage, and have it
repaired if necessary.
• Use the tool away from ammable
uids or gases. Failure to do so may
result in re or explosion.
Maintenance and storage:
• Make sure that all nuts, bolts and
screws are tight and that the tool is in
safe working order.
• Do not attempt to repair the tool your-
self unless you are qualied to do so.
Return the tool to our service centre
to carry out any work not listed in the
user manual.
• Keep the tool in a dry place out of chil-
dren’s reach.
• Be careful in handling the tool. Keep
the tines sharp and clean to improve
its working safety and effectiveness.
• Follow the maintenance regulations.
Electrical safety:
Warning! Do not use the tool if the
mains or extension cable is dam-
aged – danger of electrical shock.
• Keep the mains cable away from the
tines. Always trail the mains cable be-
hind you or the person operating the
tool. If the cable becomes damaged
during use, immediately disconnect it
from the mains.
Never touch the mains cable before
unplugging it from the mains.
• Make sure that the mains voltage
matches the data on the tool’s rating
label.
• If possible, connect the tool to a socket
with a residual-current (RC) trip switch
at a triggering current of not more than
30 mA.
• Avoid skin contact with earthed ob-
jects such as metal fences and posts.
• Make sure that the connector on the
extension cable is protected from
splash water, and is made of rubber
or has a rubber covering. Only use
extension cables that are intended for
outdoor use and are labelled as such.
Use extension cables with a cable
core diameter of at least one square
millimetre. Always completely unwind
the cable reel before use. Check the
cable for damage.
• Use the cable hanger tted for the
purpose when using an extension ca-
ble.
• Do not carry the tool by the cable. Do
not unplug the cable by tugging on it.
Keep the cable away from heat, oil
and sharp edges.
• If the power cable for this equipment
is damaged, it must be replaced with
a special power cable, which is avail-
able from the manufacturer or a cus-
tomer service agent of the same.
Your hand-operated garden tiller is
equipped with a maintenance free electric
motor and a gearbox with sump lubrica-
tion.
The tool is tted with four rotating tine
wheels that automatically dig themselves
into the ground.
The aluminium frame can be folded to aid
storage.
Please refer to the following descriptions
for the function of the controls.

8
GB CY
The major functional parts
are shown on the foldout
pages.
A
1a Right-hand fork grip with dead-
man lever, safety release catch
and cable tension relief
1b Left-hand fork grip
2 Mains cable
4 Plastic cross-plate
5 Two central tubes
6 Frame tubing
3a Large cable clip
3b Small cable clip
7 Vent
8 Motor housing
9 Gearbox
10 Driveshaft
11 Tines
12 Belt clip
The tool is intended for breaking up and
tilling coarse soil for the purpose of mixing
in fertiliser, peat and compost in domestic
areas.
Any use other than that specically
named in this manual may lead to dam-
age to the tool and represents a serious
injury hazard for the operator.
The operator or user of the tool is respon-
sible for any damage or injury caused to
other persons or property.
This tool is intended for use by adults.
Children and persons unfamiliar with the
manual must not be allowed to use the
tool. Do not use the tool in rain or damp
surroundings.
The manufacturer shall not be held liable
for damage arising from improper use or
incorrect operation of the tool.
Always disconnect the tool from the
mains before conducting any work
on it.
Carefully remove the tool from the pack-
aging and check that the following parts
are complete:
• Motor housing with tines and frame
tubing
• Right-hand fork with dead-man lever
and permanently xed mains cable
• Left-hand fork grip
• Plastic cross-plate with cable guide
• Assembly tools, cable clips and belt
clip
• User manual
While assembling the tool, make
sure that the mains cable does not
become caught and has enough
slack.
B
1. Push the two fork grips (1a/1b)
into the plastic cross-plate (4),
and screw the plate into the cor-
responding holes in the grip tub-
ing from behind using the bolts
provided (13).
2. Screw both central tubes (5) onto
the fork handles (1a/1b). To do
this, push the enclosed screws
(14) inwards through the holes
from the outside and screw them
in place with the wing nuts (15).
3. Position the handle rod with the
pipe ends to the left and right on
the lower frame tubing (
A
6)
and screw it in place with the en-
closed screws (14) and wing nuts
(15).

9
CY
GB
When assembled correctly, the
handle ends point away from the
equipment front with the ventila-
tion slits (see 7).
4. Fasten the mains cable with the
cable clips supplied:
- Large cable clip (3a) above the
cross-plate
- Small cable clip (3b) at the
frame tubing.
Observe noise-abatement laws and
local by-laws.
Note:Beforeswitchingthetool
on,makesurethatthetoolisnot
touchinganyotherobjectsand
holditrmlyinbothhands.
C
1. Plug the tool into the extension ca-
ble.
2. Loop the end of the extension ca-
ble and hang it onto the cable ten-
sion relief (16) to ease the tension
on the cable.
3. Plug the tool into the mains.
4. Hang the extension cable onto the
belt clip (12) and fasten it to your
trouser belt.
5. To switch on, press the safety re-
lease catch (17) and then squeeze
the dead-man lever (18). Release
the safety release catch (17).
The tines (
A
11) will begin to ro-
tate and dig themselves into the
earth.
6. To switch off, release the dead-
man lever (18).
Warning!Thetineswillcontinue
toturnforafewsecondsafter
thetoolhasbeenswitchedoff.
Donottouchtherotatingtines–
injuryhazard!
Alwayskeeparmgriponthe
toolwithboothhandsandwatch
yourfeet.
Thetinesmaycauseanacci-
dent.
Becarefulwhilemovingback-
wards–dangeroftripping!
Do not touch the gearbox, as it
may become hot during opera-
tion – danger of burns!
To avoid damage to the tool:
• Never lift or drag the tool with the
motor running.
• Lift the tool while moving it over
hard surfaces such as tiles or
steps.
Switch the tool off after working with
it and for transport; disconnect from
the mains and wait for the tines to
stop moving.
• Walk the tool through the soil
at normal pace and in a line as
straight as possible.
• Always work away from the
mains socket. Make sure that
the cable is kept well away from
the working area. Hanging the
cable into the belt clip included in
the package will help.
• Overload protection: The mo-
tor will cut out immediately if
overloaded. The tool cannot
be used until it has completely
cooled down again.

10
GB CY
Warning! Always return the tool
to the service centre for work not
described in the manual. Only use
original parts.
Switch the tool off, unplug it from
the mains, and wait for the tines to
stop moving before carrying out any
maintenance or cleaning work on
the tool.
Perform regular maintenance and clean-
ing on the tool. This will ensure long, reli-
able service.
Do not spray the tool down with wa-
ter (especially not under pressure),
and do not clean it under running
water.
Wear protective gloves when carry-
ing out maintenance and cleaning
work on the tool to avoid injury from
cuts.
Always clean the tool thoroughly after
each use. Always keep the tool clean.
Do not use cleaning uids or solvents.
• Remove any soil and dirt residues
stuck to the tines, driveshaft, tool
surface and vents with a brush or dry
cloth.
• Spray or rub biodegradable oil into the
tines.
• Clean soiled grips with a damp cloth.
• Always check the tool for obvious
damage such as loose, worn or dam-
aged parts before using it. Check that
all nuts, bolts, and screws are tight.
• Check the covers and guards for dam-
age and correct t. Change them if
necessary.
We shall not be held responsible for any
damage caused in any of the following
ways:
- Improper repair
- Use of non-original parts
- Use other than for the intended pur-
pose
The tool is tted with four tine wheels that
can easily be changed in pairs. Both of
the tine-wheel pairs can be tted on the
left or right, as required.
Alwayschangebothtinepairsatthe
sametimetoavoiddamagetothe
toolfromimbalance.
Switch the tool off, unplug it and
wait for the tines to stop turning.
D
1. Unscrew the hex bolt (19) and
the self-locking nut (20) on the
tine-wheel pair (11).
2. Slide the tine-wheel pair off the
shaft (10).
3. Clean the driveshaft
with biological oil.
4. Slide the new tines onto
the driveshaft with the
holes on the axles
aligned to the holes on
the driveshaft (21).
Make sure that the tines are set to
their proper turning direction. The
arrows on the gearbox and tines
should point the same way
(
D
No. 22).

11
CY
GB
5. Slide the hex bolt through the
hole and tighten on the self-
locking nut (supplied with each
new tine wheel pair 23).
• Leave the motor to cool down before
you put the tool into a closed space.
• Keep the tool clean, dry and out of the
reach of children.
• Do not cover the tool in plastic bags
as moisture may form.
E
Unscrew the wing nuts
and fold the fork grips down to reduce the
space taken by the tool.
Make sure that the cable does not be-
come jammed.
• The frame tubing also serves as a
hook to hang up the tool at the place
of storage.
Donotusethetoolwiththehan-
dlefoldedclosed.
• This tool is subject to a guarantee
period of thirty-six months. A shorter
guarantee period of 12 months shall
apply for commercially used and re-
placement tools according to statutory
regulations.
If you have a justied guarantee
claim, please contact us at our
service centre (see last page for
our telephone number, fax number,
and e-mail address). We will then
give you the details on the claims
procedure.
• Damage caused by natural wear,
overload, or improper use is not cov-
ered by guarantee. Certain compo-
nents are subject to normal wear and
are not covered by guarantee. Such
components particularly include: tines.
• Guarantee service is also conditional
upon compliance with cleaning and
maintenance instructions
• Any damage caused by faults in ma-
terials or manufacturing shall be rem-
edied by free repair or replacement.
• You may have repairs not covered by
guarantee carried out for a charge at
our service centre. Our service centre
will be pleased to supply you with a
cost estimate.
We can only process orders on tools
sent in with adequate postage and
packing.
• Tools sent in by express, measure-
ment cargo or other special forms
of postage with freight collect will
be refused.
• We will dispose of tools free of
charge.
Use the service address or fax number
supplied to order replacement parts. Make
sure you include the order number in your
order.
Set of tines
Right/left ...................Order No. 30261000
Please contact our service address for all
other replacement part numbers.

12
GB CY
Be environmentally friendly. Return the
tool, accessories and packaging to a recy-
cling centre when you have nished with
them.
Do not dispose of electrical appli-
ances in household waste.
Return the tool to a recycling centre. The
plastic and metal parts used can be sepa-
rated and sorted for recycling. Ask our
service centre for details.
FGH 710 A1 Electric Tiller
Motor power input ...........................710 W
Mains voltage ............................. 230V AC
Mains frequency ..............................50 Hz
Safety class ......................................... II
Degree of protection ..........................IP24
Working width ............................. 360 mm
Max working depth ..............max. 180 mm
Number of tine wheels ............................ 4
Nominal rotation rate .......Approx 230 rpm
Weight ..........................................7.85 kg
Acoustic pressure level (LpA)
................................69,3 dB(A); KpA=1,41
Measured sound power level (LwA)
...............................89,3 dB(A); KwA=1,41
Guaranteed sound power level
.....................................................93 dB(A)
Vibration at hand grip (an)
..................................2.7 m/s2; K=1,4 m/s2
Noise and vibration values have been de-
termined according to the standards and
regulations named in the declaration of
conformity.
Technical and optical alterations may be
made without notice for the purposes of
improvement. No guarantee can be given
for the accuracy of dimensions, notices
and specications stated in this manual.
The manufacturer shall therefore not ac-
cept liability for statutory claims arising
from the manual.

13
HR
U interesu svoje vlastite sigurnosti
i sigurnosti drugih osoba, pročitajte
prije prvog puštanja u pogon
pažljivo ove upute za uporabu.
Dobro ih sačuvajte, kako bi Vam
informacije uvijek stajale na raspo-
laganju.
Ovaj odjeljak obrađuje temeljne sigurnos-
ne propise pri radu s uređajem.
Natpisi na uređaju
Pozor!
Pročitajte Uputu za upora-
bu.
Pozor! Zaštitite od kiše i
vlage
Opasnost od povreda odbačenim
dijelovima! Udaljite osobe u okoli-
ni iz opasnog područja.
Pozor! Prije radova čišćenja i
održavanja isključite uređaj i iz-
vucite mrežni utikač.
Opasnost od oštećenog mrežnog
kabela. Udaljite priključne vodove
od noževa!
Opasnost od povreda rotirajućim
dijelovima! Poslije isključenja
noževi još rade. Sačekajte
zaustavljanje.
93
Podatak o razini snage zvuka LWA
u dB
Klasa zaštite II
Elektrouređaji ne spadaju u kućno
smeće.
Sigurnosne upute .............................. 13
Slikovni znakovi .............................. 13
Opće sigurnosne upute ................... 14
Opis funkcije ...................................... 16
Funkcionalni dijelovi .......................... 17
Svrha primjene ................................... 17
Uputa za montažu .............................. 17
Opseg isporuke ............................... 17
Montaža ručki .................................. 17
Upravljanje ......................................... 18
Uključenje i isključenje .................... 18
Radne upute ................................... 18
Čišćenje, održavanje, skladištenje .. 19
Opći radovi čišćenja i održavanja ... 19
Zamjena noža ................................. 19
Skladištenje ..................................... 20
Garancija ........................................... 20
Rezervni dijelovi ................................ 21
Uklanjanje/zaštita okoliša ................. 21
Tehnički podaci .................................. 21
EZ-izjava o sukladnosti ........................ 62
Sklopni crtež ....................................... 65
Grizzly Service-Center ....................... 66

14
HR
Hrvatska oznaka ispitivanja konfor-
mnosti.
Izjava o sukladnosti za ovaj proi-
zvod dostupna je na internet stra-
nici www.lidl.hr.
Simboli u Uputi
Znakoviopasnostispodaci-
maozaštitiodmaterijalnihili
oštećenjaosoba.
Znakovi naredbe (umjesto uskličnika
naredba je objašnjena) s podacima o
zaštiti od oštećenja.
Znakovi upozorenja s informacija-
ma za bolje postupanje s uređajem.
Upozorenje! Ovaj uređaj može kod
nestručne uporabe prouzrokovati
ozbiljne povrede. Brižljivo pročitajte
Uputu za uporabu i dobro se upoz-
najte sa svim upravljačkim dijelovi-
ma uređaja, prije nego što počnete
s radom.
• Dobro sačuvajte Uputu i dajte ju
svakom sljedećem korisniku, kako bi
informacije u svako doba stajale na
raspolaganju.
• Mislite na to, da je korisnik odgovoran
za nezgode s drugim osobama ili nji-
hovom imovinom.
Uz to pročitajte sljedeće sigurnosne
upute, kako biste izbjegli materijal-
na i oštećenja osoba:
Priprema:
• S uređajem smiju postupati samo do-
voljno poučene osobe.
• Iz sigurnosnih razloga djeca i mladež
ispod 16 godina ne smiju koristiti
uređaj kao ni osobe, koje nisu upoz-
nate s Uputom za uporabu.
• Nikad nemojte koristiti ovaj uređaj,
dok su u blizini osobe, osobito djeca i
kućni ljubimci.
• Upoznajte svoju okolinu i pazite na
moguće opasnosti, koje se pri radu
pod izvjesnim okolnostima mogu
prečuti.
• Pregledajte teren, na kojem se uređaj
koristi i odstranite kamenje, štapove,
žice ili ostala strana tijela, koja bi mo-
glea biti zahvaćena i odbačena.
• Nosite pogodnu radnu odjeću kao
čvrste cipele s neklizajućim potplatom
i robusne, duge hlače. Ne koristite
uređaj, kada hodate bosi ili nosite ot-
vorene sandale.
• Radi izbjegavanja porezotina ne
uključujte uređaj, kada se ne nalazi u
radnom položaju.
• Prije svake uporabe izvršite vizualni
pregled uređaja. Nemojte koristiti
uređaj, ako nedostaju, istrošeni su
ili oštećeni sigurnosni uređaji (npr.
blokada uključenja ili sigurnosni po-
klopac), dijelovi reznog uređaja ili klin.
Osobito ispitajte, postoji li oštećenje
na vodu mrežnog priključka i startnoj
ručici.
• Radi izbjegavanja neuravnoteženosti
oštećeni alati i klinovi se smiju samo
kompletno mijenjati.
• Koristite samo rezervne i dijelove
pribora, koje je proizvođač isporučio i
preporučio. Uporaba stranih dijelova
vodi do momentalnog gubitka prava
na garanciju.
Rad s uređajem:
Pri radu, osobito pri puštanju u
pogon, odmaknite noge i ruke od
noževa. Postoji opasnost od po-
vreda!

15
HR
• Pridržavajte se zaštite od buke i
lokalnih propisa. Uporaba uređaja
može biti ograničena ili zabranjena
određenim danima (npr. nedjeljom i
praznicima), u određeno doba dana
(popodnevni odmor, noćni mir) ili u
određenim područjima (npr. lječilišta,
klinike itd.).
• Uređaj se ne smije primjenjivati za
usitnjavanje kamenja ili prekopavanje
travnatih površina. Postoji opasnost
od oštećenja uređaja.
• Nemojte koristiti uređaj na kiši,
nevremenu, u vlažnoj okolini (kao npr.
uz vrtna jezerca ili bazene). Radite
samo na dnevnom svjetlu ili dobrom
osvjetljenju.
• Razumno krenite na posao. Ne radite
s uređajem, kada ste umorni ili nekon-
centrirani ili poslije uzimanja alkohola
ili tableta. Uvijek pravovremeno na-
pravite stanku u radu.
• Pri radu pazite na stabilno stajalište,
osobito na obroncima. Uvijek radite
poprečno na obronku, nikad prema
gore ili dolje. Budite posebno oprez-
ni, kada mijenjate smjer kretanja na
obronku. Ne radite na previše strmim
obroncima.
• Ako na nizbrdici postoji opasnost
od sklizanja, tada neki pratitelj mora
šipkom ili užetom držati uređaj. Prati-
telj se mora nalaziti iznad uređaja na
dovoljnom razmaku od radnih alata.
• Za vrijeme rada uređaj uvijek dobro
čvrsto držite objema rukama.
• Pazite na to, da su ručke suhe i čiste.
Pozor pri hodanju unatrag. Postoji
opasnost od spoticanja!
• Budite osobito oprezni, kada okrećete
stroj ili ga privlačite k sebi.
• Ukoliko dođe do blokade reznih
noževa od strane nekog stranoga
tijela, isključite uređaj i izvucite mrežni
utikač. Odstranite strano tijelo (npr.
korijen), prije nego što ponovno pus-
tite uređaj u pogon.
• Ne radite s oštećenim, nepotpu-
nim ili bez suglasnosti proizvođača
pregrađenim uređajem. Naročito ne
radite s oštećenim ili bez zaštitnih na-
prava.
• Nemojte preopteretiti svoj uređaj.
Radite samo u navedenom području
snage. Nemojte koristiti strojeve male
snage za teške poslove. Koristite svoj
uređaj samo za svrhe, za koje je on
određen.
• Izbjegavajte oštećenja uređaja. Ne
postavljajte dodatne utege i ne vucite
uređaj po čvrstoj podlozi kao pločice ili
stepenice.
Prekidi rada:
Pozor! Poslije isključenja uređaja
noževi se okreću još nekoliko se-
kundi. Sačekajte, dok se noževi
zaustave. Postoji opasnost od po-
vreda.
• Uređaj se ne smije podizati ili trans-
portirati, sve dok motor radi. Pri
promjeni radnog područja isključite
uređaj i sačekajte, dok se noževi
zaustave. Onda izvucite mrežni
utikač.
• Uređaj nikad ne ostavljajte bez nadzo-
ra na radnom mjestu.
• Isključite uređaj, sačekajte dok se
noževi zaustave i izvucite mrežni
utikač:
- uvijek, kada Vi napuštate stroj,
- kada Vi uklanjanje dijelove s tla i dije-
love biljaka,
- kada se uređaj ne koristi,
- kod svih radova održavanja i čišćenja,
- ako je priključni vod oštećen ili
zamršen,
- ako uređaj pri radu naiđe na neku pre-
preku ili ako nastupe neuobičajene vi-
bracije. U tom slučaju pregledajte, ima
li oštećenja na uređaju i prema potrebi
ga dajte na popravak.

16
HR
• Ne koristite uređaj u bilizini za-
paljivih tekućina ili plinova. Kod
nepridržavanja postoji opasnost od
požara ili eksplozije.
Održavanje i skladištenje:
• Pobrinite se za to, da su sve matice,
klinovi i vijci čvrsto pritegnuti i da je
uređaj u sigurnom radnom stanju.
• Ne pokušavajte, sami popraviti uređaj,
osim ako Vi imate izobrazbu za to.
Dajte da sve radove, koji nisu nave-
deni u ovoj Uputi, izvrši naš Servisni
centar.
• Čuvajte uređaj na suhom mjestu i iz-
van dometa djece.
• Brižljivo postupajte sa svojim
uređajem. Održavajte alate oštrim i
čistim, kako bi mogli bolje i sigurnije
raditi.
• Pridržavajte se propisa o održavanju.
Električna sigurnost:
Pozor! Uređaj se smije koristiti
samo kod neoštećenog priključnog
i produžnog voda. Postoji opasnost
od električnog udara.
• Udaljite vod mrežnog priključka od
reznih alata. Mrežni kabel načelno vo-
dite iza osobe koja upravlja uređajem.
Ako se vod ošteti za vrijeme uporabe,
odmah ga odvojite od mreže.
Ni u kom slučaju ne dodirujte mrežni
kabel, sve dok se ne izvuče mrežni
utikač.
• Pazite na to, da se mrežni napon
slaže s podatkom na natpisu s tipom.
• Priključite uređaj po mogućnosti samo
na utičnicu sa zaštitnim uređajem
struje kvara (FI-prekidač) s izmjere-
nom strujom ne više od 30 mA.
• Izbjegavajte dodire tijela s uzemljenim
dijelovima (npr. metalne ograde, me-
talni stupovi).
• Spojka produžnog kabela mora biti
zaštićena od prskanja vode, sasto-
jati se od gume ili biti presvučena
gumom. Koristite samo produžne
kablove, koji su određeni za upora-
bu na otvorenom i odgovarajuće su
obilježeni. Poprečni presjek spletice
produžnog kabela mora iznositi naj-
manje 2,5 mm2. Prije uporabe uvijek
sasvim odmotajte kabelski bubanj.
Provjerite, ima li oštećenja na kabelu.
• Za postavljanje produžnog kabela
koristite za to predviđeno ovješenje
kabela.
• Ne nosite uređaj za kabel. Ne koris-
tite kabel, kako biste izvukli utikač iz
utičnice. Zaštitite kabel od vrućine,
ulja i oštrih rubova.
Ručno vođena električni kultivator oprem-
ljena je elektromotorom bez održavanja
i prigonom s podmazivanjem u uljnoj
kupelji.
Uređaj posjeduje četiri rotirajuća, kaljena
noža kao rezni uređaj, koji automatski
prodiru u tlo.
Aluminijska šipka je sklopiva radi boljeg
skladištenja.
O funkciji upravljačkih dijelova molimo
pročitajte u sljedećim opisima.
Sliku najvažnijih funkcio-
nalnih dijelova naći ćete na
strani rasklapanja.

17
HR
A
1a Desna viličasta ručica sa startnom
polugom, gumbom za deblokiran-
je i vlačnim rasterećenjem
1b Lijeva viličasta ručica
2 Mrežni kabel
3a velika kabelska stezaljka
3b mala kabelska stezaljka
4 Plastični poprečni most
5 Srednje prečke
6 Lučna motka
7 Prorezi za provjetravanje
8 Kućište motora
9 Prigon
10 Pogonsko vratilo
11 Nož
12 Zakačka za pojas
Uređaj je određen samo za kopanje i usit-
njavanje grudastoga tla i za umješavanje
gnojiva, treseta i komposta oko kuće.
Svaka druga primjena, koja nije izričito
dopuštena ovom Uputom, može dovesti
do oštećenja na uređaju i predstavljati
ozbiljnu opasnost za korisnika.
Poslužitelj ili korisnik odgovoran je za
nesreće ili oštećenja drugih ljudi ili njihove
imovine.
Uređaj je određen za uporabu od strane
odraslih osoba. Djeca kao i osobe, koje
nisu upoznate s ovom Uputom, ne smiju
koristiti uređaj. Zabranjena je uporaba
uređaja po kiši ili vlažnoj okolini.
Proizvođač ne jamči za oštećenja, koja su
prouzrokovana uporabom protivno odred-
bama ili pogrešnim upravljanjem.
Prije svih radova na uređaju izvucite
mrežni utikač.
Oprezno izvadite uređaj iz pakiranja i pro-
vjerite, jesu li potpuni sljedeći dijelovi:
• kućište motora s nožem i lučnom mot-
kom
• desna viličasta ručica s prekidačem i
čvrsto montiranim mrežnim kabelom
• lijeva viličasta ručica
• plastična poprečni most s vodilicom
kabela
• pribor za montažu, kabelske stezaljke
i zakačka za pojas
• Uputa za uporabu
Pri montaži pazite na to, da se ne
prikliješti mrežni kabel i da ima do-
voljno prostora.
B
1. Uvucite obje viličaste ručice
(1a/1b) u plastični poprečni most
(3). Priloženim vijcima (13) uvijte
ih straga u za to predviđene
izbušene rupe na motki s
ručicom.
2. Uvijte obje srednje prečke (5) na
viličaste ručke (1a/1b). Za to pro-
vucite priložene vijke (14) izvana
prema unutra kroz otvore i čvrsto
ih uvijte krilnim maticama (15).
3. Pozicionirajte šipke ručke s kra-
jevima cijevi bočno desno i lijevo
na donjoj lučnoj prečki (6) i čvrsto
ju uvijte priloženim vijcima (14) i
krilnim maticama (15).
Kod pravilne montaže krajevi
ručke su okrenuti od prednje
strane uređaja s prorezima za
prozračivanje (vidi 7).

18
HR
4. Fiksirajte mrežni kabel priloženim
kabelskim stezaljkama:
- veliku kabelsku stezaljku (3a)
iznad
- poprečnog mosta,
- malu kabelsku stezaljku (3b) na
motku.
Pridržavajte se zaštite od buke i
lokalnih propisa.
Oprez!Prijeuključenjapazitena
to,dauređajnedodirujenikakve
predmeteidobrogadržiteobje-
marukama.
C
1. Priključite produžni kabel na mrežni
utikač uređaja.
2. Radi vlačnog rasterećenja obli-
kujte od kraja produžnog kabela
jednu omču i ovjesite ju u vlačno
rasterećenje (16).
3. Priključite uređaj na mrežni napon.
4. Objesite produžni kabel u zakačku
za pojas (12) i pričvrstite ga na po-
jas hlača.
5. Za uključenje pritisnite gumb za
deblokiranje (17) na ručici i poslije
toga startnu polugu (18). Otpustite
gumb za deblokiranje (17).
Noževi se počinju rotirati i uko-
pavaju se u tlo.
6. Za isključenje otpustite startnu pol-
ugu (18).
Pozor!Poslijeisključenjauređaja
noževiseokrećujošnekoliko
sekundi.Nedodirujterotirajuće
noževe.Postojiopasnostodpo-
vreda.
Zavrijemeradauređajuvijek
čvrstodržiteobjemarukamai
pazitenasvojenoge.
Postojiopasnostodnezgode
uslijednoževa.
Pozorprikretanjuunatrag.
Postojiopasnostodspoticanja!
Nedodirujteprigon–poslije
duljegaradamožepostativruće.
Postojiopasnostodopeklina!
Kako biste izbjegli oštećenja na
uređaju:
• Uređaj nikad nemojte podizati ili
vući uređaj, dok motor radi.
• Podignite uređaj pri transportu
preko čvrstih površina kao pločice
ili stepenice.
Kakobisteizbjeglipovredei
oštećenja:
Poslije rada i pri transportu isključite
uređaj, izvucite mrežni utikač i
sačekajte zaustavljanje noževa.
• Vodite uređaj u tempu hodanja po
mogućnosti po ravnim stazama
kroz tlo.
• Uvijek radite odmičući se od
utičnice. Pazite na to, da se kabel
udalji od radnog područja. Pri
tome će Vam pomoći zakačka za
pojas sadržana u opsegu isporu-
ke za vješanje produžnog kabela.
• Zaštita od preopterećenja: Kod
preopterećenja se motor automat-
ski isključi. Uređaj je opet spre-
man za rad tek poslije potpunog
hlađenja.

19
HR
Dajte da radove, koji nisu navedeni u
ovoj Uputi, izvrši naš Servisni centar.
Koristite samo originalne dijelove.
Prije svih radova održavanja i
čišćenja isključite uređaj, izvucite
mrežni utikač i sačekajte zaustavljan-
je noževa. Postoji opasnost od po-
vreda i opasnost od strujnog udara.
Redovito provodite sljedeće radove
održavanja i čišćenja. Tako je garantirana
duga i pouzdana uporaba:
Uređaj nemojte prskati vodom i
ne čistite ga pod tekućom vodom.
Postoji opasnost od strujnog udara i
uređaj bi se mogao oštetiti.
Pri radovima čišćenja i održavanja
nosite zaštitne rukavice, kako biste
izbjegli porezotine.
Poslije svake uporabe temeljito očistite
uređaj. Uvijek držite uređaj čistim. Ne ko-
ristite nikakva sredstva za čišćenje odn.
otapala.
• Odstranite četkom ili suhom krpom
stvrdnute ostatke tla i prljavštine na na
noževima, pogonskom vratilu, površini
uređaja i prorezima za provjetravanje.
• Naprskajte ili istrljajte noževe nekim
biološki razgradivim uljem.
• Očistite zaprljane ručice vlažnom krpom.
• Prije svake uporabe kontrolirajte, ima
li na uređaju vidljivih nedostataka kao
olabavljeni, istrošeni ili oštećeni dijelovi.
Ispitajte čvrsto nalijeganje svih matica,
klinova i vijaka.
• Provjerite, ima li oštećenja na poklop-
cima i zaštitnim napravama te njihovo
pravilno nalijeganje. Zamijenite ih prema
potrebi.
Mi ne jamčimo za oštećenja uzrokovana
našim uređajima, koja su prouzrokovana
- nestručnom popravkom,
- korištenjem neoriginalnih dijelova,
- nenamjenskom primjenom.
Uređaj je opremljen sa četiri noža, koji se
bez problema mogu u paru mijenjati. Oba
para noževa se mogu po izboru koristiti lije-
vo ili desno.
Uvijekistovremenozamijeniteoba
paranoževa,kakobisteizbjegli
oštećenjauslijedneuravnoteženosti
nauređaju.
Isključite uređaj, izvucite mrežni
utikač i sačekajte zaustavljanje
noževa.
D
1. Otpustite šestostrani vijak (19) i
samoosiguravajuću maticu (20)
na paru noževa (11).
2. Skinite par noževa s pogonskog
vratila (10).
3. Očistite pogonsko vratilo bio-
uljem.
4. Navucite novi nož na pogonsko
vratilo tako, da se otvori na osi
noža poklapaju s otvorima na po-
gonskom vratilu (21).
Pazite na pravilan smjer okretan-
ja noževa. Strelice na prigonu i
noževima moraju biti okrenute u
istom smjeru
(
D
br. 22).

20
HR
5. Uvucite šestostrani vi-
jak kroz otvor i uvijte novu
samoosiguravajuću maticu
(sadržana u opsegu isporuke no-
vog noža) (23).
• Ostavite da se motor ohladi, prije
nego što ostavite uređaj u zatvorenim
prostorijama.
• Uređaj čuvajte očišćen, suh i izvan
dometa djece.
Otpustite krilne matice (
A
br. 4) i preklo-
pite viličaste ručice prema dolje, kako bi
uređaj zauzimao manje mjesta.
Pri tome se kablovi ne smiju
prikliještiti.
• Lučna motka (
B
br. 5) također služi
za vješanje na mjestu čuvanja.
• Ne omotavajte uređaj plastičnim
vrećama, jer bi se mogla stvoriti vlaga.
Uređajsenesmijekoristiti
spreklopljenommotkomza
ručicu.
• Za ovaj uređaj mi dajemo garanciju od
36 mjeseci. Za profesionalnu uporabu
i zamjenske uređaje vrijedi skraćeno
jamstvo od 12 mjeseci, prema zakon-
skim odredbama.
Ako postoji opravdan slučaj garan-
cije, molimo telefonsko uspostav-
ljanje kontakta s našim Servisnim
centrom (br. tel., br. faxa, e-mail ad-
resa vidi posljednju stranu). Tu ćete
dobiti ostale informacije o obradi
reklamacije.
• Oštećenja, koja se svode na prirodno
habanje, preopterećenje ili nestručno
upravljanje, isključena su iz garancije.
Određeni ugradni dijelovi podliježu
normalnom habanju i isključeni su iz
garancije. Ovdje se osobito ubrajaju:
noževi.
• Preduvjet za prava na garanciju uz
to je pridržavanje uputa za čišćenje i
održavanje.
• Oštećenja, koja su nastala uslijed
grešaka materijala ili proizvodnje,
besplatno se odstranjuju isporukom
rezerve ili popravkom.
• Vi možete dati provesti popravke, koje
ne podliježu garanciji, u naš Servis-
ni centar uz obračun troškova. Naš
Servisni centar će Vam rado izraditi
Predračun troškova. Mi možemo obra-
diti samo one uređaje, koji su poslani
dovoljno upakirani i frankirani.
• Ne preuzimaju se uređaji koji nisu
poslani franco – kao glomazna
roba, express ili s drugim specijal-
nim teretom.
• Uklanjanje Vaših uređaja mi vršimo
besplatno.
Other manuals for FGH 710 A1
6
Table of contents
Languages:
Other FLORABEST Tiller manuals

FLORABEST
FLORABEST FGH 700/10 User manual

FLORABEST
FLORABEST FGH 710 A1 Owner's manual

FLORABEST
FLORABEST FGH 700/9 User manual

FLORABEST
FLORABEST FGH 710 A1 Quick start guide

FLORABEST
FLORABEST FGH 700/9 User manual

FLORABEST
FLORABEST FLV 1300 A1 Owner's manual

FLORABEST
FLORABEST FGH 710 A1 Quick start guide

FLORABEST
FLORABEST FGH 710 A1 Owner's manual

FLORABEST
FLORABEST FGH 750 B2 User manual

FLORABEST
FLORABEST FGH 710 A1 User manual