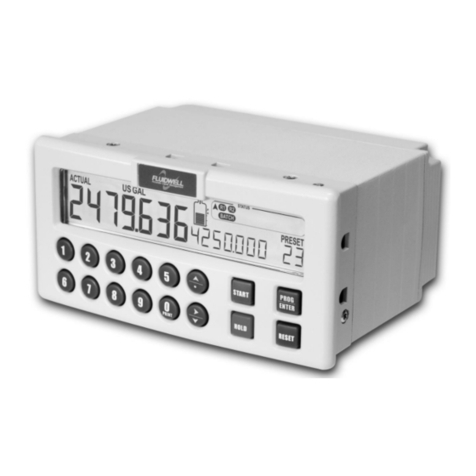
Fluidwell D030-P Series User manual

Fluidwell D-Series Indicators - The better alternative for DIN panel mount indicators
D030-P
BATCH CONTROLLER
WITH CONTROL OUTPUT
Signal input type P: pulse, Namur and coil
Control Output: one control output for one stage
batching

User manual D030-P Batch Controller
ii FW-D030-P-MAN-EN-V0102_02
Health and Safety Information
This instruction manual supplements the requirements of nationally accepted codes of
practice. All installations must comply with the relevant sections of these codes and/or
other comparable codes that applies in the region the D030-P is installed in.
In addition, particular industries or end users may have specific requirements relating to
the safety of their installations. These requirements must also be met.
Disposal
Caution:
The D030-P must only be installed, operated and maintained by competent personnel
that received proper training on regular basis, including instructions on the various
types of protection and installation practices, relevant rules and regulations, and the
general principles of area classification.
At the end of its life this product must be disposed of according to local regulations
regarding waste electronic equipment. If a battery is present in this product it must be
disposed of separately. The separate collection and recycling of your waste equipment
will help to conserve natural resources and ensure that it is recycled in a manner that
protects the environment.

FW-D030-P-MAN-EN-V0102_02 iii
Read Me First!
About This Guide
This manual describes all standard features and instructions related to the D030-P Batch
Controller.
This manual is intended for all personnel involved in the operation, configuration,
installation and troubleshooting of the D030-P Batch Controller.
Information in this manual is subject to change without prior notice. Fluidwell bv is not
responsible for mistakes in this material or for incidental damage caused as a direct or
indirect result of the delivery, performance or use of this material.
© All rights reserved. No parts of this publication may be reproduced or used in any
form or by any means without written permission of your supplier.
Prerequisites
All personnel working with the D030-P Batch Controller are assumed to fully understand,
be capable of and act according to the information provided in this manual.
All personnel working with the D030-P are further assumed to be authorized and
properly trained for the task at hand.
About Functions and Type Codes
Not all D030-P types share the same functions. Depending on the type codes on your
particular D030-P, some functions described in this manual may –or may not– be
available.
For details see this manual.
Conventions
The following conventions may have been used to emphasize information:
Note:
This version (FW-D030-P-MAN-EN-V0102_02) is written with a focus on software
version 03.03.01. For other versions contact your supplier.
Warning:
This icon warns about actions that, when not performed correctly, may lead to product
damage, personal injury or even death.
Warning:
Danger of electrical shock: this icon warns about actions that include the risk of
electrical shock, resulting in product damage, personal injury or even death.
Such actions are best performed with power removed or made inaccessible.
Caution:
This icon warns about actions or procedures that may lead to incorrect functioning of
the D030-P when not applied correctly.
Note:
This icon indicates a hint or provides important background information about the
consequences of the described procedure or action.
Example:
This icon indicates a solution for a hypothetic situation, intended to help you interpret
the related concept information.

User manual D030-P Batch Controller
iv FW-D030-P-MAN-EN-V0102_02
How To Read This Manual
This guide consists of the following main sections:
Power up, Power down and Storage of the D030-P
Your D030-P was shipped to you in a cardboard box and may be equipped with battery
power. During transport the unit was switched off (shelf mode).
• If your D030-P is equipped with a battery you can press START twice to power it up.
• To power your D030-P down you must perform the following steps:
a Press and hold PROG for 7 seconds. (See "Password Protection" on page 19 when
password protected.)
b Setup is indicated. Use to go to Setup Menu 4 — "Power Management"
c Next press twice to go to 42 "Battery Mode" and press PROG
dYouenter menu 42. Select shelf and press PROG to switch the unit off.
Storage and Hot Spare Configuration
When storing or transporting the D030-P, put the unit back in shelf mode and store it
at room temperature, in a dry place and in the original box.
Caution:
• Before operating, configuring, opening or installing the D030-P you are expected to
have read and understood all relevant sections in this manual.
• Before operation the D030-P MUST be installed in compliance with the installation
instructions as described in "Installation Instructions" on page 8.
chapter 1: "Introduction" on page 1 Provides an introduction and technical overview of the
D030-P Batch Controller.
chapter 2: "Specifications of the D030-P" on page 4 Provides an overview of the D030-P specifications.
chapter 3: "Installation Instructions" on page 8 Providesmechanicalandelectricalinstallationinstructions.
chapter 4: "Configuring the D030-P" on page 18 Provides an overview of configuration commands and
programming sequence of the D030-P.
chapter 5: "Operating the D030-P" on page 27 Provides operating instructions for the daily use of the
D030-P.
chapter 6: "Maintenance" on page 31 Provides maintenance instructions.
Note:
Before storing you may want to consider configuring a spare unit with identical settings
as an active unit in the field. This way you have created a “hot spare” which can be
taken from shelf and field mounted within minutes by electrical engineers.
SETUP
SETUP

v
FW-D03FW-D030-P-MAN-EN-V0102_02 v
Contents
Read Me First! iii
About This Guide. . . . . . . . . . . . . . . . . . . . . . . . . . . . . . . . . . . . . . . . . . . . . . . . . . . . . . . . . . .iii
Prerequisites. . . . . . . . . . . . . . . . . . . . . . . . . . . . . . . . . . . . . . . . . . . . . . . . . . . . . . . . . . . . . . iii
About Functions and Type Codes . . . . . . . . . . . . . . . . . . . . . . . . . . . . . . . . . . . . . . . . . . . . . iii
Conventions . . . . . . . . . . . . . . . . . . . . . . . . . . . . . . . . . . . . . . . . . . . . . . . . . . . . . . . . . . . . . . iii
How To Read This Manual. . . . . . . . . . . . . . . . . . . . . . . . . . . . . . . . . . . . . . . . . . . . . . . . . . . .iv
Power up, Power down and Storage of the D030-P . . . . . . . . . . . . . . . . . . . . . . . . . . . . . . . .iv
Storage and Hot Spare Configuration. . . . . . . . . . . . . .. . . . . . . . . . . . . . . .. . . . . . . . . . . . . iv
1 Introduction 1
System Description of the D030-P. . . . . . . . . . . . . . . . . . . . . . . . . . . . . . . . . . . . . . . . . . . . . . 1
Functions and Features . . . . . . . . . . . . . . . . . .. . . . . . . . . . . . . . . .. . . . . . . . . . . . . .. . . . . 1
Field Input. . . . . . . . . . . . . . . . . . . . . . . . . . . . . . . . . . . . . . . . . . . . . . . . . . . . . . . . . . . . . . . . 1
Standard Outputs . . . . . . . . . . . . . . . . . . . . . . . . . . . . . . . . . . . . . . . . . . . . . . . . . . . . . . . . . . 1
The D030-P Display Functions. . . . . . . . . . .. . . . . . . . . . . . . . . . . .. . . . . . . . . . . . . . . .. . . 2
Configuration of the D030-P. . . . . . . . . . . . . . . . . . . . . . . . . . . . . . . . . . . . . . . . . . . . . . . . . . 2
EEPROM Memory . . . . . . . . . .. . . . . . . . . . . . . .. . . . . . . . . . . . . . . .. . . . . . . . . . . . . . . .. 2
Options of the D030-P . . . . . . . . . . . . . . . . . . . . . . . . . . . . . . . . . . . . . . . . . . . . . . . . . . . . . . 2
Available D030-P configurations . . . . . . . . . . . . . . . . . . . . . . . . . . . . . . . . . . . . . . . . . . . . . . . 3
2 Specifications of the D030-P 4
General specifications . . . . . . . . . . . . . . . . . . . . . . . . . . . . . . . . . . . . . . . . . . . . . . . . . . . . . . . 4
Panel Mount Enclosure. . . . . . . . . . . . . . . . . . . . . . . . . . . . . . . . . . . . . . . . . . . . . . . . . . . . . . 4
Temperature. . . . . . . . . . . . . . . . . . . . . . . . . . . . . . . . . . . . . . . . . . . . . . . . . . . . . . . . . . . . . . 4
Approvals and compliances . . . . . . . . . . . . . . . . . . . . . . . . . . . . . . . . . . . . . . . . . . . . . . . . . . 4
Power supply . . . . . . . . . . . . . . . .. . . . . . . . . . . . . . . .. . . . . . . . . . . . . .. . . . . . . . . . . . . . . 4
Sensor excitation . . . . . . . . . . . . . . .. . . . . . . . . . . . . . . .. . . . . . . . . . . . . .. . . . . . . . . . . . . 5
Terminal connections . . . . . . . . . . . . . . . .. . . . . . . . . . . . . . . .. . . . . . . . . . . . . .. . . . . . . . . 5
Data protection . . . . . . . . . . . . . . . . . . . . . . . . . . . . . . . . . . . . . . . . . . . . . . . . . . . . . . . . . . . . 5
Inputs. . . . . . . . . . . . . . . . . . . . . . . . . . . . . . . . . . . . . . . . . . . . . . . . . . . . . . . . . . . . . . . . . . . . 5
Flowmeter. . . . . . . . . . . . . . . . . . . . . . . . . . . . . . . . . . . . . . . . . . . . . . . . . . . . . . . . . . . . . . . . 5
Outputs. . . . . . . . . . . . . . . . . . . . . . . . . . . . . . . . . . . . . . . . . . . . . . . . . . . . . . . . . . . . . . . . . . . 6
Control output. . . . . . . . . . . . . .. . . . . . . . . . . . . . . .. . . . . . . . . . . . . . . .. . . . . . . . . . . . . . . 6
Operational. . . . . . . . . . . . . . . . . . . . . . . . . . . . . . . . . . . . . . . . . . . . . . . . . . . . . . . . . . . . . . . . 6
Operator functions . . . . . . . . . . . . . .. . . . . . . . . . . . . .. . . . . . . . . . . . . . . .. . . . . . . . . . . . . 6
Preset and Total. . . . . . . . . . . . . . . . . . . . . . . . . . . . . . . . . . . . . . . . . . . . . . . . . . . . . . . . . . . 6
Accumulated total. . . . . . . . . . . . .. . . . . . . . . . . . . . . .. . . . . . . . . . . . . .. . . . . . . . . . . . . . . 6
3 Installation Instructions 8
Mechanical Installation. . . . . . . . . . . . . . . . . . . . . . . . . . . . . . . . . . . . . . . . . . . . . . . . . . . . . . . 8
Electrical installation – general. . . . . . . . . . . . . . . . . . . . . . . . . . . . . . . . . . . . . . . . . . . . . . . . . 9
Overview of Terminal Connectors . . . . . . . . . . . . . . . . . . . . . . . . . . . . . . . . . . . . . . . . . . . . . 9
Power Supply Wiring . . . . . . . . . . . . . . . . . . . . . . . . . . . . . . . . . . . . . . . . . . . . . . . . . . . . . . . 10
External Power Supply wiring. . . . . . . . . . . .. . . . . . . . . . . . . .. . . . . . . . . . . . . . . .. . . . . . 10
Backlight. . . . . . . . . . . . . . . . . . . . . . . . . . . . . . . . . . . . . . . . . . . . . . . . . . . . . . . . . . . . . . . . 12
I/O wiring options. . . . . . . . . . . . . . . . . . . . . . . . . . . . . . . . . . . . . . . . . . . . . . . . . . . . . . . . . . 13
Control output wiring . . . . . . . . . . . . . . . . . . . . . . . . . . . . . . . . . . . . . . . . . . . . . . . . . . . . . . . 16
Active / Passive output, Type OH. . . . .. . . . . . . . . . . . . .. . . . . . . . . . . . . . . .. . . . . . . . . . 16
Passive output, Type OT . . . . . . . . . . . . .. . . . . . . . . . . . . . . .. . . . . . . . . . . . . .. . . . . . . . 17
Relay Contact Output, Type OR. . . . . . . . . .. . . . . . . . . . . . . . . . . .. . . . . . . . . . . . . .. . . . 17

User manual D030-P Batch Controller
1–CONTENTS
vi FW-D030-P-MAN-EN-V0102_02
4 Configuring the D030-P 18
General . . . . . . . . . . . . . . . . . . . . . . . . . . . . . . . . . . . . . . . . . . . . . . . . . . . . . . . . . . . . . . . . . 18
The D030-P Display Functions . . . . . . . . . . . . . . . . . . . . . . . . . . . . . . . . . . . . . . . . . . . . . . . 18
The D030-P Key Functions . . . . . . . . . . . .. . . . . . . . . . . . . . . .. . . . . . . . . . . . . . . .. . . . . . 18
Quick Reference Menu . . . . . . . . . . . . . . . . .. . . . . . . . . . . . . . . .. . . . . . . . . . . . . . . .. . . . 19
Password Protection . . . . . . . . . . . . . . . . . . . . . . . . . . . . . . . . . . . . . . . . . . . . . . . . . . . . . . .1
9
Modes of Operation. . . . . . . . . . . . . . . . . . . . . . . . . . . . . . . . . . . . . . . . . . . . . . . . . . . . . . . . 20
Overview of Setup Functions and Settings . . . . . . . . . . . . . . . . . . . . . . . . . . . . . . . . . . . . . . 22
The D030-P Setup Functions Explained . . . . . . . . . . . . . . . . . . . . . . . . . . . . . . . . . . . . . . . . 23
Total . . . . . . . . . . . . . . . . . . . . . . . . . . . . . . . . . . . . . . . . . . . . . . . . . . . . . . . . . . . . . . . . . . . 23
Overrun . . . . . . . . . . . . . . . . . . . . . . . . . . . . . . . . . . . . . . . . . . . . . . . . . . . . . . . . . . . . . . . . . 24
Display . . . . . . . . . . . . . . . . . . . . . . . . . . . . . . . . . . . . . . . . . . . . . . . . . . . . . . . . . . . . . . . . . 24
Power Management . . . . . . . . .. . . . . . . . . . . . . . . .. . . . . . . . . . . . . .. . . . . . . . . . . . . . . .25
Flowmeter . . . . . . . . . . . . . . . . . . . . . . . . . . . . . . . . . . . . . . . . . . . . . . . . . . . . . . . . . . . . . . . 25
Others . . . . . . . . . . . . . . . . . . . . . . . . . . . . . . . . . . . . . . . . . . . . . . . . . . . . . . . . . . . . . . . . . . 26
5 Operating the D030-P 27
The D030-P button and display functions . . . . . . . . . . . . . . . . . . . . . . . . . . . . . . . . . . . . . . . 27
The D030-P Display Functions . . . . . . . . . . . . . . . . . . . . . . . . . . . . . . . . . . . . . . . . . . . . . . . 27
The D030-P Key Functions . . . . . . . . . . . .. . . . . . . . . . . . . . . .. . . . . . . . . . . . . . . .. . . . . . 27
Operator functions. . . . . . . . . . . . . . . . . . . . . . . . . . . . . . . . . . . . . . . . . . . . . . . . . . . . . . . . . 28
To enter a batch quantity. . . . . . . . . .. . . . . . . . . . . . . . . .. . . . . . . . . . . . . . . .. . . . . . . . . .28
Batch maximum. . . . . . . . . . . . . . . . . . . . . . . . . . . . . . . . . . . . . . . . . . . . . . . . . . . . . . . . . . . 28
Starting up the batch process . . . . . . . . . .. . . . . . . . . . . . . . . . . .. . . . . . . . . . . . . . . .. . . . 28
Interrupting and ending the batch process. . . .. . . . . . . . . . . . . .. . . . . . . . . . . . . . . .. . . . 29
Display total and accumulated total. . . . . .. . . . . . . . . . . . . . . .. . . . . . . . . . . . . . . .. . . . . . 29
Clear total . . . . . . . . . . . . . . . . . . . . . . . . . . . . . . . . . . . . . . . . . . . . . . . . . . . . . . . . . . . . . . . 29
Display accumulated total . . . . . . . . . . . . . . . . . . .. . . . . . . . . . . . . . . . . .. . . . . . . . . . . . . .29
Operator alarms. . . . . . . . . . . . . . . . . . . . . . . . . . . . . . . . . . . . . . . . . . . . . . . . . . . . . . . . . . . 30
Low-battery alarm . . . . . . . . . . .. . . . . . . . . . . . . .. . . . . . . . . . . . . . . .. . . . . . . . . . . . . .. . 30
Alarm 01-03. . . . . . . . . . . .. . . . . . . . . . . . . . . . . .. . . . . . . . . . . . . . . . . .. . . . . . . . . . . . . . 30
6 Maintenance 31
General directions . . . . . . . . . . . . . . . . . . . . . . . . . . . . . . . . . . . . . . . . . . . . . . . . . . . . . . . . . 31
Battery life . . . . . . . . . . . . . . . . . . . . . . . . . . . . . . . . . . . . . . . . . . . . . . . . . . . . . . . . . . . . . . . 31
Replacing the battery. . . . . . . . . . . . . . . . .. . . . . . . . . . . . . . . .. . . . . . . . . . . . . . . .. . . . . . 31
Preventive maintenance checks . . . . . . . . . . . . . . . . . . . . . . . . . . . . . . . . . . . . . . . . . . . . . . 32
Repairs . . . . . . . . . . . . . . . . . . . . . . . . . . . . . . . . . . . . . . . . . . . . . . . . . . . . . . . . . . . . . . . . . 32
Setup Configuration Examples 33
Troubleshooting the D030-P 35

FW-D030-P-MAN-EN-V0102_02 1
1
CHAPTER
Introduction
System Description of the D030-P
Functions and Features
The Batch Controller model D030-P is a microprocessor controlled device for batching and filling
of small batch sizes up to medium large quantities as well as displaying total and accumulated
total .
The D030-P has been designed with a focus on:
• Ultra-low power consumption, to allow for battery operation of up to five years.
• Front panel mounting solution based on IP66/67 (Nema4X), suitable for harsh industrial
surroundings.
• Very easy and user-friendly installation and programming through an easy menu-driven
structure. Know one, know them all!
• Ability to process all type of signals.
• One control output for controlling a pump or valve.
Field Input
The “P” in D030-P indicates a pulse flowmeter input. Other versions are available to process (0)4-
20mA “A” or 0-10V “U” flowmeter signals.
•The D030-P can read one passive or active flowmeter with a passive, active, Namur or sine
wave (coil) pulse output.
•To power the flowmeter, several options are available.
Standard Outputs
The following output is available for the D030-P:
• Control output: This passive transistor output controls the valve or pump for the batch
process.
Control output
Figure 1: Typical application of the D030-P

User manual D030-P Batch Controller
1–INTRODUCTION
2FW-D030-P-MAN-EN-V0102_02
The D030-P Display Functions
The D030-P has a large transflective LCD with a number of symbols and digits to display
measuring units, status information, trend indication and keyword messages.
Configuration of the D030-P
"Available D030-P configurations" on page 3 shows that this unit is available in various hardware
configurations to support a wide range of applications. Other models of this type have other
configurations. Contact your reseller for details.
The configuration mode of the D030-P allows you to configure and shape your D030-P towards
your specific requirements. The configuration mode supports all available hardware
configurations of the D030-P and includes several important features such as K-factor,
measurement units, signal settings, etc.
All setting as are stored in EEPROM memory and will not be lost in case of power breakdown or in
the event of an empty battery.
EEPROM Memory
The D030-P contains EEPROM memory that does not loose its data upon power loss.
All configuration settings remain stored in case of a power failure or deactivation of the unit (e.g.
during transport or storage).
Options of the D030-P
The following section describes the configuration options this particular D030-P may have been
equipped with. Other models of this type have other options. Contact your reseller for details.
Figure 2: The display functions of the D030-P
Indication of large
display readout Measuring units large display
readout
Large display trending
(increase or decrease) Numerical 17mm large display
readout
low battery indicator (replace
when steady) D030-P status indicators
indication of small
display readout Alphanumerical small display
readout
RUN
LOW BATTERY
SET-UP PAUSE
ALARM
PROGRAM
READY
Note:
You may optimize battery-life time (type PB only) by optimizing the power-
management functions as described in "Power Management" on page 25.

User manual D030-P Batch Controller
INTRODUCTION – 1
FW-D030-P-MAN-EN-V0102_02 3
Available D030-P configurations
Your D030-P model is available in a number of hardwired configuration options.
A product label on the backside of the unit identifies which configuration options are included in
your D030-P.
The following table identifies the options that may apply to your D030-P.
Note:
A combination of configuration options is not always possible: some options rule others
out and some options require others to be included. Consult the product label on your
D030-P enclosure to see which options are included on your particular unit.
Standard confuguration: D030-P-HB-OT-PX-ZX
Coding information D030-_ -HB -O_ -P_ -Z_
flowmeter input signal(s)
PPulse (coil, NAMUR, npn, pnp, reed switch)
Front Panel mount enclosure - IP66/67 (NEMA4X)
HB Aluminum DIN 43700 / IEC 61554 front panel
Control output
OH Active and passive transistor output - requires PD (DC). (PD (AC) and PM are pending).
OR Highly isolated mechanical relay output - requires PD (DC). (PD (AC) and PM are pending
OT Passive transistor output - standard configuration.
Power supply
PB Long life lithium battery
PD 24V DC/AC + sensor supply.
PM 115 - 230V AC + sensor supply.
PX Basic power supply 8 - 30V DC
Other options
ZB Backligh, Bi-colort green/amber
ZF Extra high sensitive coil input: 10mV p-p
ZG Very high sensitive coil input: 5mV p-p
ZX No options
The bold marked text contains the standard configuration.

CHAPTER
4FW-D030-P-MAN-EN-V0102_02
2
Specifications of the D030-P
General specifications
Display
Type High intensity reflective numeric and alphanumeric LCD, UV-
resistant.
Digits Seven 17mm (0.67") and eleven 8mm (0.31")digits.
Various symbols and measuring units.
Refresh rate User definable: fast - 1 sec - 3 sec - 15 sec - 30 sec - off.
Option ZB Transflective LCD with bi-color LED backlight; green / amber.
Intensity and color can be adjusted in the configuration menu.
High contrast readings in full sunlight and darkness.
Panel Mount Enclosure
General Die-cast ALU (aluminum) enclosure with Polycarbonate
window and silicone.
UV stabilized and flame retardant material. GRP back cover.
Control Keys Three industrial micro switch keys. UV-stabilized silicone
keypad
Painting UV-resistant 2-component industrial paint
Dimensions 144 x 72 x 71.4mm (5.67" x 2.83" x 2.81") – LxHxD
Weight 325 gr.
Classification IP66, IP67 (NEMA4x) at the front-side
Panel cutout 138 x 68mm (5.43" x 2.68") – LxH
Panel thickness Max. 6mm (¼")
Type HB Die-cast ALU panel-mount enclosure according: DIN 43700 /
IEC 61554
Temperature
Operating -40°C to +80°C (-40°F to +176°F) ambient
Approvals and compliances
EMC compatibility Compliant ref: EN 61326 (1997), EN 61010-1 (1993).
Power supply
Type PB 3,6V Lithium battery life-time depends upon settings and
configuration – up to 5 years.
Type PD 24V AC / DC + 10%. Power consumption max. 5 Watt.
Type PM 115-230V AC + 10%. Power consumption max. 15 Watt.
Type PX 8-30V DC. Power consumption max. 0.3 Watt.
Type ZB 20 - 30V DC. Power consumption max. 1 Watt.
With type PD - PM: Internally powered

User manual D030-P Batch Controller
SPECIFICATIONS OF THE D030-P – 2
FW-D030-P-MAN-EN-V0102_02 5
Sensor excitation
Sensor exitation specifications relate to the power supply
type.
Type PB / PX 3V DC for pulse signals and 1.2V DC for coil pick-up.
Type PD / PM Dipswitch adjustable sensor supply:
8.2V DC. Iout max 35mA @ 20°C
12V DC. Iout max 50mA @ 20°C
24V DC. Iout max 75mA @ 20°C (this voltage can vary
depending on the input supply voltage).
Terminal connections
Type Removable plug-in terminal strip.
Wire max. 1.5mm2and 2.5mm2solid / stranded.
Screw thread M3
Tightening torque 0.5-0.6 Nm
Data protection
Memory type EEPROM; data retention >10 years
Automatic backup of settings upon change & running totals
every minute
Access restriction Via configurable 4 digit numerical pass code
Inputs
Flowmeter
Type P Coil/sine wave (minimum 20mVpp or 80mVpp - sensitivity
selectable), NPN/PNP, open collector, reed-switch, Namur,
active pulse signals 8 - 12 and 24V
Frequency Min. 0 Hz – max. 7 kHz for total and flowrate (max. frequency
depends on signal type and internal low-pass filter).
Reed switch with low-pass filter: max. frequency 120 Hz.
K-Factor 0.00001 - 9,999,999 with variable decimal position.
Low-pass filter Available for all pulse signals.
Option ZF: coil sensitivity 10mVpp.
Option ZG: coil sensitivity 5mVpp.
Note:
To prevent battery drainage only use for pulse
sensors with a very low power consumption such as
coils (sine wave) and reed-switches.

User manual D030-P Batch Controller
2–SPECIFICATIONS OF THE D030-P
6FW-D030-P-MAN-EN-V0102_02
Outputs
Control output
Output type Control output according the batch process.
Type OH Active 24V DC transistor output; Requires PM/PD. Max load
75mA
Passive transistor output - not isolated; Requires PM/PD. Max.
24V DC - 300mA.
Type OR Isolated electro-mechanical relay (NO/NC); max. resistive
load: 2A@230Vac / 30V DC. Pilot duty rating: 0,5A @ 230Vac.
Requires PM/PD (DC).
Note: In case of inductive load, use RC snubbers.
Type OT Passive transistor output (NPN) - not isolated; Max. 50V DC -
300mA.
Operational
Operator functions
Displayed functions • Preset value - can be entered by the operator
• Total and accumulated total
• Batched quantity or remaining quantity
• key-word messages
Preset and Total
Units L, m3, GAL, USGAL, kg, lb, bbl - no units
Digits 7 digits
Displayed decimals configurable 0 — 3
Accumulated total
Units / Decimals Identical to selection for "Total".
Digits 11 digits
Note:
Total can be reset to zero by pressing the STOP key
twice.
Note:
Accumulated total can not be reset to zero.

User manual D030-P Batch Controller
SPECIFICATIONS OF THE D030-P – 2
FW-D030-P-MAN-EN-V0102_02 7
This page is left blanc intentionally.

3
8FW-D030-P-MAN-EN-V0102_02
CHAPTER
Installation Instructions
Mechanical Installation
To extend life of your unit:
• Mount the D030-P on a solid base to avoid vibrations.
• Provide sufficient slack on cables to prevent stress on cable entries.
• Make sure the seal is mounted properly between the housing and the panel.
• The IP66, IP67 (NEMA4X) classification is valid for the front enclosure only.
• Do not expose the casing to strongly varying (weather) conditions, not even when rated IP67.
Note:
This section describes various hardware configurations of the D030-P. Your particular
model of the D030-P may not support all configuration options described.
Figure 3: Mechanical mounting precautions
Figure 4: Panel cut-out dimensions
@@Panel cut-out dimensions D-series
68mm (2.68")
138 mm (5.43")
10.2 mm (0.4”)
72 (2.83”)
144 mm (5.67”)
55,3mm (2.18”)
15,6mm (0.61”)

User manual D030-P Batch Controller
INSTALLATION INSTRUCTIONS – 3
FW-D030-P-MAN-EN-V0102_02 9
Electrical installation – general
Overview of Terminal Connectors
To gain access to the connectors open the panel containing the D030-P. You now see the battery
cover with the battery and the connectors at the back side of the display unit as shown below.
The actual number and size of connectors depends on your particular model.
Figure 5: Connector location D030-P
flowmeter and Power
A 6-pole Classic COMBICON connector connects the
flowmeter and (optional) power supply.
Pulse Output
A 3-pole Classic COMBICON connector connects the
optional Pulse output.
Mains Power Supply
A3-poleClassicCOMBICON connector connects the mains
power supply.(110/230V) (PM)
Figure 6: Pin layout options of main connector(s) –availability depends on model ID
AC power
supply
(option)
control out Voltage
switch
8.2/12/24V
input sensor
supply DC power
supply
Analog out /
HART
(option)
R1 R2 R3 S1 S2 S3 S4 P3 P4 A1 A2
⊥+↑+↓ ⊥ +↑⊥+↑
OH: PNP / NPN P: reed / NPN PX: 8-30Vdc
COM
⊥NO NC ⊥-↑3.0V↓8.2/12/
24V↓
OR: make-and-
break relay
P: PNP
Note:: OH and OR require a
PM/PD Power Supply. ⊥-↑3.0V↓8.2/12/
24V↓
P: NAMUR
⊥+↑3.0V↓8.2/12/
24V↓
P: active pulse
P0 P1 P2
∼∼
PD:24V AC
L1 N
PM: 115-
230V AC

User manual D030-P Batch Controller
3–INSTALLATION INSTRUCTIONS
10 FW-D030-P-MAN-EN-V0102_02
Connector Types and Wiring Sizes
The following connector types are fitted. Wires are connected using a flat head screw driver:
Classic COMBICON
A screw connector with 5.08mm pitch, suitable for 0.2—2.5mm2 or AWG
24—12 wire. Max. torque 0.5Nm.
Power Supply Wiring
Below section describes the available power supply types for the D030-P. Which types are
available in your particular D030-P depends on the ordering code.
Battery equipped models switch their internal battery off when an external supply is active.
The following power supply options are available:
• Battery powered. see "Battery powered type PB" on page 10 for details.
• Externaly powered, see ""External Power Supply wiring" on page 10" for details.
Battery powered type PB
Type PB is internally battery powered and does not require any external wiring.
When power supply PX is available (see below) the internal battery is switched off. This extends
battery life and guarantees higher availability during power outages.
• A healthy battery has a life expectancy of several years, depending on its use and
configuration settings. For details see "Battery life" on page 31.
• When installing verify that the battery is in good working condition by running the power-up
sequence on page iv of this manual. If the battery needs to be replaced follow the battery
replacement instructions delivered with the new battery.
External Power Supply wiring
The D030-P can be equipped with a power supply, type PX or PD.
• For type PX or PD DC your D030-P must be equipped with a 6 pole connector.
Type PD can also power your flowmeter in the field, see "Power wiring type PD" on page 11 for
details.
Figure 7: Voltage switch positions
8.2V 12V 24V
A
B
A
B
A
B
A
B
A
or
B
A
B
Note:
• Type PX < 16V does not foresee in the (optional) backlight power; see "Backlight" on
page 12.
• The internal battery is on standby, when external power is supplied. Note that the
internal battery cannot be used to power a flowmeter with 8.2V (pin S4)!
Caution:
The D030-P and it’s field devices are functionally isolated to a maximum of 500V!

User manual D030-P Batch Controller
INSTALLATION INSTRUCTIONS – 3
FW-D030-P-MAN-EN-V0102_02 11
Power wiring type PX
Connect the “-”, GND or “0V” wire of your external power supply to pin P3. Connect the “+” wire
to pin P4.
With power wiring type PX pin S4 offers 8.2V to power a device in the field
Power wiring type PD
Figure 8: Power wiring type PX
D030-P
P4
8-30Vdc
P3
With power wiring type PD / PM pin S4 offers a limited sensor supply (8.2/12/24V) to power the
flowmeter in the field.
Figure 9: Power wiring type PD DC / AC – with flowmeter supply
D030-P
P4
24Vdc ±10%
P3
S4 Power supply to flowmeter,seeFigure
7: "Voltage switch positions" for settings
P2
24Vac 50/60Hz
P1
0V
+
++
-
+
0V
++
-
~
~
ground - yellow /green
P0

User manual D030-P Batch Controller
3–INSTALLATION INSTRUCTIONS
12 FW-D030-P-MAN-EN-V0102_02
Power wiring type PM
Type PM is a galvanically isolated highpower switching power supply, converting 115–230Vac
mains (50/60Hz) to power the D030-P,the backlight (option) and provides up to 24V sensor
supply to the field.
Backlight
For those applications where readability during day and night is an issue, a bi-color backlight is
available. The background color can be set to green or amber and the intensity can be adjusted
in the configuration menu, see 32 "Backlight" on page 24
Backlight requires a power supply of at least 16V and is internally powered by options PD, PM or
PX above 16V.
Warning
•HIGH VOLTAGE! Danger of electrical shock: remove power from the supply lines
before connecting.
Warning
• Never connect 24V AC and DC together on the same unit, this will damage the unit.
Figure 10: Power wiring type PM
D030-P
S4 Supplies up to 24Vdc@75mA sensor
power, see Figure 7: "Voltage switch
positions" for settings
P3/
S1
P2
115–230Vac 50/60Hz
+
0V
N
P1
L1
P0 ground - yellow /green

User manual D030-P Batch Controller
INSTALLATION INSTRUCTIONS – 3
FW-D030-P-MAN-EN-V0102_02 13
I/O wiring options
Batch Controller Input Wiring Options Type P
Below flowmeter signal types can be connected to the D030-P.
The screen of the signal wire must be connected to the common ground if not earthed at the
sensor itself.
The maximum input frequency is approximately 10 kHz (depending on the type of signal). The
input signal type has to be selected with the correct SETUP-function (see "Signal" on page 25).
Explanation of symbol ‘cable shielding’
Low pass filter
A low-pass filter is an electronic filter that passes low-frequency signals and attenuates (reduces
the amplitude of) signals with frequencies higher than the cutoff frequency.
Sine-wave (Coil) Signal
The D030-P can be connected to flowmeters with a coil output signal.
Two sensitivity levels can be selected with setup menu 51 "Signal":
• COIL LO: sensitivity about 120mVp-p.
• COIL HI: default sensitivity about 20mVp-p.
(with type ZF COIL HI sensitivity is increased to 10mVp-p and with type ZG to 5mV p-p.)
cable shielding
Figure 11: Coil signal input
D030-P +1.2Vdc S3 Input sensitivity selectable
via setup menu 51 "Signal"
S2
S1
~
~

User manual D030-P Batch Controller
3–INSTALLATION INSTRUCTIONS
14 FW-D030-P-MAN-EN-V0102_02
Pulse-signal NPN / NPN-LP
The D030-P is suitable for use with flowmeters which have a NPN output signal.
For reliable pulse detection, the pulse amplitude has to go below 1.2V. Signal setting NPN-LP
employs a low-pass signal noise filter, which limits the maximum input frequency. See "Low pass
filter" on page 13.
Pulse-signal PNP / PNP-LP
The D030-P is suitable for use with flowmeters which have a PNP output signal.
3.0V is offered as a pull-up voltage which has to be switched by the PNP sensor. Optionally an
8.2/12/24V pull-up voltage can be wired, when powered with a power supply type PD/PM.
For a reliable pulse detection, the pulse amplitude has to go above 1.2V. Signal setting PNP-LP
employs a low-pass signal noise filter, which limits the maximum input frequency. See "Low pass
filter" on page 13.
For a signal detection level of 50% of the supply voltage: please refer to "Flowmeter Pickup
Signal Types Supported" on page 33
Figure 12: NPN pulse signal input
D030-P +3.0Vdc LP = Optional Low-Pass filter. For configuration details see Setup
menu 51 "Signal".
S2
S1
*
100kΩ
Figure 13: PNP pulse signal input
D030-P LP = Optional Low-Pass filter. For
configuration details see Setup menu 51
"Signal"
8.2/12/
24Vdc S4
Choose between sensor power from 3.2Vdc
or 8.2Vdc terminal
3.0Vdc S3
S2
S1
or
820
Ω
Table of contents
Other Fluidwell Controllers manuals
Fluidwell
Fluidwell F074-A User manual

Fluidwell
Fluidwell F130-P User manual
Fluidwell
Fluidwell N-410-P User manual
Fluidwell
Fluidwell F Series User manual
Fluidwell
Fluidwell F130-P User manual
Fluidwell
Fluidwell F131-P User manual

Fluidwell
Fluidwell F124-P User manual
Fluidwell
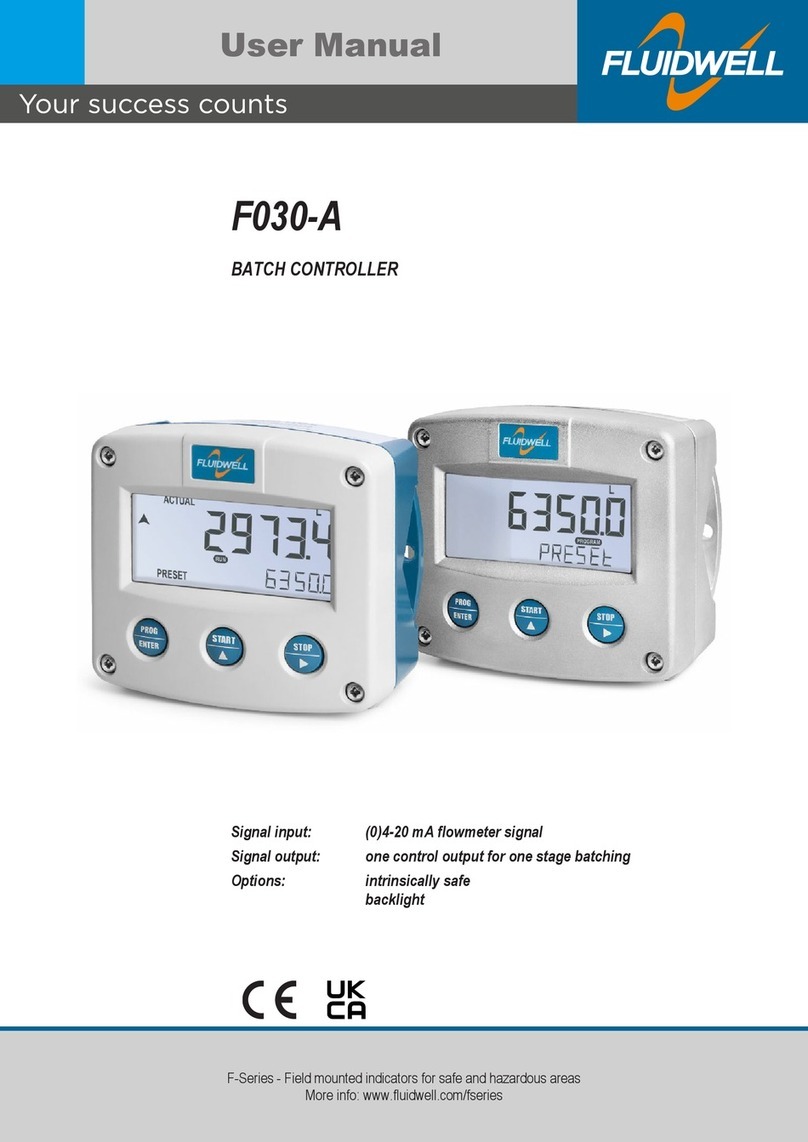
Fluidwell F030-A User manual
Fluidwell
Fluidwell F132-P User manual
Fluidwell
Fluidwell D Series User manual
Popular Controllers manuals by other brands

CrimeStopper
CrimeStopper FS-60 Operation instructions
Endress+Hauser
Endress+Hauser Liquiline Control CDC90 operating instructions
YASKAWA
YASKAWA MP2300S user manual
Lightwave Research
Lightwave Research Data Flash AF 1000 user manual

SURAN
SURAN ENDA EHTC7425A manual
Shimax
Shimax MAC5 Series instruction manual
