Fluke Calibration RUSKA 7615 User manual

PN 3952199
November 2010
© 2010 Fluke Corporation. All rights reserved. Printed in USA. Specifications are subject to change without notice.
All product names are trademarks of their respective companies.
RUSKA 7615
Hydraulic Pressure Controller/Calibrator
Users Manual
Via Acquanera, 29 22100 Como
tel. 031.526.566 (r.a.) fax 031.507.984
info@calpower.it www.calpower.it

LIMITED WARRANTY AND LIMITATION OF LIABILITY
Each Fluke product is warranted to be free from defects in material and workmanship under normal use and
service. The warranty period is one year and begins on the date of shipment. Parts, product repairs, and
services are warranted for 90 days. This warranty extends only to the original buyer or end-user customer of
a Fluke authorized reseller, and does not apply to fuses, disposable batteries, or to any product which, in
Fluke's opinion, has been misused, altered, neglected, contaminated, or damaged by accident or abnormal
conditions of operation or handling. Fluke warrants that software will operate substantially in accordance
with its functional specifications for 90 days and that it has been properly recorded on non-defective media.
Fluke does not warrant that software will be error free or operate without interruption.
Fluke authorized resellers shall extend this warranty on new and unused products to end-user customers
only but have no authority to extend a greater or different warranty on behalf of Fluke. Warranty support is
available only if product is purchased through a Fluke authorized sales outlet or Buyer has paid the
applicable international price. Fluke reserves the right to invoice Buyer for importation costs of
repair/replacement parts when product purchased in one country is submitted for repair in another country.
Fluke's warranty obligation is limited, at Fluke's option, to refund of the purchase price, free of charge repair,
or replacement of a defective product which is returned to a Fluke authorized service center within the
warranty period.
To obtain warranty service, contact your nearest Fluke authorized service center to obtain return
authorization information, then send the product to that service center, with a description of the difficulty,
postage and insurance prepaid (FOB Destination). Fluke assumes no risk for damage in transit. Following
warranty repair, the product will be returned to Buyer, transportation prepaid (FOB Destination). If Fluke
determines that failure was caused by neglect, misuse, contamination, alteration, accident, or abnormal
condition of operation or handling, including overvoltage failures caused by use outside the product’s
specified rating, or normal wear and tear of mechanical components, Fluke will provide an estimate of repair
costs and obtain authorization before commencing the work. Following repair, the product will be returned to
the Buyer transportation prepaid and the Buyer will be billed for the repair and return transportation charges
(FOB Shipping Point).
THIS WARRANTY IS BUYER'S SOLE AND EXCLUSIVE REMEDY AND IS IN LIEU OF ALL OTHER
WARRANTIES, EXPRESS OR IMPLIED, INCLUDING BUT NOT LIMITED TO ANY IMPLIED WARRANTY
OF MERCHANTABILITY OR FITNESS FOR A PARTICULAR PURPOSE. FLUKE SHALL NOT BE LIABLE
FOR ANY SPECIAL, INDIRECT, INCIDENTAL, OR CONSEQUENTIAL DAMAGES OR LOSSES,
INCLUDING LOSS OF DATA, ARISING FROM ANY CAUSE OR THEORY.
Since some countries or states do not allow limitation of the term of an implied warranty, or exclusion or
limitation of incidental or consequential damages, the limitations and exclusions of this warranty may not
apply to every buyer. If any provision of this Warranty is held invalid or unenforceable by a court or other
decision-maker of competent jurisdiction, such holding will not affect the validity or enforceability of any other
provision.
Fluke Corporation
P.O. Box 9090
Everett, WA 98206-9090
U.S.A.
Fluke Europe B.V.
P.O. Box 1186
5602 BD Eindhoven
The Netherlands
11/99
To register your product online, visit register.fluke.com

i
Table of Contents
Chapter Title Page
1 General Information ............................................................................ 1-1
Introduction........................................................................................................ 1-1
General Information........................................................................................... 1-1
How to Contact Fluke ........................................................................................ 1-1
Safety Information ............................................................................................. 1-2
Safety Summary ............................................................................................ 1-2
Keep Away From Live Circuits..................................................................... 1-2
Do Not Service or Adjust Alone.................................................................... 1-2
Resuscitation.................................................................................................. 1-2
Electrostatic Discharge Sensitive Parts ......................................................... 1-2
Compressed Air ............................................................................................. 1-2
Personal Protective Equipment...................................................................... 1-2
Inert Gases..................................................................................................... 1-2
Symbols Used in this Manual ............................................................................ 1-3
Features.............................................................................................................. 1-3
NIST Traceability.......................................................................................... 1-3
Power Supply................................................................................................. 1-3
Measurement While Control ......................................................................... 1-3
Friendly Display ............................................................................................ 1-4
Adjustable Pressure Display.......................................................................... 1-4
Ease of Operation .......................................................................................... 1-4
Easily Programmable..................................................................................... 1-4
Attractive Desktop Packaging ....................................................................... 1-4
Power-On Self Test (POST).......................................................................... 1-4
Ease of Calibration ........................................................................................ 1-4
Automatic Zero Adjust .................................................................................. 1-4
Automatic Head Correction........................................................................... 1-4
Choice of Medium......................................................................................... 1-4
Choice of display units .................................................................................. 1-4
Communications Interface............................................................................. 1-4
Standard Equipment & Options......................................................................... 1-5
2 Theory of Operation ............................................................................ 2-1
Introduction........................................................................................................ 2-1

RUSKA 7615
Users Manual
ii
The Power Supply.............................................................................................. 2-1
The Electronics Module..................................................................................... 2-1
The Back Plane.............................................................................................. 2-1
The Microprocessor Board ............................................................................ 2-1
The Analog / Digital I/O Board..................................................................... 2-2
The IEEE-488 Interface................................................................................. 2-2
The Front Panel ............................................................................................. 2-2
The Control Board......................................................................................... 2-2
The Hydraulic/Pneumatic Module..................................................................... 2-3
Pneumatic/Hydraulic Intensifier.................................................................... 2-3
Reservoir Valve ............................................................................................. 2-4
Fluid Reservoir .............................................................................................. 2-5
System Valve................................................................................................. 2-5
High Speed System Transducer..................................................................... 2-5
High Accuracy Pressure Sensor .................................................................... 2-5
Optional - Second High Accuracy Sensor..................................................... 2-5
Test Port ........................................................................................................ 2-5
Supply Port .................................................................................................... 2-5
Reservoir Select Valve .................................................................................. 2-5
3 Installation ........................................................................................... 3-1
Introduction........................................................................................................ 3-1
Unpacking the Calibrator................................................................................... 3-1
Cautions ............................................................................................................. 3-2
Powering Up the Calibrator ............................................................................... 3-2
Hydraulic/Pneumatic Connections..................................................................... 3-3
Air Supply Port.............................................................................................. 3-3
Test Port ........................................................................................................ 3-3
Reservoir ....................................................................................................... 3-3
Purge Hydraulic System ................................................................................ 3-3
Tutorial .............................................................................................................. 3-4
4 Local Operation ................................................................................... 4-1
Local Operations................................................................................................ 4-1
Numeric Keypad............................................................................................ 4-1
Function Keys................................................................................................ 4-1
Arrow Keys ................................................................................................... 4-1
Cancel, Prev, Abort ....................................................................................... 4-2
Measuring Pressure............................................................................................ 4-3
Multi-Range Sensor - Options....................................................................... 4-3
Selecting Pressure Units ................................................................................ 4-3
Defining a New Pressure Unit ....................................................................... 4-4
Changing the Number of Decimals ............................................................... 4-4
Setting the Alarm Limits ............................................................................... 4-4
Using Head Pressure Correction.................................................................... 4-5
Set Tare Mode ............................................................................................... 4-5
Controlling Pressure .......................................................................................... 4-5
Control Modes ............................................................................................... 4-5
Normal Mode ............................................................................................ 4-5
Cycle Modes.............................................................................................. 4-6
Setting the Pressure Setpoint ......................................................................... 4-6
Entering/Exiting Control Mode..................................................................... 4-6
Setting Slew Rate .......................................................................................... 4-6
Stepping and Jogging .................................................................................... 4-7

Contents (continued)
iii
Programming Sequences.................................................................................... 4-7
Storing a Sequence in Memory ..................................................................... 4-7
Preparing to Program..................................................................................... 4-7
Program name ........................................................................................... 4-7
Configuration ............................................................................................ 4-7
Number of Set-Points................................................................................ 4-7
Set Point Pressure and Tolerance.............................................................. 4-8
Dwell time................................................................................................. 4-8
Max time ................................................................................................... 4-8
Mode of entry............................................................................................ 4-8
Entering a New Program ............................................................................... 4-8
Automatically Generating a Program ............................................................ 4-9
Changing the Name of a Program ................................................................. 4-9
Changing an Existing Program...................................................................... 4-9
Changing the Configuration Stored with a Program ..................................... 4-10
Running a Program........................................................................................ 4-10
Configuration ..................................................................................................... 4-11
Test Access Code .......................................................................................... 4-11
Bargraph Maximum....................................................................................... 4-11
Key Click....................................................................................................... 4-11
Date/Time...................................................................................................... 4-11
5 Remote Operation ............................................................................... 5-1
Remote Operation .............................................................................................. 5-1
Capabilities ........................................................................................................ 5-1
IEEE-488 ....................................................................................................... 5-1
RS-232........................................................................................................... 5-2
Remote/Local Operation.................................................................................... 5-2
Configuration ..................................................................................................... 5-3
Device Messages................................................................................................ 5-3
SCPI Command Format ................................................................................ 5-3
SCPI Response Format.................................................................................. 5-3
ANSI/IEEE 488.2-1987 Command Summary............................................... 5-4
SCPI Command Summary ............................................................................ 5-4
Example SCPI Commands ............................................................................ 5-6
SCPI Status Registers .................................................................................... 5-6
Interface Panel Emulation.................................................................................. 5-7
Serial Operation ................................................................................................. 5-7
6 Maintenance......................................................................................... 6-1
Introduction........................................................................................................ 6-1
Observing the Calibrator’s Full Scale Rating .................................................... 6-1
Observing the Software Version Number.......................................................... 6-1
Preventive Maintenance..................................................................................... 6-1
Initiating the Calibrator’s Self Test ............................................................... 6-1
Removing the Calibrator’s Cover.................................................................. 6-1
Processor Battery ............................................................................................... 6-2
Calibration ......................................................................................................... 6-2
Calibration Instructions—Single and Dual Sensor........................................ 6-3
Storing the Coefficients................................................................................. 6-4
Calibration Instructions—Multi-Ranged Sensor ........................................... 6-5
Preparation..................................................................................................... 6-5
Storing the Coefficients................................................................................. 6-7
Editing the Calibration Coefficients .............................................................. 6-7

RUSKA 7615
Users Manual
iv
Zeroing .......................................................................................................... 6-8
Cleaning............................................................................................................. 6-8
7 Preparation for Storage & Shipment ................................................. 7-1
Disconnecting the Calibrator ............................................................................. 7-1
Packing Instructions........................................................................................... 7-1
Shipping Instructions ......................................................................................... 7-2
Appendices
A Summary of Specifications ......................................................................... A-1
B Summary of Error Messages ....................................................................... B-1

v
List of Tables
Table Title Page
1-1. Symbols.................................................................................................................. 1-3
1-2. 7615 DPC Options List .......................................................................................... 1-5
2-1. Conversion Factors................................................................................................. 2-3
3-1. General Specifications & Parameters..................................................................... 3-2
5-1. RS-232 Pin Allocations.......................................................................................... 5-2

RUSKA 7615
Users Manual
vi

vii
List of Figures
Figure Title Page
2-1. DPC Block Diagram .............................................................................................. 2-2
2-2. RUSKA 7615 Calibrator Hydraulic/Pneumatic Diagram ...................................... 2-4
4-1. RUSKA 7615 Front Panel...................................................................................... 4-1
4-2. Menu Tree .............................................................................................................. 4-2

RUSKA 7615
Users Manual
viii

1-1
Chapter 1
General Information
Introduction
This manual contains operation and routine and preventive maintenance instructions for
the 7615 Hydraulic Pressure Controller/Calibrator (Calibrator), manufactured by Fluke.
This section of the manual provides general information about the Calibrator and presents
its features and options.
General Information
The RUSKA 7615 Calibrator uses transducers to provide the precise measurement of
pressure. During normal operation, the Calibrator performs in either Measure Mode or
Control Mode.
In Control Mode, the Calibrator simultaneously measures and controls pressure. Control
Mode is commonly used in the calibration and testing of pressure gages, transducers,
pressure switches, and production pressure instruments.
In Measure Mode, the Calibrator measures pressure. Typically, Measure Mode finds
applications in research laboratories, testing of gages and transducers.
How to Contact Fluke
To order accessories, receive operating assistance, or get the location of the nearest Fluke
distributor or Service Center, call:
•Technical Support USA: 1-800-99-FLUKE (1-800-993-5853)
•Calibration/Repair USA: 1-888-99-FLUKE (1-888-993-5853)
•Canada: 1-800-36-FLUKE (1-800-363-5853)
•Europe: +31-402-675-200
•China: +86-400-810-3435
•Japan: +81-3-3434-0181
•Singapore: +65-738-5655
•Anywhere in the world: +1-425-446-5500
Or, visit Fluke's website at www.fluke.com.
To register your product, visit http://register.fluke.com.
To view, print, or download the latest manual supplement, visit
http://us.fluke.com/usen/support/manuals.

RUSKA 7615
Users Manual
1-2
Safety Information
Safety Summary
The following are general safety precautions that are not related to any specific
procedures and do not appear elsewhere in this publication. These are recommended
precautions that personnel must understand and apply during equipment operation and
maintenance to ensure safety and health and protection of property.
Keep Away From Live Circuits
Operating personnel must at all times observe safety regulations. Do not replace
components or make adjustments inside the equipment with the voltage supply connected.
Under certain conditions, dangerous potentials may exist when the power control is in the
off position due to charges retained by capacitors. To avoid injuries, always remove
power from, discharge, and ground a circuit before touching it.
Do Not Service or Adjust Alone
Do not attempt internal service or adjustment unless another person capable of rendering
aid and resuscitation is present.
Resuscitation
Personnel working with or near dangerous voltages shall be familiar with modern
methods of resuscitation. Such information may be obtained from your local American
Medical Association.
Electrostatic Discharge Sensitive Parts
WCaution
Electrostatic discharge sensitive (ESDS) is applied to low
power, solid-state parts which could be damaged or destroyed
when exposed to discharges of static electricity. Maintenance
personnel are often not aware that an ESDS part has been
damaged or destroyed because electrostatic discharges at
levels less than 4,000 volts cannot be seen, felt, or heard.
When the ESDS symbol appears between a paragraph number and paragraph title,
the entire paragraph and all subparagraphs shall be considered ESD sensitive. When the
ESDS symbol appears between a step number and the step test, the step shall be
considered ESD sensitive.
Compressed Air
Use of compressed air can create an environment of propelled foreign matter. Pressure
systems safety precautions apply to all ranges of pressure. Care must be taken during
testing to ensure that all pneumatic connections are properly and tightly made prior to
applying pressure. Personnel must wear eye protection to prevent injury.
Personal Protective Equipment
Wear eye protection approved for the materials and tools being used.
Inert Gases
Operation of pressure equipment may be accompanied by the discharge of inert gases to
the atmosphere. The result is a reduction of oxygen concentration. Therefore, it is
mandatory that all exhaust gases be vented outside the work area.

General Information
Symbols Used in this Manual 1
1-3
WWarning
If the equipment is used in a manner not specified by the
manufacturer, the protection provided by the equipment may be
impaired. The AC main plug, switch and power cord shall
remain readily accessible for operation.
Symbols Used in this Manual
In this manual, a Warning identifies conditions and actions that pose a hazard to the user.
A Caution identifies conditions and actions that may damage the Calibrator.
Symbols used on the Hydraulic Pressure Controller/Calibrator (Calibrator) and in this
manual are explained in Table 1-1.
Table 1-1. Symbols
Symbol Description
BAC (Alternating Current)
JEarth Ground
WImportant Information: refer to manual
XShock Hazard
~Do not dispose of this product as unsorted
municipal waste. Go to Fluke’s website for
recycling information.
Electrostatic discharge Sensitive (ESDS)
P
This equipment meets the requirements of
all relevant European safety directives. The
equipment carries the CE mark.
Features
The following features are standard on all RUSKA 7615 Calibrators.
NIST Traceability
All Calibrator’s are calibrated using RUSKA deadweight gages, which are directly
traceable to the National Institute of Standards and Technology (NIST). All instruments
are provided with a NVLAP accredited calibration certificate.
Power Supply
The Calibrator’s universal power supply accepts AC voltages from 100 – 120 / 220 – 240
VAC. This outputs supply voltages of +5 VDC, +12 VDC, -12 Vdc, and 24 VDc which
are distributed to the Back Plane Board and Control Board.
Measurement While Control
The Calibrator simultaneously displays the commanded pressure, the actual pressure, and
the difference between the two. A bar graph shows the user how close the actual pressure
is to the commanded pressure, as well as how close the commanded pressure is to the
Calibrator’s full scale pressure.

RUSKA 7615
Users Manual
1-4
Friendly Display
The Calibrator’s vacuum fluorescent display combines a bright, low-glare readout with a
wide viewing angle. During normal operation, the measured pressure is easily visible
from a distance of 10 feet (3 meters).
Adjustable Pressure Display
The pressure display can be adjusted to show one decimal greater than or less than the
default resolution.
Ease of Operation
An intuitive, menu-driven interface makes the Calibrator easy to use. Frequently used
selections such as the units of measure are restored to memory each time the Calibrator
powers up.
Easily Programmable
The Calibrator’s powerful microprocessor provides the basis for smart electronics. With a
few simple keystrokes, the user can set limits on the system pressure, create unique units
of measure, program a test sequence, and more.
Attractive Desktop Packaging
A sturdy aluminum case houses all of the Calibrator’s hydraulic, pneumatics, electronics,
and user controls.
Power-On Self Test (POST)
Upon power-up, the Calibrator quickly tests its hardware and software. After the
Calibrator completes this test, the user can select more extensive self-tests for the
hydraulic and electronics.
Ease of Calibration
A menu drive calibration procedure can be performed either remotely or entirely from the
front panel. No disassembly is required, and there are no potentiometers to tune.
Automatic Zero Adjust
At the user’s request, the Calibrator’s software automatically performs the zero
adjustment, with no potentiometers to tune.
Automatic Head Correction
The Calibrator automatically corrects for head pressure, between the Calibrator and the
DUT (Device Under Test) taking into account the density of the test fluid.
Choice of Medium
The hydraulic Calibrator can be used with various non-corrosive fluids as pressure media.
Choice of display units
Standard units include inches of mercury at 0°C and 60°C, kiloPascals, bars, pounds
per square inch, inches of water at 4°C, 20°C, and 25°C, kilograms per square centimeter,
millimeters of mercury, centimeters of mercury at 0°C, and centimeters of water at 4°C.
Altitude and airspeed units include feet, meters, knots, and kilometers/hour. In addition to
these predefined units, four user-defined units are programmable.
Communications Interface
RS-232 serial interface and IEEE-488 interfaces are standard. The user’s computer
communicates with the Calibrator through the Standard Commands for Programmable
Instruments (SCPI) protocol. The Calibrator can also be configured to accept existing
software written for the RUSKA Series 6000 DPG.

General Information
Standard Equipment & Options 1
1-5
Standard Equipment & Options
A standard hydraulic Calibrator comes with this manual, and a power cord. The standard
hydraulic Calibrator is fully functional, but the following options are also available.
Additional Power Cords: Additional power cords are available for most countries of the
world.
Table 1-2. 7615 Calibrator Options List
Option Part Number
User’s Manual 3952199
Power Cord: USA 284174
Power Cord: Canada 284174
Power Cord: Central Europe 769422
Power Cord: India 782771
Power Cord: Japan 3898323
Power Cord, Australia/New Zealand 658641
Battery, Spare 2135249

RUSKA 7615
Users Manual
1-6

2-1
Chapter 2
Theory of Operation
Introduction
The Calibrator’s power supply, electronics, pneumatics, hydraulics, and sensor combine
to form a complete, stand-alone, measure and control instrument. This portion of the
manual breaks the Calibrator down into its component modules (See Figure 2-1) and
provides a general discussion of each.
The Power Supply
The Calibrator’s universal power supply accepts AC voltages from 115/230 VAC volts.
This outputs supply voltages of +5 VDC, +12 VDC, -12 VDC, and 24 VDC which are
distributed to the Back Plane Board and Control Board.
The Electronics Module
The Calibrator’s electronics module consists of an electronic back plane the
Microprocessor Board, Analog/Digital I/O Board, Pressure Control Board, IEEE
interface, and the Front Panel.
The Back Plane
The Microprocessor Board, Analog/Digital I/O Board, Control Board and the IEEE
Interface all plug into the Back Plane Board. The +5 VDC, + 12 VDC, and – 12 VDC
voltages supplied by the Power Supply is distributed from the Back Plane Board to the
four plug in boards and to the front display.
The Microprocessor Board
All of the systems software resides in non-volatile, programmable, read-only memory
(Flash EPROM) on the Microprocessor Board. This software contains all of the
instructions that operate the instrument, as well as the conversion factors that the
instrument uses to translate the detected pressure into the units selected by the user.
These factors are given in Table 2-1.
When the Calibrator powers up, its software is loaded into random access memory
(RAM), which is also on the Microprocessor Board. At the same time, the values stored
in EEPROM are restored to memory.
Another important component on the Microprocessor Board is the lithium battery, which
continuously updates the Calibrator’s date and time, even when the unit is powered down.
The Microprocessor Board also supports the RS-232 serial interfaces, which allow the
user’s computer to communicate with the Calibrator.

RUSKA 7615
Users Manual
2-2
The Analog / Digital I/O Board
The Calibrator’s Analog/Digital I/O board, which plugs directly into the back plane, is
utilized by the Calibrator to read various analog and digital signals and to drive system
solenoids.
The IEEE-488 Interface
The Calibrator’s IEEE-488 (GPIB) Interface card, which plugs directly into the Back
Plane, provides the Calibrator with an IEEE-488 interface. This interface allows the user
to automate the measurement and control processes.
The Front Panel
The Microprocessor Board and Control Board work together to interpret all input from
the Front Panel. The Front Panel contains the vacuum fluorescent display and rubberized
keys used to operate the Calibrator.
Air
Supply
Test
Port
PNEUMATIC
CYLINDER
POWER
SUPPLY
AC POWER
DISPLAY
PANEL
IEEE CARD
CONTROL
BOARD
BACK
PLANE
SENSORS
PUMP
ANALOG /
DIGITAL I/O
BOARD
MICROPROCESSOR
BOARD
gko001.eps
Figure 2-1. Calibrator Block Diagram
The Control Board
The Control Board is used to for the pneumatic control of pressure into the Pneumatic
Cylinder. It drives the 24 volt high speed supply and exhaust control valves which are
used to drive the pneumatic/hydraulic intensifier.

Theory of Operation
The Hydraulic/Pneumatic Module 2
2-3
Table 2-1. Conversion Factors
Symbol Description Conversion Factor
inHg inches of mercury (0°C) = kPa x 0.2952998
inHg inches of mercury (60°C) = kPa x 0.296134
kPa kiloPascals = kPa x 1.0
bar bars = kPa x 0.01
psi pounds per inch2= kPa x 0.1450377
cmH2O centimeters of water (4°C) = kPa x 10.19744
inH2O inches of water (4°C) = kPa x 4.014742
inH2O inches of water (20°C) = kPa x 4.021898
inH2O inches of water (25°C) = kPa x 4.024108
kg/cm2kilograms per cm2= kPa x 0.0101972
mmHg millimeters of mercury (0°C) = kPa x 7.500605
cmHg centimeters of mercury (0°C) = kPa x 0.7500605
knots airspeed knots per NASA TN D-822
km/hr kilometers per hour = knots x 1.852
feet feet of altitude per MIL-STD-859A
meters meters of altitude per MIL-STD-859A
user1 user defined = kPa x User defined
user2 user defined = kPa x User defined
Pa user defined (Pascals) = kPa x 1000.0
%FS user defined (percent of full scale) = kPa x 0.1450377 (for 100 psi models)
The Hydraulic/Pneumatic Module
The hydraulic/pneumatic module, shown on 2-2, houses components which generate and
accurately measures hydraulic pressure.
Pneumatic/Hydraulic Intensifier
The pneumatic/hydraulic intensifier consists of a air driven hydraulic pump which varies
the system pressure by compressing and expanding system fluid. The pump plunger is
linked to a large area piston of a pneumatic cylinder which varies its position through a
0 to 100 psi pneumatic control utilizing high speed supply and exhaust control valves.
The pump has a position sensor which tracks the position of the pump plunger. The pump
and the system is protected from the over pressure by a rupture disc. The pump pressure
is monitored by a high response pressure transducer.

RUSKA 7615
Users Manual
2-4
gko002.bmp
Figure 2-2. RUSKA 7615 Calibrator Hydraulic/Pneumatic Diagram
Reservoir Valve
The reservoir valve isolates the pump from the reservoir. It is a high pressure valve
actuated by a pneumatic dome valve. This pneumatic dome valve has a diaphragm
operator which is driven be an internally regulated 80 psi air pressure which is sourced
from the air supply port. The air is controlled to this valve through a three way normally
open solenoid valve.
Table of contents
Other Fluke Calibration Measuring Instrument manuals
Fluke Calibration
Fluke Calibration 2700G Series User manual
Fluke Calibration
Fluke Calibration DewK User manual
Fluke Calibration
Fluke Calibration 1586A Super-DAQ Installation and operating instructions
Fluke Calibration
Fluke Calibration 525B/A0 120V User manual

Fluke Calibration
Fluke Calibration 525B User manual
Fluke Calibration
Fluke Calibration 525B User manual
Fluke Calibration
Fluke Calibration 7103 User manual
Fluke Calibration
Fluke Calibration 6050H User manual
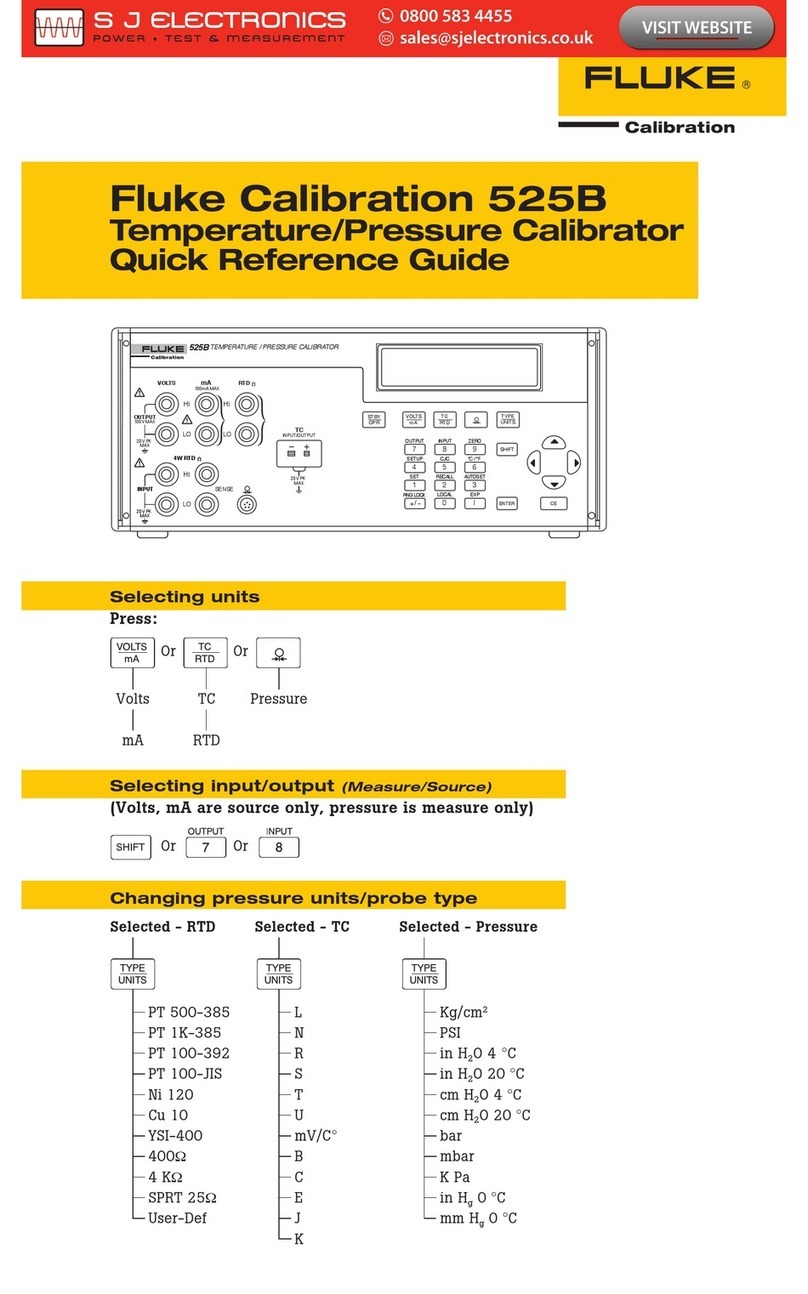
Fluke Calibration
Fluke Calibration 525B User manual
Fluke Calibration
Fluke Calibration 4180 Original instructions
