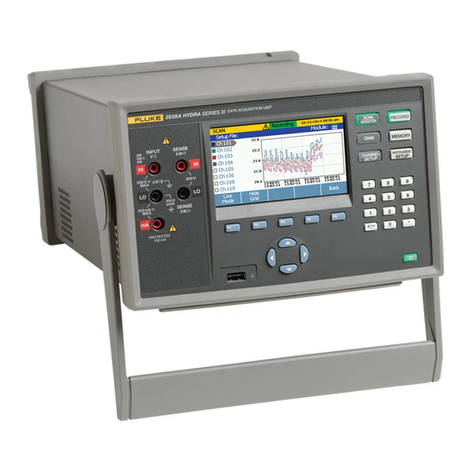
Fluke VIBXPERT II User manual

Data Collector &
Vibration Analyzer
VIBXPERT II
Users Manual

PN5178694
12.2019, Rev. 2 06.2022
Series: VIB 5.310
Firmware version: 3.2x
VIBXPERT®II
Dual channel
FFT data collector and
signal analyzer
Operating instructions

LEGAL NOTES
Copyright
Both this manual and the product it describes are copyrighted. All rights belong to the
publisher. The manual may not be copied, reproduced, translated or made accessible
to a third party in any form, neither in its entirety nor as an excerpt.
Disclaimer
No liability may be claimed against the publisher regarding the product described in
this manual. The publisher assumes no liability for accuracy of the manual contents.
Furthermore, under no circumstances may the publisher be held liable for direct or
indirect damage of any kind resulting from use of the product or the manual, even if
the publisher has expressly indicated the potential for occurrence of such damage.
The publisher assumes no liability for any product defects. This warranty and liability
limitation applies to all distributors and sales partners as well.
Trademarks
The trademarks mentioned in this manual are generally noted as such and are the
property of their owners. Lack of such designation does not imply, however, that
names are not protected by trademark laws.
© Copyright 2010-2022 by Fluke Corporation

1-3
Foreword
Congratulations! And thank you for selecting the VIBXPERT II
FFT data collector and signal analyzer*. This newly developed
measurement device is not just the ideal companion for your routine
measurement round, but also a reliable on-site aid for recording and
analyzing complex machine signals.
VIBXPERT records all types of machine vibrations, bearing
conditions as well as process and visual inspection data, and
transfers this information to the OMNITREND maintenance software
for evaluation, archiving and documentation.
The combination of its extensive range of features and easy
operation makes VIBXPERT the effective choice for a wide range of
applications:
• High measurement accuracy and high-speed data collection
• Operating modes:
'Route' for routine data collection for condition-based
maintenance,
'Multimode' for individual measurements for machine diagnosis
'Balancing' in one or two planes (optional).
'Machine templates' for recurrent measurement tasks within the
scope of acceptance or service measurements
• Almost every type of sensor can be connected
• One or two measurement channels (analog);
Upgrade to 2-channel device at any time via password.
Hardware
• Two synchronous measurement channels for diagnosis of
complex measurements (e.g. shaft vibration).
• Sufficient storage capacity (2 GB CompactFlash).
• Dustproof and splashproof (IP65) - ideal for use in demanding
industrial environments
• Connector technology compatible to VIBSCANNER (same cable)
• Connector for NiCrNi thermocouples
• Connector for headphones
Data collection and data analysis
• Overall values
- Vibration acceleration, velocity, displacement
- Current & voltage (process parameters)
- Shock pulse (bearing condition)
- Temperature
- RPM
• Signals
- Frequency-based and order-based data collection
- Amplitude, envelope, order spectra
- Cepstrum
- Time waveform
- Phase measurement (synchronous, cross channel)
- Dynamic shaft movement (Orbit and shaft displacement)
Foreword
* Also referred to as 'VIBXPERT' and
'device' in these operating instructions.

1-4
Foreword
Structural analysis:
- Coast down / Run up analysis (natural frequencies, machine)
- Impact test (natural frequencies, machine components)
• Advanced measurements
- 1+1 dual measurement (simultaneous 2-channel measurement)
- Multitask (measure multiple measurement tasks in a sequence)
- On-site balancing in one or two planes
- TrendingSpectrum (a measurement provides a time signal, a
spectrum and several characteristic overall values, in route and
template mode).
- Recording
- Multiplexer measurements: Data collection via VIBRONET field
multiplexer
Ergonomics
• Large, backlit color display* ensures clear data presentation and
optimum readability
• Easy-to-use keypad
• Three alarm LEDs (red-yellow-green) indicate if thresholds have
been exceeded (based on ISO standards). A blue LED lights up if
everything is OK.
• Daylight sensor controls keyboard illumination
• Graphical user interface
• Color-coded connectors
• Online, context-sensitive HELP
Power supply
• Lithium-Ion battery of latest generation for more than 8 hours of
operation
• Smart battery charging in VIBXPERT
• Automatic power management (display, device)
Communication
• Fully networkable
• PC connection via USB, Ethernet, RS232.
Documentation
• Printing out of reports, directly on paper or as a PDF file.
VIBXPERT* from PRÜFTECHNIK once again demonstrates
the company's skills and innovative strength in the field of
maintenance, and is a consistent advancement in the series
of successful portable device systems such as VIBSCANNER,
VIBROCORD, VIBROTIP, VIBCODE.
Also, we would like to make you aware of the application-oriented
seminars offered by PRÜFTECHNIK that feature a significant practical
segment. They are very well received by course participants and
you will find them to be a good investment.
Check with PRÜFTECHNIK or with your local distributor for
availability and schedules. For further information, visit our website:
http://www.pruftechnik.com
*VGA (480 x 640 Pixel),
262 144 colors

1-5
Contents
Contents
Chapter 1: Prior to starting .................................................1-9
Safety and operating notes........................................................... 1-10
Chapter 2: Getting started ..................................................2-1
Overview............................................................................................2-1
Keyboard ..............................................................................................................2-2
Status display per LED .........................................................................................2-2
Notes on operation ..........................................................................2-3
Interfaces ...........................................................................................2-5
Power supply.....................................................................................2-7
Charging the battery in the device....................................................................2-7
Carrying pouch - VIB 5.356 ............................................................2-9
Belt .........................................................................................................................2-9
Hand strap.............................................................................................................2-9
Memory card................................................................................... 2-10
For older devices — Serial Number 30000 – 39999..................................... 2-10
For new devices — from Serial Number 40000 ............................................. 2-10
Replacing the memory card (older devices) .................................................. 2-10
Basic settings - Device Setup ................................................. 2-12
Date & Time........................................................................................................ 2-12
Display settings, switchoff and additional options ...................................... 2-13
Route................................................................................................................... 2-14
Transducers........................................................................................................ 2-19
Language............................................................................................................ 2-23
Registration........................................................................................................ 2-24
Units .................................................................................................................... 2-24
Key controls........................................................................................................ 2-25
Printer (for older devices — serial number 30000 – 39999)....................... 2-26
Analog out/headphones................................................................................... 2-28
Service menu ..................................................................................................... 2-29
Memory card (CF) .............................................................................................. 2-31
Standardization factor for dB scaling.............................................................. 2-31
Deleting files ...................................................................................................... 2-31
Data transfer................................................................................... 2-32
Direct connection to PC ................................................................................... 2-32
Network connection.......................................................................................... 2-33
USB flash drive................................................................................................... 2-33
Setting up the network communication ........................................................ 2-34
IP address of the local PC in the network ..................................................... 2-35
Entering a fix IP address for the local PC ...................................................... 2-35
Update................................................................................................................. 2-36
Chapter 3: Measurement ...................................................3-1
Preparation ........................................................................................3-1
What is a measurement task?.............................................................................3-2
Multimode: Measurement, Analysis, Diagnosis ............................3-3
Typical workflow of a measurement..................................................................3-3
Starting a measurement:.....................................................................................3-3
Continuous measurement (live mode) ...............................................................3-4
Save result.............................................................................................................3-4
Measurement of a route ...................................................................3-5
Preliminary remarks.............................................................................................3-5
Notes about routes................................................................................................3-7

1-6
Contents
Typical workflow of a route ................................................................................3-7
Start Route.............................................................................................................3-7
Icons.......................................................................................................................3-9
MENU functions in the tree / list view............................................................ 3-10
MENU functions in the measurement task selection screen........................ 3-12
Measuring with a machine template........................................... 3-13
Preliminary remarks.......................................................................................... 3-14
Start measurement............................................................................................ 3-15
Options before, during and after a measurement...................... 3-17
Aborting a measurement ................................................................................. 3-17
Repeating a measurement ............................................................................... 3-17
Saving a result................................................................................................... 3-17
Changing the measurement channel ............................................................ 3-17
Changing the sensor ........................................................................................ 3-18
Entering the RPM manually ............................................................................. 3-18
Changing the measurement task (M).............................................................. 3-19
Setting up a new measurement task (M)........................................................ 3-19
Creating a new setup (M)................................................................................. 3-20
Entering an Event/Comment............................................................................ 3-26
Signal sensitivity on analog output/headphones ......................................... 3-27
Trend............................................................................................... 3-28
Near location (Route) ..................................................................... 3-32
Triaxial sensor (Route)................................................................... 3-34
Recording........................................................................................ 3-36
Starting the measurement recording.............................................................. 3-38
Ending the measurement recording ............................................................... 3-39
Special cases...................................................................................................... 3-39
Time waveform recorder............................................................... 3-40
Data acquisition at the VIBRONET multiplexer .......................... 3-41
Connecting the VIBXPERT to the multiplexer................................................. 3-42
Automatic data acquisition............................................................................... 3-43
Manual data acquisition................................................................................... 3-43
Diagnostic measurement at VIBRONET multiplexer .................. 3-44
Diagnostic measurement.................................................................................. 3-44
Chapter 4: Results...............................................................4-1
Evaluating results .............................................................................4-2
Result details.........................................................................................................4-2
Characteristic overall value - single values......................................................4-2
Characteristic overall values - trending............................................................4-3
Time waveform.....................................................................................................4-4
Spectrum, Cepstrum.............................................................................................4-8
3D display of spectra: Waterfall diagram ....................................................... 4-13
Sound spectrum: third-octave and octave level diagram............................ 4-15
Configuring the result display (Display Setup)........................... 4-17
Printing out reports........................................................................ 4-21
Preparations for direct printing ....................................................................... 4-21
Printing the content of a result screen ........................................................... 4-21
Measurement reports........................................................................................ 4-22
Configuring the measurement report.............................................................. 4-22
Printing out the measurement report.............................................................. 4-23
Printing out the report for route/machine template...................................... 4-24
Loading reports onto USB flash drive ............................................................. 4-25
Exporting measurement data in MS Excel format......................................... 4-26

1-7
Contents
Chapter 5: Measurement tasks...........................................5-1
Characteristic overall vibration values...............................................................5-1
Shock pulse measurement ..................................................................................5-2
RPM measurements..............................................................................................5-4
Temperature measurement .................................................................................5-5
Runup / Coastdown .............................................................................................5-6
Shaft centerline plot.......................................................................................... 5-12
Phase measurement ......................................................................................... 5-14
Orbit..................................................................................................................... 5-16
Envelope analysis ............................................................................................. 5-18
Cepstrum analysis............................................................................................. 5-19
User-defined measurement quantities ........................................................... 5-19
Multi-measurement task ('Multitask') .............................................................. 5-20
Dual measurement (1+1) ................................................................................. 5-23
Impact test - 1 channel..................................................................................... 5-25
Modal analysis - two-channel impact test .................................................... 5-27
TrendingSpectrum............................................................................................. 5-29
Order spectrum .................................................................................................. 5-29
Order-based spectrum ...................................................................................... 5-29
DC measurements.............................................................................................. 5-30
Chapter 6: Appendix ...........................................................6-1
Numerical editor................................................................................6-1
Text Editor..........................................................................................6-2
File Manager......................................................................................6-3
Functions of the MENU key.................................................................................6-3
Printing out the PDF file.......................................................................................6-4
Transferring a PDF file on a USB flash drive.....................................................6-4
VIBXPERT utility ................................................................................6-5
Installing and starting the program...................................................................6-5
Register functions.................................................................................................6-6
Setting up a connection with VIBXPERT ...........................................................6-7
Configuring VIBXPERT..........................................................................................6-7
Transferring files ..................................................................................................6-8
Transferring system files.....................................................................................6-8
VIBCODE.......................................................................................... 6-10
Mechanical coding ............................................................................................ 6-10
Coding ... ........................................................................................................... 6-11
VIBCODE concept............................................................................................... 6-11
Measuring with VIBCODE ................................................................................. 6-12
Measuring VIBCODE Route/ Pool ..................................................................... 6-13
Technical notes.............................................................................. 6-14
Storage................................................................................................................ 6-14
Cleaning ............................................................................................................. 6-14
Maintenance ...................................................................................................... 6-14
Guarantee ........................................................................................................... 6-15
Spare parts, accessories ................................................................................... 6-15
Disposal .............................................................................................................. 6-15
Technical data ................................................................................................... 6-16
Troubleshooting............................................................................. 6-18
Symptom: .......................................................................................................... 6-18
Reloading firmware........................................................................................... 6-18
Index................................................................................................ 6-20
1-8
Empty page

1-9
Chapter 1: Prior to starting
On delivery, check the goods for damaged or missing parts. Note
any possibly objectionable parts on the shipping documents and
claim them with the forwarder or your local PRUFTECHNIK partner.
Service addresses
Feel free to contact us in case of questions:
Hotline: +49 89 99616-0
Service address:
Fluke Deutschland GmbH
Freisinger Str. 34,
85737 Ismaning, Germany
About this manual
This manual describes the basic functions and operation of the
measurement device in the 'Multimode', Templates' and 'Route'
operating modes. The operation of the optional ‘Balancing’ module
is described in the ‘VIBXPERT - Balancing’ operating manual
PN5178758 (LIT 53.202.EN).
If you don't have this manual handy, open the online help in the
device with the HELP key.
This manual is valid for Firmware Version 3.2x.
Prior to starting

1-10
Safety and operating notes
Read this section carefully, paying especially close attention to the
safety notes, before working with the device.
Symbols used
This symbol warns of operating errors that can
lead to data loss or equipment damage.
This symbol denotes information and tips on
operating the data collector.
Intended use
- The measurement device may only be used for the measurement
of machine signals in industrial environments while taking into
consideration the technical specifications (see " Technical data").
- Transducers and cables may be used only for their respective
intended uses as defined in the corresponding sales leaflets.
Any other use shall not be considered an intended use and is
impermissible. Incorrect or impermissible use and failure to observe
the instructions in this manual result in a loss of warranty from
PRÜFTECHNIK.
Conformity
The product complies with the relevant European directives.
The declaration of conformity is available as a PDF and may be
downloaded from the PRÜFTECHNIK website: www.pruftechnik.com
Attention!
Note

1-11
General safety
The following notes must be carefully read and completely
understood before the device is put into service.
Risk of injury when measuring on a running machine!
Observe the safety regulations. Install the measurement equip-
ment properly. During measurement on machines with rotating
parts exposed, ensure that no brackets, cables etc. can become
caught in rotating machine parts.
The measurement device may only be operated if it is undam-
aged, dry and clean.
Operation and maintenance are to be performed only by prop-
erly trained personnel.
Repairs to the device may be carried out only by a PRÜFTECH-
NIK-authorized service technician.
Only original spare parts and accessories may be used.
Only properly functioning, regularly-maintained electrical
equipment may be used. Any defects such as broken plugs or
loose sockets must be corrected immediately. Damaged cables
must be replaced by an authorized service technician.
Any alterations that affect device design or operating safety are
not permitted.
Environmental influences
Portable radio-based devices can interfere with proper func-
tioning of the device when operated nearby. In case of doubt,
check the connecting cable between the device and its trans-
ducer.
Avoid exposing the device, its transducers and cables to envi-
ronmental conditions that exceed the tolerances listed in the
‘Technical Data’ section at the rear of this manual.
Keep the protective caps on the connector sockets when they
are not in use to keep them clean.
How to deal with rechargeable batteries
• Charge the battery only with the VIBXPERT charger.
• Maximum charge temperature: 40°C.
• Follow the safety instructions enclosed with the charger.
• Do not use damaged batteries!
• Do not use force to open the battery or throw it in the fire!
• Do not short-circuit connection contacts!
• Dispose of used batteries properly in accordance with regula-
tions.
• Do not send devices with defective batteries by air freight.
• During extended periods of non-use and during storage, con-
nect VIBXPERT regularly to the mains supply. This prevents the
battery from becoming completely discharged, and the date
and time settings are retained.
Safety and operating notes

1-12
Nameplates
The diagram below shows the locations and the contents of the
device nameplate and the battery nameplate (standard version).
Nameplate for the VIBXPERT
device with serial number ('S.No.')
Nameplate for the rechargeable
battery with with serial number and
safety notes
Safety and operating notes
00100
VIB 5.310
00100

2-1
Getting started
Chapter 2: Getting started
Overview
The illustrations show the interfaces and operating elements:
8
A / B - measuring chan-
nels for analog signals and
charging sockets.
9
Temperature - interface for
thermo couple type K
10
Digital input/ analog output for:
- Trigger / RPM sensor
- Data transfer via RS 232
- Headphone / Oscilloscope
- Strobe control
1
Full color display - large,
backlit, high contrast.
2
Ambient light sensor con-
trols keyboard illumination.
34
12
56
7
7
Additional key with ENTER
function (Rear panel)
6
Rechargeable battery (built-
in), replaceable
5
Memory card (built-in)
2 MB; as from SN 40000 not
replaceable.
4
Keyboard - ergonomic,
backlit.
3
Four LEDs indicate:
- Alarm condition
- Measurement error
- Battery charge status.
11
Communication
via Ethernet / USB
10
8911

2-2
Keyboard
The keys can be comfortably operated with the thumb of the
right hand. In a dark environment the keyboard illumination
automatically turns on.
Getting started
* only when switching on
Additional (ENTER) key on
the rear panel (p. 2-25)
1
Plus (+) / Minus (-) key
- Zoom for X axis
- Change tab
2
F key for special functions such
as tab, fast key, search
3
Navigation keys and Enter
key
4
MENU key opens the menu
with context-sensitive func-
tions.
5
On/ Off key for switch-
ing on, switching off and
restarting VIBXPERT.
6
HELP key opens context-
sensitive help page in the
active language.
7
ESC key is used to cancle an
operation, to page back and to
switch off VIBXPERT (only in
the start screen).
BLUE GREEN YELLOW RED
2
3
4
6
7
5
1
LED RED YELLOW GREEN BLUE
constant Alarm Warning Prewarning Meas. OK
flashing slow Signal Signal Display off / Battery
overload unstable Meas. incomplete almost empty
flashing fast Battery --- Trigger signal ---
empty*
constant Error Battery Battery full ---
charging
Status and alarm indication
Status display per LED
Four colored LEDs indicate threshold violations, errors, and system
status and show the battery status while charging in the device.
Flashing LEDs have the higher priority, i.e RED flashes with signal
overload and alarm level exceeded.
Battery status during charging

2-3
Notes on operation
To keep operation as simple and intuitive as possible, the graphical
user interface guides the user step-by-step and is based on the
'Microsoft Windows' operating concept.
Switch on / off
To switch on the device, hold the On/Off key down for two seconds.
VIBXPERT is ready for operation when the start screen appears. To
switch off, press the On/Off key again for 2 seconds and confirm the
resulting query to switch off with 'YES'.
Reset:
Press the On/Off key for approx. 5 seconds until the device switches
off and restarts.
Navigation and editing
Select the screen elements with the cursor which can be moved by
the navigation keys. The selected element is highlighted. To confirm
the selection, press the 'Enter' key.
Some examples of navigation and editing are shown below:
Fields
Black frame => 'Measurement channel' field is selected.
Grey frame => Selection confirmed. The settings can now be
modified ('Channel A' or 'Channel B').
Getting started - Operation
Switching on VIBXPERT
Tree view
'Plus symbol' => The folder contains further subfolders/files. To
open a branch, press 'Enter' or the right navigation key.
To close a branch, press 'Enter' or the left navigation key.

2-4
Getting started - Operation
Menu
The functions of the current program section are found in the 'Menu'
which is displayed with the MENU key and hidden again with the
ESC key.
An arrow next to a menu entry indicates a further submenu. To
open it, press the right navigation key.
Help
Tips and operating instructions are available for every screen in the
program. Call up these help pages at any time by pressing the HELP
key and close them by pressing the HELP key again.

2-5
Interfaces
The connections for the sensor and data cables are located on the
front of the measurement device. The cable connectors and sockets
are colored for easy identification.
To unplug the connector, push the connector sleeve backwards to
release the lock. Only then should you remove the connector from
the device. Never pull directly on the cable!
Analog
The blue channels marked with 'A' and 'B' are used as the:
- Input for analog signals
- Charging socket for the battery (A or B)
The sensor cable is connected to the channel (A or B) set in the
measurement task.
The analog measurement channels are not electrically insulated.
For 2-channel measurement on two machines, check the potential
equalization (VDE 0100) or use electrically insulated sensors.
Top view
Attention!
Getting started - Interfaces
Colored circle with
dot marking
Socket with notch
Connector with
dot marking
BA
Analog
(A & B) Temperature
(type K)
Digital Communication
Sockets and cable connectors are colored
BA
First unlock,
then unplug!
BA

2-6
Getting started - Interfaces
Digital
The yellow channel is used as the:
- Input for digital signals from a trigger or a RPM sensor
- Serial interface for data transmission (RS 232)
- Output for the analog signal (connection for headphone/
oscilloscope)
- Output for stroboscope control (TTL signal)
The permissible range for trigger signals is:
-26V ... 0V (negative) or -5V ... +26V (positive).
Switching threshold positive: max. 2.5V rising
min. 0.6V falling
Switching threshold negative: min. -8V rising
max. -10V falling
The input signal must not exceed the switching threshold of the
positive and negative range as otherwise incorrect measurements
can occur.
Temperature
This interface is used for the connection of a thermo couple type K.
Communication
The green channel is used as the:
- Communication interface to the PC. The connection is established
via a network (Ethernet) or directly via a USB cable.
- USB printer port.
- Connection interface for an USB flash drive.
The network is configured in the 'Device Setup' (see 'Ethernet' on
page 2-34).
Attention!
BA
BA
BA

2-7
Getting started - Power supply
Power supply
VIBXPERT is supplied with energy by a Lithium-Ion rechargeable
battery. With the power on the the battery icon on the display
indicates the residual charge of the battery:
Note
VIBXPERT charger
VIB 5.320 INT
Follow the instructions for connection and disconnection of the
cable in the section ‘Interfaces’ (page 2-5).
The second free channel can in fact be used for measuring, but
electrical interference can lead to faulty measurements under cer-
tain circumstances!
Battery icon
Residual charge 100%
Residual charge 25%
Battery is being charged
Battery almost empty
If the battery is almost empty, a message appears on the display
and the blue LED flashes. The battery can be charged inside the
device using the VIBXPERT charger (VIB 5.320 INT).
Follow the safety instructions enclosed with the charger.
Charging the battery in the device
Connect the charger to one of the two analog input channels (A / B).
VIBXPERT can be operated during charging.
Attention!
Other manuals for VIBXPERT II
1
This manual suits for next models
1
Table of contents
Other Fluke Data Logger manuals

Fluke
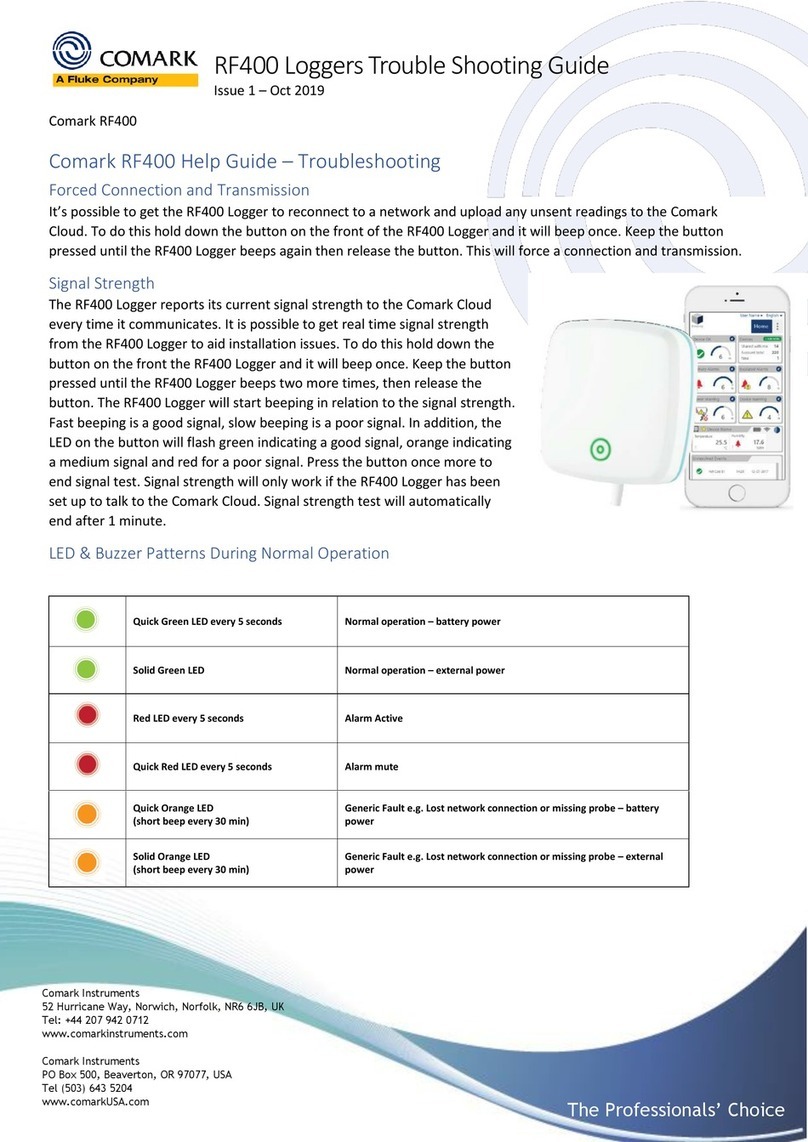
Fluke Comark RF300 Series User manual

Fluke
Fluke 1736/FPC User manual

Fluke
Fluke VR1710 Instruction manual

Fluke
Fluke 1750 Instruction manual

Fluke
Fluke 1743 User manual

Fluke
Fluke FL1730-BAS User manual

Fluke
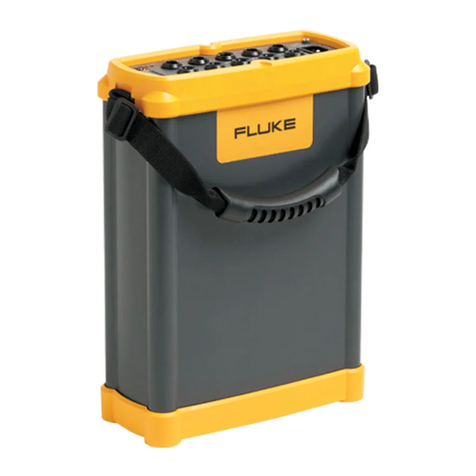
Fluke VIBXPERT 3 User manual

Fluke
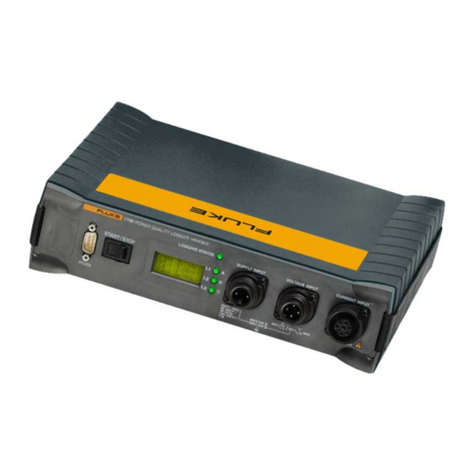
Fluke 434/PWR User manual

Fluke
Fluke 1742 User manual

Fluke
Fluke 1745 User manual