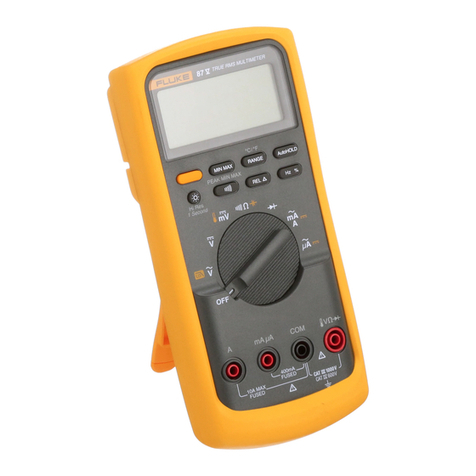
Fluke 87V MAX Use and care manual

January 2020
© 2020 Fluke Corporation. All rights reserved. Specifications are subject to change without notice.
All product names are trademarks of their respective companies. 1
87V MAX
Digital Multimeter
Calibration Information
Introduction
XWWarning
To prevent electric shock or injury, do not perform the
performance tests or calibration adjustment procedures unless
qualified to do so.
The information provided in this document is for the use of
qualified personnel only.
This document provides adjustment and performance test procedures for the
Fluke 87V MAX Digital Multimeter (the Meter).
See the 87V MAX Users Manual for complete operating instructions.
Contact Information
To contact Fluke, call one of the following telephone numbers:
•Technical Support USA: 1-800-44-FLUKE (1-800-443-5853)
•Calibration/Repair USA: 1-888-99-FLUKE (1-888-993-5853)
•Canada: 1-800-36-FLUKE (1-800-363-5853)
•Europe: +31 402-675-200
•Japan: +81-3-6714-3114
•Singapore: +65-6799-5566
•China: +86-400-921-0835
•Brazil: +55-11-3530-8901
•Anywhere in the world: +1-425-446-5500
Or, visit Fluke's website at www.fluke.com.
To register your product, visit http://register.fluke.com.
To view, print, or download the latest manual supplement, visit
http://us.fluke.com/usen/support/manuals.
Safety Information
General Safety Information is in the printed Safety Information document that
ships with the Product and at www.fluke.com. More specific safety information is
listed where applicable.

87V MAX
Calibration Information
2
General Specifications
Maximum voltage between any
terminal and earth ground ........................................... 1000 V rms
Fuse Protection for mA or μA inputs .......................... 0.44 A, 1000V, IR 10kA
Fuse Protection for A inputs........................................ 11 A, 1000 V, IR 17 kA
Display
Digital.......................................................................... 6000 counts, updates 4/sec / 19,999 counts in high-resolution
mode
Bargraph ..................................................................... 33 segments; updates 40/sec
Altitude
Operating .................................................................... 2000 meters
Storage ....................................................................... 10 000 meters
Temperature
Operating .................................................................... -15 °C to 55 °C, to -40 °C for 20 minutes when taken from 20 °C
Storage ....................................................................... -55 °C to 85 °C (without battery)
-55 °C to 60 °C (with battery)
Temperature coefficient ............................................... 0.05 X (specified accuracy) / °C (<18 °C or >28 °C)
Safety ............................................................................. IEC 61010-1: Pollution Degree 2
IEC 61010-2-033: CAT III 1000 V, CAT IV 600 V
Electromagnetic Compatibility (EMC)......................... In an RF field of 3 V/m, accuracy = specified accuracy +20
counts, except 600 μA dc range total accuracy = specified
accuracy +60 counts. Temperature not specified.
International ................................................................ IEC 61326-1: Portable Electromagnetic Environment
CISPR 11: Group 1, Class A
Group 1: Equipment has intentionally generated and/or uses conductively coupled radio frequency energy
that is necessary for the internal function of the equipment itself.
Class A: Equipment is suitable for use in all establishments other than domestic and those directly connected
to a low-voltage power supply network that supplies buildings used for domestic purposes. There may be
potential difficulties in ensuring electromagnetic compatibility in other environments due to conducted and
radiated disturbances.
Caution: This equipment is not intended for use in residential environments and may not provide adequate
protection to radio reception in such environments.
Emissions that exceed the levels required by CISPR 11 can occur when the equipment is connected to a test
object.
Korea (KCC) ............................................................... Class A Equipment (Industrial Broadcasting & Communication
Equipment)
Class A: Equipment meets requirements for industrial electromagnetic wave equipment and the seller or user
should take notice of it. This equipment is intended for use in business environments and not to be used in
homes.
USA (FCC).................................................................. 47 CFR 15 subpart B. This product is considered an exempt
device per clause 15.103. In an RF field of 3 V/M, accuracy =
specified accuracy +20 counts, except 600 μA dc range total
accuracy = specified accuracy +60 counts. Temperature not
specified
Relative Humidity.......................................................... 0 % to 95 % (0 °C to 35 °C)
0 % to 70 % (35 °C to 55 °C)
Digital Multimeter
Detailed Specifications
3
Battery Type .................................................................. 3 AA Alkaline batteries, NEDA 15A IEC LR6
Battery Life .................................................................... 800 hr typical without backlight (Alkaline)

Vibration ........................................................................ Per MIL-PRF-28800 for a Class 2 instrument
Size (H x W x L) ............................................................. 1.8 in x 3.7 in x 7.7 in (4.6 cm x 9.4 cm x 19.7 cm)
Size with Holster ........................................................... 2.4 in x 4.3 in x 8.5 in (6.0 cm x 10.1 cm x 21.5 cm)
Weight ............................................................................ 1.14 lb (517.1 g)
Weight with Holster and Flex-Stand............................ 1.54 lb (698.5 g)
IP Rating ........................................................................ IEC 60529: IP67
Detailed Specifications
For all detailed specifications:
Accuracy is specified for 2 years after calibration, at operating temperatures of 18 °C to 28 °C, with relative humidity at
0 % to 95 %. Accuracy specifications take the form of ±([% of Reading] + [Number of least-significant digits]).
For the 4 ½-digit mode, multiply the number of least-significant digits (counts) by 10.
AC Voltage
AC conversions are ac-coupled and valid from 3 % to 100 % of range.
Range Resolution Accuracy
45 – 65 Hz 15 – 200 Hz 200 – 440 Hz 440 Hz – 1 kHz 1 – 5 kHz 5 – 20 kHz
600.0 mV 0.1 mV
±(0.7 % + 4)
±(1.0 % + 4) [1]
±(2 % + 4) ±(2 % + 20) [2]
6.000 V 0.001 V
60.00 V 0.01 V
±(0.7 % + 2)
±(2 % + 4) [3] Unspecified
600.0 V 0.1 V Unspecified
1000 V 1 V Unspecified Unspecified
Low-Pass Filter ±(1.0 % + 4) [1] +1.0 % + 4
-6.0 % - 4 [4] Unspecified Unspecified Unspecified
[1] Below 30 Hz, use smoothing function. Below 20 Hz add 0.6 %.
[2] Below 10 % of range, add 12 counts.
[3] Frequency range: 1 to 2.5 kHz
[4] Specification increases from -1 % to -6 % at 440 Hz when filter is used.
DC Voltage, Conductance, and Resistance
Function Range Resolution Accuracy
mV dc 600.0 mV 0.1 mV ±(0.1 % + 1)
V dc
6.000 V 0.001 V
±(0.05 % + 1)
60.00 V 0.01 V
600.0 V 0.1 V
1000 V 1 V
Ω
600.0 Ω0.1 Ω±(0.2 % + 2) [2]
6.000 kΩ0.001 kΩ
±(0.2 % + 1)
60.00 kΩ0.01 kΩ
600.0 kΩ0.1 kΩ
6.000 MΩ0.001 MΩ
50.00 MΩ0.01 MΩ±(1.0 % + 1) [1]
nS 60.00 nS 0.01 nS ±(1.0 % + 10) [1,2]
[1] Add 0.5 % of reading when measuring above 30 MΩin the 50 MΩrange, and 20 counts below 33 nS in the 60 nS range.
[2] When using the rel function to compensate for offsets.

87V MAX
Calibration Information
4
Temperature
Range Resolution Accuracy [1,2]
-200 °C to +1090 °C
-328 °F to +1994 °F
0.1 °C
0.1 °F
±(1.0 % + 10)
±(1.0 % + 18)
[1] Does not include error of the thermocouple probe.
[2] Accuracy specification assumes ambient temperature stable to ±1 °C. For ambient temperature changes of ±5 °C, rated accuracy applies after 2
hours.
AC Current
Function Range Resolution Burden Voltage Accuracy[1]
(45 Hz – 2 kHz)
μA ac
600.0 μA 0.1 μA 100 μV/μA
±(1.0 % + 2)
6000 μA 1 μA 100 μV/μA
mA ac 60.00 mA 0.01 mA 1.8 mV/mA
400.0 mA [2] 0.1 mA 1.8 mV/mA
A ac 6.000 A 0.001 A 0.03 V/A
10.00 A [3,4] 0.01 A 0.03 V/A
[1] AC conversion are ac coupled and calibrated to the rms value of a sine wave input.
[2] 400 mA continuous. 600 mA for 18 hr maximum.
[5] W10 A continuous up to 35 °C. <20 minutes on, 5 minutes off at 35 °C to 55 °C. >10 A to 20 A for 30 seconds maximum, 5 minutes off.
[6] >10 A accuracy unspecified.
DC Current
Function Range Resolution Burden Voltage Accuracy
μA dc 600.0 μA 0.1 μA 100 μV/μA ±(0.2 % + 4)
6000 μA 1 μA 100 μV/μA ±(0.2 % + 2)
mA dc 60.00 mA 0.01 mA 1.8 mV/mA ±(0.2 % + 4)
400.0 mA [1] 0.1 mA 1.8 mV/mA ±(0.2 % + 2)
A dc 6.000 A 0.001 A 0.03 V/A ±(0.2 % + 4)
10.00 A [2,3] 0.01 A 0.03 V/A ±(0.2 % + 2)
[1] 400 mA continuous. 600 mA for 18 hr maximum.
[2] W10 A continuous up to 35 °C. <20 minutes on, 5 minutes off at 35 °C to 55 °C. >10 A to 20 A for 30 seconds maximum, 5 minutes off.
[3] >10 A accuracy unspecified.
Capacitance
Range Resolution Accuracy
10.00 nF 0.01 nF ±(1.0 % + 2) [1]
100.0 nF 0.1 nF
1.000 μF 0.001 μF
±(1.0 % + 2)
10.00 μF 0.01 μF
100.0 μF 0.1 μF
9999 μF 1 μF
[1] With a film capacitor or better, using the rel mode to zero residual.
Diode
Range Resolution Accuracy
2.000 V 0.001 V ±(1.0 % + 1)

Digital Multimeter
Detailed Specifications
5
Frequency
Range Resolution Accuracy
199.99 Hz 0.01 Hz
±(0.005 % + 1) [1]
1999.9 Hz 0.1 Hz
19.999 kHz 0.001 kHz
199.99 kHz 0.01 kHz
>200 kHz 0.1 kHz Unspecified
[1] From 0.5 Hz to 200 kHz and for pulse widths >2 μs.
Frequency Counter Sensitivity and Trigger Levels
Input Range Minimum Sensitivity (RMS Sine Wave) Approximate Trigger Level
(DC Voltage Function)
5 Hz – 20 kHz 0.5 Hz – 200 kHz
600 mV dc 70 mV (to 400 Hz) 70 mV (to 400 Hz) 40 mV
600 mV ac 150 mV 150 mV -
6 V 0.3 V 0.7 V 1.7 V
60 V 3 V 7 V (≤140 kHz) 4 V
600 V 30 V 70 V (≤14.0 kHz) 40 V
1000 V 100 V 200 V (≤1.4 kHz) 100 V
Duty Cycle (Vdc and mVdc)
Range Accuracy
0.0 % to 99.9 % [1] Within ±(0.2 % per kHz + 0.1 %) for rise times < 1 μs.
[1] 0.5 Hz to 200 kHz, pulse width >2 μs. Pulse width range is determined by the frequency by the frequency of the signal.
Input Characteristics
Function Overload
Protection[1]
Input
Impedance
(nominal)
Common Mode
Rejection Ratio
(1 kΩunbalance)
Normal Mode Rejection
1000 V rms
10 MΩ<100 pF
> 120 dB at dc, 50 Hz
or 60 Hz > 60 dB at 50 Hz or 60 Hz
1000 V rms > 120 dB at dc, 50 Hz
or 60 Hz > 60 dB at 50 Hz or 60 Hz
1000 V rms 10 MΩ< 100 pF
(ac-coupled) > 60 dB, dc to 60 Hz
Open Circuit
Test Voltage
Full Scale Voltage Typical Short Circuit Current
To 6 MΩ50 MΩor
60 nS 600 Ω6 kΩ60 kΩ600 kΩ6 MΩ50 MΩ
Ω1000 V rms <2.8 V dc <850 mV dc <1.3 V dc 500 μA 100 μA 10 μA 1 μA 0.2 μA 0.1 μA
1000 V rms <2.8 V dc 2.200 V dc 1.0 mA typical
[1] 106V Hz Max

87V MAX
Calibration Information
6
MIN MAX Recording
Nominal Response Accuracy
100 ms to 80 %
(dc functions) Specified accuracy ±12 counts for changes >200 ms in duration
120 ms to 80 %
(ac functions) Specified accuracy ±40 counts for changes >350 ms and inputs >25 % of range
250 μs (peak) [1]
Specified accuracy ±100 counts for changes >250 μs in duration
(add ±100 counts for readings over 6000 counts)
(add ±100 counts for readings in Low Pass mode)
[1] For repetitive peaks: 1 ms for single events.
Basic Maintenance
XWWarning
To prevent possible electrical shock, fire, or personal injury:
•Remove the input signals before you clean the Product.
•Do not operate the Product with covers removed or the case
open. Hazardous voltage exposure is possible.
•Use only specified replacement parts.
•Have an approved technician repair the Product.
General Maintenance
Periodically wipe the case with a damp cloth and mild detergent. Do not use
abrasives or solvents.
Dirt or moisture in the terminals can affect readings and can falsely activate the
Input Alert feature. Clean the terminals as follows:
1. Turn the Meter off and remove all test leads.
2. Shake out any dirt that may be in the terminals.
3. Soak a clean swab with mild detergent and water. Work the swab around in
each terminal. Dry each terminal using canned air to force the water and
detergent out of the terminals.

Digital Multimeter
Basic Maintenance
7
hStatic Awareness h
XSemiconductors and integrated circuits can be damaged by electrostatic
discharge during handling. This notice explains how to minimize damage to
these components.
1. Understand the problem.
2. Learn the guidelines for proper handling.
3. Use the proper procedures, packaging, and bench techniques.
Follow these practices to minimize damage to static sensitive parts.
XW Warning
To prevent electric shock or personal injury. De-
energize the product and all active circuits before
opening a product enclosure, touching or handling
any PCBs or components.
•Minimize handling.
•Handle static-sensitive
parts by non-conductive
edges.
•Do not slide static-
sensitive components
over any surface.
•When removing plug-in
assemblies, handle only
by non-conductive
edges.
•Never touch open-edge
connectors except at a
static-free work station.
•Keep parts in the original
containers until ready for
use.
•Use static shielding
containers for handling
and transport.
•Avoid plastic, vinyl, and
Styrofoam®in the work
area.
•Handle static-sensitive
parts only at a static-
free work station.
•Put shorting strips on
the edge of the
connector to help
protect installed static-
sensitive parts.
•Use anti-static type
solder extraction tools
only.
•Use grounded-tip
soldering irons only.

87V MAX
Calibration Information
8
Fuse Test
As shown in Figure 1, with the Meter in the function, insert a test lead into
the jack and place the probe tip on the other end of the test lead against the
metal of the current input jack. If “” appears in the display, the probe tip has
been inserted too far into the amps input jack. Back the lead out a bit until the
message disappears and either OL or a resistance reading appears in the
display. The resistance value should be as shown in Figure 1. If the tests give
readings other than those shown, have the Meter serviced.
XWWarning
To prevent possible electrical shock, fire, or personal injury:
•Replace a blown fuse with exact replacement only for continued
protection against arc flash.
•Use only specified replacement fuses.
Touch top half
of input contacts
Good F1 fuse: 00.0 Ωto
00.5 Ω
Replace fuse: OL
Good F2 fuse: 0.995 kΩto
1.005 kΩ
Replace fuse: OL
gaq105.emf
Figure 1. Current Fuse Test
How to Replace the Batteries
Replace the batteries with three AA batteries (NEDA 15A IEC LR6).
XWWarning
To prevent possible electrical shock, fire, or personal injury:
•Batteries contain hazardous chemicals that can cause burns
or explode. If exposure to chemicals occurs, clean with
water and get medical aid.
•Repair the Product before use if the battery leaks. Battery
leakage may create a shock hazard or damage the Product.
•Do not put battery cells and battery packs near heat or fire.
Do not put in sunlight.
•MSHA approved for use with three Energizer P/N E91 or
three Duracell P/N MN1500 1.5 volt, “AA” alkaline batteries
only. All cells are to be replaced at the same time with
identical part number cells in fresh air locations only.

Digital Multimeter
Basic Maintenance
9
Replace the battery as follows, refer to Figure 2:
1. Turn the rotary switch to OFF and remove the test leads from the terminals.
2. Remove the six Phillips-head screws from the case bottom and remove the
battery door ().
Note
While lifting the battery door, ensure the rubber gasket stays
attached to the battery compartment barrier.
3. Remove the three batteries and replace all three with AA Alkaline batteries
().
4. Ensure the battery compartment gasket () is properly installed around the
outside edge of the battery compartment barrier.
5. Replace the battery door by aligning the battery compartment barrier with
battery compartment.
6. Secure the door with the six Phillips-head screws.
How to Replace the Fuses
Referring to Figure 2, examine or replace the Meter's fuses as follows:
1. Turn the rotary switch to OFF and remove the test leads from the terminals.
2. Refer to step 2 under the How to Replace the Batteries section above to
remove the battery door.
3. Remove the fuse compartment seal () from the fuse compartment.
4. Gently lift out the fuse compartment door () from the fuse compartment.
5. Remove the fuse by gently prying one end loose, then sliding the fuse out of
its bracket ().
6. Install ONLY specified replacement fuses with the amperage, voltage, and
speed ratings shown in Table 5. The 440-mA fuse is shorter than the 10-A
fuse. For correct placement of each fuse, note the marking on the printed
circuit board under each fuse.

87V MAX
Calibration Information
10
7. Replace the fuse compartment door by aligning the arrow on the fuse door
with the arrow on the case bottom and lowering the door into the fuse
compartment.
8. Replace the fuse compartment seal by aligning the tab on the seal with the
outline on the case bottom. Ensure the seal () is properly seated.
9. Refer to steps four through six under the Replacing the Batteries section
above to reinstall the battery door.
1
4
5
6
2
3
gaq10.emf
Figure 2. Battery and Fuse Replacement

Digital Multimeter
Performance Tests
11
Performance Tests
XWWarning
To prevent electric shock, do not perform the performance test
procedures unless the Meter is fully assembled.
The following performance tests verify the complete operation of the Meter and
check the accuracy of each Meter function against its specifications.
Performance tests should be performed bi-annually to ensure that the Meter is
within accuracy specifications. If the Meter fails any part of the test, calibration
adjustment and/or repair is indicated.
In the performance tests, the Meter is referred to as the device under test (DUT).
Required Equipment
Table 1 lists the equipment required to conduct a performance test on the Meter.
Table 1. Required Equipment
Recommended Equipment Measurement Function Accuracy
5520A Multi-product Calibrator
(or equivalent)
DC Volts 0 to 1000 V
±0.012 %
DC Current 350 μA to 2 A
±0.05 %
AC Volts 0 to 1000 V
±0.15 % @ 60 Hz to 20 kHz ±3 %
AC Current 350 μA to 2 A
±0.39 % @ 60 Hz to 1 kHz
Resistance 1 Ωto 100 MΩ
±0.06 %
Capacitance 9 to 900 μF
±0.475 %
Frequency 19.999 to 199.99 kHz, ±0.0137 %
150 mV to 6 Vrms, ±5 %
K-type Thermocouple, mini-plug
on both ends
Temperature

87V MAX
Calibration Information
12
Testing Meter Accuracy
To test the accuracy of the Meter, perform the steps in Table 2.
Table 2. Accuracy Tests
Step Test
Function Range 5520A Output Display Reading
1
AC Volts
600 mV 60 mV, 60 Hz 59.2 to 60.8
2 600 mV 330 mV, 60 Hz 327.3 to 332.7
3 600 mV 600 mV, 13
kHz
586.0 to 614.0
4 6 V 675 mV, 60 Hz 0.666 to 0.684
5 6 V 3.3 V, 60 Hz 3.273 to 3.327
6 6 V 3.3 V, 20 kHz 3.214 to 3.386
7 60 V 6.75 v, 60 Hz 6.68 to 6.82
8 60 V 33 V, 60 Hz 32.75 to 33.25
9 60 V 33 V, 20 kHz N/A
10 60 V 33 V, 5 kHz N/A
11 600 V 67.5 V, 60 Hz 66.8 to 68.2
12 600 V 330 V, 60 Hz 327.5 to 332.5
13 600 V 330 V, 2.5 kHz 323.0 to 337.0
14 1000 V 100 V, 60 Hz 97 to 103
15 1000 V 1000 V, 1 kHz 986 to 1014
16
AC Volts
Frequency
600 mV 150 mV, 99.95
kHz
99.93 to 99.97
17 600 mV 150 mV,
199.50 kHz
199.48 to 199.52
18 Sensitivity6 V 0.7 V, 99.95
kHz
99.93 to 99.97
19 60 V 7 V, 99.95 kHz 99.93 to 99.97
20
Trigger level
6 V 3.4 V, 1 kHz
Sq. Wave
999.8 to 1000.2
21
Duty Cycle
6 V 5 V, 1 kHz, DC
offset 2.5 V
Sq. Wave
49.7 % to 50.3 %
22
DC Volts
6 V 3.3 V dc 3.297 to 3.303
23 60 V 33 V dc 32.97 to 33.03
24 600 V 330 V dc 329.7 to 330.3
25 1000 V 1000 V dc 998 to 1002

Digital Multimeter
Performance Tests
13
Table 2. Accuracy Tests (cont.)
Step Test
Function Range 5520A Output Display Reading
26
DC Volts
600 mV 50 mV dc 49.8 to 50.2
27 600 mV 330 mV dc 329.6 to 330.4
28
Ohms
600 Ω330 Ω(Use 2 wire Comp) 329.1 to 330.9
29 6 kΩ3.3 kΩ(Use 2 wire Comp) 3.292 to 3.308
30 60 kΩ33 kΩ32.92 to 33.08
31 600 kΩ330 kΩ329.2 to 330.8
32 6 MΩ3.3 MΩ3.292 to 3.308
33 50 MΩ30 MΩ29.69 to 30.31
34 nS
Conductance
60 nS 100 MΩ9.60 to 10.40
35
Diode
6 V 2.0 V dc 1.979 to 2.021
36
AC Amps
6 A 3.0 A, 60 Hz 2.968 to 3.032
37
DC Amps
6 A 3.0 A 2.990 to 3.010
38
AC Milliamps
60 mA 33 mA, 60 Hz32.65 to 33.35
39 400 mA 330 mA, 60 Hz326.5 to 333.5
40
DC Milliamp
60 mA 33 mA 32.89 to 33.11
41 400 mA 330 mA 329.1 to 330.9
42
AC Microamps
600 μA 330 μA, 60 Hz 326.5 to 333.5
43 6000 μA 3300 μA, 60 Hz 3265 to 3335
44
DC Microamps
600 μA 330 μA 328.9 to 331.1
45 6000 μA 3300 μA 3291 to 3309
46
Capacitance
10 nf Open input 10.28 to 0.48
47 100 nf 5 nf 2 4.7 to 5.3
48 100 μf 9.5 μf 9.2 to 9.8
49
Low Pass Filter
1000 V 400 V, 400 Hz 372 to 408
50 1000 V 400 V, 800 Hz 3226 to 340
51 VDC Peak Min/Max 6 V 8 Vpp, 2 kHz Sq. Wave,
DC offset 2 V
Min = -1.898 to -2.102
Max = 5.896 to 6.104

87V MAX
Calibration Information
14
Table 2. Accuracy Tests (cont.)
Step Test
Function Range 5520A Output Display Reading
52 mVdc
Temperature 4
0 °C -1.0 to 1.0
53 100 °C 98.0 to 102.0
54 Backlight Press backlight button Backlight comes on
55 Press backlight button Backlight intensifies
56 Press backlight button Backlight goes off
[1] Remove test leads from unit.
[2] Use REL to compensate for internal Meter and lead capacitance (must disconnect test leads from calibrator before pushing REL)
[3] The Meter accuracy is not specified at this input signal frequency with Low-pass filter selected. The display reading shown, checks
that the Low-pass filter is active and follows an expected roll-off curve.
[4] To ensure accurate measurement, the Meter and thermocouple adapter must be at the same temperature. After connecting the
thermocouple adapter to the Meter allow for reading to stabilize before recording display reading.
Calibration Adjustments
Perform the Calibration Adjustment Procedure if the Meter fails any performance
tests. If the adjustment routine is discontinued prior to completion, no changes
are made to the calibration constants that are stored in memory. The following is
an explanation of the pushbutton features and requirements to enter the CAL
mode.
Cal Mode Pushbutton Functions
•The CAL mode will be initiated by holding down the MINMAX pushbutton at
power up and entering a four-digit password.
•The AutoHOLD pushbutton will act as an "ENTER" key and will advance
through the CAL initiation and adjustment procedure steps.
•The pushbuttons are used to select a four-digit password.
During initiation of the CAL mode, a display count will show how many times
calibration constants have been written to memory.
Entering and Displaying the Four-Digit Password
When the Meter was manufactured it was given a default password of 1234. The
following pushbuttons are used to select the password. Each pushbutton
represents the indicated digit.
Yellow = 1 MINMAX = 2 RANGE = 3 AutoHOLD = 4
Backlight = 5 Continuity = 6 REL = 7 Hz = 8
After selecting the password, the user has two choices:
Pressing AutoHOLD will display "" which indicates correct password and
successful entry. You may now proceed with the first calibration step.
Pressing RANGE will display "", which indicates correct password, proceed
to select a new password.
If the password is incorrect, the concluding AutoHOLD or RANGE pushbutton
press will instead cause the Meter to double beep and the display will show
"". The password entry process was unsuccessful and can be tried again or
you may exit this mode by turning the Meter off.

Digital Multimeter
Calibration Adjustments
15
Changing the Password
To change the password in the Meter:
1. Turn the Meter Rotary Switch from OFF to VAC mode while holding down the
MINMAX pushbutton at the same time. The Meter will display Y.
2. Press the AutoHOLD pushbutton twice. The display should show ""
3. Using the pushbuttons select the old password (do not use AutoHOLD to
save the password)
4. Press the RANGE pushbutton. The Meter should display "_ _ _ _".
5. Use the pushbuttons to select a desired new password.
6. Press AutoHOLD to save the new password.
Restoring the Default Password
If the password has been forgotten, the default password (1234) can be restored
by performing the following:
1. Turn the rotary switch of the Meter to OFF.
2. Remove the bottom case and bottom shield of the Meter.
3. Check the revision number on the PCB. Board revision location is identified in
Figures 3 and 4 below.

87V MAX
Calibration Information
16
If the revision number is 010:
4. Remove the PCB from the top case.
5. Apply power to the PCB by clipping on a dc voltage between 3.5 V and 5 V at
the test points marked “+” and “-” at the edge of the board. See Figure 3.
5
TP2
TP1
S7
S11
3.5 - 5 V
6
6
7
8
7
2X-2- 3001 REV 010
2X-2- 3001 R EV 010
gaq101.emf
Figure 3. Revision 010 Board Layout
6. While shorting across keypad button S7, turn the rotary switch one position
clockwise. See Figure 3.
7. Short across keypad button S11. See Figure 3.
8. Turn the rotary switch one position counterclockwise, back to its original
position.
9. The default password is now restored.
10. Reassemble the Meter before performing adjustments or testing.

Digital Multimeter
Calibration Adjustments
17
If the revision number is 011 or higher:
4. Apply power to the PCB by clipping on a dc voltage between 3.5 V and 5 V at
the test points marked “+” and “-” at the edge of the board. See Figure 4.
4
3.5 - 5 V
5
6
2X-2- 3001 REV 011
2X-2- 3001 REV 0 11
gaq102.emf
Figure 4. Revision 011 Board Layout
5. Turn the rotary switch from OFF to while holding down MIN MAX at the
same time. The Meter should display CAL.
6. Short across keypad button S11 on the back of the PCB. See Figure 4. The
Meter should beep.
7. Turn the rotary switch one position counterclockwise, back to the OFF
position.
8. The default password is now restored.
9. Reassemble the Meter before performing adjustments or testing.

87V MAX
Calibration Information
18
Other Pushbutton Functions
Table 3 list the button on the Meter and describes what the button does when
pressed after the password has been entered and pressed.
Table 3. Pushbutton Functions During Cal Mode
Button Cal Mode Description
(yellow)
Press and hold to test the present function. The measurement is not calibrated so it may be
inaccurate. This is normal.
Press and hold to display the required input level.
Press and hold to display the frequency of the input signal.
Press to store the new calibration adjustment value and advance to the next step. This
pushbutton is also used to exit calibration adjustment mode after the calibration adjustment
sequence is complete.
Calibration Adjustment Procedure
In the following procedure, some adjustment steps take longer to execute than
others (10 to 15 Seconds). For some of these steps the Meter gives a double
beep to indicate completion. Not all steps have this feature.
1. Turn the rotary switch of the Meter from OFF to while holding down
at the same time. The Meter should display .
2. Press once to see the number of calibrations that have been
completed. Press again to enable password entry. The Meter should
display "".
3. Use the keypad pushbuttons to enter the existing password and press .
The Meter should display Y.
4. Apply the value listed in Table 4 for each calibration step, and/or (optional)
press the to display the required input signal level and press to
display the required input signal frequency.
Note
After pressing , wait until the step number advances before
changing the calibrator source or turning the rotary switch of the
Meter. If the reference source input is not within an anticipated range
of the required value, the Meter will emit a double beep and not
allow completion of the step. Set the calibrator to standby prior to
changing the function switch position and or after completing
adjustment of each function. If the calibration adjustment is not
completed correctly, the Meter will not operate correctly.

Digital Multimeter
Calibration Adjustments
19
Table 4. Calibration Adjustment Steps
Function
(Switch Position) Adjustment Step Input Value
(AC Volts)
C-01 600.0 mV, 60 Hz
C-02 600.0 mV, 20 kHz
C-03 6.000 V, 60 Hz
C-04 6.000 V, 20 kHz
C-05 60.00 V, 60 Hz
C-06 60.00 V, 20 kHz
C-07 600.0 V, 60 Hz
C-08 600.0 V, 10 kHz
(DC Volts)
C-09 6.000 V
C-10 60.00 V
C-11 600.0 V
(DC Millivolts)
C-12 600.0 mV
C-13 60.00 mV
(Ohms)
C-14 600.0 Ω
C-15 6.000 kΩ
C-16 60.00 kΩ
C-17 600.0 kΩ
C-18 6.000 MΩ
C-19 0.000 Ω
C-20 50.0 MΩ
(Diode Test) C-21 3.000 V
(Amps)
C-22 6.000 A, 60 Hz
C-23 6.000 A dc
(Amps)
C-24 60.00 mA, 60 Hz
C-25 400.0 mA, 60 Hz
C-26 60.00 mA dc
C-27 400.0 mA dc
(Microamps)
C-28 600.0 μA, 60 Hz
C-29 6000 μA, 60 Hz
C-30 600.0 μA dc
C-31 6000 μA dc

87V MAX
Calibration Information
20
Disassembling the Meter
To disassemble the Meter:
1. Use a Philips screwdriver to remove the six battery-door screws (H1).
2. Lift the battery door (MP1) at the top end of the Meter and remove it from the
case back.
3. Remove three AA batteries.
4. Remove the fuse access door (MP4).
5. Remove the fuse cap (MP5).
6. Use a Philips screwdriver to remove the bottom-case screws (H2) with their
0-rings (H3).
7. Separate the bottom case (MP6) from the top case (MP19).
8. Use a Philips screwdriver to remove the bottom-shield screw (H4).
9. Remove the bottom shield (MP9) from the Meter.
10. Use a Philips screwdriver to remove four PCA input screws (H5).
11. Use a Philips screwdriver to remove six PCA screws (H4) from the board.
12. Remove the PCA from the top case.
13. Remove the top shield (MP13) from the top case.
14. Remove the elastomeric (MP10) from the top shield.
15. Unsnap mask (MP15) from the top shield (MP13).
16. Remove the LCD (DS1) from the top shield.
17. Remove the backlight (MP14) from the top shield.
18. Remove the keypad (MP18) from the top case.
19. Remove the RSOB spacer (MP16) from the top case.
20. Remove the E-clip holding the spring detent (MP17) from the top case.
21. Remove the sprint detent from the top case.
22. Remove the knob (MP20) from the top case.
Other manuals for 87V MAX
1
Table of contents
Other Fluke Multimeter manuals

Fluke
Fluke 116 User manual

Fluke
Fluke 8860A User manual

Fluke
Fluke Series II User manual

Fluke
Fluke 87 TRUE RMS MULTIMETER User manual

Fluke
Fluke 28 II Ex Parts list manual

Fluke
Fluke 77 User manual

Fluke
Fluke 114 User manual

Fluke
Fluke 867B User manual

Fluke
Fluke 110 Use and care manual

Fluke
Fluke 8508A User manual

Fluke
Fluke 287C Use and care manual

Fluke
Fluke 771 Use and care manual

Fluke
Fluke 8050A User manual

Fluke
Fluke 15B MAX Use and care manual

Fluke
Fluke 1587 User manual

Fluke
Fluke 80 Series V User manual

Fluke
Fluke 11/12 User manual

Fluke
Fluke 87V/IMSK User manual

Fluke
Fluke 116 User manual

Fluke
Fluke 187 User manual