Forest AV FOR-DS100 User manual

iPad & Tablet
Teleprompter Kit
Instruction Manual v1.2
Model: FOR-DS100
FOREST AV
FOREST-AV.com
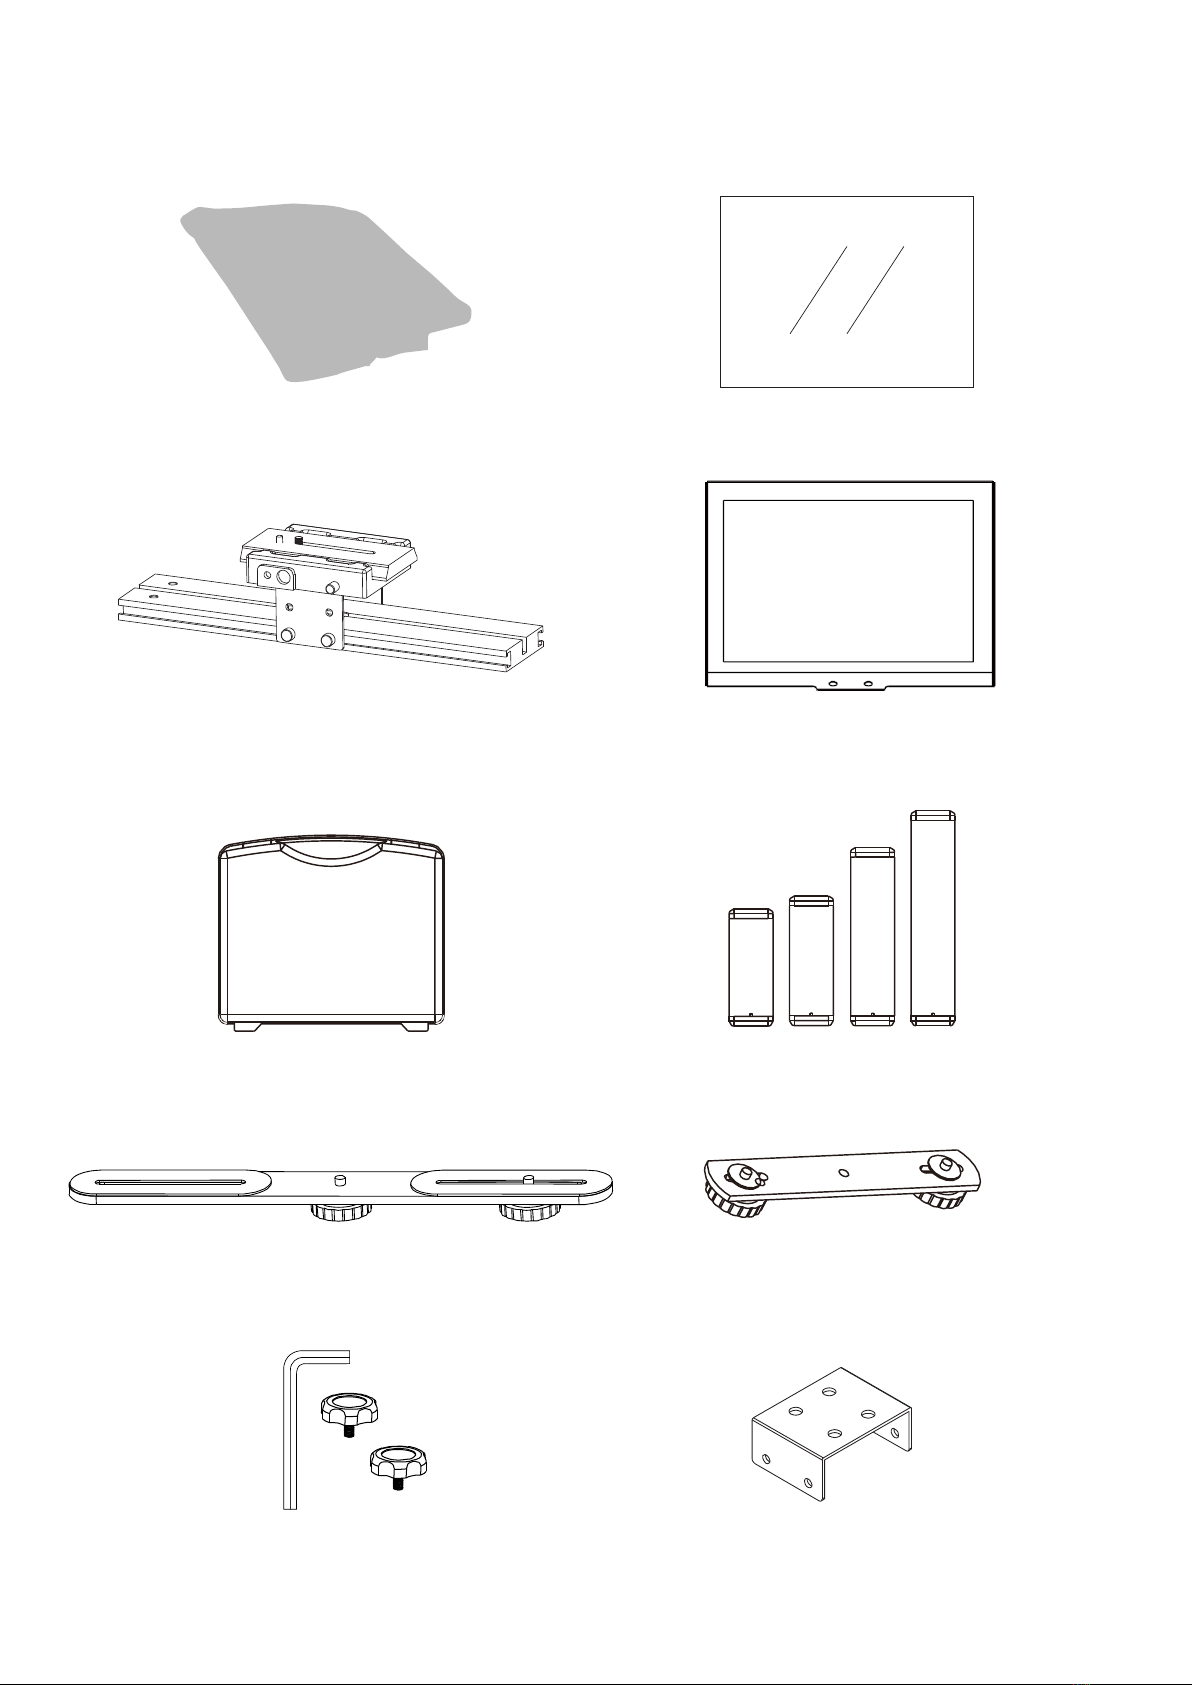
Contents
Cloth Lens Cover Hood with Velcro strips Premium 70/30 HD Beam Splitter Glass
Baseplate Assembly Glass Frame
Custom Fit Case Expanding Tablet / Mobile Clamps
Long Extension Bar Short (mobile) Extension Bar
2x Glass Frame Screws 1x Allen Keys Short Rise Plate
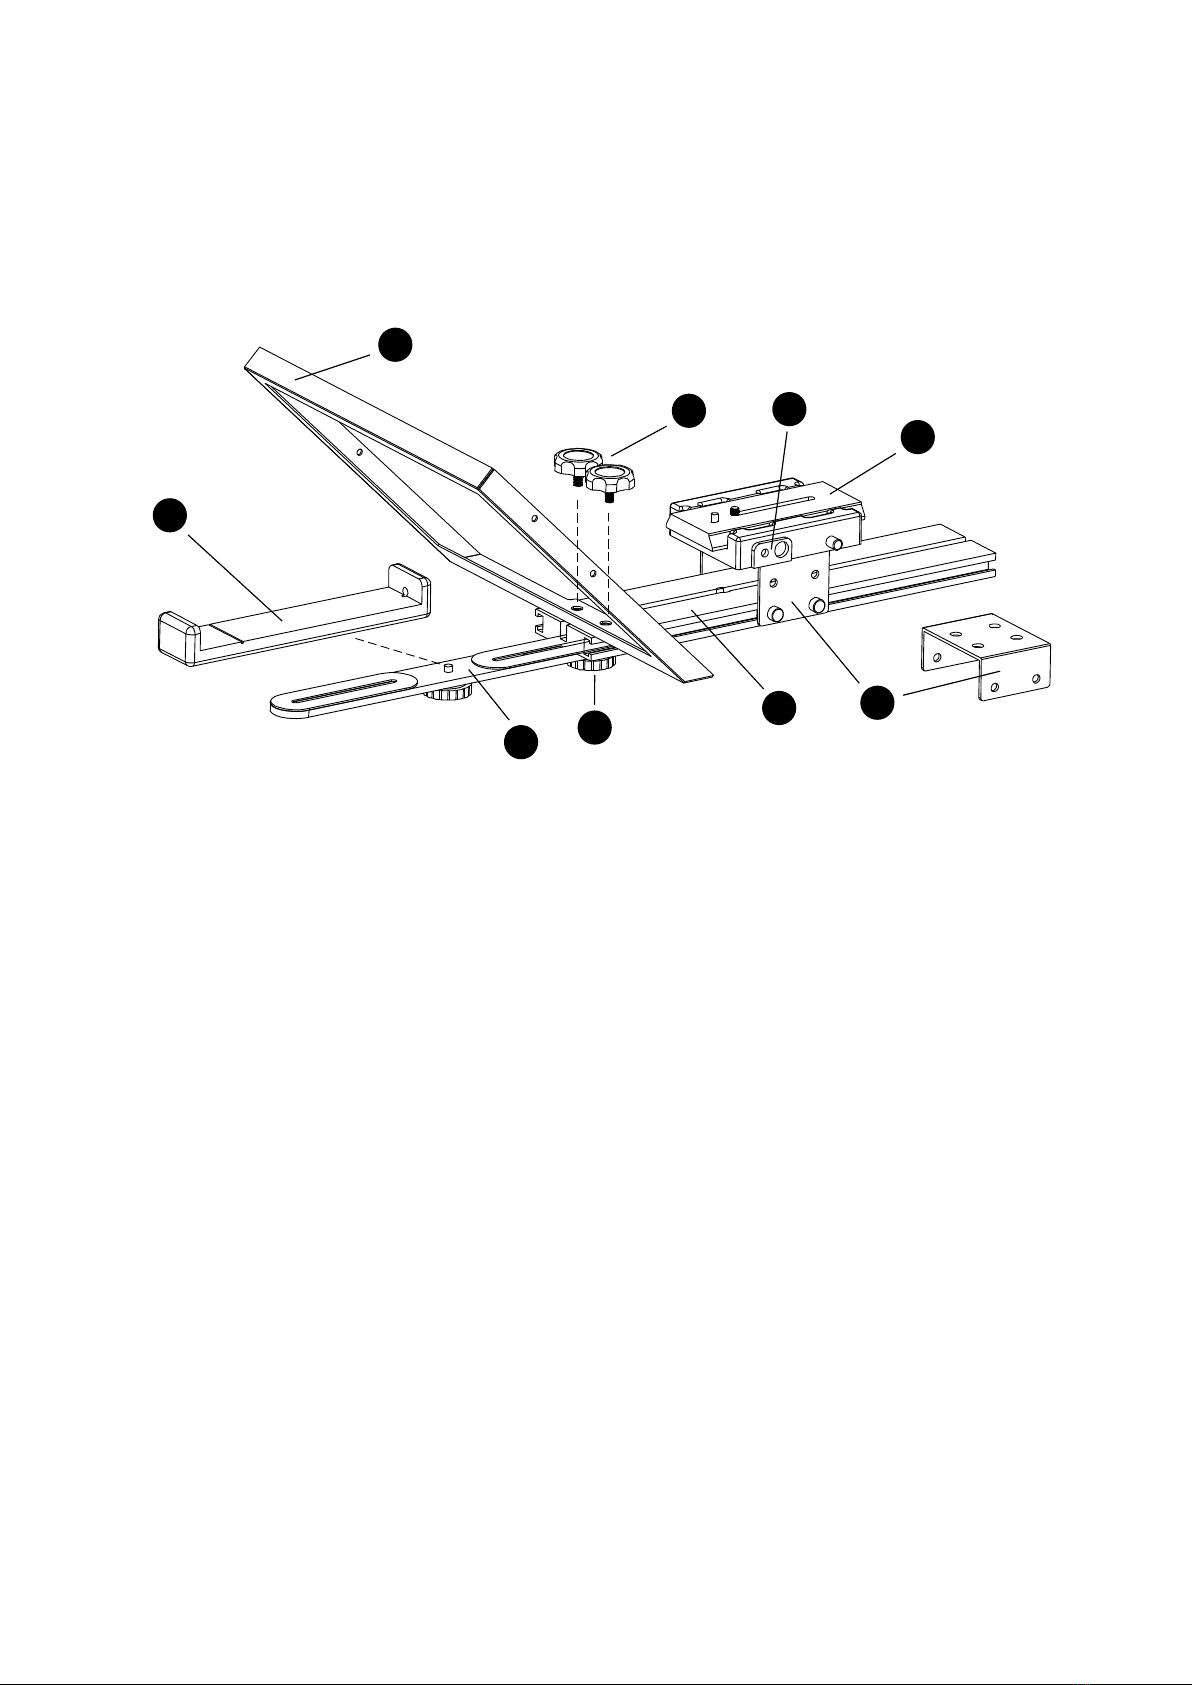
Assembly Instructions
Please follow below instructions to assemble your Teleprompter for use.
1. Attach long extension bar (D) to the first screw hole on the underside of baseplate (B) using
the hand tighten screw (H).
2. If you are using the Teleprompter with a Tripod; Attach the underside of baseplate (B) to
your tripods quick-release plate. Then, attach your tripods quick-release plate to your tripod
and lock.
3. Attach the glass frame (A) to topside of baseplate (B) using the two hand tighten screws (C).
4. Depending on the size of the tablet you will be using to display your script; Attach one of the
four tablet clamps provided (E) to the center screw of long extension bar (D).
5. Remove the quick-release plate (F) from the baseplate assembly by loosening (anti-
clockwise) the red locking clip. Press the red release pin to remove the plate.
6. Attach your video camera to the quick-release plate (F) using either the 1/4” or 3/8” screw.
The baseplate assembly also has two threads (J), which can be used to hold the unused screw.
Refit the quick-release plate (F) to the baseplate assembly and tighten the red locking clip
(clockwise).
If you are using a mobile to record, please also see the following section ‘using your mobile
to record video’.
A
D
C
G
F
B
E
H
J

7. Attach quick-release plate (F) back to its holder and tighten the red locking clip. If you are
unable to turn the clip due to obstruction, simply pull the red clip and turn to change the clips
direction.
If you need to lower the camera lens position
Baseplate (G) can be swapped with a supplied short rise plate should you need to lower the
camera lens position. To change the baseplate plate;
1) Unscrew the four side screws and slide the baseplate (G) out of the baseplate (B)
2) Using supplied Allen key, remove the four screws holding the baseplate to the
quick-release plate holder.
3) Swap the baseplate (G) as needed and refit all screws.
8. Place your tablet into the selected extendable clamp (E).
9. Attach the reflective glass to the glass frame (A) - Velcro strips on the glass edges and on the
glass frame will hold it in place. Ensure that the small circle sticker on the glass faces the
presenter and the other side faces the camera.
10. Attach the black clock hood to the glass frame (A) by marrying the Velcro strips. Tighten the
cord around your camera lens by pressing the cord clip and releasing when tight.
Note: If using a mobile to record; the hood can be placed loosely around the mobile,
complete cover is not required.
If glass frame (A) does not have Velcro strips attached to the outer edges:
Your kit may come without the Velcro strips already attached to the outer edge of the glass
frame. In which case, Velcro strips with tape backing will be supplied. Simply remove the
tape backing and stick the Velcro pieces to the glass frame as below.
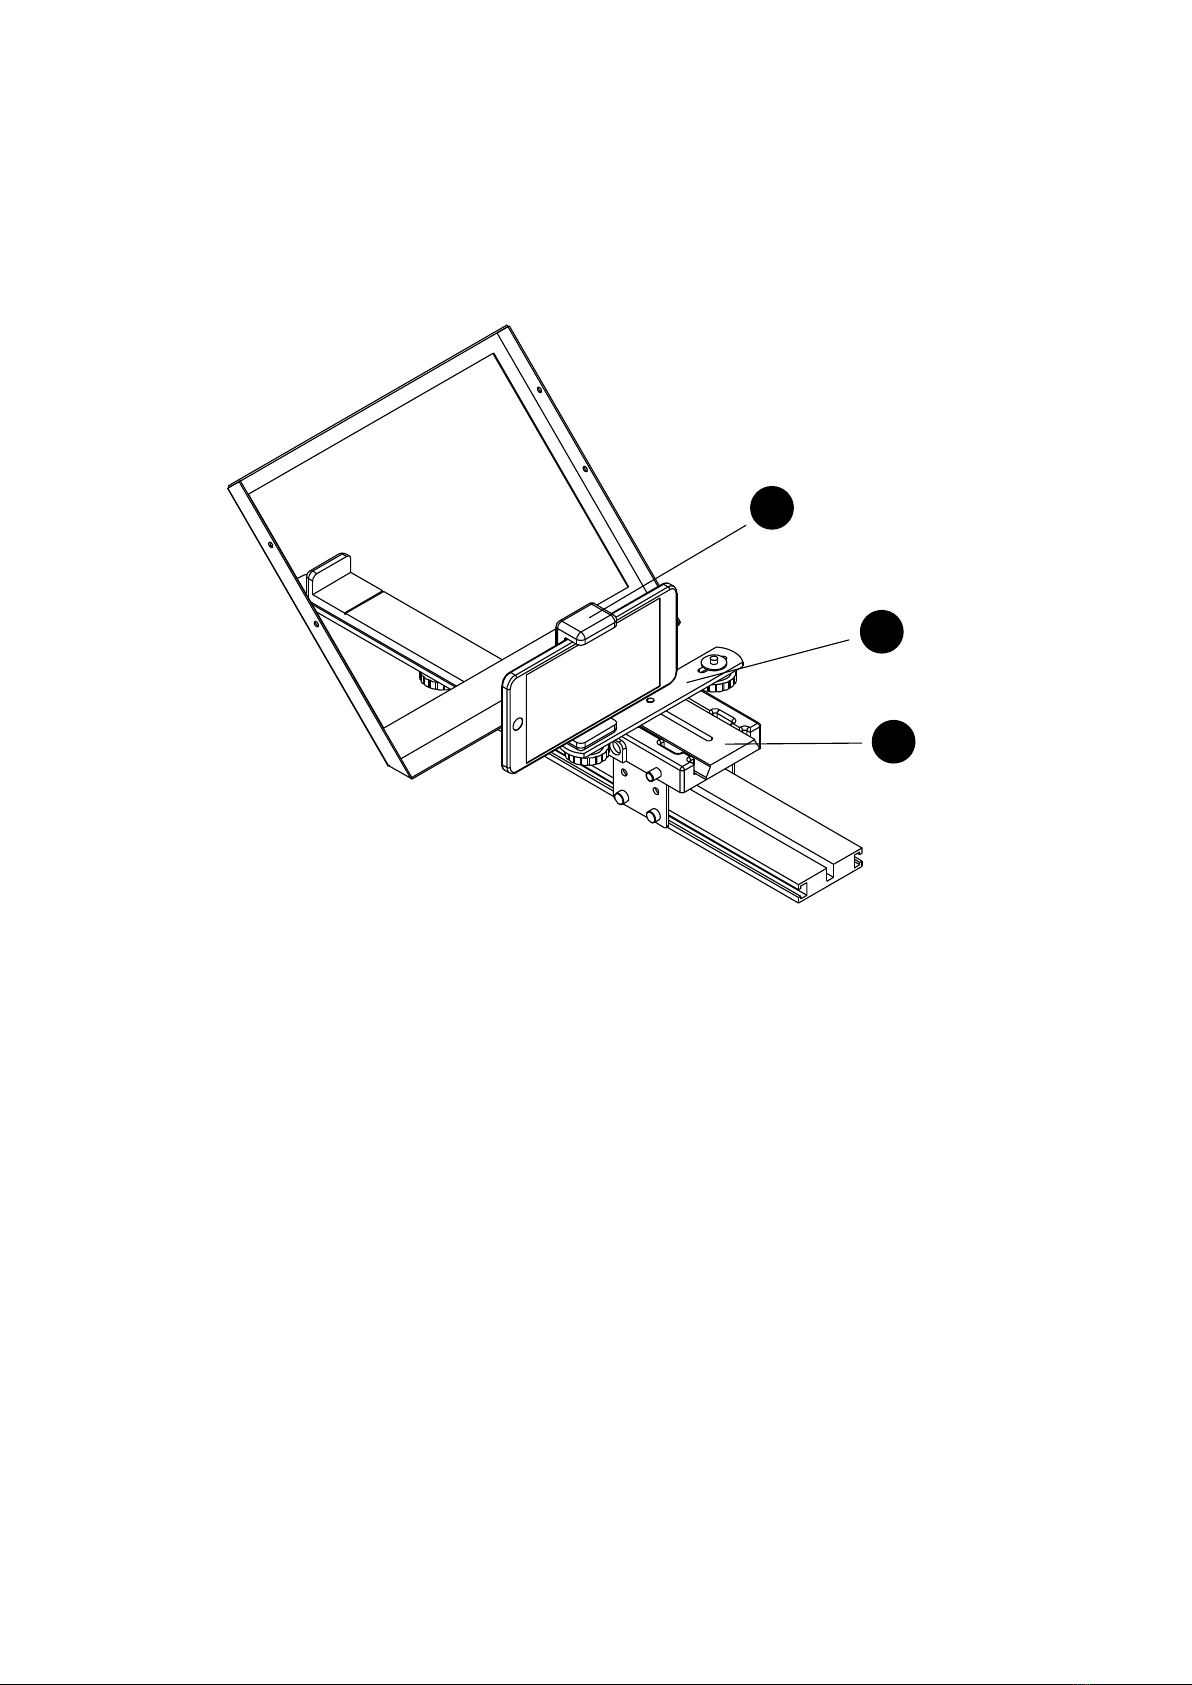
Using your mobile to record video
If you are using a mobile phone to record video, please follow the below additional instructions.
1. Attach the short extension bar (K) to the top of base plate (H) using the 1/4” screw.
2. Attach one of the expanding mobile clamps (M) to the extension bar (K) using the hand
tighten screws.
3. Place your mobile into the expanding clamp (M), ensuring that the rear camera faces the glass
and the camera lens is at the bottom (near extension bar).
Note: Not suitable for wide angle lenses.
M
K
H

Glass Care
This product contains a sheet of 70/30 mirror glass. To avoid damage or injury please handle with
care when assembling or disassembling the product.
Glass can be cleaned using warm soapy water and a cotton or microfiber cloth. You can also use
isopropyl alcohol (rubbing alcohol). Do not use household cleaning products; they could permanently
damage the reflective coating on the glass.
App Download
Using a Teleprompter App* on your Tablet – Simply add your text to the App, set the scroll speed
and press start. Your scrolling text is displayed on the reflective glass for you to read while looking
directly at the camera lens.
* Free and paid Teleprompter Apps are available on App stores. Ensure you select one that has text ‘mirroring’ option.
Table of contents
Other Forest AV Professional Video Accessories manuals


