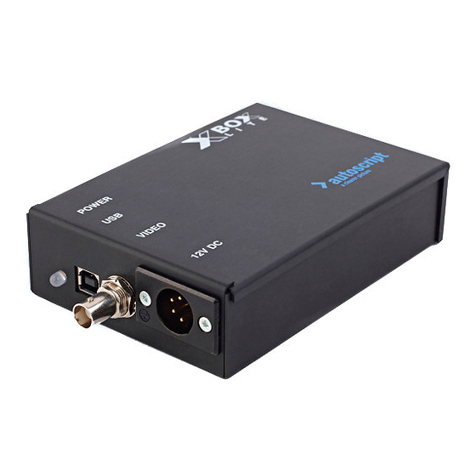
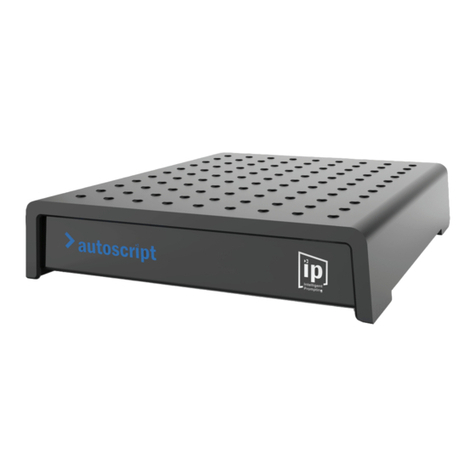
Autoscript X-Box Ultra WP-NXU User manual

WP-SXU
X-Box Ultra
USB Prompter Device
X-Box Ultra
USB Prompter Device
Part Nos. WP-NXU
www.autoscript.tv
EN
WP-NXU-SDI
WP-SXU-SDI

Copyright © 2014
All rights reserved.
Original Instructions: English
All rights reserved throughout the world. No part of this document may be stored in a retrieval system,
transmitted, copied or reproduced in any way, including, but not limited to, photocopy, photograph,
magnetic or other record without the prior agreement and permission in writing of the Vitec Group plc.
Disclaimer
The information contained in this manual is believed to be correct at the time of printing. Vitec Videocom
Ltd reserves the right to make changes to the information or specifications without obligation to notify any
person of such revision or changes. Changes will be incorporated in new versions of the publication.
We are making every effort to ensure that our manuals are updated on a regular basis to reflect changes
to product specifications and features. Should this manual not contain information on the core functionality
of your product, please let us know. You may be able to access the latest revision of this manual from our
website.
Vitec Videocom Ltd reserves the right to make changes to product design and functionality without
notification.
Trademarks
All product trademarks and registered trademarks are the property of The Vitec Group Plc.
All other trademarks and registered trademarks are the property of their respective companies.
Published by:
Vitec Videocom Ltd
Supports Technical Publications Department
Western Way, Bury St Edmunds
Suffolk IP33 3TB
United Kingdom
Email: [email protected]

1
Contents
Safety. . . . . . . . . . . . . . . . . . . . . . . . . . . . . . . . . . . . . . . . . . . . . . . . . . . . . . . . . . . . . . . . . . . . . . . . . . . . 2
About this Guide. . . . . . . . . . . . . . . . . . . . . . . . . . . . . . . . . . . . . . . . . . . . . . . . . . . . . . . . . . . . . . . . . . . 3
Components and Connections . . . . . . . . . . . . . . . . . . . . . . . . . . . . . . . . . . . . . . . . . . . . . . . . . . . . . . . 4
Box Contents - All Variants . . . . . . . . . . . . . . . . . . . . . . . . . . . . . . . . . . . . . . . . . . . . . . . . . . . . . . . . 5
Installation. . . . . . . . . . . . . . . . . . . . . . . . . . . . . . . . . . . . . . . . . . . . . . . . . . . . . . . . . . . . . . . . . . . . . . . . 6
X-Box Ultra Data and Video Connections. . . . . . . . . . . . . . . . . . . . . . . . . . . . . . . . . . . . . . . . . . . . . 6
Genlock or Control Net Connections. . . . . . . . . . . . . . . . . . . . . . . . . . . . . . . . . . . . . . . . . . . . . 6
Serial Connection . . . . . . . . . . . . . . . . . . . . . . . . . . . . . . . . . . . . . . . . . . . . . . . . . . . . . . . . . . . 7
Video Connections - X-Box Ultra. . . . . . . . . . . . . . . . . . . . . . . . . . . . . . . . . . . . . . . . . . . . . . . . 7
Video Connections - X-Box Ultra SDI . . . . . . . . . . . . . . . . . . . . . . . . . . . . . . . . . . . . . . . . . . . . 7
X-Box Ultra Power Connections . . . . . . . . . . . . . . . . . . . . . . . . . . . . . . . . . . . . . . . . . . . . . . . . . . . . 8
AC Power In Connection. . . . . . . . . . . . . . . . . . . . . . . . . . . . . . . . . . . . . . . . . . . . . . . . . . . . . . 8
DC Power In Connection. . . . . . . . . . . . . . . . . . . . . . . . . . . . . . . . . . . . . . . . . . . . . . . . . . . . . . 8
DC Power Out Connection . . . . . . . . . . . . . . . . . . . . . . . . . . . . . . . . . . . . . . . . . . . . . . . . . . . . 8
X-Box Ultra System Connections - Typical Installation . . . . . . . . . . . . . . . . . . . . . . . . . . . . . . . . . . . 9
Connecting and Installing on a Host PC . . . . . . . . . . . . . . . . . . . . . . . . . . . . . . . . . . . . . . . . . . . . . 10
Connecting and Powering the X-Box Ultra . . . . . . . . . . . . . . . . . . . . . . . . . . . . . . . . . . . . . . . 10
X-Box Ultra Setup and Registration for WinPlus. . . . . . . . . . . . . . . . . . . . . . . . . . . . . . . . . . . 13
Maintenance . . . . . . . . . . . . . . . . . . . . . . . . . . . . . . . . . . . . . . . . . . . . . . . . . . . . . . . . . . . . . . . . . . . . . 15
Troubleshooting . . . . . . . . . . . . . . . . . . . . . . . . . . . . . . . . . . . . . . . . . . . . . . . . . . . . . . . . . . . . . . . . . . 16
Technical Specification . . . . . . . . . . . . . . . . . . . . . . . . . . . . . . . . . . . . . . . . . . . . . . . . . . . . . . . . . . . . 17
General Notices . . . . . . . . . . . . . . . . . . . . . . . . . . . . . . . . . . . . . . . . . . . . . . . . . . . . . . . . . . . . . . . . . . 18

2
Safety
Important information on the safe installation and operation of
this product. Read this information before operating the product.
For your personal safety, read these instructions. Do not operate
the product if you do not understand how to use it safely. Save
these instructions for future reference.
Warning Symbols Used in these Instructions
Safety cautions are included in these instructions. These safety
instructions must be followed to avoid possible personal injury and
avoid possible damage to the product.
Intended Use
The X-Box Ultra has been designed to provide a prompting text display
and control system as part of a high quality teleprompting facility for
television broadcasting.
The X-Box Ultra is intended for use by television presenters and
prompter operators, installed within a TV studio environment, or on
outside broadcasts (OB) when protected from weather by a suitable
waterproof cover.
Electrical Connection
Basic Electrical Insulation (Class 1 equipment)
Mounting and Installation
WARNING!
Where there is a risk of personal injury or injury to others,
comments appear supported by the warning triangle symbol.
Where there is a risk of damage to the product, associated
equipment, process or surroundings, comments appear
supported by the word ‘Caution’.
ELECTRIC SHOCK
Where there is a risk of electric shock, comments appear
supported by the hazardous voltage warning triangle.
WARNING! Risk of electric shock. Always check cables for
signs of damage. Damaged cables can cause personal injury
and/or damage the equipment.
CAUTION! The products must be connected to a power
supply of the same voltage (V) and current (A) as indicated
on the products. Refer to the technical specifications for the
products.
CAUTION! Only use the power cable specified for the
products and certified for the country of use.
CAUTION! Using alternative power sources will invalidate
the system EMC liability.
WARNING! This product is Class 1 equipment. For safe
operation this equipment must be connected to a power
supply that has a protective earth connection (US: ground).
WARNING! Always ensure that all power and auxiliary
communications cables are routed so that they do not
present any danger to personnel. Take care when routing
cables in areas where robotic equipment is in use.
3
Safety and About this Guide
Water, Moisture and Dust
Ventilation
Operating Environment
Cleaning
Maintenance
About this Guide
This guide describes the installation of the X-Box Ultra as part of a full
prompting system, using the range of compatible equipment and
connecting cables available for various configurations.
The full range of X-Box Ultra variants covered in this guide consists of
the following products:
For more information on the installation and operation of the WinPlus
software, refer to the WinPlus user guide.
WARNING! Protect the product from water, moisture and
dust. The presence of electricity near water can be
dangerous.
WARNING! When using this product outside, protect from
rain using a suitable waterproof cover.
WARNING! Slots and openings are intended for ventilation
purposes to ensure reliable operation of the product, and
protect it from overheating. Do not block or cover any slots
and openings.
CAUTION! The product should not be used outside the
operating temperature limits. Refer to the product technical
specifications for the operating limits for the product.
WARNING! Risk of electric shock. Always disconnect and
isolate the product from the power supply before cleaning.
CAUTION! Do not use solvent or oil-based cleaners,
abrasives or wire brushes.
WARNING! Servicing or repair of this product must only be
performed by qualified and trained electrical engineers.
WARNING! The fitting of non-approved parts and
accessories, or the carrying out of non-approved alterations
or servicing can be dangerous and could affect the safety of
the product. It may also invalidate the terms and conditions
of the product warranty.
Part No. Description
WP-NXU WinPlus News software package, including the
standard X-Box Ultra.
WP-NXU-SDI WinPlus News software package, including the X-
Box Ultra SDI.
WP-SXU WinPlus Studio software package, including the
standard X-Box Ultra.
WP-SXU-SDI WinPlus Studio software package, including the
X-Box Ultra SDI.

4
Components and Connections
1Fuse holder 7Composite video/SDI* output sockets
2AC power indicator LED 8DC power out socket
3DC power indicator LED 9Power switch
4Serial socket 10 DC power in socket
5USB socket 11 AC power in socket
6ControlNet/Genlock input *Optional X-Box Ultra SDI version only.
1
2
3
456
7
11
9
8
10
Front View Rear View

5
Components and Connections
Box Contents - All Variants
No. Part Description WP-NXU WP-NXU-SDI WP-SXU WP-SXU-SDI
1 A5000-5937 WinPlus software CD
2XBOXULTRA or
XBOXULTRA-S
X-Box Ultra with news software license
X-Box Ultra with studio software license
3XBOXULTRA-SDI or
XBOXULTRA-S-SDI
X-Box Ultra SDI with news software license
X-Box Ultra SDI with studio software license
4 HC-1 5 button optical desktop hand controller
5 SRL-C 9-pin ‘D’ serial connecting cable
6 USB-C USB connecting cable
1
4
SDI
23
5
6

6
Installation
X-Box Ultra Data and Video Connections
Connection Options
Special consideration should be given when choosing locations and
connecting methods to install and use the X-Box Ultra.
• Using ControlNet connections, the cables can be up to 300 metres
in length.
• Serial connections are used for short connection distances, with a
maximum cable length of 18 metres.
Genlock or ControlNet Connections
The Genlock and ControlNet input is a shared connection. This input is
auto-sensing and changes function automatically with no additional
configuration requirements.
ControlNet
300 m (984 ft)
Serial
18 m (59 ft)
Genlock or ControlNet connections should always be
made with screened 75Ω coaxial cable.The cable screen
should be connected to earth (ground) at both ends.
It is not possible to connect Genlock and ControlNet
connections to the X-Box Ultra at the same time.

7
Installation
Serial Connection
Single controllers or a smart combiner box can be connected using a
serial connection. The serial connection also provides power to a
controller (hand or foot).
Video Connections - X-Box Ultra
Four composite video outputs are available to connect to prompter
monitors.
Video Connections - X-Box Ultra SDI
On the optional X-Box Ultra SDI, three SDI outputs and one composite
video output are available to connect to prompter monitors.

8
Installation
X-Box Ultra Power Connections
The X-Box Ultra can be powered using either an AC or DC power
source, depending on the requirements of the installation. The
provision of a DC power input means that the X-Box Ultra can be
powered by a suitable battery source when used on outside
broadcasts.
The X-Box Ultra also has a DC power out power socket to power
auxiliary devices.
AC Power In Connection
DC Power In Connection
DC Power Out Connection
90-260VAC
CAUTION! Do not exceed the current output limit of 1A
when powering auxiliary devices from the DC power out
socket.
12VDC
12VDC OUT
1 AMP MAX
!

9
Installation
X-Box Ultra System Connections - Typical Installation
WinPlus Software PC
ControlNet connection to a single wired
or wireless controller, or multiple
controllers via a smart combiner box.
ControlNet
connections
Serial
connections
Key
USB
connection
Video
connections
X-Box Ultra or
X-Box Ultra SDI
Prompter Monitors
connected.
Up to four directly
HC-1
Typically located
on desk with
WinPlus PC.
Smart Combiner Box
Foot Controller
USB-C
SRL-C
Wireless Receiver

10
Installation
Connecting and Installing on a Host PC
The X-Box Ultra is connected by USB to a host PC running WinPlus. It
must be installed as USB hardware on the PC to function.
Before Installing the X-box Ultra on the host PC, run the setup program
uau99XX.exe from the CD supplied. The default install path for the X-
Box Ultra is C:\Program Files\Pciwplus32U.
Connecting and Powering the X-Box Ultra
1. Using the USB cable provided, connect the X-Box Ultra to the host
PC running WinPlus.
2. Switch the X-Box Ultra on using the power switch.
3. The power source (AC or DC) is indicated by the two LEDs on the
front of the X-Box Ultra.
USB-C

11
Installation
4. The host PC will detect the X-Box Ultra and launch the Found New
Hardware Wizard.
5. The Wizard will prompt to connect to Windows Update to find the
appropriate software for the X-Box Ultra:
a) Click to select No, not this time.
b) Click the Next button to continue.
6. In the next window click to select Install from a list or specific
location (Advanced).
7. Click the Next button to continue.

12
Installation
8. In the search and installation options window:
a) Click to unselect Search removable media.
b) Click to select Include this location in the search.
c) Click the Browse button.
9. The Browse For Folder window opens.
10. Navigate to C:\Program Files\Pciwplus32U\Autoscript Device
Drivers.
11. Click OK.
12. The Wizard will now copy and install the driver files.

13
Installation
13. The Hardware Update Wizard displays the following message
when installation is successful.
14. Click the Finish button to exit the Wizard.
X-Box Ultra Setup and Registration for WinPlus
1. Launch the WinPlus application by
clicking on the WinPlus X Ultra icon
on the host PC desktop.
2. WinPlus as default will
look for an Internal PCI
card. The first time the
application is launched
a warning window will
pop up.
3. Click the Ok button to clear the warning message.
4. Click to select the Configuration icon on the far right of the
toolbar (yellow gearwheel icon).

14
Installation
5. In the Configuration window click to select the PC-Card tab.
6. In this tab under the Prompting Hardware options:
a) Select USB X-Box Ultra.
7. Click the OK button to exit.
8. WinPlus communicates
with the X-Box Ultra to
confirm the registration
number. The WinPlus
Registration window
opens.
9. Enter the X-Box Ultra registration number. This number can be
found on a sticker on the CD case that shipped with WinPlus. It is
an eight digit number which is unique to each X-Box Ultra.
10. Click the OK button.
The registration number is also located on a sticker on the
underside of the X-Box Ultra.

15
Maintenance
Routine Maintenance
The X-Box Ultra requires minimal routine maintenance, apart from
checking the connections and overall operation periodically.
Routine checks
During use, check the following:
• Check cables for signs of wear or damage. Replace as necessary.
• Check that all cables are connected properly.
Cleaning
During normal use the only cleaning required should be a regular wipe
over with a dry, lint-free cloth. Dirt accumulated during storage or
periods of disuse may be removed with a vacuum cleaner. Particular
attention should be paid to all connection ports on the X-Box Ultra.
Changing the Fuse
1. Switch OFF and disconnect the power cable.
2. Using a flat-blade screwdriver, remove the fuse holder and discard
the blown fuse.
3. Replace the fuse, then reinstall the fuse holder.
WARNING! Risk of electric shock. Disconnect and isolate
the product from the power supply before cleaning.
WARNING! Risk of electric shock. Disconnect the power
cable. Fuses must only be changed by a trained and
competent person.
CAUTION! The replacement fuse must be the correct
rating: Type 20mm ceramic tube fuse rated at 0.5A 250V
AC.

16
Troubleshooting
Fault Check Comments
The X-Box Ultra is not powering up. Check that the AC or DC power source is
connected and secured.
See the section X-Box Ultra Power Connections
on page 8.
Check and if necessary replace the fuse. See the section Changing the Fuse on page 15.
The X-Box Ultra is powered up, but
not controlling the prompted text.
Check that any ControlNet and serial system
connections to controllers are correct and secured.
See the sections X-Box Ultra Data and Video
Connections on page 6.
The prompter monitor is not
displaying text.
Check that video connections are correct and
secured.
See the sections X-Box Ultra Data and Video
Connections on page 6.
Ensure that quality screened cables have been
used for the video signal and that the screen is
earthed at both ends.
If optional SDI outputs are being used, ensure that
the cable is connected to an SDI input on the
prompter monitor.
Refer to the prompter monitor user guide.

17
Technical Specification
Physical Data
Width . . . . . . . . . . . . . . . . . . . . . . . . . . . . . . . . . . . . . 180 mm (7.1 in.)
Length . . . . . . . . . . . . . . . . . . . . . . . . . . . . . . . . . . . 260 mm (10.2 in.)
Depth . . . . . . . . . . . . . . . . . . . . . . . . . . . . . . . . . . . . . . 31 mm (1.2 in.)
Weight . . . . . . . . . . . . . . . . . . . . . . . . . . . . . . . . . . . . . . . .1 Kg (2.2 lb)
*Excluding controls and connectors.
Environmental Data
Operating temperature range . . . . . .+5°C to +40°C (+41°F to +104°F)
Storage temperature range . . . . . . . . -20°C to +60°C (-4°F to +140°F)
Electrical Data
AC power input . . . . . . . . . . . . . . . . . . . . . . . . . . . . . . . . . .90-260V AC
DC power input. . . . . . . . . . . . . . . . . . . . . . . . . . . . . . . . . . . . . 12V DC
DC power output . . . . . . . . . . . . . . . . . . . . . . . . . . . . . . . . 12V DC, 1A
AC power consumption . . . . . . . . . . . . . . . . . . . . . . . . . . . . . . . . .0.1A
DC power consumption . . . . . . . . . . . . . . . . . . . . . . . . . . . . . . . . . . 1A
Connections Data
DC Power In Socket
Connector type: 4 pin XLR plug.
DC Power Out Socket
Connector type: 3.5 mm mono jack socket.
Serial Connection
Connector type: 9-way D socket.t
Data format is standard RS232 voltage
levels, 8 data, 1 stop, no parity, 2400 baud.
ControlNet Connection
Connector type: BNC Connector.
USB Connection
Conforms to USB 2.0 standard.
Video Out Sockets
Connector type: 75Ω BNC socket.
Technical specifications are subject to change without notice.
Pin Signal
1GROUND
4+12V DC
Pin Signal
Tip +12V DC
Sleeve GROUND
Pin Signal
Centre Composite Video In (PAL or NTSC)
Outer GROUND (Cable screen)
Pin Signal
1TX
5GROUND
8RX
9+12 VDC
Pin Signal
Tip Data
Sleeve Ground

18
General Notices
FCC Certification
FCC Notice
This product complies with the limits for a Class A digital device,
pursuant to Part 15 of the FCC Rules. These limits are designed to
provide reasonable protection against harmful interference in a
commercial environment. This equipment generates, uses and can
radiate radio frequency energy and, if not installed and used in
accordance with the instructions, may cause harmful interference with
radio communications. Operation of this product in a residential area is
likely to cause harmful interference, in which case you will be required
to correct the interference at your own expense.
FCC Warning
Changes or modifications not expressly approved by the party
responsible for compliance could void the user’s authority to operate
the equipment.
FCC Declaration of Conformity
This product complies with Part 15 of the FCC Rules. Operation is
subject to the following two conditions:
1.This product may not cause harmful interference.
2.This product must accept any interference received, including
interference that may cause undesired operations.
Declaration of Conformity
Vitec Videocom Limited declares that this product has been
manufactured in accordance with BS EN ISO 9001:2008.
This product complies with the following EU Directives:
• Low Voltage Directive 2006/95/EC
• EMC Directive 2004/108/EC
Compliance with these directives implies conformity to applicable
harmonized European standards (European Norms) which are listed on
the EU Declaration of Conformity for this product or product family. A
copy of the Declaration of Conformity is available upon request.
Environmental considerations
ROHS Compliance Statement
Vitec Videocom Limited is compliant with the European Union Directive
2002/95/EC Restrictions of Hazardous Substances (RoHS) that
restricts the use of hazardous substances in Electrical and Electronic
Equipment.
X-Box Ultra System
XBoxUltra
XBoxUltra-SDI
This manual suits for next models
3
Table of contents
Other Autoscript Professional Video Accessories manuals

Autoscript
Autoscript EPIC-IP User manual

Autoscript
Autoscript FC-IP User manual

Autoscript
Autoscript Control Net HC-1 User manual

Autoscript
Autoscript ELP 15 PLUS User manual

Autoscript
Autoscript XBOXLITE User manual

Autoscript
Autoscript LED8TFT-ME User manual

Autoscript
Autoscript XBox-IP User manual

Autoscript
Autoscript LED12TFT-ME User manual