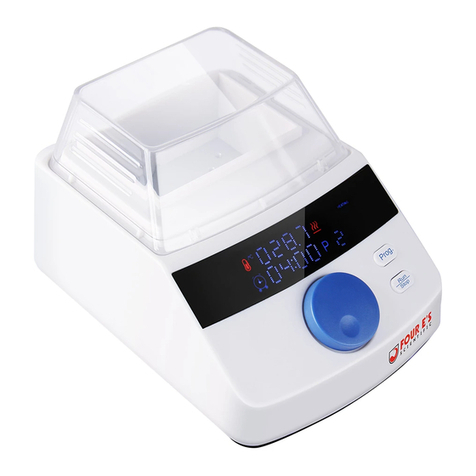
Four E's Scientific Ironman User manual

Operating Instructions
使用说明书
Water Bath
恒温水浴器
WB101 / Ironman
WB201 / Ironman ⅡV02

1
Please read the operating instructions in full before starting up and follow the safety instructions.
The appearance and specifications are subject to change without notice.
Contents
Declaration of Conformity
1. Safety Instructions
2. Unpacking
3. Installation
4. Correct use
5. Operation
6. Calibration
7. Faults
8. Maintenance and Cleaning
9. Technical Data
10. Warranty
3
3
5
5
7
12
14
14
15
15

2
DECLARATION OF CONFORMITY
Four E’s Scientific water baths meet the requirements of
international safety standard IEC61010-1:2001 “Safety
requirements for electrical equipment for measurement, control,
and laboratory use”

3
1. SAFETY INSTRUCTIONS
Read the operating instructions in full before starting up and
follow the safety instructions.
• Socket must be earthed (protective ground contact) before use.
• Water must be filled into the chamber before power-on.
• Avoid operating the bath without water.
• The symbols below are marked on the equipment and in this
manual to indicate:
Caution: Surfaces can be hot during and after use
Caution: Socket must be earthed
(protective ground contact).
2. UNPACKING
Please unpack the device carefully and check it for damage. It
is important that any transport damage is detected when the
device is unpacked. If necessary, any inventory of the damage
should be made immediately (postal service, railway, haulage
company).
Delivery scope
Model
Water bath
Cover board
Transparent lid
Base tray
Power cable
Operating manual
WB101
1
/
1
1
1
1
WB201
1
1
2
1
1
1

①
②
③
④
⑤
①Transparent lid ② Stainless-steel chamber ③ LED display
④ Water bath ⑤ Base tray
WB201
4
①Transparent lid ② Cover board ③ Stainless-steel chamber
④ LED display ⑤ Water bath ⑥ Base tray
①
②
③
④
⑥
⑤
WB101

5
3. INSTALLATION
3.1 Assembly of the equipment and components
The water bath has three main components, the bath, the lid
and the base tray. The base tray fits into the bath with the feet
downward so that it creates a gap between the bottom of the
chamber and the tray.
Note:
1. For optimum temperature stability, avoid allowing the base
tray and sample container to touch the sides of the chamber
while operating.
2. The lid should only be lifted by the handle, as other parts can
become hot during use.
It has a vent/thermometer hole–this hole should not be
sealed as pressure could build up inside the bath.
3.2 Instrument placement
Place the water bath on a level, non-combustible surface.
Ensure that the mains plug and the switch are easily accessible.
3.3 Electrical supply
• Check that the supply voltage marked on the serial number
label, and the type of mains plug, are correct for your mains
supply outlet, which must have a ground connection.
• To disconnect the equipment from the mains supply, remove
the mains plug from the mains supply outlet.
4. CORRECT USE
4.1. Avoid operating the bath without water
• Avoid using your bath without water in the chamber. Dry-start
will affect the service life of the key component.
• The bath has an inbuilt protection mechanism known as dry
start protection which will detect this condition in most
circumstances and prevent the bath from continuing to heat.
In this instance the bath will display “ ” and sound an

alarm. If theprotection program fails to detect the dry-heating,
built-in safety temperature cut-out switch will cut off the heating
to protect the water bath when heated to a certain temperature .
Note:
The dry-start protection program is on by default. If you need to
turn it off, please refer to 5.8. Setting the dry-start protection alarm.
The chamber internal surface can become very hot if an
accidental dry start has occurred, even if the dry start cut out
has operated. Avoid touching the chamber until it has been left
to cool.
4.2. Emptying the baths
Before emptying any bath, disconnect the device from the power
supply and pull out the plug. Then allow the water temperature
to fall to a safe level and take reasonable precautions to prevent
accidental spillage.
4.3. Using transparent lid
• When the setting temperature is above 60°C , use the lid to
maintain proper temperature control and ensure that the water
temperature reaches the set point.
• The lid will also prevent excessive evaporation that requires
the bath to be filled more often and will save energy.
4.4. Using base tray
• Using the base tray can improve temperature control inside
containers.
• Don’t put the containers or other items into the stainless-steel
chamber directly. Avoid the containers or other items direct
contact with the inside walls of chamber.
6

°C
°F
P1
P2
P3 set
① ② ③ ④ ⑤
⑥⑦ ⑧
5. OPERATION
5.1. Bath controls
①Preset program ② Over-temperature alarm key ③ Run/Stop
④ Set ⑤ Heating indicator ⑥ ℃ indicator ⑦ ℉ indicator
⑧ Alarm indicator
5.2. Run/Stop
When it is displayed OFF, the water bath is in unheated status.
When it displays the actual temperature, the water bath is in
heating status.
Press to switch run/stop heating
For example:
Operation Display
OFF
50.0
OFF
The bath is in unheated status
Press the run/stop key to start heating,
it displays the current temperature
Press the run/stop key again, heating
stops, and the screen displays “OFF”
7

set
set
Operation
Operation Display
Display
50.0
37.0
Directly set the heating temperature you
require
Press the set key to save the value then
exit, it displays the current temperature/OFF
Press set key to enter the first level menu
Press set key again to enter the temperature
setting menu option
Set the temperature you require
Press the set key to save the setting then exit,
it displays the current temperature/OFF.
set
set
set
5.3. Heating temperature setting
Method 1:
Directly press to enter the temperature setting as
following steps:
For example:
the current temperature is 37.0°C, and set the temperature 50.0°C
Method 2:
Press to enter the temperature setting sub-menu to adjust the
temperature as following steps:
For example:
the current temperature is 37.0°C, and set the temperature 50.0°C
Method 3: Run the preset . Please see the detailed
steps 5.4 for how to configure and run the presets.
P1 P2 P3
8

Operation Display
Operation Display
set
P1
P1
P1
5.4. Configuring and running temperature presets
The bath has 3 presets: . Temperature presets allow
you to conveniently store or run bath temperature settings for you
routinely use.
Before you can use presets, you need to store the values you wish
to use in at least one of the presets as the following procedures:
For example:
configuring the preset P1, the current temperature is 37.0°C, preset
the temperature 50.°C
Running the preset as the following procedures
For example: run the preset P1
5.5. Switch between Fahrenheit Temperature (°F) and Celsius
Temperature (°C)
When the °C indicator is on, the unit of temperature is °C; When
the °F indicator is on, the unit of temperature is °F.
Setting procedures as following:
For example: switch “°C” to “°F”.
P1 P2 P3
Select the preset you wish to set;
Set the value you wish to use;
Press the preset again to store the value
and the bath with automatically return to
displaying the current temperature/OFF
Press the preset you want to use;
Press “set” to confirm the preset, it displays
the current temperature/OFF.
9

Operation Display
Operation Display
set
set
set Select the menu option;
Navigate to the switching °C/ °F selection
menu option
Press the set key to enter °C/ °F switching
Switch to °F; C stands for °C, and F stands for°F
Press the set key to save the setting,
it displays the current temperature/OFF.
5.6 Setting the over temperature alarm
Protect the sample by setting the max. temperature that the bath
allows to be heated.
The setting procedures are as following:
For example:
the current temperature is 37.0°C and the over-temperature alarm
limit is 90.0°C
If the liquid temperature exceeds the setting over-temperature alarm
limited temperature, the water bath will stop heating, display “ ”
and start an alarm. The alarm can be turned off by the following
operations:
• Turn off the power, the alarm is turned off, and restart the machine
after the water temperature is lower than the over-temperature
alarm limited temperature ;
• Add some cold water until the water temperature drops below the
over-temperature alarm limited temperature, and the alarm will be
turned off;
Press the over-temperature alarm key to
enter the setting menu.
Set the over-temperature alarm limit you
require
Press the over-temperature alarm key again
to save the setting, it displays the current
temperature/OFF.
10

• Set the over-temperature alarm limited temperature to above the
water temperature, and the alarm will be turned off.
5.7. Setting the countdown timer
The countdown timer range is 1~999 min
After the countdown is over, an alarm will sound three times and
the heating will stop, “OFF” is displayed.
Note:
1. When the countdown time is more than 10 minutes, the countdown
time is hidden and the real-time temperature is displayed.
2. When the countdown time is less than 10 minutes, the countdown
time is displayed.
3. The countdown can start only in heating state. The countdown
will stop once the heating is stopped.
4. In heating state, save the setting value of timer, the countdown
will start immediately.
5. In unheated state, save the setting value of timer, then press the
“Run/Stop” to start countdown.
6. The countdown settings are independent of the temperature
settings. When setting the countdown, take into account the
time required to achieve the set temperature.
The countdown timer setting as following procedures:
For example:
set the countdown time from 0 to 10 min.
Operation Display
set
set Select the menu option
Navigate to the countdown timer selection
menu option
Press set key to enter the countdown timer
setting
If the countdown time is 0, it displays OFF.
If not, it displays the countdown timer value
Set the countdown time you require
The “ •” in lower right corner means that it is
in countdown timer setting
11

set
Press key to save the setting
The countdown timer will begin once you save
the setting
The setting will exit automatically after 5S
without operation
set
Operation Display
set
set
set
set
Select the menu option
Select the dry-start protection setting
menu option
Press set key to enter the dry-start protection
setting. The default setting is “ON”
Select to turn off the dry-start protection
Press key to save the setting
The setting will exit automatically after 5S
without operation
It displays the current temperature/OFF
5.8. Setting the dry-start protection alarm
When the dry-start protection function is on, the bath will stop
heating and an alarm will sound when the system detects that the
inner chamber is in dry-start status. When the dry-start protection
is off, there is no protection alarm and the bath will continue
heating to the set temperature.
For example:
the current temperature is 37.0°C, set the dry-start protection from
“ON” to “OFF”;
6. CALIBRATION
6.1. Calibration condition
1. The accuracy of the thermometer should be more than 10 times
that of the water bath display.
2. At a stable ambient temperature (+/-1°C) without air convection.
3. Wait for the liquid to reach the calibration setting temperature
and stabilize for 30 minutes before calibrating.
12

Operation Display
set
set
set
set
6.2. Dual point calibration
Due to the influence of ambient temperature, humidity, and pot
structure, the water bath has a certain deviation in temperature
measurement. In order to improve the measurement and control
accuracy, each single instrument is calibrated before shipment.
Includes two calibration options -- low temperature point and high
temperature point.
Low temperature point: 30 ~ 40°C
High temperature point: Above 55°C
Low temperature point calibration:
For example:
Before calibration, the screen displays 32.0 C but the actual liquid
temperature is 37.0°C
After calibration, the screen displays 36.8 C and the actual liquid
temperature is 37.0°C
High temperature point calibration:
For example:
Before calibration, the screen displays 60°C but the actual liquid
temperature is 65.0°C;
After calibration, the screen displays 64.7°C and the actual liquid
temperature is 65.0°C;
Select the menu option
Select the low temperature point calibration
setting menu option
Press set to enter the calibration value
Enter the reference thermometer value
Press to store the calibration value
The setting will exit automatically after 5S
without operation
Leave the bath to stabilize and check the
calibration
13

Operation Display
set
set
set
Select the menu option
Select the high temperature point calibration
setting menu option
Press set to enter the calibration value
Enter the reference thermometer value
Press to store the calibration value
The setting will exit automatically after 5S
without operation
Leave the bath to stabilize and check the
calibration
set
7. FAULTS
Possible cause
Temperature sensor short-circuit
Temperature sensor open-circuit
Over-temperature Alarm
1. The initial water temperature is
above the OTP value
2.If the OTP setting value is too low
Dry-start alarm, no water in the
chamber or the water is less than
the Min.amount.
Symptom Action required
Have a competent person check
the temperature sensor or
motherboard for a short circuit
fault.
Check if the sensor is well
contacted.
1. Let water cool.
2.Reset the OTP value.
Switch the bath off and refill the
bath with water
8. MAINTENANCE AND CLEANING
Correct use of the instrument to keep it in good working condition
will help extend its service life.
Disconnect the power supply before maintenance and cleaning.
No routine maintenance is required except for cleaning. Clean the
outside of the equipment with a damp cloth soaked in soap, dish
washing liquid or alcohol. Wait for dry before continuing to use.
There are no user serviceable parts inside the unit.
14

Model
Input
Power[W]
Heating temperature range [℃]
(under standard atmosphere)
Temperature stability [℃]
Temperature display accuracy[℃]
Time setting range[min]
Dimensions(W x H x D)[mm]
Reservoir capacity[L]
Weight[kg]
WB101
200-240VAC,50/60HZ
100-120VAC,50/60HZ
200
Room temp. +5~99
±0.5
0.1
1-999
252*188*285
2
3
9. TECHNICAL DATA
10. WARRANTY
You have purchased an original laboratory machine which meets
the highest engineering and quality standards. In accordance with
our warranty conditions, the warranty period is 24 months from our
shipment. For claims under the warranty, please contact your local
dealer. You may also send the machine directly to our works,
enclosing the delivery invoice and giving reasons for the claim.
You will be liable for freight costs.
The warranty does not cover worn out parts, accidental damage,
incorrect storage, nor does it apply to faults resulting from improper
use, insufficient care or maintenance not carried out in accordance
with the instructions in this operating manual.
WB201
200-240VAC,50/60HZ
100-120VAC,50/60HZ
450
Room temp. +5~99
±0.5
0.1
1-999
394*188*285
5
4.5
15

请仔细阅读说明书并在说明书的操作指导下安全使用本仪器。
外形和性能指标如有变动,概不另行通知。
前言
符合性声明
1. 安全说明
2. 开箱指引
3. 安装
3.1. 仪器安装
3.2. 仪器摆放
3.3. 电源供应
4. 操作说明
4.1. 操作规范
4.2. 操作设置
4.3. 校准
5. 故障排除
6. 清洁与维护
7. 技术参数
8. 保修
目 录
16
17
17
18
18
20
20
20
20
20
20
21
25
27
27
27
28

17
前言
欢迎使用《恒温水浴器使用说明书》。用户在使用本仪器前应仔细阅读本
说明书,了解相关注意事项,并按照说明书中的指导和规范进行操作。
符合性声明
本产品符合IEC61010-1:2001 “测量、控制和实验室用电气设备的安
全要求”的相关规定。

18
1. 安全说明
• 为保证安全,使用本仪器前请确认电源插座接地良好。
• 使用时必须先加水到内锅里,再接通电源。
• 避免干烧。
• 以下标志在设备和使用说明书中表示:
注意:表面在使用期间和使用后可能会很热。
注意:必需接地。
2. 开箱指引
• 请小心拆除包装并检查仪器
• 如果发现任何破损,请填写破损报告并立即通知货运公或联系供货商。
注意:
• 如果设备/适配器有明显损坏,请不要连接电源线。
• 包装清单
型号
主机
盖板
透明盖子
托盘
电源线
使用说明书
Ironman
1台
/
1个
1个
1条
1本
Ironman Ⅱ
1台
1个
2个
1个
1条
1本

19
①
②
③
④
⑥
⑤
①
②
③
④
⑤
① 透明盖子 ② 不锈钢内锅 ③ 控制面板 ④ 水浴器主体 ⑤托盘
Ironman Ⅱ
① 透明盖子 ② 盖板 ③ 不锈钢内锅 ④控制面板 ⑤ 水浴器主体 ⑥ 托盘
Ironman
This manual suits for next models
3
Table of contents
Other Four E's Scientific Laboratory Equipment manuals

Four E's Scientific
Four E's Scientific MI0102001 User manual

Four E's Scientific
Four E's Scientific CF0201002 User manual

Four E's Scientific
Four E's Scientific MultiEX 032 User manual

Four E's Scientific
Four E's Scientific VM112B User manual

Four E's Scientific
Four E's Scientific WB301 User manual

Four E's Scientific
Four E's Scientific MI0102008 User manual

Four E's Scientific
Four E's Scientific Overstar60 User manual

Four E's Scientific
Four E's Scientific OHS-20D Reference guide

Four E's Scientific
Four E's Scientific OHS-20D User manual

Four E's Scientific
Four E's Scientific TC0401005 User manual