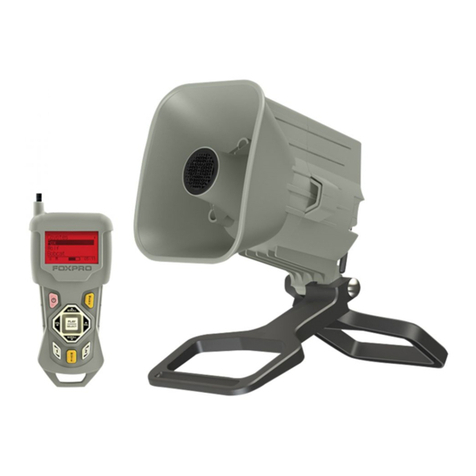
Foxpro FUSION User manual


2
Important Information
FOXPRO®’s goal is to provide our customers with the highest quality
products in the industry. We take great pride in manufacturing our
products in the USA. Please do not hesitate to contact us for assistance,
comments, or questions.
FOXPRO®Inc.
14 Fox Hollow Drive
Lewistown, PA 17044
(717) 248-2507
Fax: (717) 247-3594
Hours of Operation
Monday – Friday
8AM – 5PM EST
Contact Us
Customer Service: (717) 248-2507
Toll Free Orders Only: 866-463-6977
General Inquiry E-mail: sales@gofoxpro.com
Stay up to date with the latest sounds by visiting our online sound
library. Watch for new products and upgrades from FOXPRO®. Visit us
online:
www.gofoxpro.com
This manual, the animal sounds stored in your caller, and animal sounds
purchased from FOXPRO®Inc. for installation in your caller is protected
by copyright.
Publication Date: September 22, 2023
Copyright ©℗ 2023 by FOXPRO®Inc.
REV12

3
Contents
1. Getting Started..................................................................................7
1-1 What is in the Box? ....................................................................7
1-2 Fusion: First Glance....................................................................7
1-3 Fusion: Requirements ................................................................9
1-4 Fusion Remote: First Glance ....................................................11
1-5 Fusion Remote: Requirements ................................................13
2. Quick Start Guide ............................................................................13
2-1 Playing Sounds Manually .........................................................13
2-2 Fusion Remote Setup ...............................................................14
2-3 Playing Sounds Remotely.........................................................15
2-4 Using Presets/Favorites ...........................................................16
3. Fusion In-Depth...............................................................................17
3-1 Charge Jack Specifications .......................................................18
3-2 External Speaker Jacks Specifications......................................19
3-3 Auxiliary Device Jack Specifications .........................................20
3-4 Integrated Decoy Wiring Harness ............................................20
3-5 Integrated USB Port .................................................................21
4. Fusion Remote Operation ...............................................................22
4-1 What are FOX FEATURES?........................................................22
4-2 Turning on the Fusion Remote ................................................22
4-3 Navigating the Fusion Remote.................................................22
4-4 Understanding the Fusion Remote Display .............................23
4-5 Accessing Fusion Remote Configuration Menu .......................25
4-6 Verifying Channel of Operation ...............................................25

4
4-7 Playing Sounds with the Remote .............................................26
4-8 Volume & Mute Control...........................................................28
4-9 Presets / Favorites ...................................................................28
5. FOX FEATURES.................................................................................29
5-1 FOXFUSION...............................................................................30
5-2 FOXMOTION.............................................................................32
5-3 FOXBANG .................................................................................33
5-4 FOXPITCH .................................................................................34
5-5 AUTO VOLUME.........................................................................35
5-6 User Button ..............................................................................36
5-7 FOXDATA ..................................................................................37
5-8 FOXGRIP ...................................................................................40
6. Sound Settings.................................................................................41
6-1 Volume Step.............................................................................41
6-2 Primary & Secondary (FOXFUSION) Mode...............................41
6-3 Speaker Mode ..........................................................................42
6-4 Right and Left Speaker .............................................................42
6-5 Preset Mute Override ..............................................................43
7. Display / Power ...............................................................................43
7-1 Brightness.................................................................................44
7-2 Keypad......................................................................................44
7-3 Theme ......................................................................................44
7-4 Display Timeout .......................................................................45
7-5 Auto Off....................................................................................46
8. Date / Time(r)..................................................................................46


5
8-1 Stand Timer & Timer Reset ......................................................46

8-2 Alarm........................................................................................47
8-3 Time..........................................................................................47
8-4 Date & Date Format.................................................................48
9. TX1000 Settings...............................................................................49
9-1 Radio Channel ..........................................................................49
9-2 Download List...........................................................................50
9-3 AUX...........................................................................................50
9-4 View..........................................................................................50
9-5 Temperature Units...................................................................51
9-6 Barometer Measurement Units...............................................51
9-7 Elevation...................................................................................51
9-8 About Info ................................................................................52
9-9 Restore Defaults.......................................................................52
10. Fusion Remote USB Operation........................................................52
10-1 Editing the Presets File.............................................................54
10-2 Viewing the FOXDATA File .......................................................55
11. Programming the Fusion.................................................................55
11-1 Requirements...........................................................................56
11-2 Connecting to a Computer.......................................................56
11-3 Manual Programming Process .................................................57
11-4 Indexing the Files .....................................................................58
11-5 Using the FOXPRO Programming Utility ..................................59
11-6 Editing the Categories Manually..............................................62
11-7 Editing the Categories with FOXPRO Utility.............................64

6
11-8 Updating the Remote Playlist ..................................................64
12. Creating FOXCAST Sequence Files...................................................65
12-1 Creating FOXCAST Sequences Manually..................................65
12-2 Enabling File Extensions in Windows.......................................68
12-3 Placing Sequences in the Fusion ..............................................69
12-4 Creating FOXCAST Sequences Online ......................................69
12-5 Synchronizing the Fusion Remote ...........................................69
13. Product Care & Maintenance..........................................................70
14. Troubleshooting ..............................................................................72
15. Maximizing Remote Range..............................................................74
16. FCC & IC Information.......................................................................75
17. Warranty Statement .......................................................................77

7
1. Getting Started
Congratulations on your purchase of the FOXPRO Fusion digital game
call! To get the full advantage of the Fusion and its array of capabilities,
please read and understand the operating instructions in full.
WARNING: To avoid personal injury and product damage, read all
operating instructions and safety precautions in this guide before using
the FOXPRO Fusion digital game call system.
1-1 What is in the Box?
Included with the box you should find the following list of items: Fusion
digital game call, Fusion remote control, Operators manual, Warranty
registration card.
1-2 Fusion: First Glance
The graphics below depict the Fusion in two angular views. Certain
aspects of the Fusion will be marked with a number which corresponds
to the chart defining that element.

8
1. Rugged ABS housing.
2. Rear cone speaker that is located at the rear of the call.
3. Battery compartment door located on the back side of the call.
4. Power switch and manual volume control knob is located on
front side of the call.
5. Internal speaker on/off switches are located on the bottom of
the control panel.
6. The charge jack port is located below the control panel on the
far-left side. Please note the connector is protected by a rubber
cover.
7. The rear external speaker jack is located to the right of the
charge port. Please note the connector is protected by a rubber
cover.
8. The Aux port is located to the right of the rear external speaker
port. Please note the connector is protected by a rubber cover.
9. The front external speaker jack is located to the right of the Aux
port. Please note the connector is protected by a rubber cover.

9
10. The low power indicator is to the right of the external front
speaker jack.
11. Front Horn speaker that is located at the front of the call.
12. The sound selection up and down buttons are located on the
right side of the control panel. Note these buttons are not
marked on the image.
1-3 Fusion: Requirements
The Fusion and Fusion remote control are shipped without batteries
installed. The Fusion digital game call requires 8 ‘AA’ batteries. You
may use alkaline batteries to get started, but it is recommended that
you use high-capacity rechargeable NiMH (nickel metal hydride)
batteries or one of FOXPRO’s optional rechargeable battery packs. Visit
our website to view the entire line of recharging options for the Fusion.
Installing batteries in the Fusion
1. Access the battery compartment by removing the door on the
back of the Fusion. After the door has been removed, locate the
black plastic battery tray. The tray is double-sided, providing
spaces for 8 ‘AA’ batteries. The tray is connected to a power
cable inside of the Fusion. You may unplug this cable and
remove the tray from the compartment during battery
installation.
2. Place the batteries into each battery cavity while observing
polarity as indicated.

10
3. Reconnect the power cable to the tray (if disconnected) and
place the tray back into the compartment.
4. Secure the door back to the Fusion.
After the batteries are installed, you must select the appropriate
battery chemistry in the Fusion.
Selecting the correct battery chemistry:
1. Turn on the Fusion. The screen will briefly display the Fusion
revision number, the channel of operation, and then three
horizontal dashes.
2. Simultaneously depress the Sound Up and Sound Down arrow
buttons two times to enter the battery chemistry configuration.
Notice: depressing the Sound Up and Sound Down arrow
buttons a single time will display the channel selector, which is
identifiable by the letter “c” on the left segment of the display.
The battery type selection is identified by the latter “b” on the
left segment of the display.
3. Push the Sound Up button to cycle through the available
options. Options include Alkaline (displayed as “bAL”, Lithium
cells (displayed as “bLi”), and NiMH (displayed as “bnH”).
4. After you have selected the appropriate battery type,
simultaneously push the Sound Up and Sound Down arrow
button to lock in the setting. The screen on the Fusion will
return to the three horizontal dashes.

11
1-4 Fusion Remote: First Glance
Figure 2 Image of the Fusion Remote
1. The second item from the left on the top status line is the
FOXBANG/FOXGRIP status indicator.
2. Next item to the right is the moon phase indicator.
3. The next item to the right is the barometric pressure indicator.
4. The last item to the right is the temperature indicator.
5. The largest part of the screen is the primary display area.

12
6. The first button on the top right side of the remote is P2.
7. The P1 button is located under P2.
8. The FOXFUSION button is the last button on the right, just under
the P1 button.
9. On the bottom of the remote display is the bottom status line
and to the far right is the clock/elapsed stand timer.
10. To the left of the clock is the battery level indicator.
11. On the lower portion of the remote is the handle/buttons
portion. The first button to the upper right is the Back/Menu
button.
12. In the middle of the handle is a large square shaped button.
Directly above and below this button are the scroll up and down
buttons.
13. On the lower right side of the remote there are two buttons.
The topmost button is the Mute button.
14. Under the mute button is the Recall button.
15. On the very bottom of the remote is the lanyard loop.
16. To the left of the Mute and Recall buttons is the auxiliary
button.
17. Directly opposite the Recall button is the User button.
18. Above the user button is the FOXPITCH button.
19. To the left and right of the large square button in the middle are
the Volume Up (left) and Volume Down (right) buttons.
20. The large square button in the middle is the Play/Select button.
21. On the upper left area of the handle portion is the Power
button.
22. To the left of the battery level indicator is the volume level
indicator.
23. To the left of the volume level indicator is the Mute status
indicator.
24. Along the upper left side of the remote are three buttons. The
lowest button on the left is the FOXDATA button.
25. Above the FOXDATA button is the P3 button.
26. Above the P3 button is the P4 button.
27. In the top left corner of the top status line is the FOXMATION
status indicator.

13
28. In the back of the transmitter, above the battery tray is the USB
port.
1-5 Fusion Remote: Requirements
The Fusion remote control operates on 3 ‘AA’ batteries. It is
recommended that you use high quality lithium or alkaline batteries for
the best performance. To install batteries, access the battery
compartment by removing the door from the back of the remote. The
door slides down and off the remote. Place the batteries into each
battery cavity while observing polarity as indicated. Slide the battery
compartment door back on the remote.
2. Quick Start Guide
We realize that some of you may wish to jump directly into basic
operations, such as playing sounds manually, remotely, and using
presets. This is a very brief overview and it is strongly recommended
that you read this manual entirely in order to fully understand all
capabilities of the system.
2-1 Playing Sounds Manually
After installing batteries as described in Chapter 1, turn on the Fusion
by rotating the volume/power knob clockwise. The LCD display located
on the control panel of Fusion will activate, briefly displaying the Fusion
revision number, the channel of operation, and three horizontal dashes.
When you see the three horizontal dashes, the Fusion is ready to be
operated.
Make sure that at least one of the speaker switches is moved to the
right or “on” position. Use the Sound Selector buttons (located to the
right of the screen) to scroll through the available sounds. Each sound is
displayed by a three-digit number on the LCD display (you can
download a copy of the factory standard list at the FOXPRO website for

14
reference). When you find the number of a sound that you wish to play,
release the Sound Selector button and the sound will begin playback.
You can use the volume knob to adjust volume up or down to a desired
level. To begin playback of a different sound, simply scroll through the
list, find the sound, and release the Sound Selector button.
2-2 Fusion Remote Setup
After installing batteries or changing batteries in the Fusion remote, it is
recommended that you make it a routine to take a moment to set up
the date and time settings. This section will explain these setup
configurations.
Setting the Clock:
1. Access the Date/Time(r) menu and select “Time.”
1. Use the scroll buttons to set the current time.
2. Push “Play/Select” to lock it in.
The clock can be displayed in either the standard 12-hour format or 24-
hour format (military time).
Configuring Time Format:
1. Access the Date/Time(r) menu and select “Time Format.”
2. Use the scroll buttons to select either 12- or 24-hour time
format.
3. Push “Play/Select” to lock in the setting.
The bottom status line of the Fusion display can show either the current
time or the stand timer. The stand timer will only be displayed if it is
turned on—otherwise, the clock will show the current time. The Fusion
remote will keep track of the current date to properly render moon
phases. This needs to be set up when you first start using the Fusion
remote. The Fusion remote control features a moon phase indicator. To

15
display the correct moon phase, it is imperative that you enter the
correct date. Otherwise, the displayed information may not be correct.
Setting the Date:
1. Access the Date/Time(r) menu and select “Date.”
2. By default, the first option is the month. Use the scroll buttons
to select the current month and then push the “Play/Select”
button.
3. Next you set the day using the same method described above,
and then push “Play/Select”.
4. Finally, set the year and push “Play/Select” to lock it in.
There are three different date formats that you can choose from
depending upon your personal preference. They are month/day/year,
year-month-day, and day.month.year.
Configuring Date Format:
1. Access the Date/Time(r) menu and select “Date Format”
2. Use the scroll buttons to cycle through the options.
3. When your desired date format is shown, push “Play/Select” to
lock it in.
2-3 Playing Sounds Remotely
The Fusion remote control is not intended to operate the caller at
distances shorter than 1 meter (3 feet). If the remote is located too
close to the caller, proper operation cannot be ensured. Make sure that
you have properly installed batteries in both the Fusion and Fusion
remote as described within Chapter 1. Turn on the Fusion by turning
the volume/power knob clockwise. Turn on the Fusion remote by
pushing and holding the power button for approximately about 1-2
seconds. When powered on, the Fusion display will show three
horizontal dashes. The Fusion remote default view will display the
available categories.

16
Using the scroll buttons on the Fusion remote, highlight the category
you wish to pick a sound from, and then push the “Play/Select” button.
The sounds assigned to that category will now be displayed. Use the
scroll buttons to highlight a sound that you wish to play, and then push
the “Play/Select” button to begin playback. You then must use the
volume up button to raise the volume level to your desired setting.
To mute the sound, simply push the “Mute” button. Un-muting is
accomplished by pushing the “Mute” button a second time. You can
quickly change to a different sound by highlighting it on the screen and
then pushing the “Play/Select” button. To quickly go back to the
previous sound, you can push the “Recall” button.
For more detailed information on remote operations and configuration,
please continue to Chapter 4.
2-4 Using Presets/Favorites
The Fusion remote can store up to 50 unique presets or favorites. A
preset is a shortcut to a particular sound which has a defined volume
level. The Fusion remote has 4 quick access preset buttons located on
the top left and right (see image in section 1-4).
By default, your Fusion remote will have no presets established. The
following instructions will describe how to setup a preset:
To Create a Preset/Favorite:
1. From the main screen, select the “Favorites/Presets” menu
item.
2. Select one of the 50 preset slots. Notice that the screen will
indicate “Preset Recording”. The first step is to select the sound.
3. Use the scroll buttons to highlight the sound you want to
establish for this preset and then push the “Play/Select” button.

17
4. The last step is setting the volume level. Use the volume buttons
to dial-in the desired volume level you wish to assign to this
preset and then push “Play/Select” to lock it in.
5. Your preset is now setup.
You can assign the P1, P2, P3, and P4 buttons in the following manner:
1. Highlight the sound that you wish to have established in one of
the four positions.
2. From the main sounds or category screen, press and hold the
P1, P2, P3, or P4 button for approximately 3-4 seconds.
3. Set the volume level and then push the “Play/Select” button to
lock in that preset.
To initiate playback of preset 1-4, make sure that both the Fusion and
Fusion remote are turned on, and then push the corresponding preset
button (P1 – P4) on the top sides of the remote. The Fusion will then
instantly switch to that sound and volume level.
To initiate playback of any preset, simply select the “Favorites/Presets”
menu on the main screen, browse through the available presets, and
then use the “Play/Select” button, just as if you were picking a sound
for normal playback.
Presets can also be managed by editing a specific file located within the
Fusion remote. For advanced information on this process, please view
Chapter 10.
3. Fusion In-Depth
This section provides detailed information concerning the Fusion charge
jack, external speaker jacks, speaker use, and USB port.

18
3-1 Charge Jack Specifications
The integrated charge jack is designed to be used only with the FOXPRO
recharging kit that includes 8 AA rechargeable batteries and 110VAC
wall charger. The Fusion digital game caller is designed to operate on 8
‘AA’ batteries. FOXPRO has several charging accessories available for
purchase. For optimal performance, it is recommended that you use
high capacity (2300 mAh or higher) NiMH (Nickel Metal Hydride)
rechargeable cells.
When you operate your Fusion to play sounds at extremely loud
volume levels, the current demand on the batteries is much more than
alkaline cells can deliver. Consequently, the run times for these
batteries can be very short.
All FOXPRO rechargeable battery kits are shipped with individual
instruction sets that pertain to their unique operations. The following
list of cautions and warnings should be observed with any rechargeable
system you decide to use.
WARNING:
•Do not mix battery types! For example: never use NiMH
rechargeable batteries in conjunction with non-rechargeable
alkaline batteries.
•Never connect your Fusion to an unregulated 12V system (i.e.
automotive systems, high current power supplies, etc.) Serious
damage will occur which is not covered by the warranty. The
charge jack is intended only for FOXPRO®chargers.
•Never attach an unapproved or a non-FOXPRO®charger to your
Fusion! Damages caused by plugging unapproved charging
devices into your Fusion will not be covered by the warranty.

19
GENERAL PRECAUTIONS FOR CHARGING
•Disconnect any/all accessory devices that may be attached to
the Fusion prior to charging. This includes external speakers,
auxiliary devices, and USB cables.
•Make sure that the rechargeable battery pack is installed in the
Fusion properly.
•Connect the approved FOXPRO charger to the charger jack on
the Fusion and attach the transformer to the appropriate outlet.
•Never attempt to charge batteries that are not intended to be
recharged! This includes both Zinc Carbon and alkaline cells.
The resulting damage can be serious and will not be covered by
the warranty. For maximum charge efficiency, we recommend
charging your Fusion in temperatures ranging from 40°F to 85°F
(5°C to 30°C).
•Remember that NiMH batteries self-discharge about 1% per day.
•Do not leave charging batteries unattended.
•Remove batteries from the battery when the caller will not be
used for prolonged periods to help prevent deep discharge and
leakage.
•Recharge your batteries periodically—even when not in use—to
prevent deep discharge.
3-2 External Speaker Jacks Specifications
The Fusion features two external speaker jacks labeled “R EXT” and “F
EXT”. These are standard 3.5mm female jacks that can accept a 3.5mm
male plug. When selecting an external speaker to use with the Fusion,
note that FOXPRO recommends the use of a speaker with 8Ω
Impedance.
FOXPRO carries a variety of external speakers that can be used with the
Fusion. You can view the line of speakers online by visiting
www.gofoxpro.com

20
Connect an external speaker to Your Fusion:
1. Make sure that the Fusion is powered-off before connecting an
external speaker.
2. Connect the plug from the external speaker to either the rear or
front external speaker jack.
3. Turn on the Fusion and begin playing a sound to hear the
external speaker in action.
Disabling the internal speakers:
You can turn off the internal speakers (either rear or front)
independently while still playing audio through rear or front external
speaker jacks. The Fusion features a slide switch for each of the internal
speakers. The switches are labeled “REAR INT” (rear internal) and
“FRONT INT” (front internal). To disable either one of the internal
speakers, simply move the desired switch from the right “on” position
to the left “off” position.
3-3 Auxiliary Device Jack Specifications
The AUX jack is provided primarily for the control of FOXPRO decoys,
and may be suitable for controlling other similar devices. It is NOT
intended for the direct control of motors, flashlights, or other devices
requiring the internal AUX jack circuitry to switch more than 50
milliamps. The jack tip polarity is positive. Do not exceed 15 volts. You
are urged to seek help from a knowledgeable professional before
connecting any unapproved device to the jack. Keep in mind that any
damage to the FOXPRO caller as a result of improper use of the AUX
jack is not covered by the warranty, nor will FOXPRO be liable for
damage to any connected devices.
3-4 Integrated Decoy Wiring Harness
The Fusion features an integrated decoy wiring harness (see image to
the right) for connecting the Fox Jack 4 decoy. Unlike other decoys
Table of contents
Other Foxpro Speakers manuals

Foxpro
Foxpro Hammer Jack 2 User manual

Foxpro
Foxpro SUPER SNOW-CROW PRO W User manual

Foxpro
Foxpro Scorpion User manual

Foxpro
Foxpro SNOWPRO User manual

Foxpro
Foxpro CS-24C User manual

Foxpro
Foxpro PROWLER User manual

Foxpro
Foxpro NX4 User manual

Foxpro
Foxpro HELLCAT PRO User manual

Foxpro
Foxpro HELLFIRE User manual

Foxpro
Foxpro X1 User manual