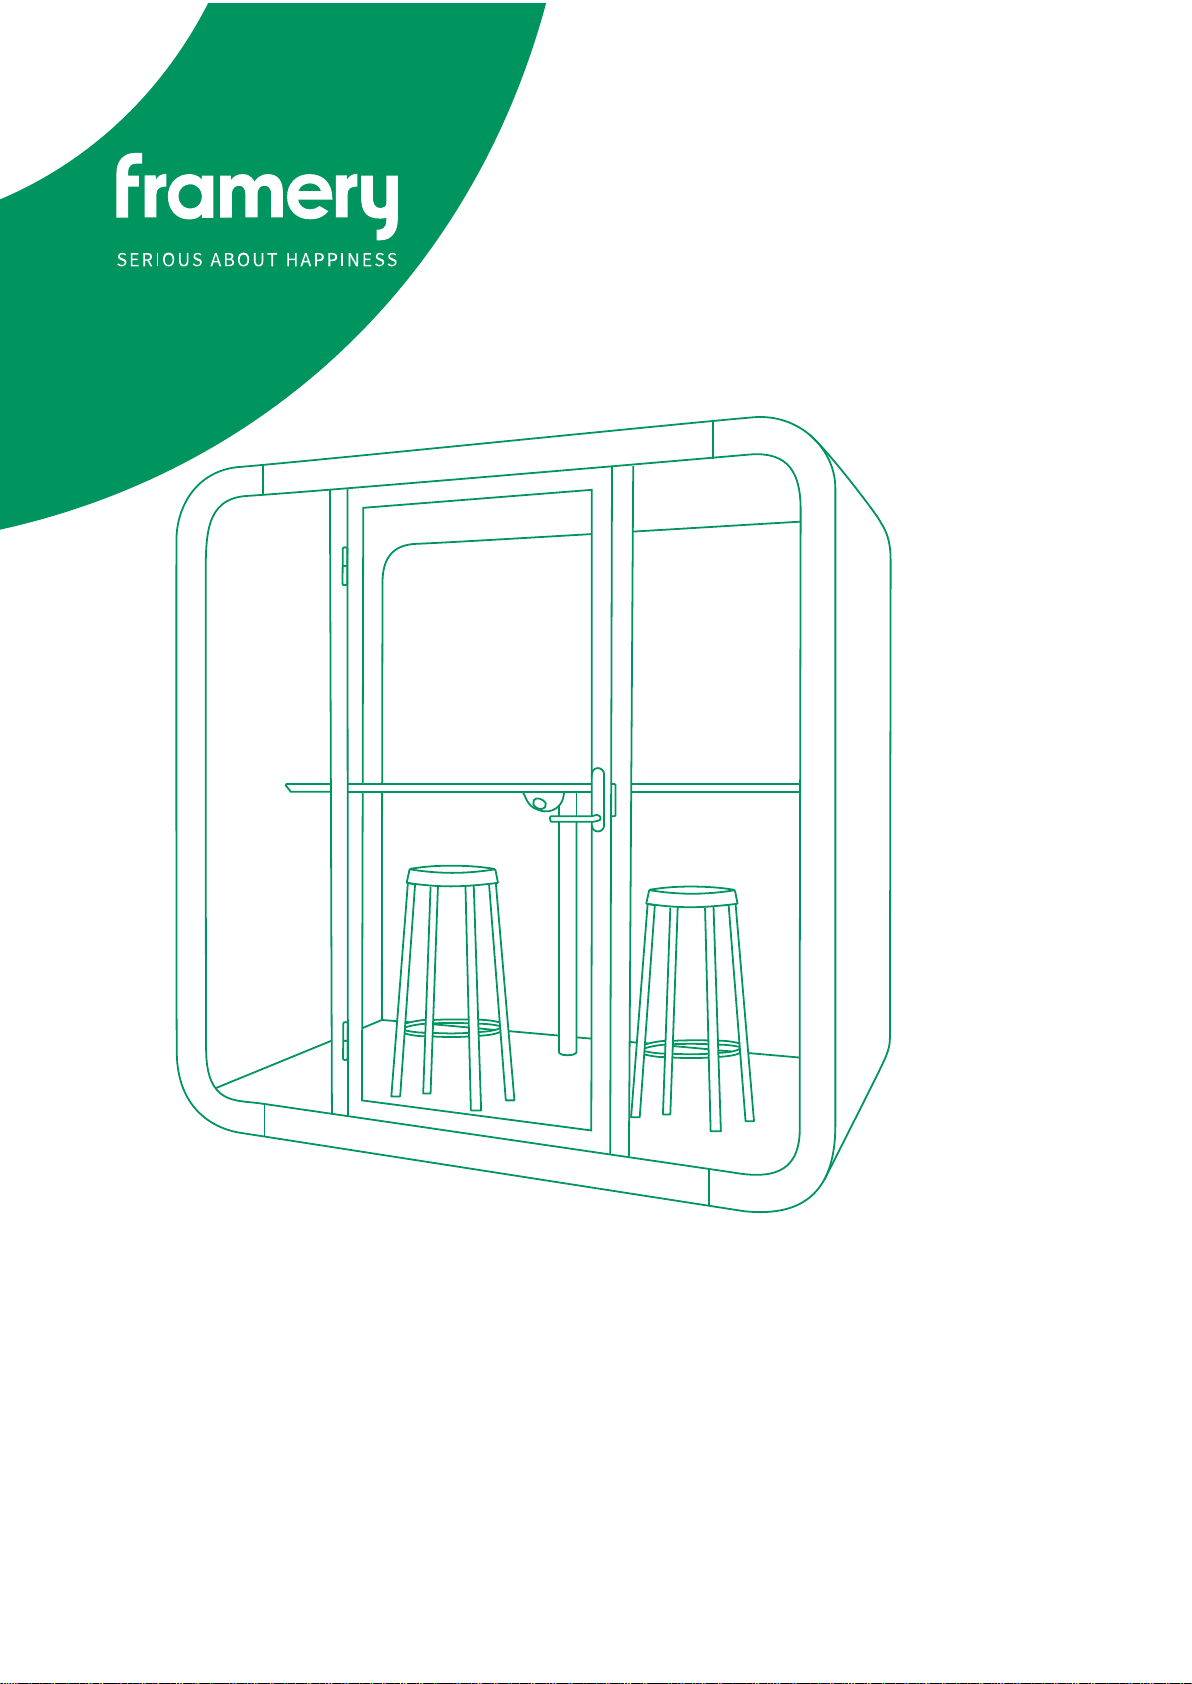
Framery Q Working with PAL User manual

Framery Q Working with PAL
Installation instructions English
Version 2.1


Contents
1 Warranty checklist....................................................................................... 5
2 Safety............................................................................................................ 6
3 Installation requirements............................................................................ 8
3.1 Tools and accessories............................................................................................8
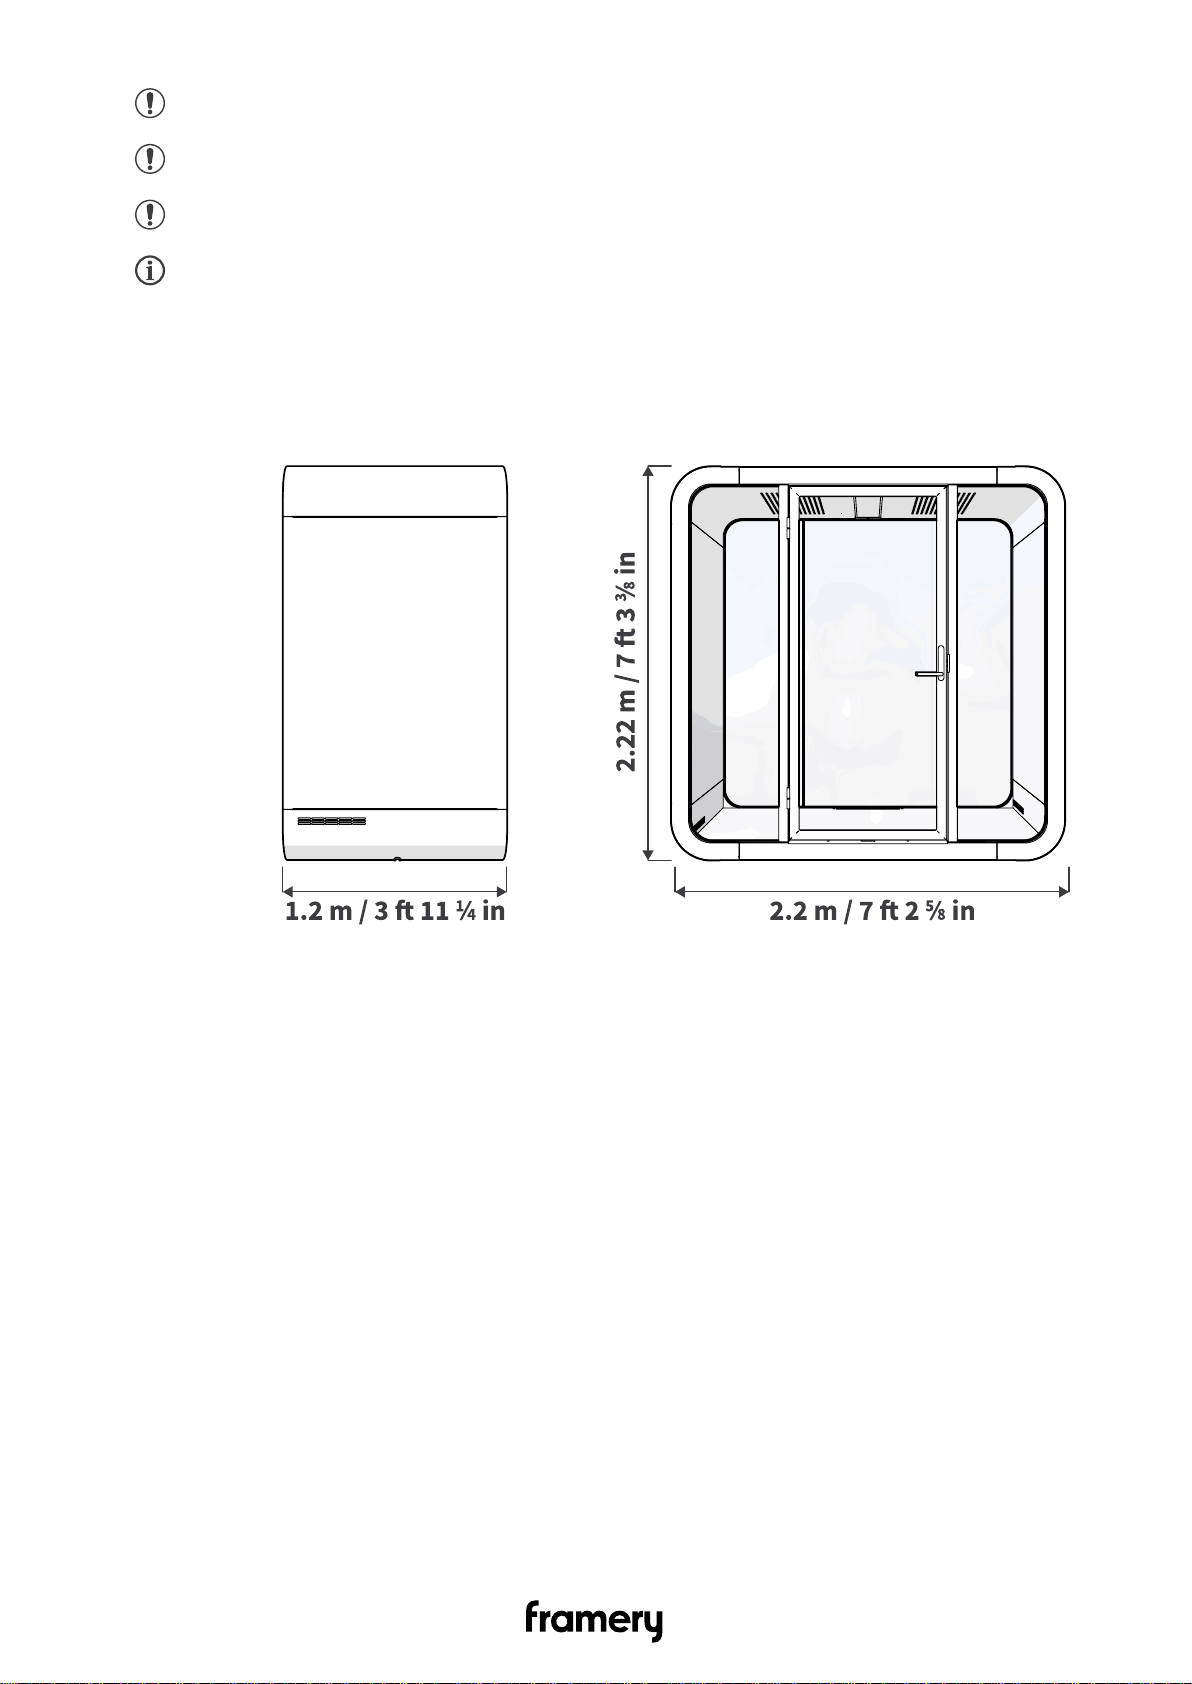
3.2 Main dimensions.....................................................................................................9
3.3 Installation space....................................................................................................9
3.4 Operating space................................................................................................... 10
4 Floor............................................................................................................ 11
4.1 Connect the floor modules................................................................................... 11
4.2 Level the floor.......................................................................................................16
5 Install the wall modules............................................................................17
5.1 Remove the wall cover panels.............................................................................17
5.2 Connect the wall modules to the floor................................................................. 18
6 Roof............................................................................................................. 21
6.1 Connect the roof modules....................................................................................21
6.2 Install the roof.......................................................................................................24
7 Front frames...............................................................................................27
7.1 Install the side frames (front)............................................................................... 27
7.2 Install the front glasses........................................................................................ 31
7.3 Install the upper and lower frames...................................................................... 35
7.4 Install the booking system bracket (optional).......................................................37
8 Back frames and glasses......................................................................... 45
8.1 Install the side frames (back)...............................................................................45
8.2 Install the lower frame..........................................................................................48
8.3 Install the back glasses........................................................................................49
8.4 Install the upper frame......................................................................................... 51
9 Install the cover panels and plates......................................................... 53
10 Install the electrical equipment..............................................................55
10.1 Install the power cord from the floor.................................................................. 55
10.2 Install the power cord from the roof................................................................... 57
10.3 Install the LAN cord (optional)........................................................................... 59
10.4 Install the power unit.......................................................................................... 60

10.5 Install the control unit......................................................................................... 64
10.6 Install the motion detector and light................................................................... 66
11 Install the seals........................................................................................71
12 Install the carpet......................................................................................72
13 Install the floor threshold....................................................................... 73
14 Install the ceiling threshold....................................................................75
15 Install the door.........................................................................................77
15.1 Install the door....................................................................................................77
15.2 Install the door handle........................................................................................79
16 Install the interior.................................................................................... 82
16.1 Install the coat hangers......................................................................................82
16.2 Assemble the table.............................................................................................83
16.3 Install the LAN data cartridge (optional).............................................................85
16.4 Install the power outlet....................................................................................... 87
16.5 Install the table................................................................................................... 88
16.6 Place the seats in the pod................................................................................. 92
17 Install the body covers........................................................................... 93
17.1 Install the roof cover panel.................................................................................93
17.2 Install the bottom body covers........................................................................... 94
17.3 Install the roof body covers................................................................................96
17.4 Install the wall body covers..............................................................................100
18 Finish the installation............................................................................102

1 Warranty checklist
For the product warranty to be valid:
Fill this checklist and send it to Framery after pod installation. Take a photo or scan the filled list and send it to Framery at
[email protected]. Leave the completed list inside the pod.
Country: _________________________________________
City: _________________________________________
Customer: _________________________________________
Pod serial number: _________________________________________
SO number: _________________________________________
Installation company: _________________________________________
Name of installer: _________________________________________
YES
All bolts are tightened according to the instructions
The pod is leveled and standing on the feet of the leveling screws
When the door is left open, it is either at standstill or closes
The door is in the middle of the opening
The door handle is not loose and is installed according to instructions
The pod power cord is connected according to the instructions
The light and fans switch on when a person enters the pod
The fans are making a quiet and even sound
Air flows into the pod from the ventilation channels in the roof module
All furniture is installed securely and according to the instructions
Air flows out of the pod from the ventilation channels when the door is closed
The body covers are installed according to the instructions
The light inside the pod switches off after approximately 8 minutes of inactivity
All glasses are installed evenly and according to the instructions
All glass gaskets are installed according to the instructions
Circle the location of scratches or any other visual defects below. Attach pictures and descriptions of the defects
to the warranty email.
I certify that the pod is installed according to Framery installation instructions and the pod has been checked to be
operating correctly.
Signature and date: ___________________________________________________________
Framery Q Working with PAL Installation instructions
5

2 Safety
This chapter outlines important safety matters concerning the installation and maintenance
of the pod. It is important that these instructions are followed to recognize and prevent
potential risks before they occur.
Note: All personnel must understand and observe these instructions prior to
installation or maintenance of the pod.
Restrictions
• Non-conventional use
• Installation or maintenance of the pod without reading and understanding the
instructions
• Use of the pod beyond the limits of use
• Making alterations to the pod
• Using the pod in spite of obvious defects or damage
• Using the pod outdoors
Making alterations to the pod
Warning: To prevent risks and ensure optimal performance, rebuilding or making
any alterations to the pod may not be carried out without the manufacturer’s explicit
prior permission.
Safety considerations
Note: Read these instructions before installation or maintenance.
Note: Use safety boots and cut-resistant gloves during installation and
maintenance.
Note: The use of the pod is only permitted after it has been properly installed.
Note: When installing or performing maintenance, obey all the local requirements
for safety issues, lifting, and other special tasks.
Note: Keep the installation or maintenance area clean.
Note: After installation or maintenance, clean up the surroundings of the pod.
Note: Do not cover the ventilation channels.
Note: Never drop or insert any object into any opening unless instructed.
Note: Do not place heavy objects on the roof of the pod.
Note: Do not attach or hang extra weight from the door.
Warning: Always disconnect the pod from the power outlet before performing any
maintenance. To disconnect, remove plug from outlet.
6Framery Q Working with PAL Installation instructions

Installation environment
The pod is intended to be used in the following conditions.
• Ambient temperature: +15°C ... +30°C (59°F ... 86°F)
• Humidity: max. 50%
Framery Q Working with PAL Installation instructions
7

3 Installation requirements
3.1 Tools and accessories
Figure 1: Tools and accessories needed for installation and maintenance
Note: Use a white rubber mallet to prevent leaving marks on the body covers.
Note: Use a plastic chisel to remove the body covers.
Note: Use a draw wire in the electrical installations.
8Framery Q Working with PAL Installation instructions

Note: Use a separate piece of carpet in the door installation.
Note: Use a lint-free cloth to clean the pod.
Note: Use a mild alcohol-based cleaning solution to clean the pod.
Tip: Use glass washing liquid as a lubricant to help install the seal.
3.2 Main dimensions
Figure 2: Main dimensions of the pod
3.3 Installation space
Make sure that you have enough installation space before you start the installation.
The minimum operating width includes 50 mm (1.9 in) on both sides of the pod and 150
mm (5.9 in) above the pod to ensure sufficient ventilation.
Framery Q Working with PAL Installation instructions
9

Figure 3: Installation space measurements
3.4 Operating space
Make sure that the pod has enough space for the air to circulate correctly.
Figure 4: Operating space measurements
10 Framery Q Working with PAL Installation instructions

4 Floor
4.1 Connect the floor modules
1. Lay the floor modules down at the intended final location.
Leave approximately 0.5 m (2 ft) of empty space behind the floor modules.
Note: If reinstalling the pod after relocation, there may be some scratches on
the black ABS strips. Make sure that the scratched sides are on the intended
front of the pod.
Note: Make sure that the half-sized acoustic panel is at the intended back of
the pod.
Framery Q Working with PAL Installation instructions
11

2. Install guide pins (2 pcs) to the holes in one of the floor modules.
Note: Make sure that the flat side of the guide pin goes into the mounting hole.
3. Push the floor modules together.
12 Framery Q Working with PAL Installation instructions

4. Install flanged M8x50 bolts (4 pcs) and M8 nuts (4 pcs).
5. Unscrew the 4x30 screws (4 pcs) and remove the cover plates (4 pcs). Set the cover
plates and screws aside.
Framery Q Working with PAL Installation instructions
13

6. Install guide pins (4 pcs) to the holes on the front of the floor.
Note: Make sure that the flat side of the guide pin goes into the mounting hole.
7. Install the front lower frame to the front of the floor with M8x60 bolts (2 pcs) and M8
washers (2 pcs) at the small openings and with one M8x35 bolt and M8 washer at the
center opening.
Note: Press the acoustic panel aside to reach the bolt holes. Make sure that
you return the acoustic panel to its original position.
Note: Make sure that you install the correct frame to the front.
14 Framery Q Working with PAL Installation instructions

8. Install guide pins (4 pcs) to the holes on the back of the floor.
Note: Make sure that the flat side of the guide pin goes into the mounting hole.
9. Install the back lower frame to the floor with M8x60 bolts (2 pcs) and M8 washers
(2 pcs) at the small openings and with one M8x35 bolt and M8 washer at the center
opening.
Note: Press the acoustic panel aside to reach the bolt holes. Make sure that
you return the acoustic panel to its original position.
Note: Make sure that you install the correct frame to the back.
Framery Q Working with PAL Installation instructions
15

4.2 Level the floor
1. Screw out the feet of the leveling screws (8 pcs) gradually with a T-handle socket
wrench.
The feet of the leveling screws are against the floor when you feel resistance.
2. Measure the floor module with a spirit level at six measuring points:
• On top of the walls on the right-hand and left-hand sides
• On the ABS strips at the edges of the floor modules
Measure opposite points repeatedly and adjust the feet of the leveling screws
gradually.
16 Framery Q Working with PAL Installation instructions

5 Install the wall modules
5.1 Remove the wall cover panels
1. Place the wall modules lengthwise against a wall.
2. Unscrew the 4x30 screws (24 pcs) and remove the cover panels (4 pcs). Set the cover
panels and screws aside.
Note: Make sure that the wall modules do not fall over.
Framery Q Working with PAL Installation instructions
17

5.2 Connect the wall modules to the floor
1. Install the guide pins (4 pcs) to the mounting holes of the floor modules.
Note: Make sure that the flat side of the guide pin goes into the mounting hole.
2. Lift one wall module into place so that the "This side up" -sticker is on the top edge of
the wall.
Note: Support the wall until it is secured with the bolts.
18 Framery Q Working with PAL Installation instructions

3. Install M8x35 bolts (4 pcs) and M8 washers (4 pcs).
Note: Support the wall until it is secured with the bolts.
4. Lift the other wall module into place so that the "This side up" -sticker is on the top
edge of the wall.
Note: Support the wall until it is secured with the bolts.
Framery Q Working with PAL Installation instructions
19

5. Install M8x35 bolts (4 pcs) and M8 washers (4 pcs).
Note: Support the wall until it is secured with the bolts.
20 Framery Q Working with PAL Installation instructions
Table of contents
Other Framery Indoor Furnishing manuals
Popular Indoor Furnishing manuals by other brands

Argos
Argos Adult Malibu 532/8038 Assembly instructions

Deuba
Deuba 100480 instructions

Rockler
Rockler Deluxe Murphy manual

Rife
Rife DM7 Assembly and operation instructions

Workrite Ergonomics
Workrite Ergonomics Sierra SEHX7890-4272OC Series Assembly/installation instructions

IKEA
IKEA EKTORP CHAIR FRAME instructions

Pacific Casual
Pacific Casual Barcalounger Edgewater 301-2X1-3SS Use and care instructions

BOBOCHIC
BOBOCHIC MEYER quick start guide

Amart Furniture
Amart Furniture SILENTIA 73576 Assembly instruction

Furniture of America
Furniture of America CM-DK6252CD-1 Assembly instructions

Linak
Linak DESKLINE DL5 user manual

Stryker
Stryker 4400-800-000 Assembly instructions