Framery O VCR Guide

Framery O VCR
Troubleshooting instructions
English
Version 1.0
Pods ordered 02/2019–08/2019


Contents
1 Safety............................................................................................................ 5
2 The door is leaking sound or does not seal properly..............................7
3 The body covers do not fit.......................................................................23
4 Power issues..............................................................................................26
4.1 There is no electricity in the pod or the electricity goes on and off...................... 26
4.2 The power outlet is not working...........................................................................37
5 Fans and lights.......................................................................................... 40
5.1 There is no power to the fans and light............................................................... 40
5.2 The fans and lights switch off too quickly or are always on................................. 45
5.3 The ceiling light does not switch on.....................................................................48
5.4 The display light does not switch on....................................................................54
5.5 The control panel is not working..........................................................................57
5.6 When you adjust the ceiling light, the display light is also adjusted..................... 59
5.7 One or both fans are not working........................................................................ 62
5.8 The fans are noisy............................................................................................... 67
5.9 The air inside the pod does not feel fresh........................................................... 71
6 Door handle and lock................................................................................78
6.1 The door handle is loose..................................................................................... 78
6.2 The door handle is tight....................................................................................... 81
6.3 The lock latch is stiff or gets stuck...................................................................... 85


1 Safety
This chapter outlines important safety matters concerning the installation and maintenance
of the pod. It is important that these instructions are followed to recognize and prevent
potential risks before they occur.
Note: All personnel must understand and observe these instructions prior to
installation or maintenance of the pod.
Restrictions
• Non-conventional use
• Installation or maintenance of the pod without reading and understanding the
instructions
• Use of the pod beyond the limits of use
• Making alterations to the pod
• Using the pod in spite of obvious defects or damage
• Using the pod outdoors
Making alterations to the pod
Warning: To prevent risks and ensure optimal performance, rebuilding or making
any alterations to the pod may not be carried out without the manufacturer’s explicit
prior permission.
Safety considerations
Note: Read these instructions before installation or maintenance.
Note: Use safety boots and cut-resistant gloves during installation and
maintenance.
Note: The use of the pod is only permitted after it has been properly installed.
Note: When installing or performing maintenance, obey all the local requirements
for safety issues, lifting, and other special tasks.
Note: Keep the installation or maintenance area clean.
Note: After installation or maintenance, clean up the surroundings of the pod.
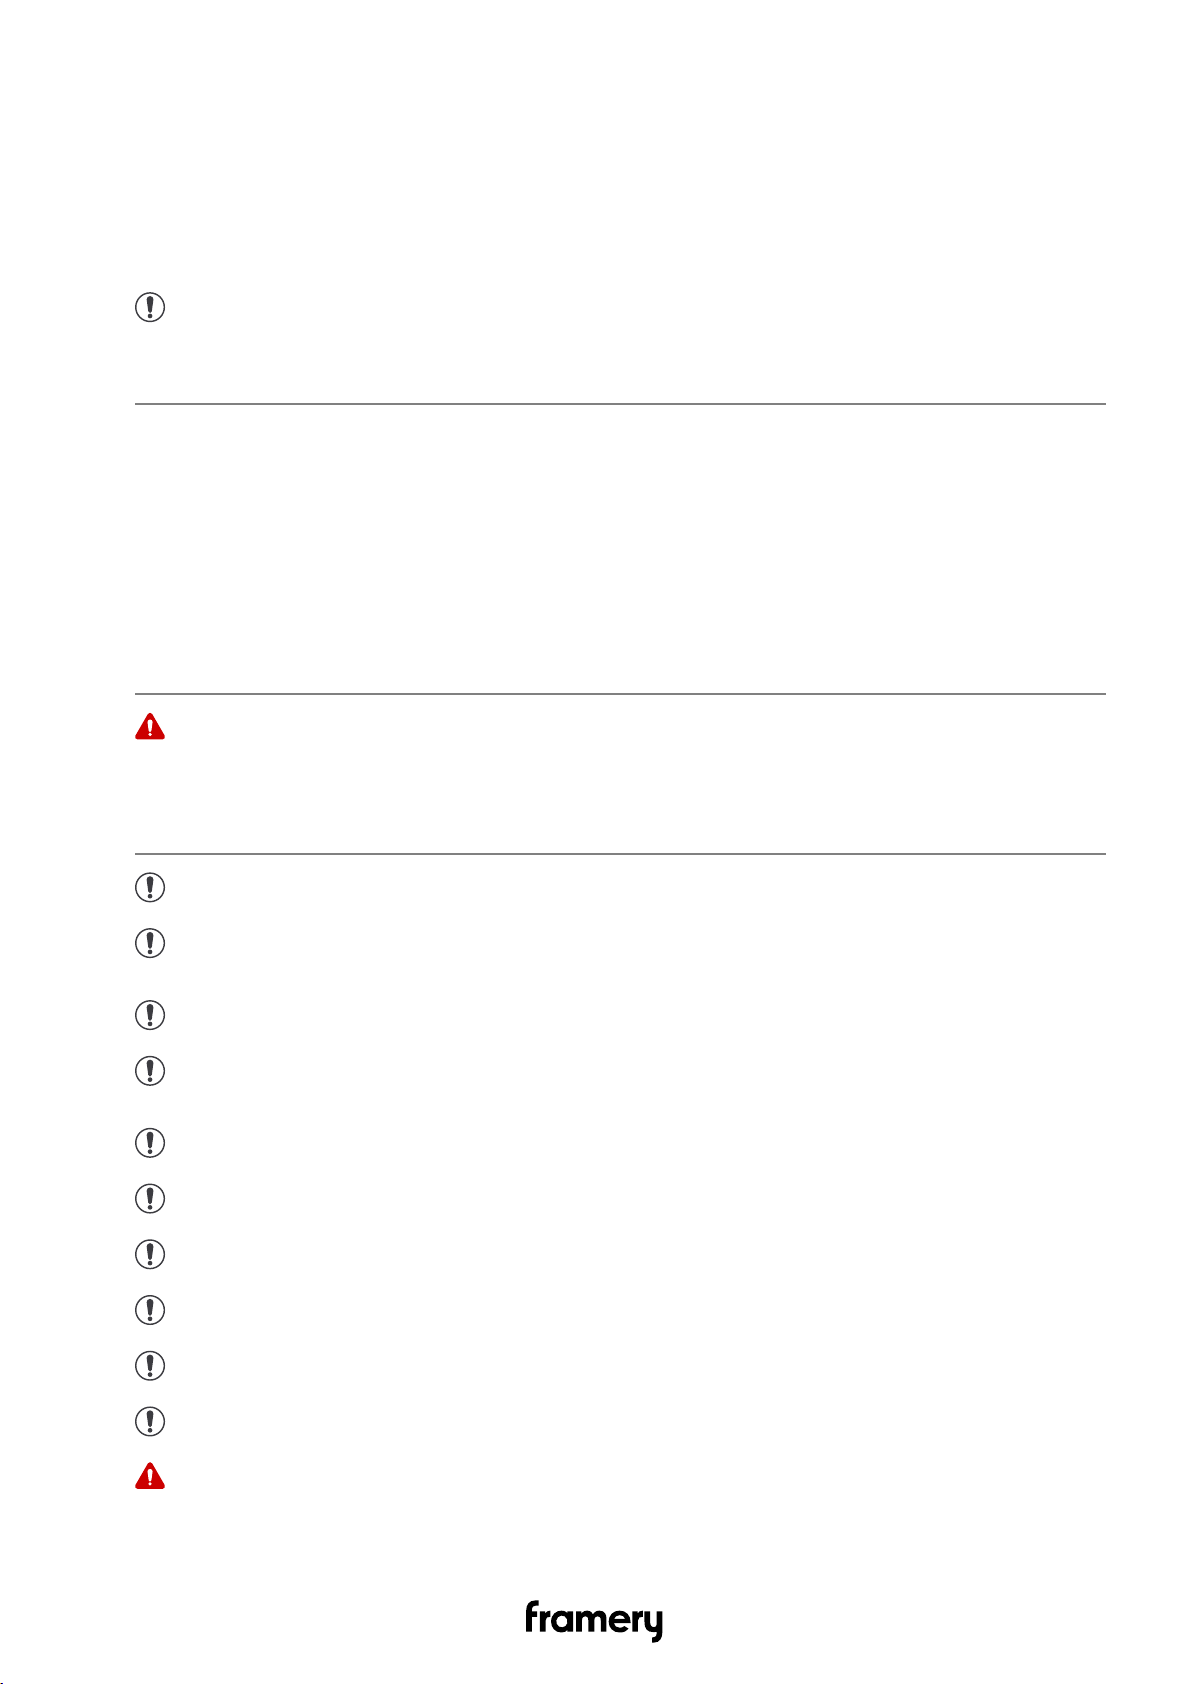
Note: Do not cover the ventilation channels.
Note: Never drop or insert any object into any opening unless instructed.
Note: Do not place heavy objects on the roof of the pod.
Note: Do not attach or hang extra weight from the door.
Warning: Always disconnect the pod from the power outlet before performing any
maintenance. To disconnect, remove plug from outlet.
Framery O VCR Troubleshooting instructions
5

Installation environment
The pod is intended to be used in the following conditions.
• Ambient temperature: +15°C ... +30°C (59°F ... 86°F)
• Humidity: max. 50%
6Framery O VCR Troubleshooting instructions

2 The door is leaking sound or does not seal properly
Condition
When you are standing outside the pod you can hear what a person inside the pod is
saying and the person inside the pod can hear noises from outside the pod.
Cause: The floor of the pod is not leveled.
Solution: Level the floor.
1. Remove the carpet.
Framery O VCR Troubleshooting instructions
7

2. Measure the floor module with a spirit level at four measuring points:
• Along the sides
• At the edge of the floor module (on the ABS strips)
3. Measure opposite points repeatedly and adjust the leveling screws gradually.
8Framery O VCR Troubleshooting instructions

4. Reinstall the carpet.
Note: Make sure that the carpet is firmly in place and that there are no bumps.
Cause: The pod is not standing straight.
Solution: Straighten the pod.
1. Check the straightness of the pod with a spirit level on both sides. If the pod is not
standing straight, complete the following steps.
Framery O VCR Troubleshooting instructions
9

2. Remove the wall body covers.
3. Remove the roof and bottom body covers.
10 Framery O VCR Troubleshooting instructions

4. Remove the carpet.
5. Unscrew the 4x30 screws (8 pcs) and remove the wall cover panels (4 pcs).
Framery O VCR Troubleshooting instructions
11

6. Unscrew the 4x30 screws (32 pcs) and remove the top and bottom cover panels (4
pcs).
7. Unscrew the 4x30 screws (4 pcs) and remove the floor cover panels (2 pcs).
12 Framery O VCR Troubleshooting instructions

8. Unscrew the 4x30 screws (4 pcs) and remove the roof cover panels (2 pcs).
9. Remove the seal from the glass wall.
Framery O VCR Troubleshooting instructions
13

10. Open the door completely (180°).
11. Loosen all the frame and body bolts slightly.
14 Framery O VCR Troubleshooting instructions

12. Measure and push the pod walls as needed and, keeping them straight, tighten the
bolts at the same time.
Note: Do not overtighten the bolts.
13. Install a new seal to the glass wall.
14. Reinstall the removed parts.
Cause: The door is too low.
The door is not vertically in the middle of the door opening.
Framery O VCR Troubleshooting instructions
15

Solution: Adjust the door height.
1. Remove the caps from the hinges.
2. Open the door and loosen the set screws.
3. Close the door.
16 Framery O VCR Troubleshooting instructions

4. To raise the door, insert the hex key into the top of the upper hinge and turn clockwise.
To lower the door, turn counter-clockwise.
Note: After the initial installation, the door normally does not have to be
lowered, but raised.
5. Adjust the height setting of the lower hinge accordingly so that the load on both hinges
is the same. Turn clockwise to raise and counter-clockwise to lower the setting.
Framery O VCR Troubleshooting instructions
17

6. Make sure that the door is aligned correctly.
7. Test with a flashlight from the inside of the pod.
If the flashlight shines through the door seams, adjust the door.
8. Repeat steps 4–6 if needed.
9. Close the door.
10. Open the door and tighten the set screws when the adjustment is complete.
Note: Make sure that both hinges have the same height setting.
18 Framery O VCR Troubleshooting instructions

11. Install the caps.
Cause: The door is sagging.
Solution: Install an adjustment plate under the lower hinges.
1. Open the door completely (180°).
Framery O VCR Troubleshooting instructions
19

2. Lift the door to detach it.
3. Unscrew the 5x30 screws (4 pcs) and remove the lower hinges.
20 Framery O VCR Troubleshooting instructions
Other manuals for O VCR
1
This manual suits for next models
1
Table of contents
Other Framery Office Equipment manuals
Popular Office Equipment manuals by other brands

Spaceti
Spaceti Smart Stone CO2 user manual

bott
bott Cubio Installation and operating instructions

Xylem
Xylem Ebro EBI 16 manual

Cool Collection
Cool Collection Crystalline AP813012 user manual

OCEE DESIGN
OCEE DESIGN DEN.Curve Assembly instructions

Acroprint
Acroprint ELECTRIC STAMPS General service instructions