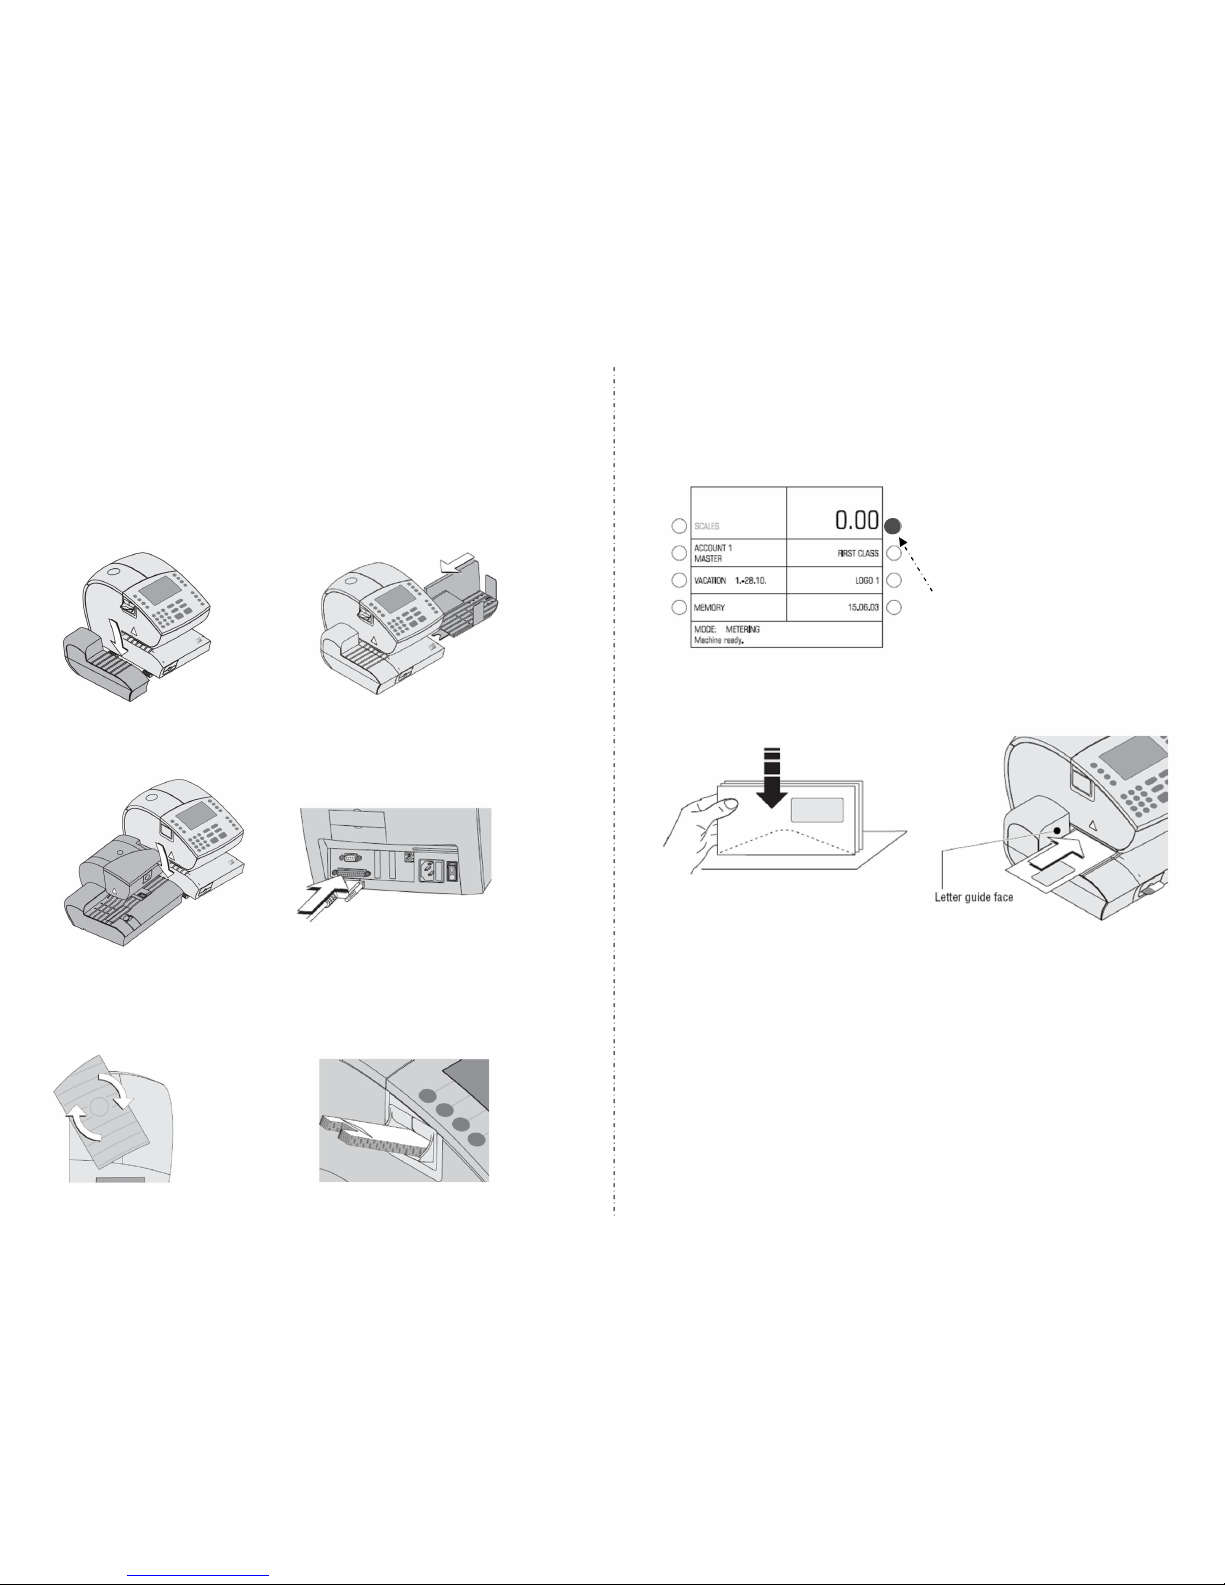
Francotyp-Postalia ultimail User manual

FP Ultimail
www.fpmailing.co.uk
Quick install guide
Please install this unit first
Francotyp Postalia
Ultimail
Francotyp Postalia
74 Questor
Powdermill lane
Dartford
Kent
DA1 1EF
To book service calls, please visit our website www.fpmailing.co.uk and
click on the service request link
The franking machine should be installed on a flat surface near to a
power socket and an analogue phone socket.
Leave enough room at the rear of the machine for ventilation.

Ultimail keyboard layout
Now that the credit has been loaded onto the machine we would like you to
take a minute to connect to our warranty server to register the machine.
Connect to our warranty server
12
Step
Push the setup Button and then the ‘System information’ option
Now choose the ‘Send to FP service Dept. option
The machine will automatically dial our warranty server and active your
warranty
Once the upload is complete, push the HOME button

The box / boxes should contain the following items. If any items are missing from the
box / boxes, please contact Francotyp – Postalia on: 0870 145 0055
Ultimail franking machine
2 ink cartridges
2 x master cards
Telephone cable
Power Cable
Quick reference guide
Scale platform (optional)
Hand feed unit
Catcher tray Label dispenser (optional)
Checking the contents of the
franking machine box
1
Step
Operating manual
Trouble-shooting
11
Step
If you experience any problems during this installation please refer to our
website where you will find a support section, please fill in the form and email
it to us and one of our customer representatives will call you back.
Please refer to the operating manual for full operating instructions
including setting up accounts and using the internal scale
(where ordered)
There is a comprehensive troubleshooting section in the operating manual
section 13.
You will also find a support FAQ section on our website.
www.fpmailing.co.uk
You can also call our customer support team on: 0870 145 0055

Trial run
10
Step
You can frank a trial run with postage
value “0.00” (zero imprint).
Type the postage value “0” in the
home menu and confirm with the soft
key next to the postage value (upper
right soft key)
Place an empty envelope on the
letter receiving tray
Push the envelope in until the letter
sensor recognises the envelope and
starts letter transport.
Your new FP Ultimail should be printing and is now ready for daily use.
If you have experienced any problems with this installation, please refer
to the operating manual for a comprehensive guide including cleaning
the print system and troubleshooting.
Alternatively you can log a support call on our website by visiting:
www.fpmailing.co.uk and clicking on the service request link.
If you have however ordered the FP sealing unit you will need to
connect this unit to the Ultimail instead of the hand feed unit as well
as the catcher tray
If you have ordered the Ultimail with an internal scale, a scale tray
will be included in the box, position this as shown and lock by turning
it a quarter turn clockwise, you can also install the label dispenser at
this point if ordered
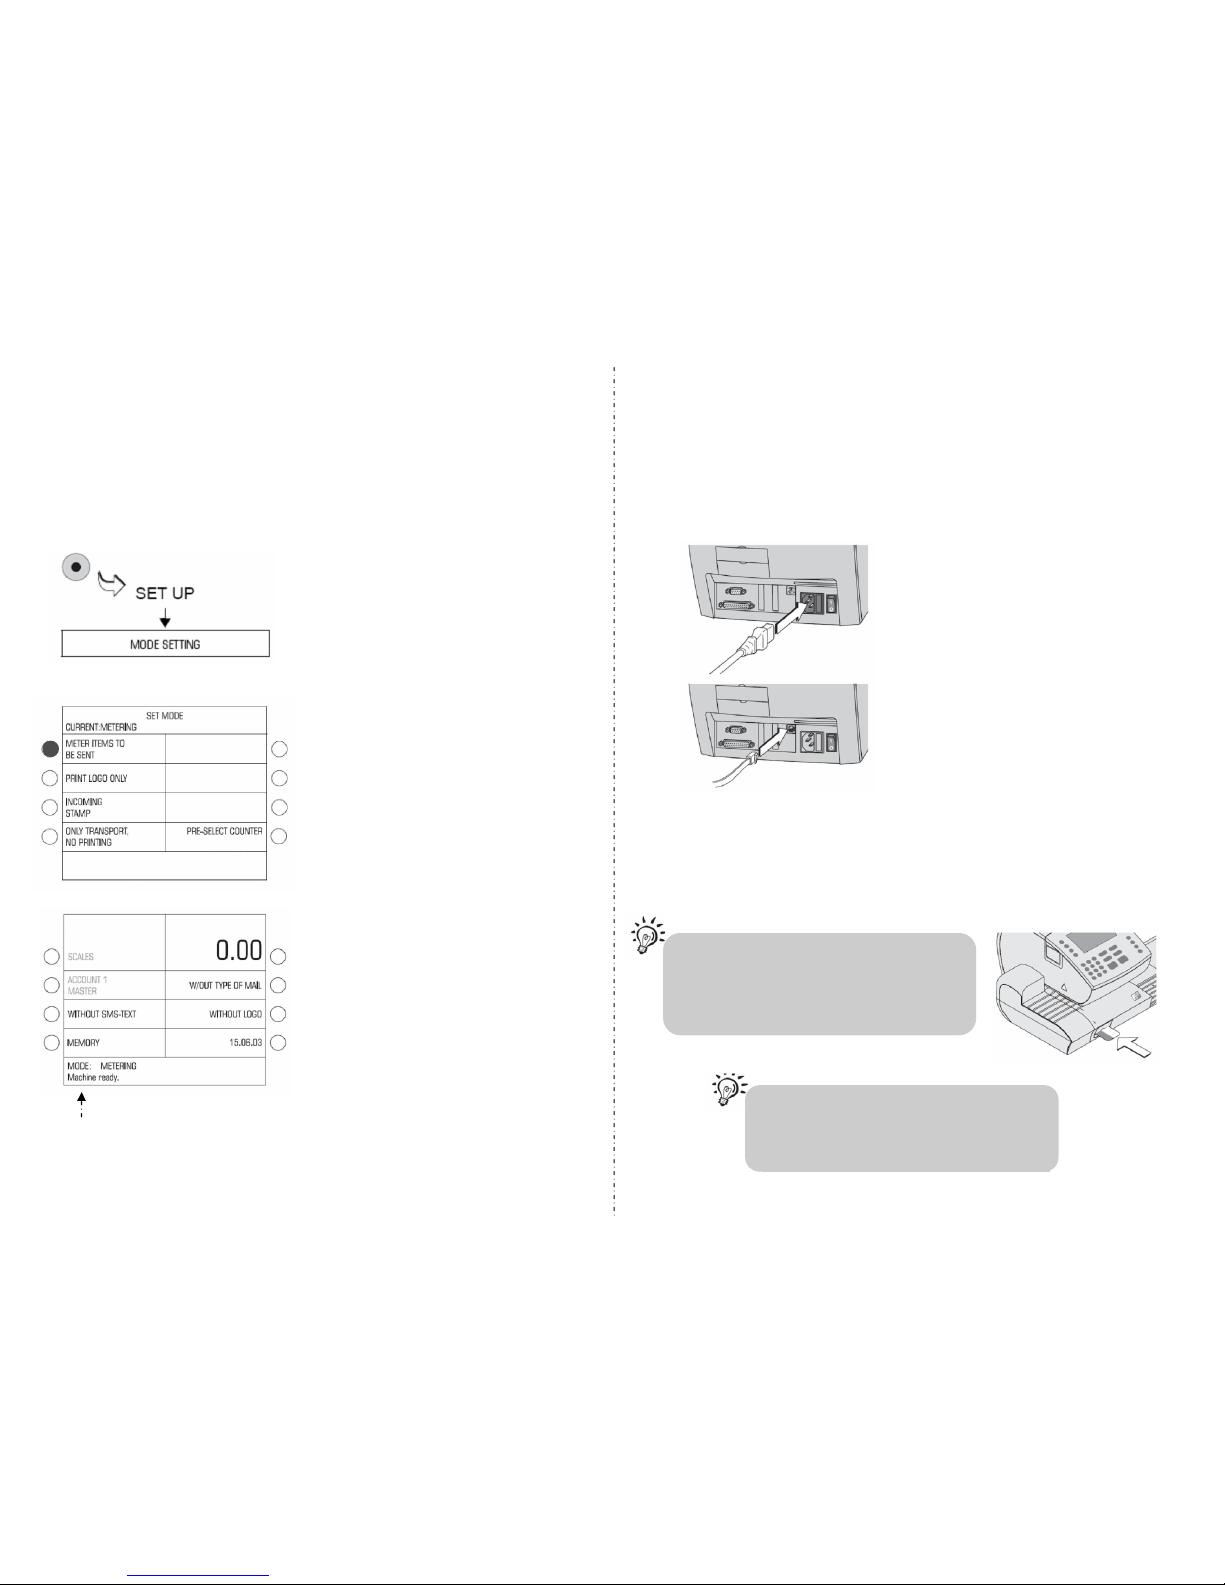
Connecting the peripherals (don't forget that the
machine need to be near a power socket and an analogue
telephone line)
2
Step
Lip at the bottom
Included in the franking machine box is a hand feed unit, if you have not
ordered the FP sealing unit you will need to connect this unit to the Ultimail as
well as the catcher tray

Now insert the black telephone cable into the back of the
franking machine, and insert the other end into the analogue*
telephone line that you wish to use (still do not switch on at this point)
Now using one of the master cards provided, insert it into the slot in the
front of the machine with the ‘chip’ facing down
Included in the franking machine box, is a black power lead, you should now
locate the power connection in the back of the franking machine and plug into
the mains socket also ensure that the mains socket is switched ‘ON’
* Analogue lines include:
• Fax lines
• Lines used by credit card machines
• Residential phone lines
Power connection
Telephone cable connection
(push until it clicks)
Connecting the cables (do not switch on at
this stage)
3
Step
You must have the ‘Master card’ in
the machine at all times (the chip on
the card must face downwards)
removing it will disable use of the
machine (security feature)
Setting the machine to franking mode
9
Step
To set the franking machine into franking mode you will need to:
Push SETUP - MODE SETTING then choose METER (FRANK) ITEMS
The mode at the bottom of the screen will then change to METERING

Calibrate the ink cartridges
8
Step
Determine the number on the test
imprint where the vertical lines are
the straightest Enter the determined
number with numeric keys.
The entered number appears in the
display after “Your input:”
Read the text in the display very
care-fully.
Then select:
TEST NEW ADJUSTMENT, to
repeat the adjustment if the lines
are still not perfectly straight or
END ADJUSTMENT PROCEDURE.
If necessary, repeat the adjustment
several times until the cartridges are
correctly aligned.
Once the power cable and the telephone cable have been connected, you can
now switch the machine on using the power switch at the rear of the Ultimail
The screen below will be displayed, BYPASS ANY ERROR MESSAGES AT
THIS TIME BY PUSHING THE ‘ENTER’ BUTTON
The first thing you need to do is connect the Ultimail to our re-crediting centre.
If your telephone line requires a 9 to reach an outside line, you can continue
to step 6 as the machine is already programmed to do this
If your telephone system is a direct line out you will need to set the Ultimail to
do this, continue to step 5
Switching the machine on
4
Step
Both horizontal and vertical lines should be
equal to 5 before ending
calibration

The telephone system you have does not require a 9 or another number to be
dialled to get an outside line
First push the ‘TELESET’ button on the keyboard
Push the ‘MODEM CONFIGURATION’
Push the ‘TYPE OF PHONE LINE’ option until ‘MAIN STATION’ appears
Push the SAVE option
Push the CONTINUE option
Push the HOME button
Configure the machine to dial direct out
5
Step
Adjust the ink cartridges
8
Step
At this point you will need to follow the on screen instructions
It is necessary to adjust the new ink
cartridges to obtain a perfect print
Image
In the ADJUSTING PRINTING
menu:Press the key next to ADJUST
INK CARTRIDGES.
The Ultimail will prompt you to position
an empty letter.
Feed an empty envelope through the
machine for a test print.
The Ultimail prints the test print.
Determine the number on the test
imprint where the horizontal lines are
the straightest. Enter the determined
number with numeric keys.
The entered number appears in the
display after “Your input:”.
Confirm with CONTINUE
SYSTEMSETTINGS
PRINT
ADJUST INK CARTRIDGES

Install the ink cartridges
7
Step
Open the ink cartridge flap as indicated
First remove the ink cartridges from the box and remove the protective tape
from the bottom of both cartridges
Insert both cartridges with the printing elements to the rear of the machine
Turn both green catches toward the back of the machine
Ensure that the green catches are locked
into position before closing the cartridges
door
Now that the dialling parameters have been configured, you can connect to
our re-crediting centre TELESET to download credit into the machine 24
hours a day 7 days a week
Connect to our re-crediting centre TELESET
6
Step
Push the TELESET button on the keypad for the following screen and
Type in the amount of postage to wish to load in units of £10 only and to a
maximum of £9990 funds permitting
confirm with the ‘Continue’ option
The machine will automatically dial our TELESET centre and download the
credit for you.
Once the re-crediting is complete, you will see a booking report, you can pass
an envelope or label through the machine to print this, otherwise choose the
CONTINUE option
If you see any error codes on the screen,
please refer to the troubleshooting section
of the operating manual
Other manuals for ultimail
1
Table of contents
Other Francotyp-Postalia Digital Mailing System manuals