manuals.online logo
Brands
  1. Home
  2. •
  3. Brands
  4. •
  5. Franke
  6. •
  7. Ventilation Hood
  8. •
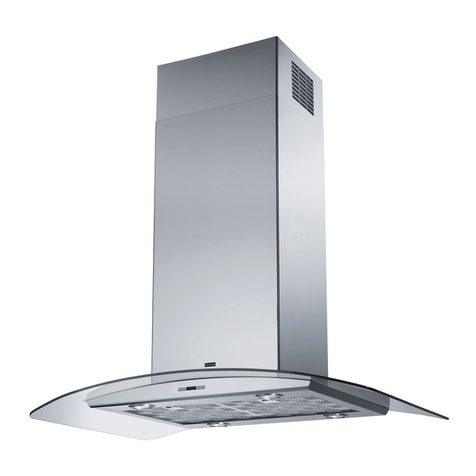
  9. Franke FNES 907 BTH XS User manual

Franke FNES 907 BTH XS User manual

HANDBOOK FNES 907 BTH XS
9925099 110.0044.369
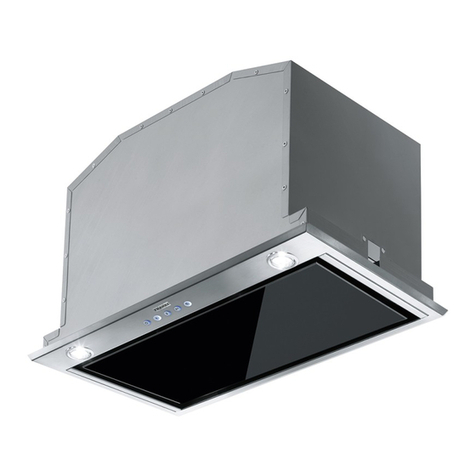
WALL MOUNTED HOOD
FLOW RATE 850/800 M3/H
TOTAL POWER WATT 400 W
no 01 motor 240 w
SPEED NO 04 speed + boost
NR 03 halogen lamps X 20 W each one
Sliding carriage
Delay – Enables automatic shutdown of the Motor, the Fans and the
Lighting with a 30’ delay.
Turns the lighting system on and off. Press for 2 Seconds to allow an
optional additional appliance to be turned on and off. Turns the reduced
intensity lighting system on and off.
Starts the Motor at a speed that allows suction of 100 m3/h for 10 minutes
per hour for 24h, after which the Motor will stop.
CHARCOAL FILTER and GREASE FILTER ALARM
updated JANUARY 2010
SPEED FLOW RATE Free
delivery [m3/h] FLOW RATE IEC
61591 [m3/h] PRESSURE
Maximum [Pa] POWER IMPUT [W] SOUND POWER
I 270 260 / 250 290 75 46 / 51
II 350 340 / 330 360 155 49 / 53
III 550 530 / 500 450 215 59 / 60
IV 730 700 / 640 480 300 66 / 66
INTENSIVO 850 800 / 710 500 340 68
Modello
Neptune Soft Jet
A Carriage Closed: Press for approx. 1.5 Seconds to open the carriage, turn the lights on, turn the Fans
on and start the Motor at the last speed set. Carriage Open: Press briefly to turn the Motor off or to
start it at the last speed set. Press for 1.5 seconds to turn the Motor and the Fans off and to close the
carriage.
Displays the set speed. With the Fans on, the Display on
the left shows an animation.
b Press briefly to decrease the working speed. Press for 2 Seconds to turn the Fans off. Once the Fans
are turned off they will turn on automati-cally every time the Carriage is extracted, or when the
Working speed is increased.
C Increase the working speed.
D Intensive function: Can only be activated with the Carriage open at any speed and with the Motor
turned off. It has a timer set to 10 minutes, after which the system will return to the speed set before.
Suitable to deal with maximum levels of cooking fumes. When the function is enabled/disabled, the
Fans are en-abled/disabled. Cannot be enabled when Delay or 24H are on.
Displays HI and the time remaining, alternately. It is
disabled by pressing the Button or turning THE MOTOR
OFF
E 24H function: Carriage Closed: The function is enabled and the carriage remains closed. Carriage
Open: When the function is enabled the Motor and the Fans turn off and the carriage returns; After this
the 24H function starts. Starts the Motor at a speed that allows suction of 100 m3/h for 10 minutes per
hour for 24h, after which the Motor will stop. When the filter alarm is active, press the button for ap-
proximately 4 seconds with the Motor and Lights off to reset the alarm. Reset is indicated by the fact
that the Display turns off. These signals are only visible when the Motor is off.
Displays 24, and the dot on the Right flashes once a
second when the Motor is on, while when the Motor is off
only 24 appears. It is disabled by pressing the Button or
turning the Motor off. When the procedure terminates,
the indication shown previously turns off: FF indicates the
need to wash the metal grease filters. The alarm is
triggered after the Hood has been in operation for 100
working hours. EF indicates the need to change the
activated charcoal filters, and to wash the metal grease
filters. The alarm is triggered after the Hood has been in
operation for 200 working hours.
F Delay function: Enables automatic shutdown of the Motor, the Fans and the Lighting with a 30’ delay.
Cannot be enabled when Intensive or 24H are on. Displays the speed of the Motor and the time remaining,
alternately. It is disabled by pressing the Button or turning
THE MOTOR OFF
G Turns the lighting system on and off. Press for 2 Seconds to allow an optional additional appliance
to be turned on and off.
H Turns the reduced intensity lighting system on and off.
Warning: Do not put anything on the sliding carriage when it is open!
RESET METAL Grease filter
These can be washed in the dishwasher, and need to be cleaned whenever the FF sign appears on the display or at least once every 2 months use, or more frequently if
use is particularly intensive. Resetting the alarm signal
• Turn the Lights and the Suction motor off, then disable the 24h func-tion, if enabled.
• Press button E until the display turns off. Cleaning the Filters
• Open the Comfort Panel by turning the knobs.
• Remove the Filters one at a time, pushing them towards the back of the unit and at the same time pulling downward.
• Wash the Filters without bending them, and leave them to dry com-pletely before replacing. (If the surface of the filter changes colour as time goes by, this will have
absolutely no effect on the efficiency of the filter itself.)
• Replace, taking care to ensure that the handle faces forwards.
Charcoal filter
This filter cannot be washed or regenerated. It must be replaced when the EF appears on the display or at least once every 4 months. Activation of the alarm signal
• In the recycling version hoods the filter saturation alarm must be activated during the instal-lation or later.
• Switch off the hood and the lights.
• Disconnect the hood from the mains supply.
• When restoring the connection press and hold B-key.
• When releasing the key two rotating rectangles appear on the display.
• Within 3 seconds press the B-key until a flashing confirmation appears on the dispaly:
• 2 flashes with EF - charcoal filter saturation alarm ACTIVATED
• 1 flash with EF - charcoal filter saturation alarm DEACTIVATED.
CHANGING THE ACTIVATED CHARCOAL FILTER Resetting the alarm signal
• Turn the Lights and the Suction motor off, then disable the 24h func-tion, if enabled.
• Press button E until the display turns off. Changing the Filter
• Open the Comfort Panel by turning the knobs.
• Remove the Metal grease filters. • Remove the saturated Activated charcoal filter, using the hooks pro-vided.
• Fit the new Filter, hooking it into place.
• Replace the Metal grease filters. • Close the Comfort Panel by turning the knobs.
Position Spare part code fun number description quantity Product code
1 1960373 133.0017.054 METAL FILTER 243 253X300MM 3 9925099
2 1961417 133.0069.797 KIT KNOBS+CLOSING PLATES NO 2 PCS 1 9925099
3 9925204 112.0016.756 CHARCOAL FILTER/ PANEL 1 9925099
4 1961392 133.0057.285 SUPPORT HINGE FOR LIGHTSPOT 1 9925099
5 1960387 133.0017.060 BUILT IN SPOTLIGHT S1000 3 9925099
8 1961178 133.0056.190 CABLE CLAMP 1 9925099
9 1961179 133.0069.798 FAN JET 3000 2 9925099
13 1961183 133.0069.799 HEXAGONAL LINER PLATE 1 9925099
18 1961187 133.0069.800 MAIN BODY NEPTUNE SOFT 1 9925099
19 1960626 133.0016.911 RUBBER 10 PIECES 1 9925099
21 1961189 133.0057.269 MICROSWITCH 2 9925099
24 1961192 133.0068.147 ADAPTER 12V BS18F-4/12 208C/ FASTON 1 9925099
25 1961315 133.0068.110 KIT GEAR+WHEEL PIVOT 2 9925099
29 1961420 133.0068.111 RACKS 2 PIECES 2 9925099
30 1961198 133.0069.801 SLIDING CARRIAGE+ GLASS 900MM 1 9925099
31 1961419 133.0069.802 LIGHTING SUPPORT 1 9925099
32 1960326 133.0017.597 SPOT LIGHTS SUPPORT HINGE WITH PIN 1 9925099
33 1961200 133.0069.803 PERIMETRIC ASPIRATION PANEL 90 CM 1 9925099
101 1960392 133.0017.062 SUPPORT ASSEMBLY 1 9925099
106 1960897 133.0018.494 FLAT 1 9925099
302 1961418 133.0059.007 FAN MOTOR 1 9925099
305 1961319 133.0051.604 KIT MOTOR SHOCK ABSORBER 4 9925099
312 1960631 133.0016.892 CAPACITOR 1 9925099
330 1961274 133.0051.414 SET CONNECTION FOR MOTOR 1 9925099
399 1961416 133.0059.008 KIT MOTOR ASSEMBLY 1000MC 220-50/60 1 9925099
501 1960662 133.0017.078 UPPER CHIMNEY X F470 1 9925099
502 1961275 133.0046.952 SET 2 FIXING BRACKETS 1 9925099
504 1961276 133.0046.956 SET FLANGE- CONNECTION 1 9925099
508 1960200 133.0016.959 SPIGOT 120-150 1 9925099
509 1961131 133.0017.034 LOWER CHIMNEY H 545 1 9925099
606 1961277 133.0052.537 SET FIXING BRACKETS 1 9925099
610 1961344 133.0056.196 KIT CABLE FIXING COVER AND BRACKET 1 9925099
617 1960014 133.0016.843 ELECTRIC CABLE 1 9925099
619 1961415 133.0069.805 KIT SCHEDA BASE V.-CS 5 VELOCITA 1 9925099
626 1961340 133.0051.578 SET TRASNFORMER 60W AND SUPPORT 1 9925099
631 1960081 133.0016.882 FLAT MOTOR EXTENSION 1 9925099
638 1961202 133.0069.804 MOTOR CAR ADAPTER 200V 1 9925099
640 1961414 133.0062.483 WIRING CONNECTION 8 WAYS 1 9925099

This manual suits for next models

2

Other Franke Ventilation Hood manuals

Franke FTF 6042XSL Operation manual

Franke

Franke FTF 6042XSL Operation manual

Franke FDFPRO9354XSAU User manual

Franke

Franke FDFPRO9354XSAU User manual

Franke FCM 904 PW Operation manual

Franke

Franke FCM 904 PW Operation manual

Franke FSN 908 BK A Operation manual

Franke

Franke FSN 908 BK A Operation manual

Franke FAK 607 XS User manual

Franke

Franke FAK 607 XS User manual

Franke FTLN H45 X/BK User manual

Franke

Franke FTLN H45 X/BK User manual

Franke FSTP NG 605 X User manual

Franke

Franke FSTP NG 605 X User manual

Franke FGL 6115 XS Operation manual

Franke

Franke FGL 6115 XS Operation manual

Franke FCUD 904 C WH RF UD User manual

Franke

Franke FCUD 904 C WH RF UD User manual

Franke FFI 622 GR LED0 Operation manual

Franke

Franke FFI 622 GR LED0 Operation manual

Franke FMY 608 BI User manual

Franke

Franke FMY 608 BI User manual

Franke FSMD 508 User manual

Franke

Franke FSMD 508 User manual

Franke FTU PLUS 3707 I BK User manual

Franke

Franke FTU PLUS 3707 I BK User manual

Franke FDW 908 IB XS User manual

Franke

Franke FDW 908 IB XS User manual

Franke FMYPL 906 WH User manual

Franke

Franke FMYPL 906 WH User manual

Franke FMY PRO 907 FM BK/IX User manual

Franke

Franke FMY PRO 907 FM BK/IX User manual

Franke FTC 912XSL Operation manual

Franke

Franke FTC 912XSL Operation manual

Franke FMA FL 805 User manual

Franke

Franke FMA FL 805 User manual

Franke MARIS PLUS FMPL 606 BK B User manual

Franke

Franke MARIS PLUS FMPL 606 BK B User manual

Franke FJO 634 XS User manual

Franke

Franke FJO 634 XS User manual

Franke 729 User manual

Franke

Franke 729 User manual

Franke FBI 522 User manual

Franke

Franke FBI 522 User manual

Franke 1200B User manual

Franke

Franke 1200B User manual

Franke FPJ 605 V Operation manual

Franke

Franke FPJ 605 V Operation manual

Popular Ventilation Hood manuals by other brands

ELICA ETT424S1 Instruction on mounting and use

ELICA

ELICA ETT424S1 Instruction on mounting and use

ROBLIN ACTIS PRO 77 Dimensions

ROBLIN

ROBLIN ACTIS PRO 77 Dimensions

VELGE Floyen Installation, operating and maintenance instructions

VELGE

VELGE Floyen Installation, operating and maintenance instructions

Defy 900 C PREMIUM owner's manual

Defy

Defy 900 C PREMIUM owner's manual

FALMEC FPDPR30W6SS-3 Instruction booklet

FALMEC

FALMEC FPDPR30W6SS-3 Instruction booklet

Eico E19 Instruction on mounting and use

Eico

Eico E19 Instruction on mounting and use

Jenn-Air 32inch (81.3 CM) WALL-MOUNTPERIMETRIC RANGE... Installation Instructions and Use & Care Guide

Jenn-Air

Jenn-Air 32inch (81.3 CM) WALL-MOUNTPERIMETRIC RANGE... Installation Instructions and Use & Care Guide

Presenza QR045 Installation guide and user's manual

Presenza

Presenza QR045 Installation guide and user's manual

AEG DIK8190HG user manual

AEG

AEG DIK8190HG user manual

Electrolux FHWC3060LSA Use & care guide

Electrolux

Electrolux FHWC3060LSA Use & care guide

viceroy WRCAN60RF user manual

viceroy

viceroy WRCAN60RF user manual

Windster HI30SS user manual

Windster

Windster HI30SS user manual

Luxair CH60NEPTUNE/BLK Installation, maintenance and usage

Luxair

Luxair CH60NEPTUNE/BLK Installation, maintenance and usage

Kenmore 233.51403 Use & care / installation manual

Kenmore

Kenmore 233.51403 Use & care / installation manual

AEG DGB3523S user manual

AEG

AEG DGB3523S user manual

CookMax BKP1428ILL manual

CookMax

CookMax BKP1428ILL manual

ETNA AI152WIT Instructions for use

ETNA

ETNA AI152WIT Instructions for use

Forno FRHRE5337-30 Installation guide and user's manual

Forno

Forno FRHRE5337-30 Installation guide and user's manual

manuals.online logo
manuals.online logoBrands
  • About & Mission
  • Contact us
  • Privacy Policy
  • Terms and Conditions

Copyright 2025 Manuals.Online. All Rights Reserved.