Freewing F-86 SABRE User manual

www.modellmarkt24.ch; www.modellmarkt24.de

www.modellmarkt24.ch; www.modellmarkt24.de
2 Product basic information 2 Package list 3 Installing fuselage 3 Installing elevator 4 Installing main wing 5 Installing rudder 6 Installing the nose landing gear 7 Nose landing gear cabin door installation 8 Rear landing gear installation 9 Servo introduction 9 Install on battery 10 Install power system 10 Motor parameters 11 Center of gravity 12 Control surface direction and set up 13 Dual rates 13 Elevator installing angle 14 Troubleshooting guide 16 16 17 17 18 19 20 21 22 23 23 g 24 24 25 26 27 * \ 27 L 28 www.modellmarkt24.ch; www.modellmarkt24.de

www.modellmarkt24.ch; www.modellmarkt24.de
Introduction C F-86 Sabre -1-1.
This is not a toy! Operators should have some basic experience. Beginners should
operate only under the guidance of a professional instructor.
2.
Before beginning assembly, please read through the instructions and carefully follow them
throughout the build.
3.
Freewing and it's vendors will not be held responsible for any losses due to improper
assembly and operation.
4.
Model airplane operators must be at least 14 years of age.
5.
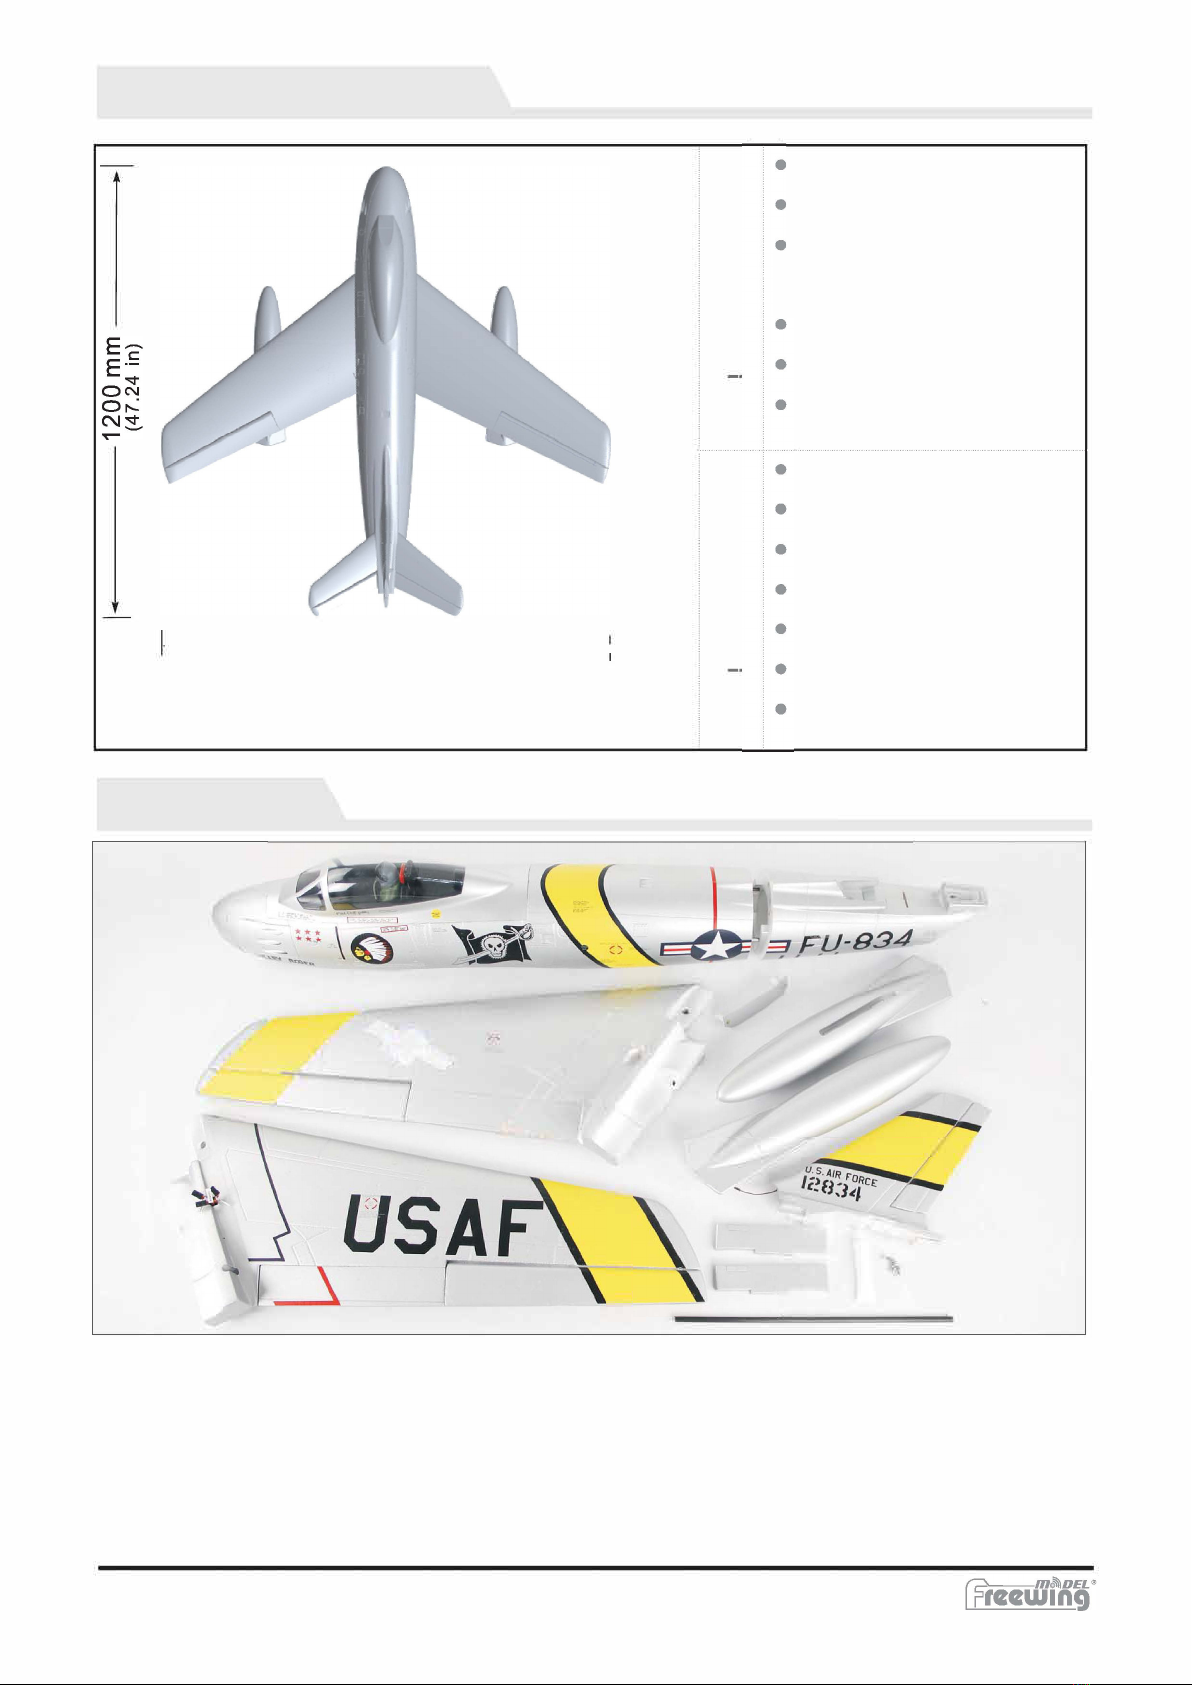
This airplane is made of EPO foam material, covered with surface spray paint. Don't use
chemicals to clean as it may cause damage.
6.
You should avoid flying in areas such as public places, areas with high voltage power
lines, nearby highways, airports or in other areas where laws and regulations clearly
prohibit flight.
7.
Do not fly in bad weather conditions, including thunderstorms, snow, etc...
8.
Lipo batteries should be properly stored in a fire proof container and be kept at a minimum
of 2M distance away from flammable or explosive materials.
9.
Damaged or scrap batteries must be properly discharged before disposal or recycling to
avoid spontaneous combustion and fire.
10.
At the Flying Field, properly dispose of any waste you have created, don't leave or burn
your waste.. Ensure that your throttle is in the low position and that your radio is turned on
before connecting the Lipo battery.
11.
Ensure that the throttle is in the lowest position and transmitter switch on, before
connecting a Lipo Battery to the ESC of the aircraft.
12.
Do not try to catch the airplane while in flight or during landing. Wait for the airplane to
come to a complete stop before handling.
Thank you for purchasing our first 80 mm EDF, the North American F-86 Sabre! Orignally designed and intended for the Air Force in 1944 with the designation NA-134, the aircraft had straight wings and a rather fat fuselage with an axial flow engine. Ultimately, the NA-134 went to the Navy as the XFJ-1 Fury, which was the first fighter they had ever ordered from North American . Shortly after WW II, the results of wind tunnel tests involving the ME 262 revealed that sweeping the wings of a fighter would enable higher sub sonic speeds so it was decided to incorporate a 35 degree sweep to the wings of the XP-86, thus turning an okay jet into the most sensational jet of the decade. The Navy eventually saw the tremendous potential of the redesigned wings and canceled it's order for the straight winged FJ-1 in favor of a swept wing version, called the FJ-2. The Sabre eventually went through several different variants, incorporated things such as power boost and 'artificial feel' systems, an 'all-flying tail' and was the first fighter to use supersonic air missiles. The F-86 Sabre you have purchased is a great scale model loaded with details in its design and, most importantly, great flight
characteristics, to fly one is to love one. Although recommended for an intermediate pilot, many pilots transitioning from 1400 mm warbirds to jets have found this to be an excellent first jet.
& NOTE:
Note
www.modellmarkt24.ch; www.modellmarkt24.de

www.modellmarkt24.ch; www.modellmarkt24.de
B
asic Product
I
nformation &
W
Package
L
ist I ( n n . � 0 n C c � 0 BOA BOA F-86 Sabre -2-Included parts will differ
b
etween the PNP
v
ersion and the Kit
v
ersion. Please refer to the following content list to check your parts in
v
entory. EN
PNP Version Kit Version
www.modellmarkt24.ch; www.modellmarkt24.de

www.modellmarkt24.ch; www.modellmarkt24.de
1 . Using a servo tester or radio, center the servo. 2 .Use the supplied glue to secure the servo into the servo hatch.
3.
Insert the servo cable into the servo wire trough.
4.
Using the supplied glue, attach the servo hatch cover to the wing.
5.
Feed the open end of the pushrod into the servo arm. center the elevator and adjust the control rod clevis to the correct length so that the elevator remains centered.
6.
Repeat these steps for the other elevator servo.
7.
Install the elevator to the rear of the fuselage and use the 2 screws to secure it.
F-86 Sabre Pa3x20mm Elevator pushrod size 55mm (2.17 in) Elevator pushrod mounting hole -3-EN • Pushrod diameter: 0 1.5mm
Fuselage Assembly
Apply glue to the rods and join the tail section to the fuselage.
M
ore glue can be applied to the two sections as deemed necessary.
F
or best results, allow the glue to become tac
k
y, then separate the two pieces so that the glue forms strings, and rejoin. Repeat three times then permanently join the two sections.Horizontal Stabilizer Assembly
www.modellmarkt24.ch; www.modellmarkt24.de

www.modellmarkt24.ch; www.modellmarkt24.de
Main Wing
A
ss
emb
l
y
1.
Use a servo tester or radio to center the servo.
2.
Use the supplied glue to secure the servo box
(E)
into the servo hatch.
3.
Install servo
(
C
)
into the servo box
(E)
.
4.
Use 2 screws
(
A
)
to screw the servo cover
Tt B Aileron pushrod mounting hole EN I:===6===s= -F-86 Sabre FI a p pushrod mounting hole Flap pushrod size Carbon Tube Main wing plate1
1.
Use the carbon tube to connect the left and right wings.
2.
Use a Y connector to connect the left and right flap servos.
3.
Use a Y connector to connect the left and right aileron servos.
4.
Use a 3 to 1 connector to connect the left and right main landing gear.
5.
Secure the main wing to the fuselage and feed the connectors through to the fuselage so that they can be plugged into the receiver.
6.
Secure the wing using the plastic wing plates (1 and 2)
Aileron pushrod size
(B) to the servo hatch (E), thus securing the servo(C).5. Feed the open end of the servo pushrod (D) into the servo arm and adjust the control rod clevis to the proper length so that at the servo's centered position, the flap is completely retracted.6. Repeat these steps to install the other three servos to the wing, remember to center the ailerons and adjust the clevis, so that they are centered when the clevis is attached to the control horn and the servo is centered.
N
ote
:
all servo boxes are factory installed so if it becomes necessary to replace a servo, it will not damage the foam. If you need to replace a servo and choose not to use a
F
reewing product, please refer to the following diagrams for the correct si
z
e.
www.modellmarkt24.ch; www.modellmarkt24.de

www.modellmarkt24.ch; www.modellmarkt24.de
Rudder
A
sse
mb
ly
1.Center the servo arm with either a servo tester or your radio.2.Insert the servo box (E) into the cavity in the vertical stabilizer.3.Install the servo (C) inside the servo box (E).4.Using 2 screws (A), fasten the servo cover (B) to the servo box which will secure the servo to the Stabilizer.5.Thread the open end of the control rod into the servo arm and adjust the clevis so that the rudder is in the neutral position when it is attached.
all servo boxes are factory installed
so if it becomes necessary to replace a servo,
it will not damaged the foam. If you need to
replace a servo and choose not to use a
Freewing product, please refer to the following
diagrams for the correct size.
Drop tank/ scale weapon pylons F-86 Sabre -5-: .r EN -8 Rudder push rod size (2.17in) j Rudder pushrod mounting hole �F
1.
Attach the rudder to the fuselage.
2.
Using 2 screws through the underside of the fuselage, lock the rudder in place.
3.
Ensure that the screws travel into the locks correctly to avoid stripping them.
1.
Apply glue to the weaponspylons and attach them to theslots on the underside of themain wing.
2.
Pull the parts off slightly andreapply several times so thatthe glue forms strings as youseparate the pylon from thewing.
3.
Allow the glue to set forapproximately two hours todry, then install the droptanks utilizing the magnetsand the pylons.
www.modellmarkt24.ch; www.modellmarkt24.de

www.modellmarkt24.ch; www.modellmarkt24.de
N
ose
G
ear
A
sse
mb
l
y
W
x
Nose landing gear accessories list (A".