Fri-Jado ACR User manual

ACR
EN (Original Instruction) 9123833 / 1308
USER MANUAL
Auto Clean Rotisserie

ACR
EN 2 / 40
KEEP THIS USER MANUAL FOR FUTURE USE
© 2013 Fri-Jado BV, Etten-Leur, The Netherlands.
We advise you to contact your supplier for the guarantee period and conditions. Further we
refer to our General Terms and Conditions for Sales and Delivery that are available upon
request.
The manufacturer does not accept any liability for damage or injury caused by failing to
adhere to these regulations or by not observing the usual caution or care in actions,
operation, maintenance or repair activities, even if not explicitly described in this manual.
As a result of constant commitment to improvement, it may happen that your unit deviates in
detail from what is described in this manual. For this reason, the given instructions are only
a guideline for the installation, use, maintenance and repair of the unit referred to in this
manual. This manual has been composed with the utmost care. The manufacturer shall,
however, not be held responsible for any mistakes in this manual nor for any consequences
thereof. The user is allowed to copy this manual for own use. Further all rights are reserved
and nothing in this manual may be reproduced and/or made public in any way.
Modifications:
In case of unauthorised modifications in or on the unit, every liability on the part of the
manufacturer becomes null and void.

ACR
EN 3 / 40

ACR
EN 4 / 40
CONTENTS
1. INTRODUCTION ....................................................................................................................... 6
1.1. General ............................................................................................................................ 6
1.2. Identification of the unit ................................................................................................. 6
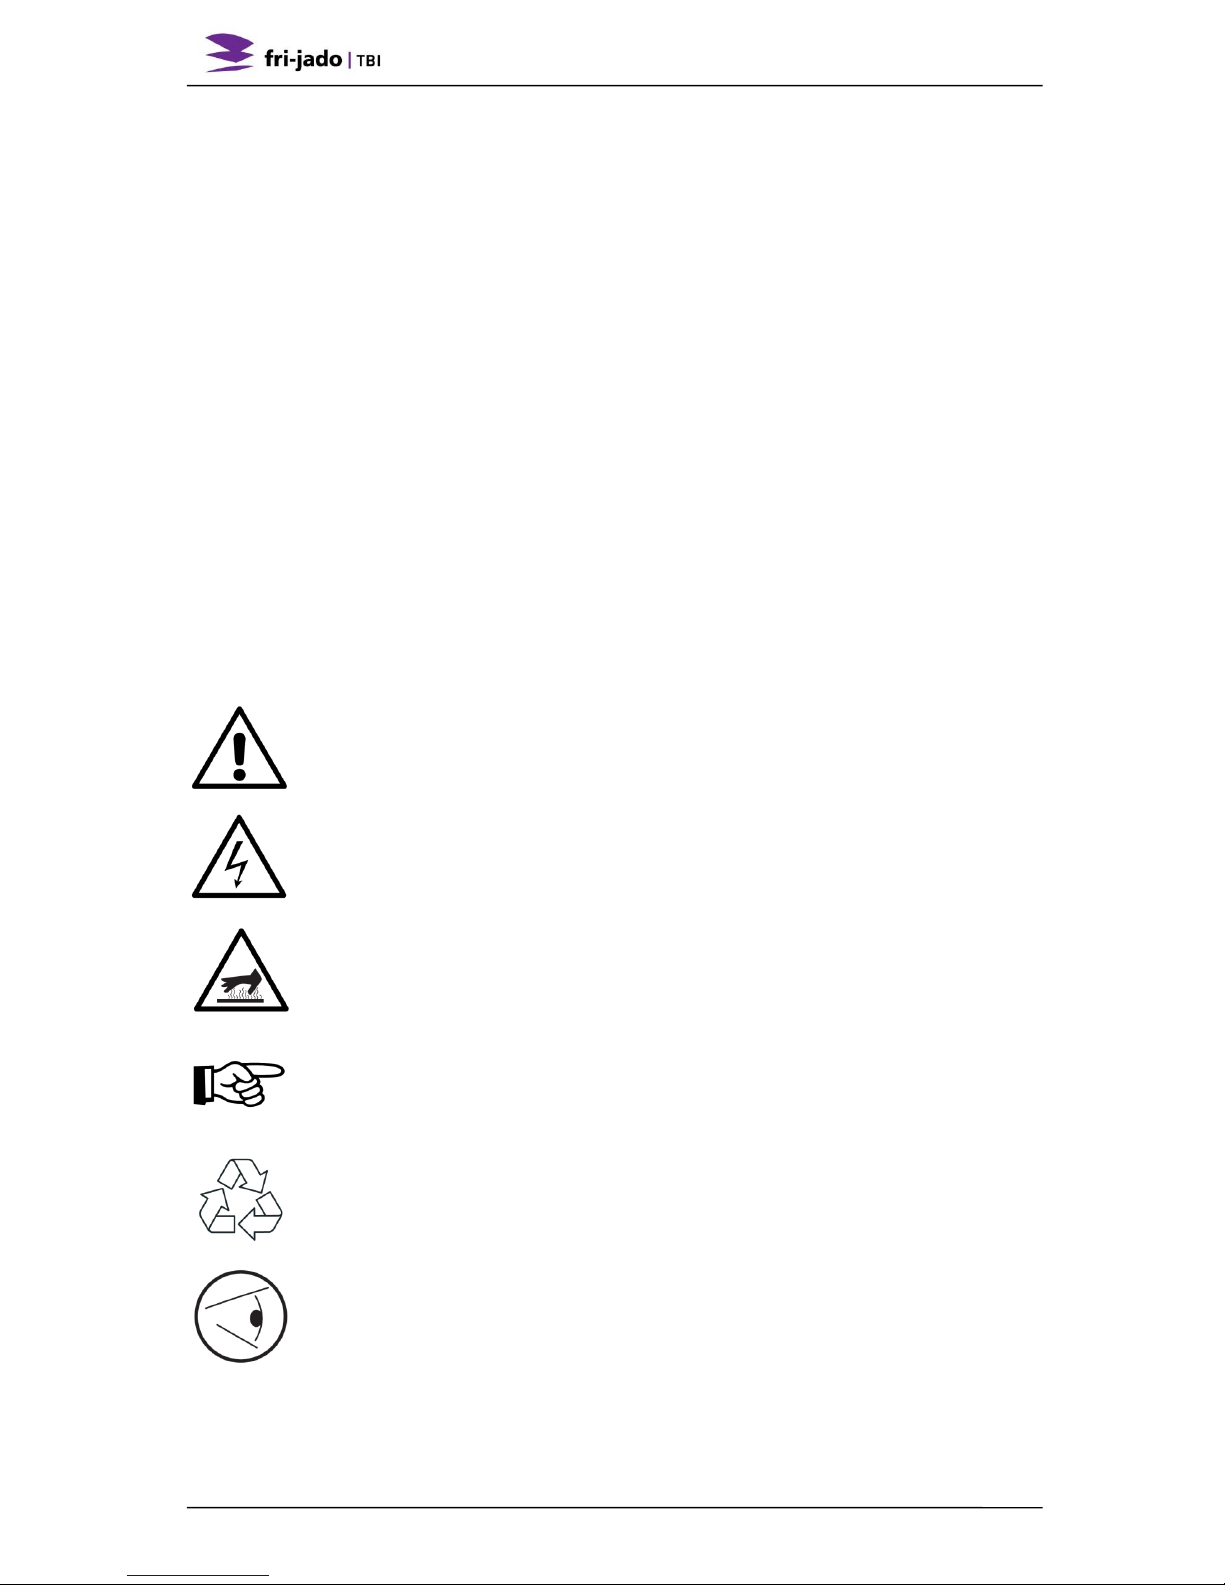
1.3. Pictograms and symbols.................................................................................................. 6
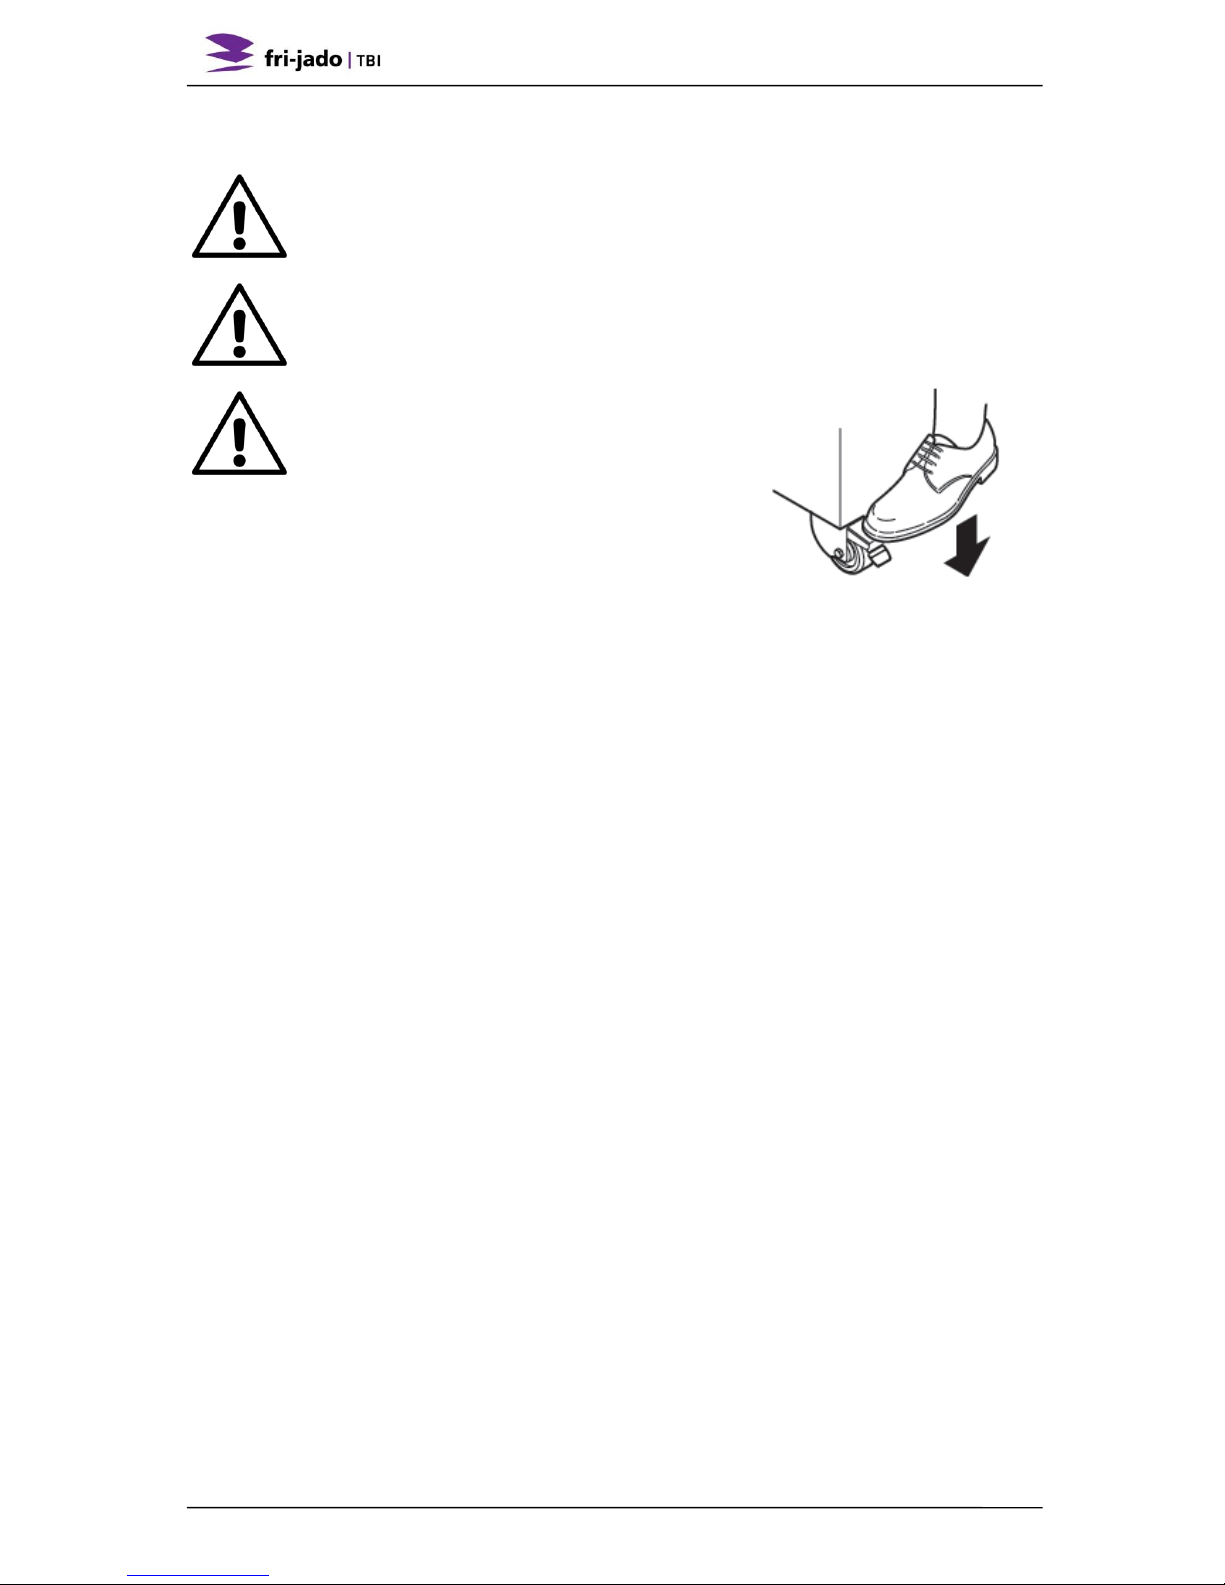
1.4. Safety instructions........................................................................................................... 7
1.4.1. General ........................................................................................................................ 7
1.4.2. Moving......................................................................................................................... 8
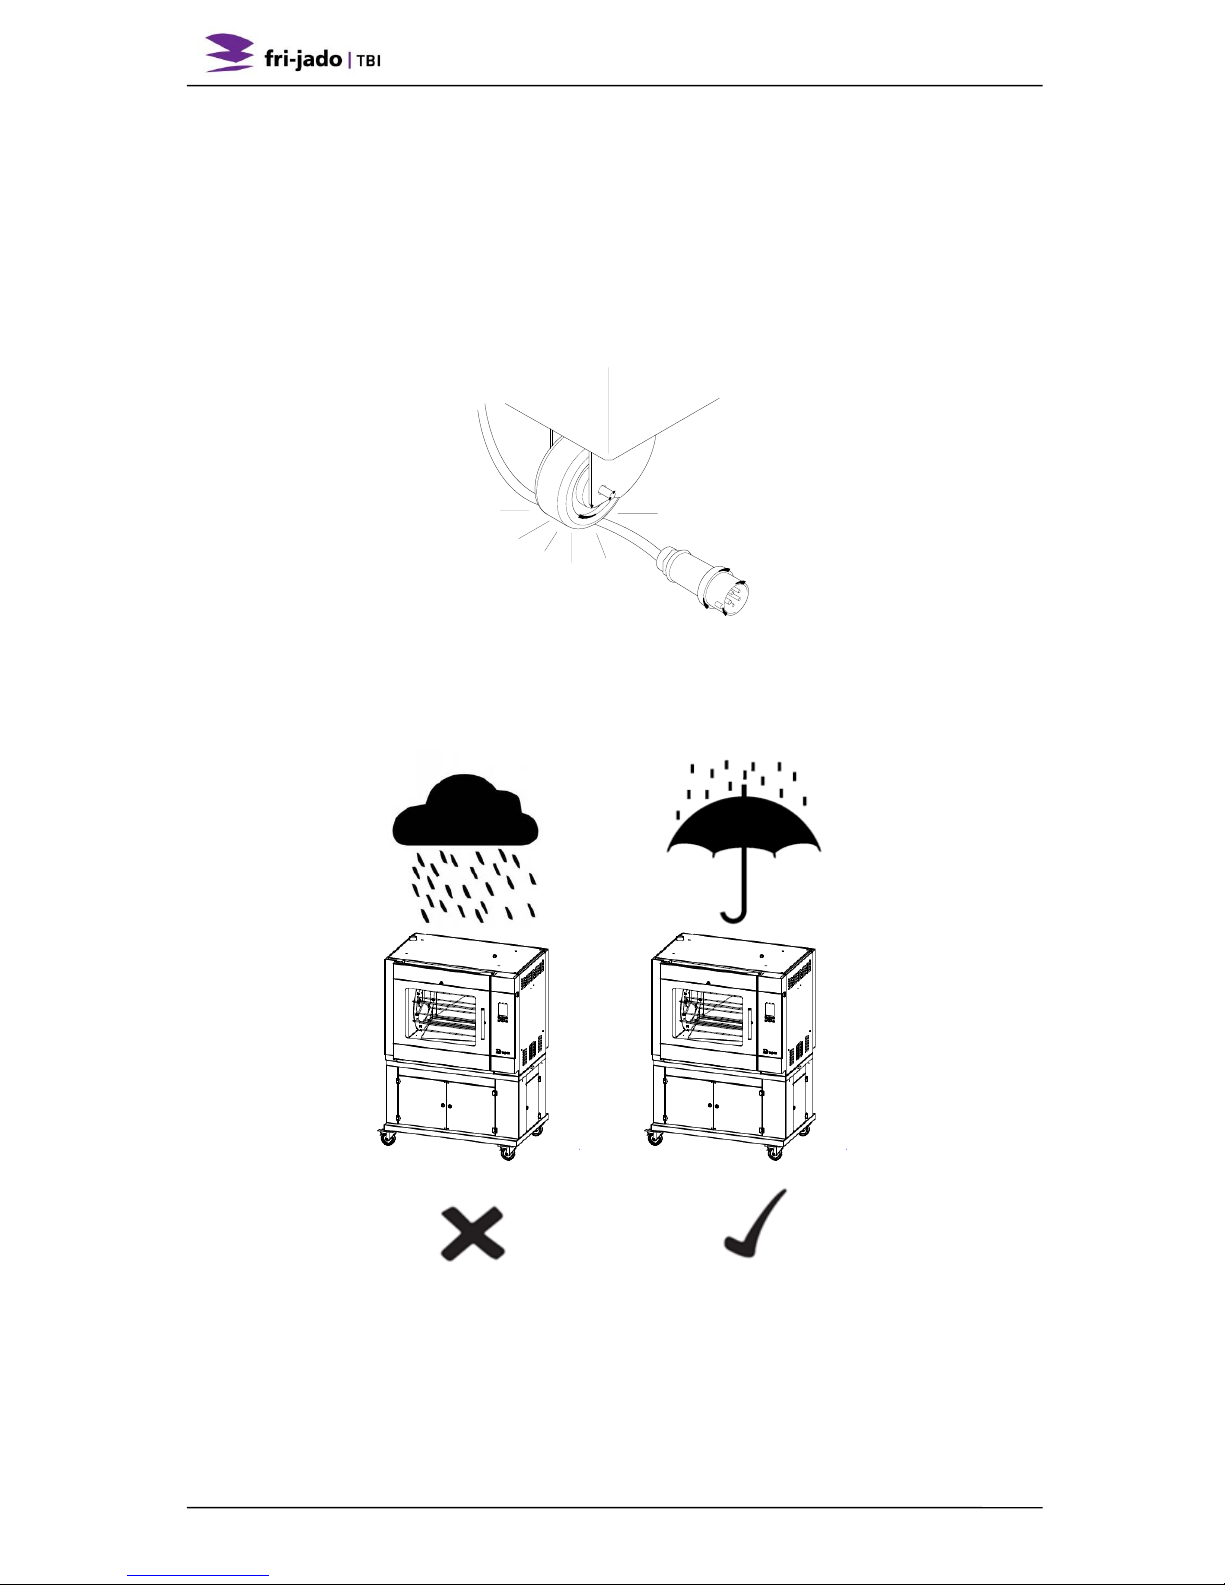
1.4.3. Outdoor use restrictions ............................................................................................. 8
1.4.4. Hygiene........................................................................................................................ 9
1.5. Service and technical support ......................................................................................... 9
1.6. Storage ............................................................................................................................ 9
1.7. Disposal ........................................................................................................................... 9
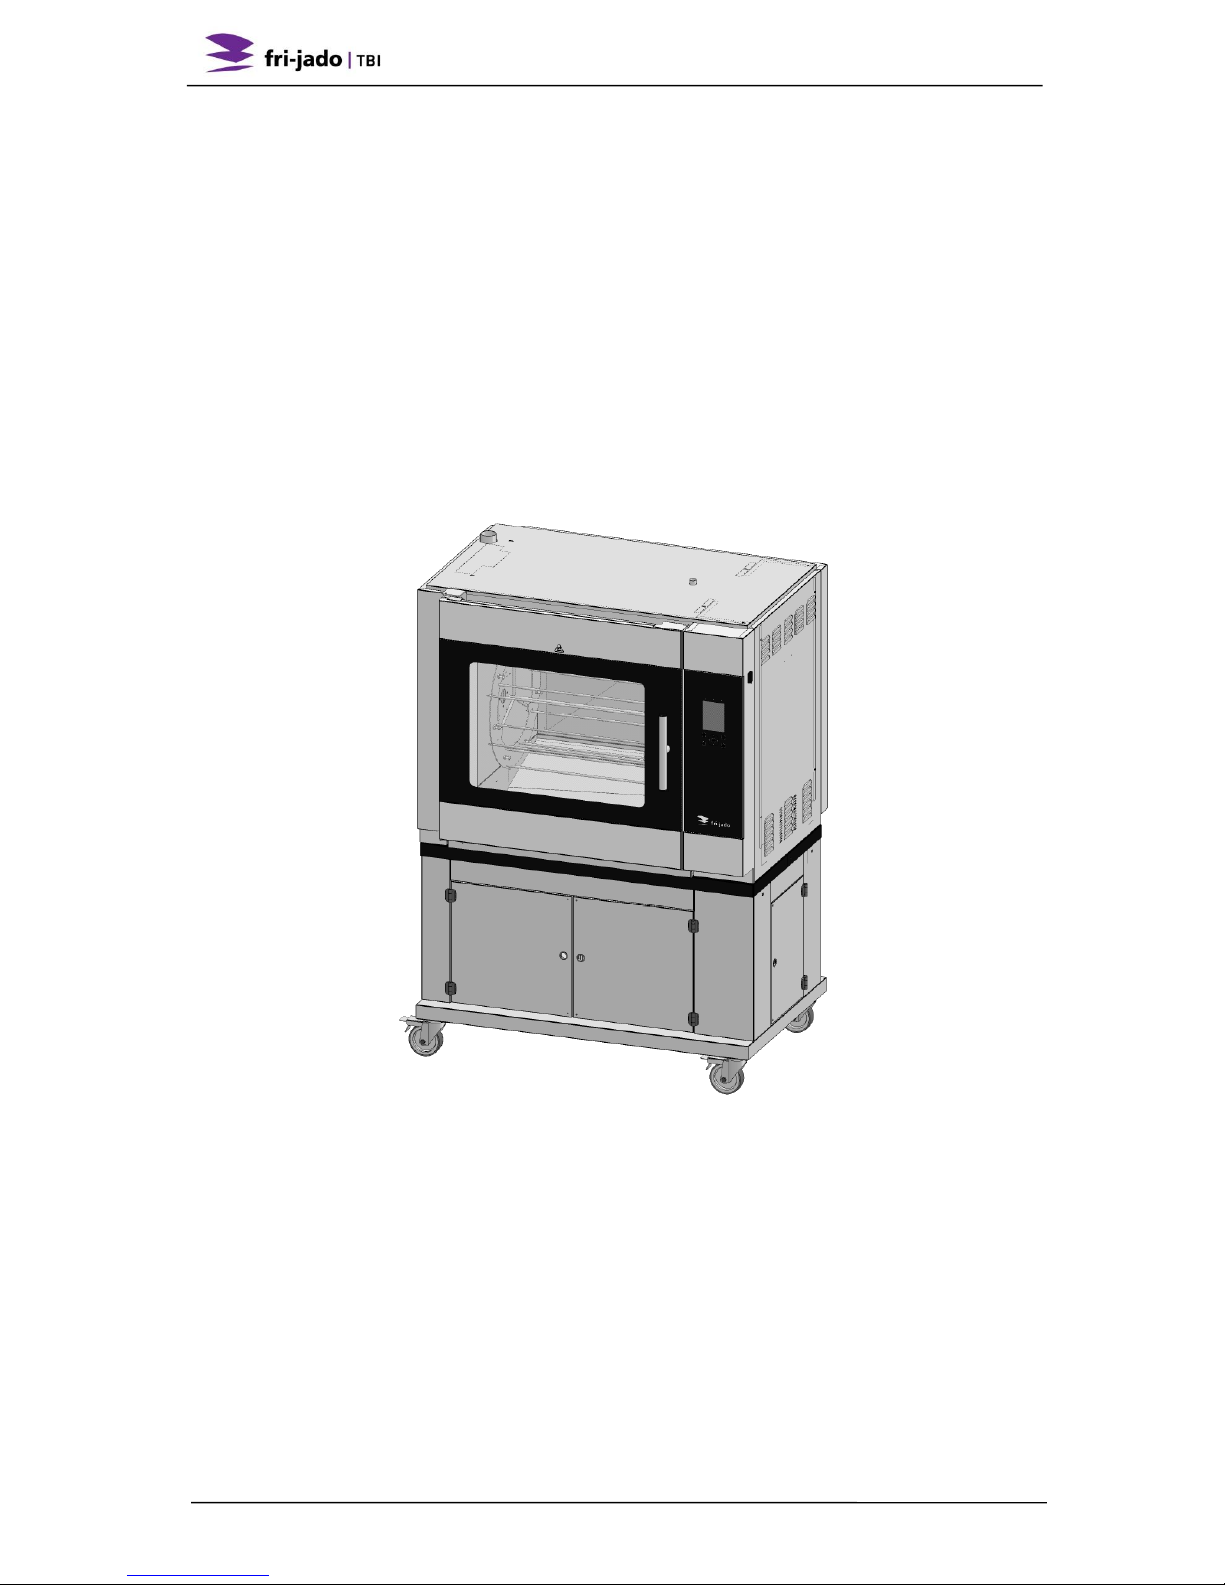
2. DESCRIPTION OF THE UNIT.................................................................................................... 10
2.1. Technical description..................................................................................................... 10
2.2. Intended use.................................................................................................................. 10
2.3. Accessories .................................................................................................................... 10
3. INSTALLATION AND FIRST USE .............................................................................................. 11
3.1. Unpacking the unit ........................................................................................................ 11
3.2. Installation and positioning........................................................................................... 12
3.3. First use ......................................................................................................................... 13
4. OPERATION AND USE ............................................................................................................ 15
4.1. Control panel................................................................................................................. 15
4.2. Switching-on the unit .................................................................................................... 16
4.3. Loading the unit............................................................................................................. 16
4.3.1. Loading the unit using meat forks............................................................................. 16
4.3.2. Loading the rotisserie using V-shape spits (accessory) ............................................. 17
4.3.3. Loading the unit using meat baskets (accessory)...................................................... 18
4.3.4. Loading the rotisserie using chicken racks (accessory) ............................................. 18
4.3.5. Loading the rotisserie using two different accessories............................................. 19
4.4. Grilling time ................................................................................................................... 19
4.5. Taking out the products ................................................................................................ 20
4.5.1. Taking out the meat forks ......................................................................................... 20
4.5.2. Taking out the V-shape spit (accessory).................................................................... 20
4.5.3. Taking out the chicken racks (accessory). ................................................................. 20
4.5.4. Taking out the meat baskets (accessories) ............................................................... 20
4.6. Switching-off the unit.................................................................................................... 21
5. OPERATE................................................................................................................................ 22
5.1. Starting a program......................................................................................................... 22

ACR
EN 5 / 40
5.2. Pre-heating .................................................................................................................... 23
5.3. While cooking................................................................................................................ 23
5.4. Adding extra time to the active program...................................................................... 24
5.5. Interrupt a program....................................................................................................... 24
5.6. Set the timer (optional)................................................................................................. 25
5.7. Reset alarm signal.......................................................................................................... 25
5.8. Power down .................................................................................................................. 25
6. SETTINGS ............................................................................................................................... 26
6.1. General .......................................................................................................................... 26
6.2. Information.................................................................................................................... 26
6.2.1. Access ........................................................................................................................ 26
6.2.2. Overview.................................................................................................................... 26
6.3. Manager ........................................................................................................................ 27
6.3.1. Access ........................................................................................................................ 27
6.3.2. Overview parameters................................................................................................ 27
6.4. Service Menu................................................................................................................. 27
7. PROGRAM.............................................................................................................................. 28
7.1. General .......................................................................................................................... 28
7.2. Adding programs ........................................................................................................... 28
7.2.1. Enter the program name........................................................................................... 28
7.2.2. Programming cooking step........................................................................................ 29
7.2.3. Keeping warm (HOLD) ............................................................................................... 30
7.2.4. Saving the program ................................................................................................... 30
7.3. Edit programs ................................................................................................................ 30
7.4. Deleting programs......................................................................................................... 30
7.5. Testing the programs .................................................................................................... 31
7.6. Sorting programs........................................................................................................... 31
8. CLEANING AND MAINTENANCE ............................................................................................ 32
8.1. Periodic maintenance.................................................................................................... 32
8.2. Daily Cleaning ................................................................................................................ 33
8.2.1. Automatic cleaning cycle........................................................................................... 33
8.2.2. Clean the accessories ................................................................................................ 33
8.3. Fan plate and fan blade................................................................................................. 34
9. MALFUNCTIONS AND SERVICE; WHAT TO DO ...................................................................... 35
9.1. Replacing the mains cord .............................................................................................. 35
10. TECHNICAL SPECIFICATIONS.................................................................................................. 36
11. ACCESSORIES ......................................................................................................................... 37

ACR
EN 6 / 40
1. INTRODUCTION
1.1. General
This manual is intended for the user of the ACR (Auto Clean Rotisserie). The features and
controls are being described, along with directions for the safest and most efficient use, in
order to guarantee a long life of the unit.
All pictograms, symbols and drawings in this manual apply to the ACR.
1.2. Identification of the unit
The identification plate can be found on the outside of the machine, and contains the
following data:
Name of the supplier or the manufacturer
Model
Serial number
Year of construction
Voltage
Frequency
Power consumption
1.3. Pictograms and symbols
In this manual, the following pictograms and symbols are used:
WARNING
Possible physical injury or serious damage to the unit, if the instructions
are not carefully followed.
WARNING
Hazardous electrical voltage.
WARNING
Danger of getting injured by hot surfaces.
Suggestions and recommendations to simplify indicated actions.
Recycling symbol.
Direction of view symbol.

ACR
EN 7 / 40
1.4. Safety instructions
WARNING
The outside of the unit can be very hot.
WARNING
The maximum load on top of the unit may never exceed 50 kg (110 lbs).
WARNING
Always use the brakes on both front wheels:
1.4.1. General
The user of the unit will be fully responsible for abiding the locally prevailing safety- rules and
regulations.
The unit may be operated by qualified and authorised persons only. Anyone working on or
with this unit must be familiar with the contents of this manual and carefully follow all
guidelines and instructions. Never change the order of the steps to be performed. The
management must instruct the personnel on the basis of this manual and follow all
instructions and regulations.
The pictograms, labels, instructions and warning signs attached to the unit, are part of the
safety measures. They may never be covered or removed, and have to be clearly visible
during the entire lifetime of the unit.
Immediately repair or replace damaged or illegible pictograms, warnings and instructions.
To avoid short-circuiting, never clean the unit using a water hose. For cleaning
instructions, see section 8.
During the grilling process, the unit can get very hot.
When the door is opened the rotor stops and the heater is de-energised.
The unit must be cleaned regularly to ensure proper functioning and prevent fire hazard
(over heating). Especially the back of the fan plate.
This appliance is not intended for the use by persons (including children) with reduced
physical, sensory or mental capabilities, or lack of experience and knowledge, unless
they have been given supervision or instruction concerning use of the appliance by a
person responsible for their safety.
Children should be supervised to ensure that they do not play with the appliance.

ACR
EN 8 / 40
1.4.2. Moving
When moving the unit:
Before moving the unit, first switch off the mains voltage by pulling the plug from the
wall socket. After that, cool-down the unit for at least ten minutes.
The units equipped with wheels are not suited to pass ledges or obstacles higher than
10 mm (3/8 inch).
When moving the unit, always push at the centre of the unit. Never on top. Never at the
bottom.
Make sure that the wheels can move freely, so they never touch the power lead (see
Figure 1).
Figure 1
1.4.3. Outdoor use restrictions
To avoid short-circuiting, the units may not be used outdoors unprotected. Placing under a
screen is allowed.
Figure 2

ACR
EN 9 / 40
1.4.4. Hygiene
The quality of a fresh product always depends on hygiene. Especially grilling products. With
the risk of salmonella contamination –especially for chicken products –you must make sure
that grilled products can never be mixed with uncooked products. Also contact between
grilled products and hands or tools that have been in contact with raw chicken meat, must be
avoided at all times.
Hands or tools that have been in contact with raw chicken meat, must be cleaned thoroughly.
1.5. Service and technical support
The electrical schematics of your unit is included. In case of malfunctions you can contact
your dealer/service agent. Make sure you have the following data available:
Model.
Serial number.
This data can be found on the identification plate.
1.6. Storage
If the unit will not be used temporarily, and will be stored, follow these instructions:
Clean the unit thoroughly.
Wrap the unit from getting dusty.
Store the unit in a dry, non-condensing environment.
1.7. Disposal
Dispose of the machine, any components or lubricants removed from it safely in accordance
with all local and national safety and environment requirements.

ACR
EN 10 / 40
2. DESCRIPTION OF THE UNIT
2.1. Technical description
The ACR uses convection heat. The rotor is being wheeled by a maintenance-free motor
with a gear box. The fan provides an equally divided heat. The glass panes are equipped
with a heat reflecting layer to keep the heat inside the grill.
The plating of the unit is made of stainless steel. The product contact parts are made of
stainless steel AISI 304 (eventual with PTFE coating).
The mains cable has a CEE-form plug (European models).
The intelligent control keeps the temperature inside the unit fixed to level set by the operator.
During the entire process, the interior of the unit will be illuminated by halogen lamps.
The intelligent control has a capability to store 250 different programs.
Each program can consist of a pre-heat step, with additional (maximum 9) steps, in which the
cooking time and temperature can be set.
Communication through USB enables easy read-out, re-work and creating of programs via a
PC. For this, special software is available at Fri-Jado.
The unit has an automated cleaning program that cleanses the unit.
2.2. Intended use
The ACR has been designed for grilling meat products, and has a special self-cleaning
feature. Any other use will not be regarded as intended use.
The manufacturer accepts no liability whatsoever for loss or injury caused by failing to strictly
adhere to the safety guidelines and instructions in this manual or due to carelessness during
installation, use, maintenance and repair of the unit referred to in this manual and any of its
accessories.
Use the unit in perfect technical condition only.
2.3. Accessories
Your unit contains the following standard accessories:
Meat forks.
User manual.
For optional accessories refer to section 11.

ACR
EN 11 / 40
3. INSTALLATION AND FIRST USE
All packing materials used for this unit are suited for recycling.
After unpacking, check the state of the unit. In case of damage, store the packing material,
and contact the transporter within fifteen working days after receiving the goods.
3.1. Unpacking the unit
Your unit is shipped using a wooden crate. All units are placed on a wooden pallet.
Figure 3
1. Remove the wooden crate.
2. Remove all remaining packing materials from the unit.
3. Remove the protective foil from the metal parts.
4. Take off the standard accessories.

ACR
EN 12 / 40
3.2. Installation and positioning
WARNING
The unit must be installed by a certified electrician.
Figure 4
Positioning:
The user must have sufficient freedom of movement to properly operate the unit.
The ambient temperature of the unit must be between 10 and 30 °C (50 and 86 °F).
Use proper lifting–and transport tools to move the unit.
Place the unit, using a spirit level, flat on a solid surface. Mind the weight of the unit!
The distances between the sides and other units or walls must be at least 100 mm (4
inch).
The minimum distance between the operator-side and possible glass panes or wooden
(partition) walls must be at least 250 mm (10 inch). The same is valid for the customer-
side.
The space between the unit and the surface it is put on, must be kept clear for proper
ventilation of the electrical compartment.
Keep a distance of at least 500 mm (20 inch) of free space above the unit. Placing the
unit under a hood is required.
In case of a wheeled unit, the floor must be flat and levelled.
The products inside the unit must be clearly visible.
Keep children away from the operating side of the unit.
Installation:
Secure the unit to the building structure using the tether bracket, refer to the installation
manual.
The unit has fixed wiring and must be connected by a certified electrician.
A water connection with an aerated valve with a ¾ inch thread connection, with a
minimum continuous flow rate of 15 litres / min, must be available near the unit. The
water pressure must be between 200 en 500 kPa (2 and 5 bar), preferably at least
300kPa (3 bar). Use connection for filtered water and connection for non-filtered
water (see Figure 4). Refer to the Installation Manual.
2 1
R 955 mm (37.6 inch)

ACR
EN 13 / 40
An open drainage with a diameter of at least 40 mm (1.6 inch) must be available near
the unit.
3.3. First use
When using the unit for the first time, clean the interior thoroughly with soap suds. Run the
Install program and heat up the unit as described below. After commissioning discolouration
of the cooking/grilling area can occur.
➊` ➋
➌
➍➎

ACR
EN 14 / 40
Metal odour
To remove both the oil- and metal odour that will appear at first use, the unit must be heated
at the maximum temperature for at least half an hour.
➊➋
➌➍
➎
1. Press “ON/OFF” for 3 seconds on to switch-on the unit.
2. Press OK the display the menu.
3. Create a new program containing ONE step of 250 °C (482 °F) and a duration of at least
30 minutes (See section 7).
4. Select tab “Operate” to return to the operation field.
5. Select the new program and press START/PAUSE to start (See section 4).
6. Allow the unit to fully execute the program.
The unit is ready for use.
SET
SET
250°C
30-45 min.
250°C
ON

ACR
EN 15 / 40
4. OPERATION AND USE
4.1. Control panel
Button
Function
SELECTION BUTTONS
Selecting tabs in display screen.
ON / OFF
Switching the unit on and off.
START / PAUSE
Starting and ending a program.
STOP / CANCEL
Interrupting a program (one step back in the menu)
OK BUTTON
Acknowledge a choice
ROTOR BUTTON
Rotate the rotor
ROTATION PAD
See "Rotation pad"
Rotation pad
This pad is used for:
Navigating through the menu-items in the screen.
Changing the settings.
Changing the settings quickly
Increase value: rub the pad clock-wise with one finger.
Decrease value: rub the pad counter-clock-wise with one finger.
Screen
The following tabs are present:
Operate “Choose between programs”(See section 5).
Program “Creating programs”(See section 7).
Settings “Change settings of programs” (See section 6).
START
SELECTION BUTTONS
OK BUTTON
ROTOR BUTTON
DISPLAY SCREEN
ON
PAUSE
ROTATION PAD
(DIAL)
OFF
STOP
CANCEL

ACR
EN 16 / 40
4.2. Switching-on the unit
➊➋
➌➍
4.3. Loading the unit
WARNING
To protect the operator for possible hot gases the door is equipped with a two-
step unlocking device.
To open the door move the handle first clock-wise then counter-clock-
wise
When the door is open press the rotor button to activate the rotor. This allow easy loading or
unloading the products.
Whilst loading the unit, make sure that the rotor gets evenly loaded, so that the mass of the
products is evenly spread over de rotor, causing an equal balance. Do not allow empty meat
forks, meat baskets and chicken racks etc. in the grilling process.
4.3.1. Loading the unit using meat forks
The unit will be equipped with a set of meat forks (see Figure 5).
Figure 5

ACR
EN 17 / 40
For preparing chicken or any other poultry, you can work as follows (see Figure 6).
Figure 6
1. Insert one point of the meat fork through the chest at the position of the wings. Insert the
other point through the drum sticks. Don‟t forget to include the wings.
2. Leave some space between the products, for an even exposure and browning.
3. Put the meat forks onto the rotor disks in such a way that during grilling the chicken
breasts face the operator.
4. Put the points of the meat forks through the appropriate holes in the rotor disks (see
Figure 7).
5. The other end of the meat forks must be put through the corresponding holes in the
opposite rotor disk.
Figure 7
6. To insert the remaining meat forks in the unit, act as follows:
Switch-on the unit using the on/off button‟.
With the door opened, use the rotor button to move the rotor to easily insert the next
meat fork. Keep the rotor button pressed until the rotor reaches the desired position.
Repeat these steps, until all products are loaded.
Whole uncut chickens should always be grilled using the meat forks.
This way their natural fat will baste each other, giving a perfectly slender
cooking result.
Refer to the You-Tube movie: “Fri-Jado instruction for binding and
loading chicken”.
4.3.2. Loading the rotisserie using V-shape spits (accessory)

ACR
EN 18 / 40
Figure 8
If you are using V-shape spits act as follows:
Place the skewer into the small outside hole on the rotor end plate on your left (as
you face the oven). The back of the V-shape spit should be pointing towards you (see
Figure 8).
Fit the other end on the spit into the small corresponding holes on the rotor end plate
on your right (as you face the oven).
Make sure the spit is level. If spit is not level make sure you are using the correct
holes on the rotor end plates.
4.3.3. Loading the unit using meat baskets (accessory)
Figure 9
If you use meat baskets, act as follows:
Place the meat baskets to the appropriate pins.
Whilst loading the unit with meat baskets, you must see to it, that the rotor gets evenly
loaded, so that the mass of the products is evenly spread over de rotor, causing an equal
balance.
Also see to it that no meat parts are sticking out of the baskets.
Figure 10
4.3.4. Loading the rotisserie using chicken racks (accessory)
When using chicken racks, (see Figure 11), you can use the principle as described in section
4.3.3.

ACR
EN 19 / 40
Figure 11
For preparing chicken or any other poultry in the racks, you can use Picture 1 as an example.
Picture 1
4.3.5. Loading the rotisserie using two different accessories.
WARNING
After loading the rotor, at least make ONE full rotation, and check
whether the rotor can spin without obstructions.
If you want to load the unit using two different accessories at the same time, always fill the
rotor with ONE accessory fewer than the maximum allowed quantity. See to it that
accessories of the same type are placed consecutively.
4.4. Grilling time
Grilling time depends on a number of factors:
The ambient temperature and draft in the direct vicinity of the unit.
Grilling temperature.
The initial product temperature.
The sort of meat (fat or lean) and with or without additives.
The mass and shape of the product.
The total amount of meat to be grilled in one grilling cycle.
The end result.

ACR
EN 20 / 40
4.5. Taking out the products
WARNING
After the grilling, the interior of the unit and the glass panes are very hot.
Always use oven gloves when taking out the meat forks or other accessories
4.5.1. Taking out the meat forks
When taking out the meat forks, it is best to act as follows (see Figure 12):
Figure 12
1. Hold the meat fork firmly.
2. Slightly lift the end with the grips and shift the meat fork into the direction of its points.
This releases the meat fork.
3. Take the meat fork at its other end and take it out of the unit.
4. Remove the products from the meat fork.
Refer to the You-Tube movie: “Fri-Jado instruction for unloading chicken
from a rotisserie”.
4.5.2. Taking out the V-shape spit (accessory)
For taking out the V-shape spit you can use the same principle as described in section 4.5.1.
4.5.3. Taking out the chicken racks (accessory).
When taking out the chicken racks from the rotisserie it is best to act as follows:
1. Slightly lift both ends of the chicken rack.
2. Move the rack towards either the left or right hand side of the unit. This action unlocks
one end of the rack.
3. Move the unlocked end towards you, and take out the rack from the unit.
Depending on the number of prepared products, you may have to empty the racks before
they can be removed.
4.5.4. Taking out the meat baskets (accessories)
For taking out the meat baskets, you can use the same principal as described in section
4.5.1, but it is recommended to act as follows:
1. Slightly lift both ends of the meat basket.
2. Move either one side towards you, and take out the basket from the unit.
Depending on the number of prepared products, you may have to empty the baskets before
they can be removed.
Table of contents
Other Fri-Jado Kitchen Appliance manuals
Popular Kitchen Appliance manuals by other brands

Sveba Dahlen AB
Sveba Dahlen AB TRENDY Pizza Operating maintenance installation

Magic Chef
Magic Chef MCKC490B2 user manual

Silvercrest
Silvercrest SDA 260 A1 user manual

Silvercrest
Silvercrest MONSIEUR CUISINE SKMH 1100 A1 operating instructions

New Air
New Air FlipShelf NWB060SS00 owner's manual

Silvercrest
Silvercrest SFW 350 D3 operating instructions