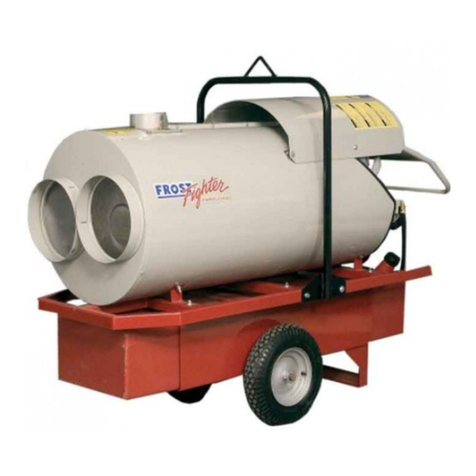
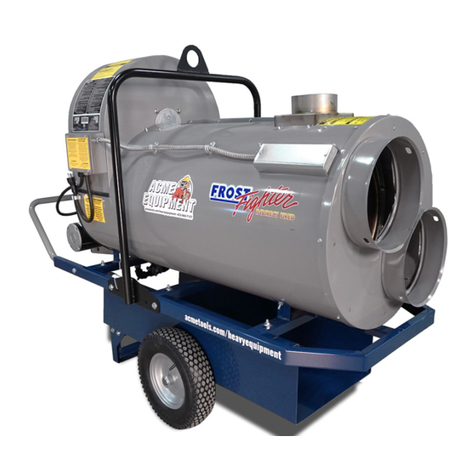
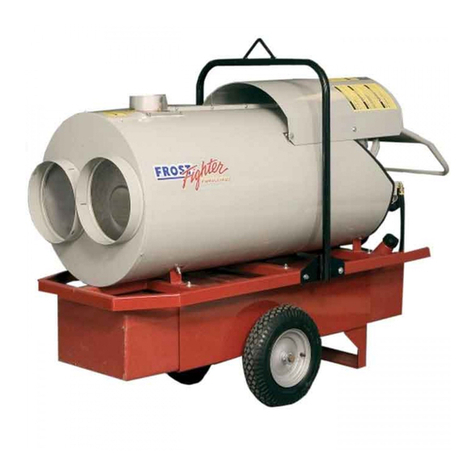
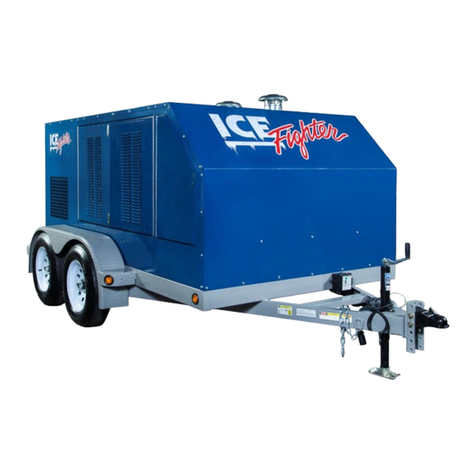
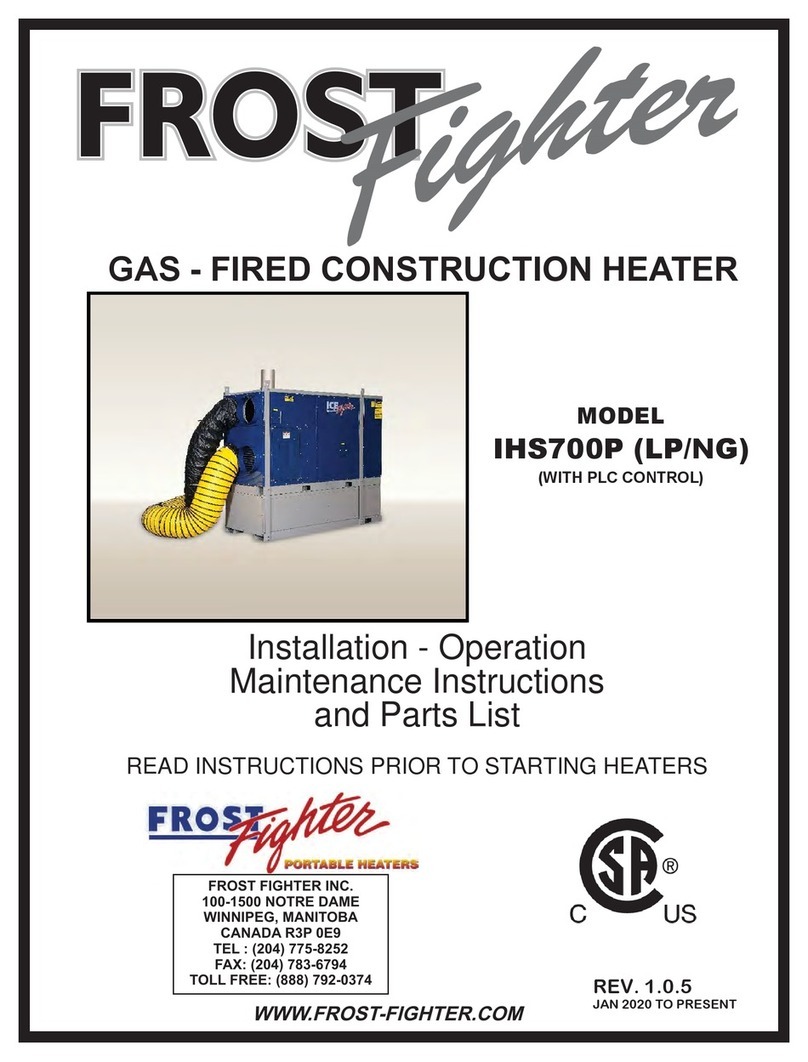
Frost Fighter IHS700P LP Datasheet

FROST FIGHTER INC.
100-1500 NOTRE DAME
WINNIPEG, MANITOBA
CANADA R3P 0E9
TEL : (204) 775-8252
FAX: (204) 783-6794
TOLL FREE: (888) 792-0374
WWW.FROST-FIGHTER.COM
OIL - CONSTRUCTIONFIRED HEATER
MODEL
IHS700P (OIL)
(WITH PLC CONTROL)
Installation - Operation
Maintenance Instructions
and Parts List
READ INSTRUCTIONS PRIOR TO STARTING HEATERS
FROSTFROST
REV. 1.0.5
JAN 2020 TO PRESENT

FROSTFIGHTER WARRANTY
Frost Fighter Inc. warrants the Frostfighter heater to be free from defects in
workmanship and materials for a period of twelve (12) months from date of initial
service not to exceed fifteen (15) months from date of shipment.
If during the warranty period, the heat exchanger fails under normal use and service
due to a defect in material or workmanship said heat exchanger will be repaired or
replacedfree of charge F.O.B. the Winnipeg Factory..
All mechanical and electrical components are covered by a one (1) year limited
warranty. Normal maintenance items are excluded under the warranty. The
warranty does NOT include any freight, labor or sales taxes incurred by the
purchaser and is subject to the following conditions:
1. The heater shall be operated in accordance with the manufacturer’s
operating and maintenance manual.
2. The heater shall be subject to normal use in service and shall not have
been misused, neglected, altered or other wise damaged.
3. The unit shall be operated within the rated capacities and with the
prescribed fuel.
4. The unit has not been allowed to exceed its proper temperature limits due
to control malfunction or inadequate air circulation.
5. There is no evidence that the unit has been subject to tampering or
deliberate destruction.
No representative of ., nor any of its distributors or dealers, isFrost Fighter Inc
authorized to assume for . any other obligations or liability inFrost fighter Inc
connection with this product, not alter the terms of the warranty in any way. This
warranty is limited to the express provisions contained herein and does not extend to
liability for labor costs incurred in replacing defective parts.
Parts can be obtained from ., Winnipeg, Manitoba on the basis thatFrost Fighter Inc
credit will be issued if the defective parts returned qualify for replacement pursuant to
the terms and conditions of this warranty. Authorization to return any alleged
defective parts must be first obtained from the factory prior to transporting the part.
The transportation charges for the alleged defective part must be prepaid by the
owner. . will not accept charges for parts purchased unless theFrost Fighter Inc
conditions of this warranty have been satisfied and prior authorization to purchase
the parts has been received from the factory.
100-1500 NOTRE DAME , WINNIPEG, MANITOBA
R3P 0E9, (204) 775-8252, 1-888-792-0374

TABLE OF CONTENTS
•Page 2
•Page 3
•Page 4
•Page 5 &6
•Page 7
•Page 8
•Page 9
•Page 10
•Page 11 & 12
•Page 13 & 14
•Page 15 to 18
•Page 19
•Page 20 to 22
•Page 23
•Page 24 & 25
•Page 26to 28
•Page 29
•Page 30 & 31
•Page 32
–Hazard Definitions
–Specifications
–Pre-Installation Checklist and Ducting
–Venting
–Electrical Supply
–Main Control Panel
–Optional High Intensity LEDBeacon
–High Limit Switches
–Fuel Line Connections & Precautions
–Preparation for Start Up
–Maintenance & Service
–Normal Sequence ofOperation
–Typical Sequence of Operation / Display Screens & Meanings
–Genisys Controller
–Configuring the VFD Display (ATV320 and ATV312)
–Burner Replacement Parts
–View ofComponents in Main Control Panel
–Wiring Diagrams
–Dimensions
1

2
WARNING Installation and adjustment of the burner requires technical knowledge and
the use of combustion test instruments. Do not tamper with the unit or controls. Call your
qualified service technician. Incorrect operation of the burner could result in severe
personal injury, death or substantial property damage.
Have your equipment inspected and adjusted annually by your qualified service technician
to assure continued proper operation.
Never store gasoline or combustible materials near the heating equipment. This could
result in explosion or fire, causing severe personal injury, death or substantial property
damage.
Never burn garbage or refuse in your heating appliance or try to light theWARNING
burner by tossing burning material into the appliance. This could result in severe personal
injury, death or substantial property damage.
Never restrict air openings on the burner or to the room in which the appliance is located.
This could result in fire hazard or flue gas leakage, causing severe personal injury, death
or substantial property damage.
To the owner-
The following will be used throughout this manual to bring attention to hazards and
their risk factors, or to special information.
Denotes presence of a hazard which, if ignored, will result in severe personalDANGER injury, death or substantial property damage.
Denotes presence of a hazard, which, if ignored, could result in severe
WARNING personal injury, death or substantial property damage.
CAUTION Denotes presence of a hazard, which, if ignored, could result in minor
personal injury, or property damage.
NOTICE Intended to bring special attention to information, but not related to personal
injury or property damage.
HAZARD DEFINITIONS
INSTRUCTION MANUAL
INDIRECT FIRED CONSTRUCTION HEATER
THE INSTALLATION OF THE UNITSHALLBE INACCORDANCE WITH THE REGULATIONS
OF THEAUTHORITIES HAVING JURISDICTION - Refer to CSAStandard B139 ,or NFPA31
Installation Code for Oil-Burning Equipment for recommended installation practice.

MODEL IHS-700P
FUEL TYPES #1 or #2 Fuel Oil / Diesel Fuel
NOZZLE
SIZE 4 0. 0 USGPH 45°B SOLID
PUMP
PRESSURE 140 P.S.I. *
AIR SETTING Band: 6
Shutter: 8
Burner Slide Plate Setting: 4.5
APPROVAL
AGENCY
SPECIFICATIONS
*Pressure at the bleeder port. Subtract 10 PSI if measured at the pump discharge port.
See unit rating plate for exact specifications.
WARNING Read all the instructions before proceeding. Follow all instructions completely.
failure to follow these instructions could result in equipment malfunction, causing severe
personal injury, death or substantial property damage.
This equipment must be installed, adjusted and started only by a qualified service technician
–an Individual or agency, licensed and experienced with all the codes and ordinances, who
is responsible for the installation and adjustment of the equipment. The installation must
comply with all local codes and ordinances and with the National Fire Protection Standard
for Oil-Burning Equipment, NFPA 31 (or CSA B139-04).
NOTICE Concealed damage –If you discover damage to the burner or the controls
during Unpacking, notify the carrier at once and file the appropriate claim.
NOTICE High altitude installations –Accepted industry practice requires no derate of
Burner capacity up to 2000 feet above sea level. For altitudes higher than
2000 Feet, derate burner capacity 4% for each 1000 feet above sea level.
To the owner-
3
This heater is not intended to be used at temperatures above 60°F (15°C). Use of this heater
at above this temperature may result in the burner locking out on the over temperature switch.
For operating conditions that will be at 8°F (-14°C) and below, it is recommended to reduce
the nozzle size to 3.5 GPH 45°B and make the appropriate air adjustments to compensate for
the increased density of fuel oil at lower temperatures.
See below for nozzle sizing
in low temperature applications.

PRE-INSTALLATION CHECKLIST
COMBUSTION AIR SUPPLY
The burner requires combustion air and ventilation air for reliable operation. Assure that the
Building and/or combustion air openings comply with National Fuel Gas Code NFPA 54/CSA B149. For
appliance/burner units in confined spaces, the room must have an air opening near the top of the room
plus one near the floor, each with a free area at least one square inch per 1000 Btu/hr input of all fuel
burning equipment in the room. For other conditions, refer to NFPA 31 (CSA B139 in Canada).
If there is a risk of the space being under negative pressure or of exhaust fans or other devices depleting
available air for combustion and ventilation, the appliance/burner should be installed in an isolated room
provided with outside combustion air.
CLEARANCES
The unit must be installed with minimum clearances of 6 inches on the sides, 18 inches from the top of
the unit and 36 inches from the burner access side. The unit can be installed on a level combustible floor.
Flue clearance is 18".
DUCT INSTALLATION
4
HIGH LIMITS
- The heater is supplied with manual reset high limits located behind marked panels on the left
side of the heater
- The high limit contacts are normally closed and open on the over temperature condition
- If a high limit trips allow the heater to cool down and then reset the high limit by manually
depressing the reset button located in the centre of the high limit.
-Duct diameter is 16 inches
-Use belt cuff ducting. Slide the cuff overtop of the duct inlet/outlet and tighten with the belt.
-The top two connections are the heated supply air into the building.
-The bottom two duct connections are for cold air or return air into the heater.
-The heater is approved use with or without ducting.
-Maximum duct length is 100 feet per supply opening. If return air ducting is used the length of the
return air duct must be subtracted from the allowable supply ducting length (i.e. if the return air
duct length is 30 feet the maximum supply duct length is reduced to 70 feet).
-Ducts should be rated for 300°F minimum.

VENT SYSTEM
The flue gas venting system must be in good condition and must comply with all the applicable codes.
OUTDOOR INSTALLATIONS:
,For outdoor installation vent cap must be installed and fastened.
:INDOOR INSTALLATIONS 3Must be done in accordance to NFPA 54 (or CSA B1 9) with local authorities having jurisdictions.
1. The flue must be securely attached to the unit with tight joints.
2. The flue must not be sized to have a cross-sectional area less then that of the flue
collar at the unit.
3. Other appliances must not be connected so as to vent through the vent of this unit.
4. Do not use 90-degree tees or elbows greater than 45 degrees.
5. Do not support the weight of the stack on the flue connection of the heating system.
6. The maximum flue gas temperature is +/- 550°F. “A” vent, or single wall steel pipe
must be used.
7. Minimize connecting pipe length and the number of bends by locating the unit as close
to the flue pipe as possible.
8. Maintain clearances between the flue pipe and combustible materials that are
acceptable to the Federal, Provincial and local authorities having jurisdiction.
9. Unit must be connected to a flue having sufficient draft to ensure proper operation of
unit.
VERTICALLY VENTED UNITS
1. Maximize the height of the vertical run of
vent pipe. A minimum of five (3) feet (1m)
of vertical pipe is required. The top of the
vent must extend at least two (2) feet
(0.61m) above highest point on the roof.
A weatherproof vent cap must be installed
to the vent termination.
2. Horizontal runs must not exceed 75% of
the vertical height of the vent pipe, up to a
maximum of ten (10) feet (3m).
Horizontal runs should be pitched upward
¼”per foot
(21 mm) and should be supported at 3
foot (1m) maximum intervals.
3. Design vent pipe to minimize the use of
elbows. Each 90 is equivalent to 5 feet
(1.5m) of straight vent pipe run.
4. Vent pipe should not be run through
unheated spaces. If such runs cannot be
avoided, insulate vent pipe to prevent
condensation inside vent pipe. Insulation
should be a minimum of ½”(12.7mm)
thick foil faced fibreglass, minimum 1 ½#
density.
5. Dampers must not be used in vent piping
runs. Spillage of flue gases into the
occupied space could result.
6. Vent pressure must be negative.
7. The vent must be terminated vertically.
5
700
8

6
Rise ratio
1/4" per foot
Vent Diameter: 12"`
Material: Single wall steel pipe or type A vent
Vent installations shall conform with local codes, or,
in the absence of local codes, with the National
F ,ire Protection Standard for Oil-Burning Equipment
NFPA , or installation Code,31 oil-burning equipment
CSA B139-04
90 Degree elbow
90 Degree elbow
Straight section
3' Minimum
25' Maximum
IHS 007
HORIZONTAL FLUE VENTING
3' Minimum
HORIZONTALLY VENTED UNITS
.
Pressures in Category 111 venting systems are positive and therefore care must be taken to avoid flue
products from entering the heated space. Use only vent material and components that are UL listed and
approved for Category 111.
WARNING: Do not use Type B vent within a building on horizontally vented units.
1. All vent pipe joints must be sealed to prevent leakage into the heated space.
2. An approved vent cap must be used.

-Verify that the power supply & connections available are correct for the unit. All power supplies MUST be grounded.
-All power must be supplied through the POWER SUPPLY RECEPTACLES and through the POWER SELECTOR /
DISCONNECT SWITCH
-The selector / disconnect switch has three positions OFF / 1 PHASE / 3 PHASE. This selects between which power
supply receptacle will be supplying power to the unit. Regardless of which type of power is being supplied, the VFD
in the heater will always ensure correct fan rotation direction and reduce the power inrush by starting the fan motor
slowly.
INSTALLING THE OPTIONAL THERMOSTAT
Plug the thermostat directly into the marked receptacle . The thermostat will control the burner through the PLC
when the System Switch is in the THERMOSTAT position. The thermostat must be a line voltage type rated for
120VAC minimum and 10 AMPS.
THE REMOTE THERMOSTAT RECEPTACLE IS USED FOR INSTALLING THE THERMOSTAT ONLY!
THIS IS NOT AN EXTRA POWER SOURCE.
ELECTRICAL SUPPLY
7
WARNING
208V/230V
3 PHASE
208V/230V
1 PHASE
POWER
SUPPLY
RECEPTACLES
POWER
SELECTOR/
DISCONNECT
SWITCH
REMOTE
THERMOSTAT
CONNECTION
208V/230V 1PH/3PH MODELS
480V/600V 3PH ONLY MODELS
POWER
DISCONNECT
SWITCH
REMOTE
THERMOSTAT
CONNECTION
POWER SUPPLY
RECEPTACLE

SYSTEM
SWITCH BLOWER
SWITCH
POWER IN
SELECTOR
SWITCH
COMPARTMENT
LIGHT
SYSTEM SWITCH
MANUAL
OFF
THERMOSTAT
BLOWER SWITCH
ON
AUTO
POWER IN SELECTOR
208V
230V
Turns on heating system (burner) to operate continuously
Heat system (burner) is off. Blower may continue to operate in cool-down sequence
Heating system (burner) is controlled by remote thermostat connected
Main blower operates continuously (Ventilation Mode)
Main blower operates based on the heating cycles controlled by the PLC
Supplies optimum control voltage when incoming line voltage is 195VAC – 215VAC
Supplies optimum control voltage when incoming line voltage is 220VAC – 240VAC
CONVENIENCE LIGHT
MOMENTARY PUSHBUTTON Controls compartment convenience lighting
TO ACTIVATE LIGHT:
-Push once
-Push and hold for 5 seconds
-Push once when light is on
Lightingprovided with 5 min. automatic shut offdelay
Lighting provided with 30 min. automatic shut offdelay
Turns lighting off atany time before delay has expired
8
MAIN CONTROL PANEL

OPTIONAL HIGH INTENSITY LED STATUS BEACON
BEACON CONNECTOR PROVIDED AT
TOP OF CONTROL PANEL
OPTIONAL BEACON
CONNECTED TO UNIT
OPTIONAL BEACON
Magnetic mounting version shown
-Available with quick mount magnetic base or can be permanently mounted
-UL (US/CAN) Approved - IP65 weatherproof / RoHS
- Beacon can be added to heater at any time using connector on control box
LED STATUS BEACON DISPLAY:
9
-Displays SOLID AMBER when desired power is connected & power selector/disconnect switch is in 1PH or 3PH position.
-Displays FLASHING GREEN on a call for heat (Manual or Thermostat) during pre-purge when burner begins operating.
-Displays SOLID GREEN when burner is firing. (Fuel valve signal applied).
-Displays FLASHING AMBER (1 second ON & 1 second OFF) during cool-down cycle.
-Displays FLASHING AMBER (2 second ON & 2 seconds OFF) in ventilation mode.
-Displays FLASHING RED (after 75 sec.) if burner goes into Lockout or (immediately) when High Limit Alarm is triggered.
Note: Versions prior to December 2018 may have FLASHING AMBER on call for heat during pre-purge in lieu of FLASHING GREEN.
The RED ALARM flash rate can be changed if
desired from 80 flashes/min to 240 flashes/
min with the switch under beacon's screw on
lens.
FLASH RATE
SELECTOR
SWITCH

HIGH LIMIT SWITCHES & LOCATIONS
LIMIT SWITCHES UNDER
REMOVABLE COVER
LIMIT SWITCH UNDER
REMOVABLE COVER
MANUAL RESET HIGH LIMIT
AUTO RESET HIGH LIMIT
10

follow this guideline and/or restricting or closing off the return line will cause damage to the
fuel seals and consequent fuel leakage. This could result in severe personal injury, death or
substantial property damage.
TWO-PIPE SYSTEM - (Bypass plug installed in pump)
TWO-STAGE TWO-PIPE MAXIMUM
LINE LENGTH (H + R)
11
Lift “H”3450 RPM Pump Speed
3/8”OD Tubing @ 7 GPM
0’80’
2’73’
4’66’
6’59’
8’52’
10’45’
12’38’
14’31’
16’80’
PRESSURE
ADJUSTMENT
SCREW
FUEL
SUPPLY
FUEL
RETURN
FUEL FLOW DIAGRAM
NOZZLE FUEL VALVE FUEL PUMP
FUEL LINE CONNECTIONS & PRECAUTIONS
CONNECTING THE OIL SUPPLY / RETURN LINES
Install the oil tank lines in accordance with all applicable codes.
Use continuous lengths of reinforced fuel rated hose routed away from and protected from traffic, where
possible.
Install a high quality shut-off valve in an accessible location on the oil supply line. Locate one valve close
to the tank.
Install the oil lines using the following guidelines. Failure to comply could lead to equipment
damage and present a risk of sever personal injury, death or substantial property damage
due to leakage of oil and potential fire hazard.
Use only flare fittings at joints and connections. Never use compression fittings.
Install fittings only in accessible locations to assure any leak will be detected.
Where joint sealing is needed, use only pipes dope. Never use Teflon tape. Tape strands
can break free and damage the fuel unit.
On two-pipe oil systems verify that the suction line vacuum does not exceed the fuel
manufacturer's recommendation.
Do not operate the burner unless a return line or a by-pass loop is installed. Failure to
WARNING

12
- When using remote fuel tanks in areas where there may be traffic or heavy equipment passing over the
fuel lines, it is critical that the lines are completely protected from possible damage or rupture.
- For extra safety in installations requiring remote fuel supplies that must not use a return line and
thereby eliminating the possibility of spills due to fuel line damage, an optional Tigerloop single line
system with integral return and safety oil valve on the supply tank is available. See Below
SUPPLY LINE FROM TANK
3-WAY VALVE USED TO
SWITCH BETWEEN SUPPLY
SOURCES – WHEN APPLICABLE.
TIGERLOOP COMBINATION
DEAERATOR AND SPIN-ON
FILTER
ON-BOARD FUEL
RETURN LINE
OIL SAFETY VALVE C/W QUICK
COUPLER CONNECTION TO
TANK.
SUPPLY LINE TO HEATER FUEL CELL
NOTE: When using remote fuel cells and shut-off type quick coupler connections, always ensure the heater has stopped running and
switch is in the "off" position or disconnected from the power supply before disconnecting the lines from the fuel cell or heater.
Failure to do this may result in fuel pump seal failure due to high pressure buildup in the return line.
Optional Single Supply Line System for Remote Fuel Tanks

PREPARE THE BURNER FOR START-UP
Start-up checklist –Verify the following before attempting to start burner
o Combustion air supply and venting have been inspected and verified to be free of obstruction
and installed in accordance with all applicable codes.
o Fuel connection to nozzle line assembly is secure.
o Fuel supply line is correctly installed, the oil tank is sufficiently filled, and shut-off valves are
open.
BEFORE STARTING THE BURNER
Do not proceed unless all prior steps in this manual have been completed. Failure to
comply could result in severe personal injury, death or substantial property damage.
WARNING Do not attempt to start the burner when excess oil has accumulated, when the appliance is
full of vapor or when the combustion chamber is very hot. Do not attempt to re-establish
flame with the burner running if the flames should be extinguished during start-up, venting
or adjustment. Allow the unit to cool off and all vapors to dissipate before attempting
another start. Failure to comply with these guidelines could cause an explosion or fire,
resulting in severe personal injury, death or substantial property damage.
PUMP PRESSURE
The pump pressure is 140 PSI to 150 PSI for the IHS700P. The pump pressure is
checked and adjusted on the side of the pump. (See page 10 Two-pipe oil flow)
13
PLC DISPLAY BEHIND
MAIN CONTROL BOX
COVER.
BURNER PRIMARY CONTROL DISPLAY
VFD DISPLAY (NEW VERSION ATV320) VFD DISPLAY (PREVIOUS VERSION ATV312)
TYPICAL START UP SCREENS DISPLAYED WHEN POWER SUPPLIED TO HEATER AND POWER
SELECTOR SWITCH IS PLACED TO EITHER THE 1PH OR 3PH POSITION.
(DEPENDING ON POWER SUPPLIED)
OR
PREPARATION FOR START UP
WARNING

AIR SETTING
The air settings should be set to 6 on the band and 8 on the air shutter. In some cases
these air-setting may need to be adjusted especially if a different size nozzle is installed.
For field setup a Bacharach smoke tester can be used to obtain a reading of between zero
and #2 smoke.
Also a flue gas analyzer can be used to measure excess O2% and CO2% levels. Set your
air shutter to bring your O2% levels between 4-5%. Your CO2% will be between 10-11%
and your CO levels should be around zero.
SET “Z”DIMENSION
slider (z dimensions) 4.5 Adjusting plate assembly,The air settings should be set at on the
which is located on the right hand side of the burner.
Adjusting plate assy.
14

MAINTENANCE AND SERVICE
WARNING Operation and adjustment of the burner requires technical knowledge and the use of combustion
test instruments. Do not tamper with the burner or controls. Failure to comply could result in
failure or the burner or system, resulting in severe personal injury, death or substantial property
damage.
oClean burner and blower wheel (to remove lint and debris).
oTest ignition and combustion and verify air damper settings.
oTest fuel lines and all connections
oInspect combustion air and vent systems.
oOil motor (if not permanently lubricated).
oReplace oil nozzle with one having the same specifications
MONTHLY MAINTENANCE
oObserve combustion air openings and vent system for integrity. Openings must be clean and free of
obstructions.
oCheck the fuel lines and fittings to verify there are no leaks.
oReplace fuel filter element
oObserve burner ignition and performance to verify smooth operation.
oShut the system down if you observe abnormal or questionable operation. Call a qualified service
agency for professional inspection and service.
oGrease the main supply blower bearings.
15
PLC CONTROL OIL PRIMARY CONTROL
These two items require no maintenance or service. There are no user serviceable parts inside. Check for proper
operation and function prior to each heating season.
ANNUAL SERVICE
Have the burner inspected; tested and started at least annually by a qualified service technician. This annual test
inspection should include at least the following:
MAINTENANCE / SERVICE

INSTALL NOZZLE
Install the oil nozzle in the nozzle adaptor. Use a open-end wrench to steady the nozzle adaptor and
use a 5/8”open-end wrench to turn the nozzle. Tighten securely but do not over-tighten.
Ensure the nozzle being installed has the correct specifications as those shown on page 4 and is sized
to account for the ambient temperature conditions that the heater will be operated in.
Verify that the oil tube assembly and electrodes are in good condition, with no cracks or damage.
WARNING Failure to properly set and maintain the electrode and nozzle spacing dimensions can
cause incorrect burner ignition or poor combustion. This could result in severe personal
injury, death or substantial property damage.
166

BEARING INSTALLATION AND MAINTENANCE
NOTE: To prevent premature failure –please ensure greasing instructions below are applied. As well,
tighten bearing set screws, collars, and wheel lugs every four to six months.
ENGINEERING – BALL & ROLLER BEARINGS LUBRICATION
For bearings that are equipped with a hydraulic grease fitting threaded into the housing for ease of
lubrication, the proper amount of lubricant in the bearing is important. Both excessive and inadequate
lubrication may cause failure. The bearings should be re-lubricated while they are rotating (if it is safe
to do so);; the grease should be pumped in slowly until a slight bead forms around the seals..The bead
in addition to acting as an indicator of adequate re-lubrication provides additional protection against the
entry of foreign matter and helps flush out contaminates in the bearing.
If necessary to re-lubricate while the bearing is idle, refer to the recommended re-lubrication grease
chart tables on the following page for various sizes of the bearings.
LUBRICANT- STANDARD BEARINGS
All bearing units are pre-lubricated at the factory This lubricant is satisfactory for an operating
temperature range of -40° to +250° F.
Select synthetic or standard industrial grade greases that conform to the following specification for
optimum bearing performance:
Premium Duty Ball & Roller;
58-75 SUS @ 210°F
50-750 SUS @ 100°F
NOTE: For heavy loaded roller bearing applications, grease with EP additives are often recommended for optimum performance.
17
Premium Duty Ball & Roller;
68-75 SUS @ 210°F
600-750 SUS @ 100°F
Premium Duty Ball & Roller;
82 SUS @ 210°F
886 SUS @ 100°F
TABLE I. RECOMMENDED LUBRICATION
Ball Bearings Roller Bearings
Shaft Size
(inches) Grease Charge
(ounces) Shaft Size
(inches) Grease Charge
(ounces)
1–1 ½ 0.15 1 –½ to 1 –1 1/16 0.32
A high quality synthetic wide temperature range grease is recommended.
Under most circumstances the fan bearings of the IHS700P will be operating within the 1500-2800 RPM range and will
be at temperatures at or below 120°F - 130°F. Therefore typical lubrication frequency of the bearings will be every 2 to 5
months. In very dirty air environment the frequency of lubrication should increase.
The following chart gives the frequency of re-lubrication based upon continuous operation for various operating
temperatures and can be used as a satisfactory guide for determining when bearings should be re-lubricated.
T IIABLE . LUBRICATION FREQUENCY
Speed Temperature Cleanliness Greasing Interval
1500 -2800 RPM Up to 120° FClean 3-5 Months
Up to 130° FClean 2 Months
Up to 200° FClean 1 Month
Any speed Up to 150° FDirty 1 Month
Any speed Over 150° F1 - 2 weeks
Any speed Any temperature Weekly
Extreme conditions
1500 -2800 RPM
1500 -2800 RPM
Dirty

TENSIONING V-BELT DRIVES
1. Ideal tension is the lowest tension at which the belt will not slip under peak load conditions.
2. Check tension frequently during the first 24-48 hours of operation.
3. Over-tensioning shortens the belt and bearing life under-tensioning reduces belt life and will
decrease performance and waste energy.
4. Keep belts free from foreign material that may cause slip.
5. Make V-drive inspection on a periodic basis. Tension when slipping. Never apply belt dressing
as this will damage the belt and cause early failure.
Check and tighten belt tension. The following procedure is recommended for tightening belts:
a) Measure span “X”shown in Figure A.
b) At the center of span length “X”, apply a force perpendicular to the span and large enough to deflect
belt 1/64”for each inch of span length. Example- the required deflection for a 40”span would be
40/64”or 5/8”.
c) Compare the force applied with the values given in Table III. If force is between the minimum and
maximum range shown, the drive tension should be satisfactory. A force below the minimum value
indicates an under tightened belt and force that exceeds the maximum value indicates an over
tightened belt.
FIGURE A
FORCE
SPANLENGTH X
PERINCHOF SPAN
DEFLECTION1/64"
18
BELT
CROSS
SECTION
(Marked on Belt)
MOTOR PULLEY
PITCH
DIAMETER
DEFLECTION FORCE
MINIMUM MAXIMUM
B 4.4” – 5.6”4.0 lbs. 5.87 lbs.
TABLE III
Other manuals for IHS700P LP
1
Table of contents
Other Frost Fighter Heater manuals

Frost Fighter
Frost Fighter IHS 1500 Manual

Frost Fighter
Frost Fighter IDF1000 User manual

Frost Fighter
Frost Fighter IDH1000 User manual

Frost Fighter
Frost Fighter IDF500HS Datasheet

Frost Fighter
Frost Fighter IDH400QR LP/NG Datasheet

Frost Fighter
Frost Fighter DF 400 User manual

Frost Fighter
Frost Fighter IDH200QR OIL Guide

Frost Fighter
Frost Fighter IHS700P LP Datasheet

Frost Fighter
Frost Fighter IDH200QR OIL Datasheet
Frost Fighter
Frost Fighter IDHQR Series Datasheet