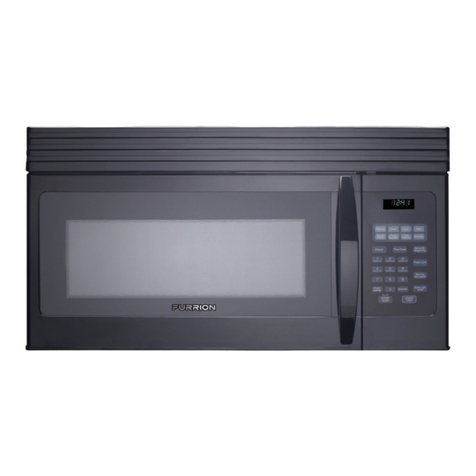
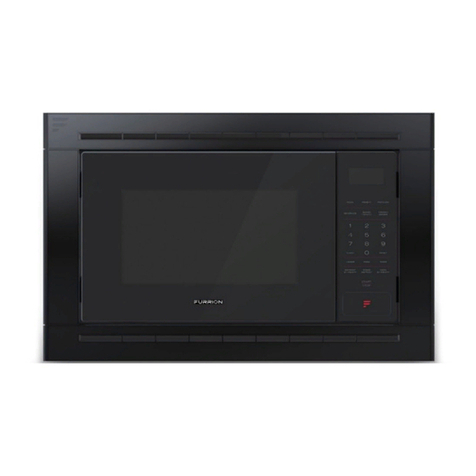
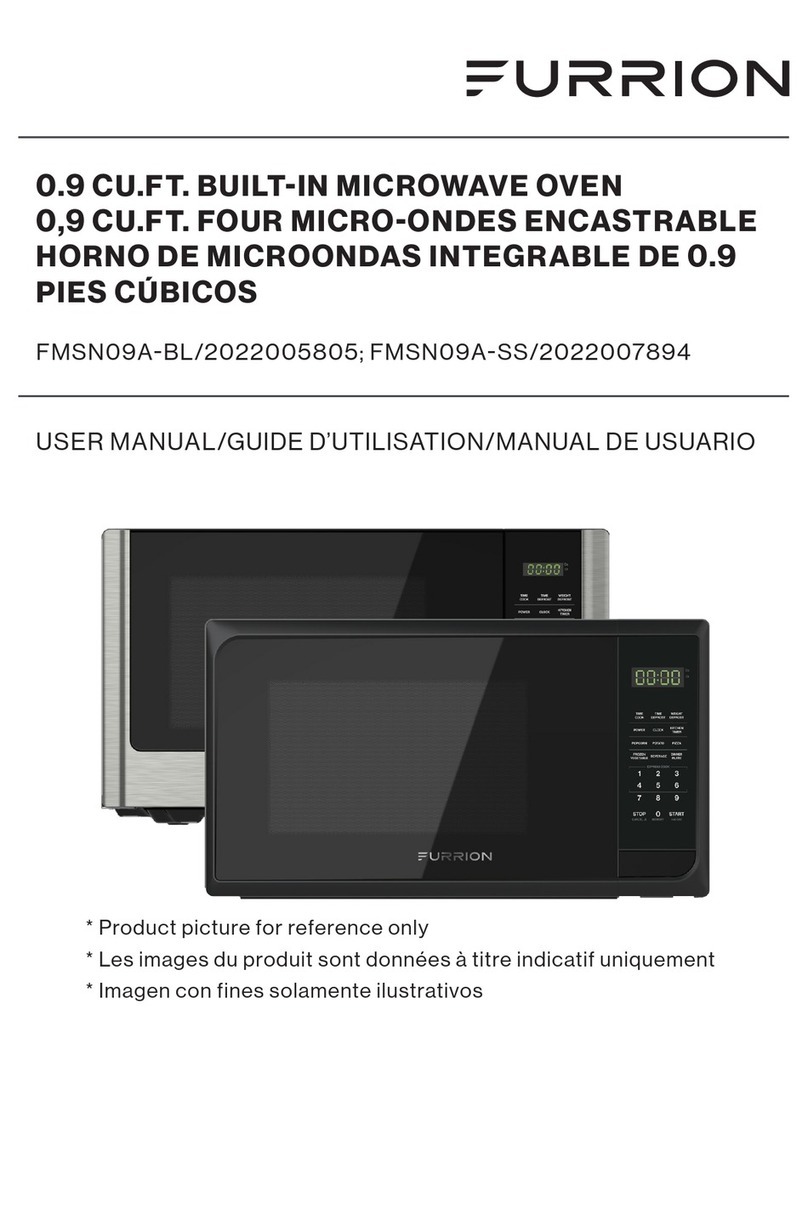
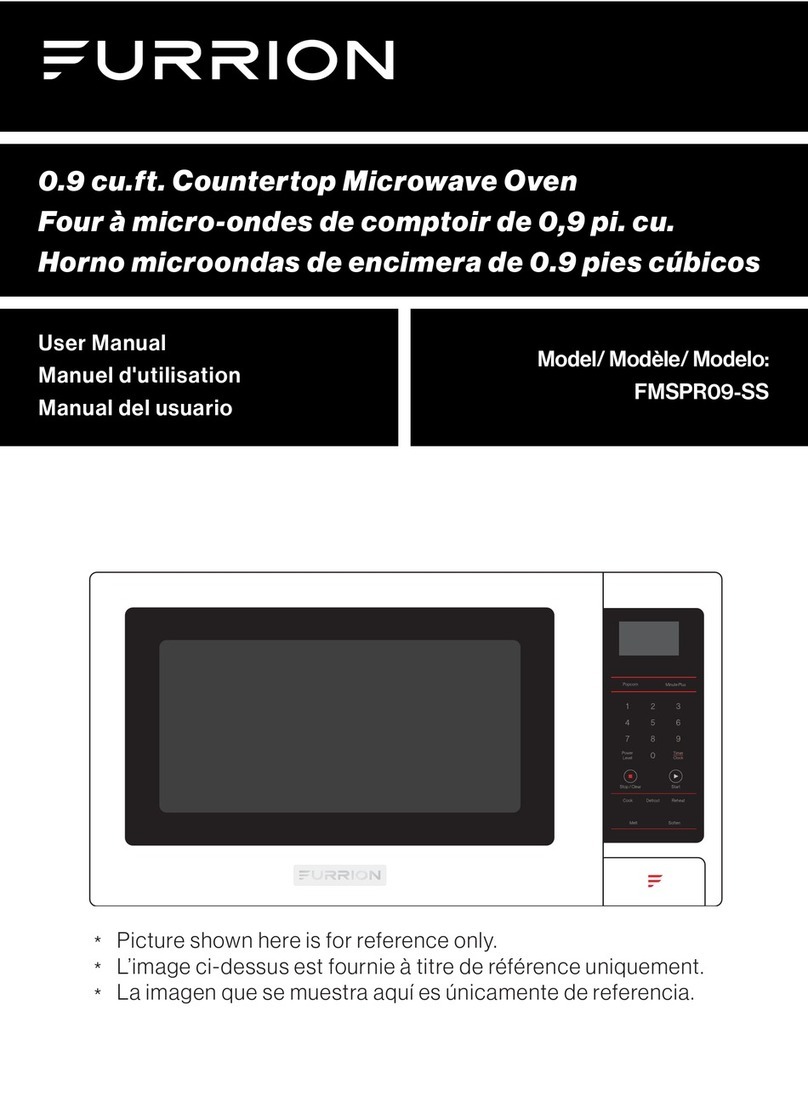
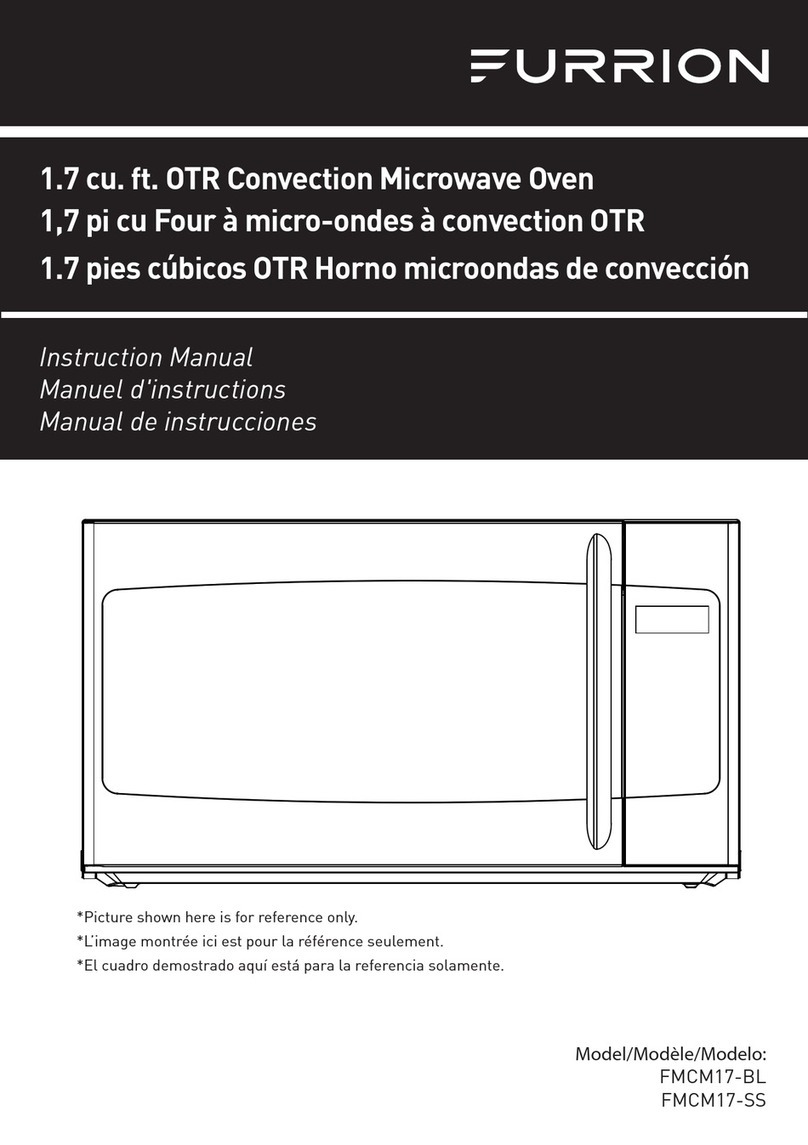
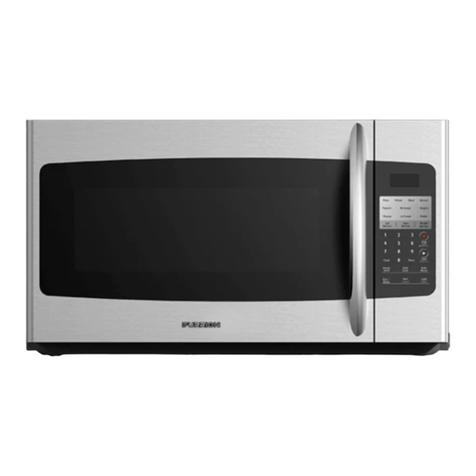
Furrion FMSMA15-SS User manual

Microwave Oven
User Manual Model: FMSMA15-SS
*Picture shown here is for reference only.
Defrost
Auto/Time
Time
Cook
Start/
Pause
Stop/
Clear
Display On/Off
Express Cook Express Cook Express Cook
Popcorn
Baked
Potato
Reheat
Beverage
Timer
Clock
AM/PM
Vent Fan
H/L/Off
Surface Light
On/Off
Power
Add
30 Sec.
https://furrion.com/
collections/cooking
* To view the multi-language user manual, please access the link or scan the QR code.
* Pour obtenir le manuel d’utilisateur multilingue, accédez au lien ou scannez le QR code.
* Para ver el manual de usuario en otros idiomas, acceda al siguiente enlace o escanee el código QR.

1
Thank you for purchasing this Furrion® product. Before operating your new appliance, please read these instructions carefully.
This instruction manual contains information for safe use, installation and maintenance of the appliance.
Please keep this instruction manual in a safe place for future reference. This will ensure safe use and reduce the risk of injury.
Be sure to pass on this manual to new owners of this appliance.
The manufacturer does not accept responsibility for any damages due to not observing these instructions.
Table of Contents
Table of Contents....................................................................................................................................... 1
Explanation of Symbols ............................................................................................................................ 2
Important Safety Instructions.................................................................................................................. 2
Safety Precautions.................................................................................................................................................................................................................2
Grounding Instructions ........................................................................................................................................................................................................3
Radio Interference..................................................................................................................................................................................................................3
PRECAUTIONS TO AVOID POSSIBLE EXPOSURE TO EXCESSIVE MICROWAVE ENERGY .........................................................3
Product Overview ...................................................................................................................................... 4
Microwave Oven .....................................................................................................................................................................................................................4
Control Panel ............................................................................................................................................................................................................................4
Before Using ............................................................................................................................................... 5
What’s in the box .....................................................................................................................................................................................................................5
Unpacking Instructions ........................................................................................................................................................................................................5
About Your Microwave Oven.............................................................................................................................................................................................5
About Food................................................................................................................................................................................................................................ 5
About Microwave Cooking ................................................................................................................................................................................................5
About Safety .............................................................................................................................................................................................................................6
About Utensils and Coverings ..........................................................................................................................................................................................6
About Children and the Microwave ................................................................................................................................................................................6
Operation..................................................................................................................................................... 7
Clock Setting ............................................................................................................................................................................................................................7
Microwave Cooking...............................................................................................................................................................................................................7
Multi-stage Cooking..............................................................................................................................................................................................................7
Speedy Cooking......................................................................................................................................................................................................................7
Defrost Cooking ...................................................................................................................................................................................................................... 7
Hood Function..........................................................................................................................................................................................................................8
Oven Lamp ................................................................................................................................................................................................................................8
Timer Function......................................................................................................................................................................................................................... 8
Display On/Off Function......................................................................................................................................................................................................8
Popcorn Menu..........................................................................................................................................................................................................................8
Baked Potato Menu ...............................................................................................................................................................................................................8
Beverage Menu........................................................................................................................................................................................................................8
Reheat Menu............................................................................................................................................................................................................................. 8
Inquiring Function...................................................................................................................................................................................................................8
Lock Function For Children................................................................................................................................................................................................8
Suggested power levels for cooking..............................................................................................................................................................................9
Suggestions for getting the best results ......................................................................................................................................................................9
Care and Maintenance............................................................................................................................... 10
Cleaning Suggestions ..........................................................................................................................................................................................................11
How to Clean the Inside.......................................................................................................................................................................................................11
How to Clean the Outside...................................................................................................................................................................................................11
Troubleshooting ......................................................................................................................................... 12
Specifications ............................................................................................................................................ 13

2
Explanation of Symbols
This manual has safety information and instructions to help
you eliminate or reduce the risk of accidents and injuries.
Always respect all safety warnings identified with these
symbols. A signal word will identify safety messages and
property damage messages, and will indicate the degree or
level of hazard seriousness.
WARNING
Indicates a potentially hazardous situation which, if not
avoided, could result in death or serious injury.
CAUTION
Indicates a potentially hazardous situation which, if not
avoided, may result in minor or moderate personal injury, or
property damage.
DANGER
Indicates an imminently hazardous situation which, if not
avoided, will result in death or serious injury.
Important Safety Instructions
Safety Precautions
WARNING
To reduce the risk of burns, electric shock, fire, injury to
persons or exposure to excessive microwave energy.
When using electrical appliances basic safety precautions
should be followed, including the following:
1. Read all instructions before using the appliance.
2. Read and follow the specific “PRECAUTIONS TO AVOID
POSSIBLE EXPOSURE TO EXCESSIVE MICROWAVE
ENERGY “ on page 5.
3. As with most cooking appliances, close supervision is
necessary to reduce the risk of a fire in the oven cavity.
4. To reduce the risk of fire in the oven cavity:
− Do not overcook food. Carefully attend the appliance
when paper, plastic, or other combustible materials
are placed inside the oven to facilitate cooking.
− Remove wire twist-ties and metal handles from paper
or plastic containers/bags before placing them in the
oven.
− If materials inside the oven ignite, keep the oven door
closed. Turn the oven off, and unplug the appliance.
Disconnect the power cord, shut off power at the fuse
or circuit breaker panel.
− Do not use the oven cavity for storage purposes. Do
not leave paper products, cooking utensils, or food in
the cavity when not in use.
5. This oven must be grounded. Connect only to properly
grounded outlet. See “GROUNDING INSTRUCTIONS”
found on page 4.
6. Install or locate this oven only in accordance with the
installation instructions provided.
7. Some products such as whole eggs and sealed
containers-for example, closed glass jars-are able to
explode and should not be heated in the oven.
8. Use this appliance only for its intended uses as described
in this manual. Do not use corrosive chemicals or vapors
in this appliance. This oven is specifically designed to
heat or cook or dry food. It is not designed for industrial or
laboratory use.
9. As with any appliance, close supervision is necessary
when used by children.
10. Do not operate this oven if it has a damaged cord or plug,
if it is not working properly or if it has been damaged or
dropped.
11. This appliance should be serviced only by qualified
service technicians. Contact the nearest authorized
service facility for examination, repair or adjustment.
12. Do not cover or block any openings on the oven.
13. Do not store or use this appliance outdoors.
14. Do not use this oven near water, for example, near a
kitchen sink, in a wet basement, near a swimming pool, or
similar locations.
15. Do not immerse cord or plug in water.
16. Keep cord away from heated surfaces.
17. Do not let cord hang over edge of table or counter.
18. When cleaning surfaces of door and oven that comes
together on closing the door, use only mild, nonabrasive
soaps or detergents applied with a sponge or soft cloth.
19. Liquids, such as water, coffee, or tea are able to be
overheated beyond the boiling point without appearing to
be boiling. Visible bubbling or boiling when the container
is removed from the microwave oven is not always
present. THIS COULD RESULT IN VERY HOT LIQUIDS
SUDDENLY BOILING OVER WHEN THE CONTAINER
IS DISTURBED OR A SPOON OR OTHER UTENSIL IS
INSERTED INTO THE LIQUID.
− Do not overheat the liquid.
− Stir the liquid both before and halfway through heating
it.
− Do not use straight-sided containers with narrow
necks.
− After heating, allow the container to stand in the
microwave oven for a short time before removing the
container.
− Use extreme care when inserting a spoon or other
utensil into the container.
20.Do not mount over sink.
21. Do not store anything directly on top of the appliance
surface when the appliance is in operation.
SAVE THESE INSTRUCTIONS

Grounding Instructions
This appliance must be grounded. In the event of an electrical
short circuit, grounding reduces the risk of electric shock
by providing an escape wire for the electric current. This
appliance is equipped with a cord having a grounding wire
with a grounding plug. The plug must be plugged into an
outlet that is properly installed and grounded.
WARNING - Improper use of the grounding can result in a
risk of electric shock.
Consult a qualified electrician or serviceman if the grounding
instructions are not completely understood, or if doubt
exists as to whether the appliance is properly grounded. If
it is necessary to use an extension cord, use only a 3-wire
extension cord that has a 3-blade grounded plug, and 3-slot
receptacle that will accept the plug on the appliance.
The marked rating of the extension cord shall be equal to or
greater than the electrical of the appliance.
DANGER - Electric Shock Hazard
Touching some of the internal components can cause
serious personal injury or death.
Do not disassemble this appliance.
WARNING - Electric Shock Hazard
Improper use of the grounding can result in electric shock. Do
not plug into an outlet until appliance is properly installed and
grounded.
1. A short power supply cord is provided to reduce the risks
resulting from becoming entangled in or tripping over a
longer cord.
2. Longer cord sets or extension cords are available and
may be used if care is exercised in their use.
3. If a long cord or extension cord is used:
1) The marked electrical rating of the cord set or
extension cord should be at least as great as the
electrical rating of the appliance.
2) The extension cord must be a grounding-type 3-wire
cord.
3) The longer cord should be arranged so that it will not
drape over the counter top or tabletop where it can be
pulled on by children or tripped over unintentionally.
Radio Interference
1. Operation of the microwave oven may cause interference
to your radio, TV or similar equipment.
2. When there is interference, it may be reduced or
eliminated by taking the following measures:
1) Clean door and sealing surface of the oven
2) Reorient the receiving antenna of radio or television.
3) Relocate the microwave oven with respect to the
receiver.
4) Move the microwave oven away from the receiver.
5) Plug the microwave oven into a different outlet so that
microwave oven is on different branch circuits.
PRECAUTIONS TO AVOID POSSIBLE
EXPOSURE TO EXCESSIVE
MICROWAVE ENERGY
●Do not attempt to operate this oven with the door open
since this can result in harmful exposure to microwave
energy. It is important not to defeat or tamper with the
safety interlocks.
●Do not place any object between the oven front face and
the door or allow dirt or cleaner residue to accumulate on
sealing surfaces.
●Do not operate the oven if it is damaged. It is
particularly important that the oven door closes
properly and that there is no damage to the:
(1) DOOR (bent)
(2) HINGES AND LATCHES (broken or loosened)
(3) DOOR SEALS AND SEALING SURFACE
●The oven should not be adjusted or repaired by anyone
except properly qualified service personnel.
3

Product Overview
Microwave Oven
FRONT VIEW
1
2
3
4 5 6 7
8
BOTTOM VIEW
FRONT
REAR
10
9
Defrost
Auto/Time
Time
Cook
Start/
Pause
Stop/
Clear
DisplayOn/Off
ExpressCook ExpressCook ExpressCook
Popcorn
Baked
Potato
Reheat
Beverage
Timer
Clock
AM/PM
Vent Fan
H/L/Off
Surface Light
On/Off
Power Add
30 Sec.
Item Description
1Oven Window
2Door Safety Lock System
3Door assembly
4Roller Ring
5Shaft
6Glass Tray
7Control Panel
8Front Vent Grill
9Surface Lights
10 Grease Filter
Control Panel
Your microwave oven control panel lets you select the
desires cooking function quickly and easily. All you have to
do is press the necessary command pad. The following is
a list of all the command and number pads located on the
control panel. For more information on these features, see
the operation section.
Defrost
Auto/Time
Time
Cook
Start/
Pause
Stop/
Clear
Display On/Off
Express Cook Express Cook Express Cook
Popcorn
Baked
Potato
Reheat
Beverage
Timer
Clock
AM/PM
Vent Fan
H/L/Off
Surface Light
On/Off
Power Add
30 Sec.
1
3
4
8
7
10
2
6
15
5
14
13
12
11
9
16
Item Description Function
1Clock AM/PM Used to set the time of clock.
2Timer Press to set timer function.
3Popcorn Press to set popcorn cooking program.
Item Description Function
4Baked Potato Press to set baked potato cooking
program.
5Beverage Press to set beverage cooking program.
6Reheat Press to set reheat cooking program.
7Number
Buttons
Press to enter cooking time, power level
or food weight.
8Power Press to turn on/off the oven.
9Add 30 Sec.
Press to start the oven.
Simply press it a number of times to set
cooking time and cook immediately at full
power level
It is used to add 30sec cooking time.
10 Vent Fan H/L/
Off
Use to turn the vent fan on, off, or to
adjust fan speed.
11 Surface Light
On/Off Press to turn the surface light on or off.
12 Start/Pause Press to pause the oven.
Press again to start the oven.
13 Stop/Clear
Press to stop the oven.
Press and hold for 3 seconds to clear
previous setting.
14 Defrost Auto/
Time Use to defrost food based on time enter.
15 Time Cook Press to set the cooking time.
16 Display on/off Press to turn on/off the display.
4

Before Using
What’s in the box
Make sure you have the following listed items included in the
packaging. If any item is damaged or missing, contact your
dealer.
●Microwave Oven Body
●User Manual
●Installation Manual
●Warranty Manual
●Top Cabinet Template and Rear Wall Template
●Mounting Plate
●Exhaust Adapter
●Glass Tray with Roller Ring
●Grease Filter x 2
●Screws
Unpacking Instructions
Unpacking and Examining Your Oven
Carefully remove oven from carton. SAVE THE CARTON AS
IT MAY MAKE INSTALLATION EASIER.
Remove:
1. All packing materials from inside the oven cavity; however,
DO NOT REMOVE THE WAVEGUIDE COVER, which is
located on the side of microwave oven. Check to see that
there are Installation Manual, Rear Wall Template, Top
Cabinet Template, bag of Installation Hardware, Charcoal
Filter and Exhaust Damper Assembly. Read enclosures
and SAVE the User Manual.
2. The feature sticker from the outside of the door, if there is
one.
Check the microwave oven for any damage, such as
misaligned or bent door, damaged door seals and sealing
surfaces, broken or loose door hinges and latches and dents
inside the cavity or on the door. If there is any damage, do not
operate the oven and contact your dealer.
See Installation Manual for more details.
About Your Microwave Oven
NEVER use the oven without the turntable and roller ring nor
turn the turntable over so that a large dish could be placed in
the oven. The turntable will turn both clockwise and counter
clockwise.
ALWAYS have food in the oven when it is on to absorb the
microwave energy.
When using the oven at power levels below 100%, you may
hear the magnetron cycling on and off.
Condensation is a normal part of microwave cooking. Room
humidity and the moisture in food will influence the amount
of moisture that condenses in the oven. Generally, covered
foods will not cause as much condensation as uncovered
ones. Ventilation openings must not be blocked.
In using recipes or package directions, check food a minute
or two before the minimum time and add time accordingly.
About Food
FOOD DO DON'T
Eggs,
sausages,
fruits and
vegetable
• Puncture egg yolks
before cooking to prevent
“explosion”.
• Pierce skins of potatoes,
apples, squash, hot dogs
and sausages so that steam
escapes.
• Cook egg in shells.
• Reheat whole eggs.
Popcorn
• Use specially bagged
popcorn for the microwave
oven.
• Listen while popping corn
for the popping to slow to 1
or 2 seconds or use special
popcorn cooking functions
listed on Page 9.
• Pop popcorn in regular
brown bags or glass
bowls.
• Exceed maximum time
on popcorn package.
Baby food
• Transfer baby food to small
dish and heat carefully,
stirring often. Check
temperature before serving.
• Put nipples on bottles
after heating and shake
thoroughly. “Wrist” test
before feeding.
• Heat disposable bottles.
• Heat bottles with nipples
on.
• Heat baby food in
original jars.
General
• Cut baked goods with filling
after heating to release
steam and avoid burns.
• Stir liquids briskly before
and after heating to avoid
“eruption”.
• Use deep bowl, when
cooking liquids or cereals,
to prevent boilovers.
• Heat or cook in closed
glass jars or airtight
containers.
• Can in the microwave
as harmful bacteria may
not be destroyed.
• Deep fat fry.
• Dry wood, gourds, herbs
or wet papers.
About Microwave Cooking
●Arrange food carefully. Place thickest areas towards outside of
dish.
●Watch cooking time. Cook for the shortest amount of time
indicated and add more as needed. Food severely overcooked
can smoke or ignite.
●Cover foods while cooking. Check recipe or cookbook for
suggestions: paper towels, wax paper, microwave plastic wrap
or a lid. Covers prevent spattering and help foods to cook evenly.
●Shield with small flat pieces of aluminum foil any thin areas
of meat or poultry to prevent overcooking before dense,
thick areas are cooked thoroughly.
●Stir foods from outside to center of dish once or twice
during cooking, if possible.
●Turn foods over once during microwaving to speed
cooking of such foods as chicken and hamburgers. Large
items like roasts must be turned over at least once.
●Rearrange foods such as meatballs halfway through
cooking both from top to bottom and from the center of
the dish to the outside.
●Add standing time. Remove food from oven and stir, if
possible. Cover for standing time that allows the food to
finish cooking without overcooking.
5

●Check for doneness. Look for signs indicating that
cooking temperatures have been reached.
●Doneness signs include:
− Food steams throughout, not just at edge.
− Center bottom of dish is very hot to the touch.
− Poultry thigh joints move easily.
− Meat and poultry show no pinkness.
− Fish is opaque and flakes easily with a fork.
About Safety
Check foods to see that they are cooked to the following
recommended temperatures.
TEMP FOOD
160oF...For fresh pork, ground meat, boneless white poultry,
fish, seafood, egg dishes and frozen prepared food.
165oF…For leftover, ready-to-reheat refrigerated, and deli and
carry-out “fresh” food.
170oF…White meat of poultry.
180oF…Dark meat of poultry.
●To test for doneness, insert a meat thermometer in a
thick or dense area away from fat or bone. NEVER leave
the thermometer in the food during cooking, unless it is
approved for microwave oven use.
●ALWAYS use potholders to prevent burns when handling
utensils that are in contact with hot food. Enough heat
from the food can transfer through utensils to cause skin
burns.
●Avoid steam burns by directing steam away from the
face and hands. Slowly lift the farthest edge of a dish’s
covering and carefully open popcorn and oven cooking
bags away from the face.
●Stay near the oven while it’s in use and check cooking
progress frequently so that there is no chance of
overcooking food.
●NEVER use the cavity for storing cookbooks or other
items.
●Select store and handle food carefully to preserve its high
quality and minimize the spread of food borne bacteria.
●Keep waveguide cover clean. Food residue can cause
arcing and/or fires.
●Use care when removing items from the oven so that
utensil, your clothes or accessories do not touch the
safety door latches.
About Utensils and Coverings
It is not necessary to buy all new cookware. Many pieces
already in your kitchen can be used successfully in your new
microwave oven. Make sure the utensil does not touch the
interior walls during cooking.
Use these utensils for safe microwave cooking and reheating
●Glass ceramic
●Heat-resistant glass
●Microwave-safe plastics
●Paper plates
●Microwave-safe pottery, stoneware and porcelain
●Browning dish
DO NOT USE
●Metal pans and bake ware
●Dishes with metallic trim
●Non-heat-resistant glass
●Non-microwave-safe plastic
●Recycled paper bags
●Food storage bags
●Metal twist-ties
●Wood
●Straw
●Wicker
Should you wish to check if a dish is safe for microwaving,
place the empty dish in the oven and microwave on HIGH for
30 seconds. A dish which becomes very hot should not be
used.
The following coverings are ideal:
●Paper towels are good for covering foods for reheating
and absorbing fat while cooking bacon.
●Wax paper can be used for cooking and reheating.
●Plastic wrap that is specially marked for microwave use
can be used for cooking and reheating. DO NOT allow
plastic wrap to touch food. Vent so steam can escape.
●Lids that are microwave-safe are a good choice because
heat is kept near the food to hasten cooking.
●Oven cooking bags are good for large meats or foods
that need tenderizing. DO NOT use metal twist ties.
Remember to slit bag so steam can escape.
How to use aluminum foil in your microwave oven:
●Small flat pieces of aluminum foil placed smoothly on the
food can be used to shield areas that are either defrosting
or cooking too quickly.
●Foil should not come closer than one inch to any surface
of the oven.
ACCESSORIES: There are many microwave accessories
available for purchase. Evaluate carefully before you
purchase so that they meet your needs. A microwave-safe
thermometer will assist you in determining correct doneness
and assure you that foods have been cooked to safe
temperatures. Furrion is not responsible for any damage to
the oven when accessories are used.
About Children and the Microwave
●Children below the age of 7 should use the microwave
oven with a supervising person closely with them.
Between the ages of 7 and 12, the supervising person
should be in the same room.
●The children must be able to reach the oven comfortably;
if not, he/she should stand on a sturdy step stool.
●At no time should anyone be allowed to lean or swing on
the oven door.
●Children should be taught all safety precautions; use
potholders, remove coverings carefully and pay special
attention to packages that crisp food because they may
be extra hot.
●Don’t assume that because a child has mastered one
cooking skill he/she can cook everything.
●Children need to learn that the microwave oven is not a
toy.
6

7
Operation
CAUTION
• To avoid risk of personal injury or property damage, do
not operation the microwave oven empty.
• To avoid risk of personal injury or property damage, do
not use stoneware, aluminum foil, metal utensils, or metal
trimmed utensils in the microwave oven.
Clock Setting
1. Press “CLOCK”, the unit enters the clock setting states.
AM indicator will light. “0:00” flashes to remind you to
input the time.
2. Press “CLOCK” again to select AM or PM. The
responding AM or PM indicator will light.
3. Press the number keys and enter the correct time. For
example, time is 10:12 now, please press “1,0,1,2” in turn.
4. Press “CLOCK” key finish setting the clock.
NOTE:
●This is a 12 hour clock from 1:00 to 12:59. If the time set is
not appropriate, press “CLOCK” .
●When current time change from 11:59 to 12:00, AM and PM
will change automatically.
Microwave Cooking
1. Press “TIME COOK” to select microwave cooking. “0:00”
flash to remind you to input the cooking time.
2. Press the number keys to adjust the cooking time you
need. For example, to cook the time for 10 minutes. Please
press “1,0,0,0” in turn.
NOTE: The maximum cooking time is 99 minutes 99
seconds.
3. At the same time, you can choose the power by pressing
“POWER”.
4. Press the number keys to select the power level.
5. Press “START/PAUSE” to start cooking. Time counts
down.
NOTE:
●If the power level you choose is 100% power, steps “3” and
“4” can be skipped and go directly to the step “5“.
●After cooking finished, buzzer sounds five times.
●During cooking process, press “Add 30 Sec.“ to add 30
seconds. The maximum time is 99 minutes 99 seconds
Ten power levels are available.
Level Power Display
110% PL1
220% PL2
330% PL3
440% PL4
550% PL5
Level Power Display
660% PL6
770% PL7
880% PL8
990% PL9
10 100% PL10
Multi-stage Cooking
At most two stages can be input.
For example: to cook the food with 100% microwave power
for 10 minutes and then cook with 80% microwave power for
15 minutes. Do as following:
1. Press “TIME COOK” to choose microwave cooking.
2. Press “1”,”0”,”0”,”0” to input the cooking time.
3. Press “POWER” to choose 100% microwave power.
4. Press “10” to choose 100% microwave power.
5. Press “TIME COOK” to choose microwave cooking.
6. Press “1”,”5”,”0”,”0” to input cooking time.
7. Press “POWER” to select the microwave power.
8. Press “8” to choose 80% microwave power.
9. Press “START” to start cooking.
NOTE:
●Microwave cooking can be set as two stages only. Defrost
program and auto menu cannot be set here.
●When the first stage finish, buzzer sounds once and the
second stage begins cooking.
Speedy Cooking
1. Press number keys from 1to 6to start cooking with full
microwave power for 1-6 minutes.
2. In waiting status,press “ADD 30 SEC.” to start cooking
100% microwave power for 30 seconds.
3. During cooking states, 30 seconds can be increased for
each pressing on “ADD 30 SEC.”. The maximum cooking
time is 99 minutes and 99 seconds.
Defrost Cooking
Defrost By Weight
1. Press “DEFROST AUTO/TIME” once to choose defrost
by weight function. 0.0 will flash and “lb” indicator flash.
2. Press number keys from 0to 9to input the defrost weight.
For example: the food weight is 1.2 Lbs, then “1”,”2” will
be input. The maximum cooking weight is 6.0 Lbs. If the
weight input is more than 6.0 Lbs, the unit will turn back to
waiting status.
3. Press “START/PAUSE” to start defrosting. “lb” indicator
will be off.
Defrost By Time
1. Press “DEFROST AUTO/TIME” twice to choose defrost
by time function. Defrost indicator will light.
2. Press number keys from 0to 9to input the defrost time.
The maximum time can be input is 99 minutes and 99
seconds.
3. Press “START/PAUSE” to start defrosting.
NOTE: If half the defrost time passes, the buzzer will sound
twice to remind you to turn the food over.

Hood Function
1. When the exhaust fan is under off states, press “VENT
FAN/HI/LOW/OFF” once to choose the fan with high
speed.
2. Press “VENT FAN/HI/LOW/OFF” twice to choose the fan
with low speed.
3. Press “VENT FAN/HI/LOW/OFF” three times to choose
the fan to be off.
Oven Lamp
1. Press “SURFACE LIGHT ON/OFF” once to turn on the lamp.
2. Press “SURFACE LIGHT ON/OFF” twice to turn off the lamp.
Timer Function
1. Press “TIMER”, timer indicator will light.
2. Press number keys to input the cooking time you need.
The maximum cooking time is 99 minutes and 99
seconds.
3. Press “TIMER”, time counts down.
NOTE: During timer states, hood and oven lamp can be
activated. Others function will not be used.
Display On/Off Function
1. Press “DISPLAY ON/OFF” three seconds, it sounds once.
The system enters display off state.
2. Press any buttons except for 7,8,9,0, Start/Pause/Power
buttons, it sounds once. The system backs to waiting
states.
Popcorn Menu
1. Press “POPCORN“ repeatedly until the number you wish
appears in the display.
“1” SET: approximate 1.75 ounces
“2” SET: approximate 3.0 ounces
“3” SET: approximate 3.5 ounces
For example, press “POPCORN” once , “3.5” appears in
the LED.
2. Press “START/PAUSE“ to cook.
Baked Potato Menu
1. Press “BAKED POTATO“ repeatedly until the number you
wish appears in the display.
“1” SET: 1 potato
“2” SET: 2 potatoes
“3” SET: 3 potatoes
For example, press “BAKED POTATO” once, “1” appears
in the LED.
2. Press “START/PAUSE“ to cook.
Beverage Menu
1. Press “BEVERAGE“ repeatedly until the number you wish
appears in the display.
“1” SET: 1 cup
“2” SET: 2 cups
“3” SET: 3 cups
For example, press “BEVERAGE” once, “1” appears in the
LED.
2. Press “START/PAUSE“ to cook.
Reheat Menu
1. Press “REHEAT“ repeatedly until the number you wish
appears in the display.
For example, press “REHEAT” once, “8.0” ounces appears
in the LED.
Press “REHEAT” twice, “16.0” ounces appears in the LED.
Press “REHEAT” 3 times, “24.0” ounces appears in the
LED.
2. Press “START/PAUSE “ to cook.
Inquiring Function
1. Under microwave cooking states, press “POWER” to
check the power level.
2. During cooking states, press “CLOCK” to check the clock.
Lock Function For Children
Lock: In waiting state, press “STOP/CLEAR“ for 3 seconds,
there will be two beeps denoting the entering into the
children-lock state.
Lock quitting: In locked state, press “STOP/CLEAR“ for
3 seconds, there will be two beeps denoting that lock is
released.
8

Suggested power levels for cooking
The 10 power levels available with this microwave will help
you to adjust to the power output best suited for the food
type you are preparing. As with any food preparation in the
microwave, it is best to follow the microwave instructions that
are printed on food packaging.
The table below provides suggested power levels for various
types of food that you can be prepare in the microwave.
Power
Level
Microwave
output
Use to prepare when
10
High 100%
Boiling water.
Cooking ground beef.
Making candy.
Cooking fresh fruits & vegetables.
Cooking fish & poultry.
Preheating browning dish.
Reheating beverages.
Cooking bacon slices.
990% Reheating meat slices quickly.
Saute onions, celery & green peppers.
880% All reheating.
Cooking scrambled eggs.
770%
Cooking breads & cereal products.
Cooking cheese dishes & veal.
Cakes, muffins, brownies & cupcakes.
660% Cooking pasta.
550%
Cooking meats & whole poultry.
Cooking custard.
Cooking spare ribs, rib roast & sirloin roast.
440% Cooking less tender cuts of meat.
Reheating frozen packaged foods.
330%
Thawing meat, poultry & seafood.
Cooking small quantities of food.
Finish cooking casseroles, stew & some sauces.
220% Softening butter & cream cheese.
Heating small amounts of food.
110% Softening ice cream.
Raise yeast dough.
Suggestions for getting the best results
To help you achieve the best possible results from your
microwave oven, read the following suggestions below:
Storage Temperature
Foods taken from the freezer or refrigerator take longer to
cook than the same foods would at room temperature.
Size
Small pieces of food cook faster than large ones. Pieces
similar in size and shape will cook more evenly when cooked
together. For more even results, reduce the power levels
when cooking large pieces of food.
Natural Moisture
Very moist foods cook more evenly because microwave
energy heats water molecules very efficiently.
Stirring
Stir foods such as casseroles and vegetable from the outside
to the center to distribute the heat more evenly. This will allow
the food to cook faster. Constant stirring is not necessary.
Turn Over Items
Turn over foods such as pork chops, roasts or whole
cauliflower halfway through the cook time. This will help to
expose all sides equally to microwave energy.
Food Placement
Place delicate areas of food items, such as asparagus tips,
toward the center of the turntable tray.
Food Arrangement
Arrange unevenly shaped foods, such as chicken pieces or
salmon, with the thicker or meatier parts toward the outside
of the turntable tray.
Let the Food Stand
After removing the food from the microwave, cover the
food with foil or a casserole lid and let it stand to finish
cooking. This will help the food finish in the center and avoids
overcooking the out edges, The length of stand time depends
on the density and surface area of the food items.
Wrapping in paper towels or waxed paper
Sandwiches and many other food types containing pre-baked
bread should be wrapped prior to placing in the microwave to
help prevent the food items fro drying out while heating.
9

Care and Maintenance
WARNING
ELECTRIC SHOCK HAZARD
●Disconnect electrical power before servicing.
●Replace all parts and panels before operating.
●Failure to do so can result in death or electric
shock.
Grease Filters
The oven ventilation exhaust filters should be removed and
cleaned often; generally at least once every month.
CAUTION
To avoid risk of personal injury or property damage, do not
operate oven hood without filters properly in place.
Surface Lights
Grease Filters
Front
Rear
1. To remove the exhaust ventilation filters, slide the filter to
the rear. Then pull filter downward and push to the other
side. The filter will drop out. Repeat for the 2nd filter.
2. Soak the ventilation filters in hot water using a mild
detergent. Rinse well and shake to dry or wash in a
dishwasher. Do not use ammonia. The aluminum on
the filter will corrode and darken.
3. To reinstall the exhaust ventilation filter, slide it into the
side slot, then push up and toward oven to lock.
Reinstall the 2nd filter using the same procedure.
Light
CAUTION
Light cover may become very hot. Do not touch glass when
light is on.
1. Unplug the microwave oven or turn off power at the main
circuit breaker.
2. Remove the bulb cover mounting screws at both light
positions under the microwave.
3. Replace bulb with 120V, 20W x 2, type: T22.
4. Re-install bulb cover and mounting screw.
5. Plug the microwave back into the power supply or turn the
power back on at the main circuit breaker.
Charcoal Filter
Charcoal Filter installed in your microwave oven, is used
for nonvented, recirculated installation. The filter should be
changed every 6 to 12 months depending on use.
1. Disconnect power to the microwave oven at the circuit
breaker panel or by unplugging.
2. Remove the vent grill mounting screws.
3. Pull the vent grill away from the unit.
4. Remove the charcoal filter by pushing it inwards, then turn
and pull it away from the unit.
10

Oven Light
Remove the vent grill per instructions 1-4 above and charcoal
filter, if used.
1. Open light cover located behind filter mounting by care
fully pulling up on the front edge.
2. Remove old light bulb and replace the bulb with 120V,
30W x 1, type: T25 x 55mm).
NOTE: DO NOT USE BULB LARGER THAN 30 WATTS.
3. Replace the microwave oven light cover by carefully
pushing into place. Replace the charcoal filter. Push the
vent grill back into place (engaging both the bottom and
top tabs) and replace the vent grill mouting screws.
Cleaning Suggestions
For best performance and for safety reasons, keep the oven
clean inside and outside. Take special care to keep the inner
door panel and oven front frame free of food and grease
build-up.
Never use rough scouring powder or pads on the microwave.
Wipe the microwave oven inside and out with a soft cloth and
warm (not hot) mild detergent solution. Then rinse and wipe
completely dry.
Wipe spatters immediately with a wet paper towel, especially
after cooking greasy foods like chicken or bacon.
Clean your microwave oven weekly or more often, if needed.
Follow these instructions to clean and care for your
microwave oven:
●Keep the inside (cavity) of the oven clean. Food particles
and spilled liquids can stick to the oven walls, causing the
oven to work less efficiently.
●Wipe up spills immediately. Use a damp, clean cloth and
mild soap. DO NOT use harsh detergents or abrasive
cleaners.
●To help loosen baked-on food particles or liquids, heat 2
cups of water (add the juice of 1 lemon if you desire to
●keep the oven fresh smelling) in a 4 cup measuring glass
at High power for 5 minutes or until boiling. Let stand in
oven cavity for 1 or 2 minutes.
●Remove the glass turntable tray from the oven when
cleaning the oven cavity or tray. To prevent the glass
turntable from breaking, handle with care and do not put
it in water immediately after cooking. Wash the turntable
tray in warm sudsy water or in the dishwasher.
●Clean the outside surface of the microwave with soap and
a clean damp cloth. Dry with a clean soft cloth. To prevent
damage to the operating parts of the oven, do not let
water seep into any vents or openings.
●Wash the oven door window with very mild soap
and water. Be sure to use a soft clean cloth to avoid
scratching.
●If steam accumulates inside or outside the oven door,
wipe with a soft cloth. Steam can accumulate when
operating the oven in high humidity and in no way
indicates microwave leakage.
●Never operate the oven without food in the oven cavity;
this can damage the magnetron tube or glass tray. You
may wish to leave a cup of water standing inside the oven
when it is not in use to prevent damage if the oven is
accidentally turned on.
How to Clean the Inside
Walls, Floor, Inside Widow, Metal and Plastic Patrs on
the Door.
Some spatters can be removed with a paper towel, others
may require a damp cloth. Remove greasy spatters with a
sudsy cloth, then rinse with a damp cloth. Do not use abrasive
cleaners or sharp utensils on oven walls.
To clean the surface of the door and the surface of the oven
that come together upon closing, use only mild, non-abrasive
soaps or detergents using a sponge or soft cloth. Rinse with a
damp cloth and dry.
Never use a commercial oven cleaner on any part of your
microwave.
Removable Turntable and Turntable Support
To prevent breakage, do not place the turntable into water
just after cooking. Wash it carefully in warm, sudsy water or
in the dishwasher. The turntable and support can be broken
if dropped. Remember, do not operate the oven without the
turntable and support in place.
How to Clean the Outside
Do not use cleaners containing ammonia or alcohol on
the microwave oven. Ammonia or alcohol can damage the
appearance of the microwave.
Case
Clean the outside of the microwave with a sudsy cloth.
Rinse with a damp cloth and then dry. Wipe the window clean
with a damp cloth.
11

Troubleshooting
Check your problem by using the chart below and try the solutions for each problem. If the microwave oven still does not work
properly, contact the nearest authorized service center.
Trouble Possible Cause Possible Remedy
Oven will not start
1. Electrical cord for oven is not plugged in.
2. Door is open.
3. Wrong operation is set.
1. Plug into the outlet.
2. Close the door and try again.
3. Check instruction.
Arcing or sparking
1. Materials to be avoided in microwave oven are used.
2. The oven is operated when empty.
3. Spilled food remains in the cavity.
1. Use microwave-safe cookware only.
2. Do not operate with oven empty.
3. Clean cavity with wet towel.
Unevenly cooked
foods
1. Materials to be avoided in microwave oven are used.
2. Food is not defrosted completely.
3. Cooking time, power level is not suitable.
4. Food is not turned or stirred.
1. Use microwave-safe cookware only.
2. Completely defrost food.
3. Use correct cooking time, power level.
4. Turn or stir food.
Overcooked foods Cooking time, power level is not suitable. Use correct cooking time, power level.
Undercooked
foods
1. Materials to be avoided in microwave oven are used.
2. Food is not defrosted completely.
3. Oven ventilation ports are restricted.
4. Cooking time, power level is not suitable.
1. Use microwave-safe cookware only.
2. Completely defrost food.
3. Check to see that oven ventilation ports are not
restricted.
4. Use correct cooking time, power level.
Improper
defrosting
1. Materials to be avoided in microwave oven are used.
2. Cooking time, power level is not suitable.
3. Food is not turned or stirred.
1. Use microwave-safe cookware only.
2. Use correct cooking time, power level.
3. Turn or stir food.
Control Panel and Door
Wipe with a damp cloth. Dry thoroughly. Do not use cleaning
sprays, large amounts of soap and water, abrasives or sharp
objects on the panel—they can damage it. Some paper
towels can also scratch the control panel.
Door Surface
It is important to keep the area clean where the door
seals against the microwave. Use only mild, non-abrasive
detergents applied with a clean sponge or soft cloth. Rinse
well.
Power Cord
If the cord becomes soiled, unplug and wash with a damp
cloth.
For stubborn spots, sudsy water may be used, but be certain
to rinse with a damp cloth and dry thoroughly before plugging
cord into outlet.
Stainless Steel
Do not use a steel-wool pad;it will scratch the surface. To
clean stainless steel surfaces, use a hot, damp cloth with a
mild detergent suitable for stainless steel surfaces. Use a
clean, hot,damp cloth to remove soap. Dry with a dry, clean
cloth.
If food soil remains, try a general kitchen cleaner, such as
Fantastik®, Simple Green®or Formula 409®.
For hard-to-clean soil, use a standard stainless-steel cleaner,
such as Bon-Ami®or Cameo®.
Apply cleaner with a damp sponge. Use a clean, hot, damp
cloth to remove cleaner. Dry with a dry, clean cloth. Always
scrub lightly in the direction of the grain.
After cleaning, use a stainless-steel polish, such as tainless
Steel Magic®, Revere Copper and Stainless Steel Cleaner®
or Wenol All Purpose Metal Polish®. Follow the product
instructions for cleaning the stainless-steel surface.
12

Specifications
Specifications
Power Input 120V, 60HZ, 15A Max
Max Rated Input Power 1550W
Max Rated Output Power (Microwave) 1000W
Product Dimensions (W x H x D) 29⁄ ” ×16⁄” × 15”
759mm x 382mm x 417mm
Oven Capacity 1.6 cu. ft.
Turntable Diameter Ø13.6”
Net Weight (lbs/kg) Approx. 55.1 / 25.0
13


IM-FHA00021 V6.0
The contents of this manual are proprietary and copyright protected by Lippert. Lippert prohibits the copying or
dissemination of portions of this manual unless prior written consent for an authorized Lippert representation
has been provided. Any unauthorized use shall void any applicable warranty. The information contained in this
manual is subject to change without notice and at the sole discretion of Lippert. Revised editions are available
for free download from lippert.com.
Please recycle all obsolete materials.
For all concerns or questions, please contact Lippert
CCD-0006082 | REV DATE: 10.20.22
Table of contents
Other Furrion Microwave Oven manuals

Furrion
Furrion FMCM15-BL User manual

Furrion
Furrion FMCM15-BL User manual

Furrion
Furrion FMCM17-BL User manual

Furrion
Furrion FMSM09-BL User manual

Furrion
Furrion FMSMA16A-BL/2022007895 User manual

Furrion
Furrion FMAN09-BL User manual

Furrion
Furrion FMSPR09-SS User manual

Furrion
Furrion FMCM15A-BL User manual

Furrion
Furrion FMSN09-BL User manual

Furrion
Furrion FMSN09A-BL/2022005805 User manual