Instructions for use
Add ingredients and water.
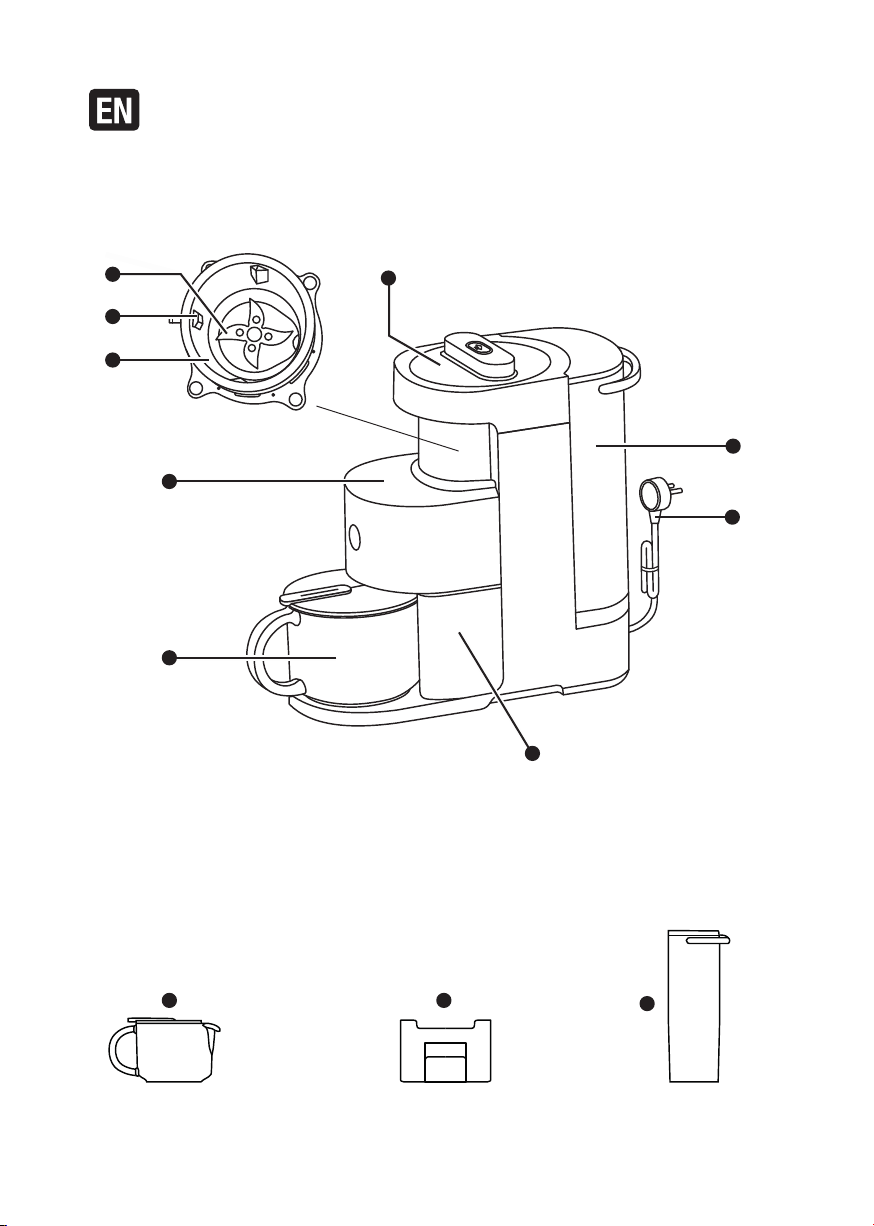
Open the lid of the mixing jar and add the ingredients. Open the lid of the water tank and
add water to the water level above the required volume. Close both lids, put the water waste
box and milk container in place and gently touch the water tank to ensure it is firmly in
place.
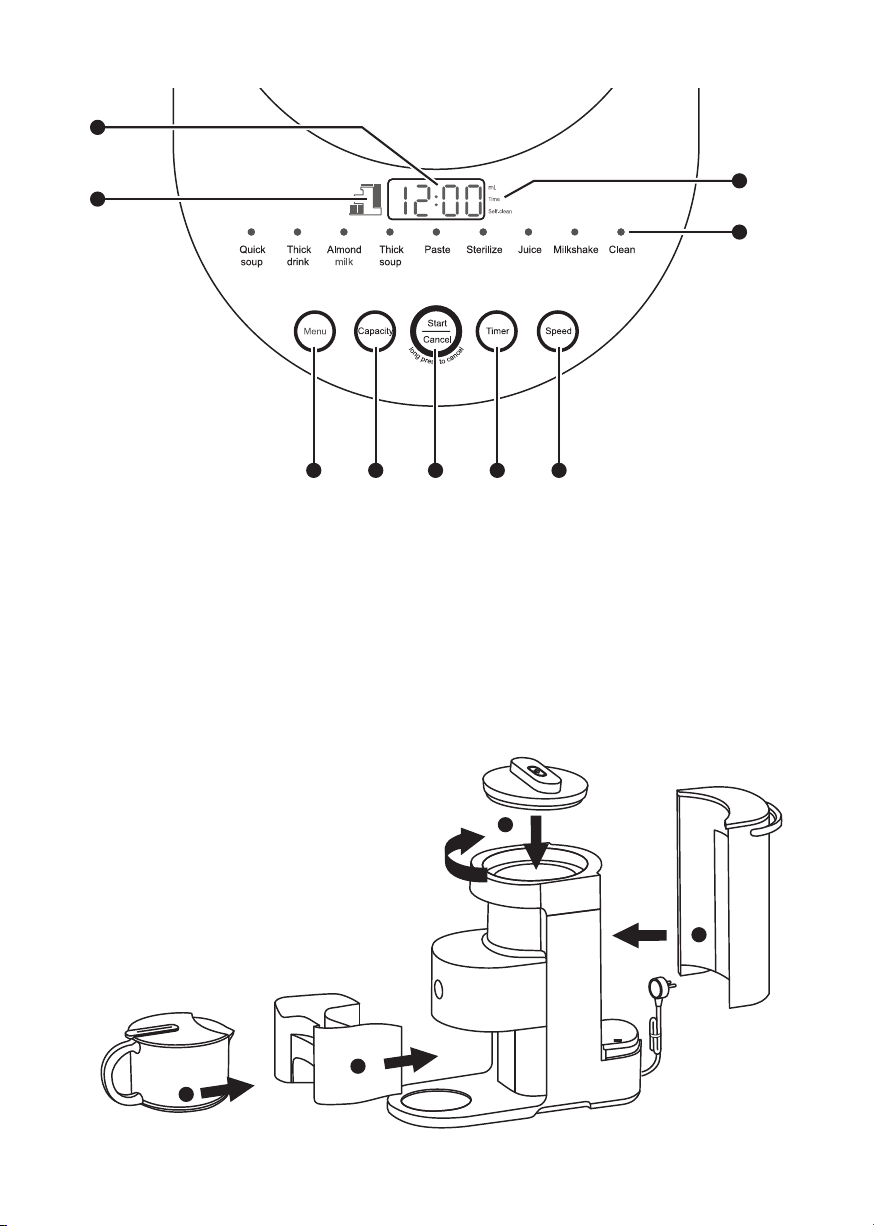
Menu selection
Touch „program“ button to choose the required program.
Capacity selection
Touch „Capacity button to choose the required capacity.
Start function
Touch the „Start/Cancel“ button – the machine starts to work. Touch and hold it for two
seconds to cancel the program and reselect new one. Confirm the new program by pressing
the „Start/Cancel“ button again.
• If you want to cancel the program and empty the mixing chamber, press and hold the
„Start/Cancel“ button for two seconds and press it again once the program is cancelled.
A 1 minute program for quick and effective blending will start and the ingredients will then be
poured into the glass container.
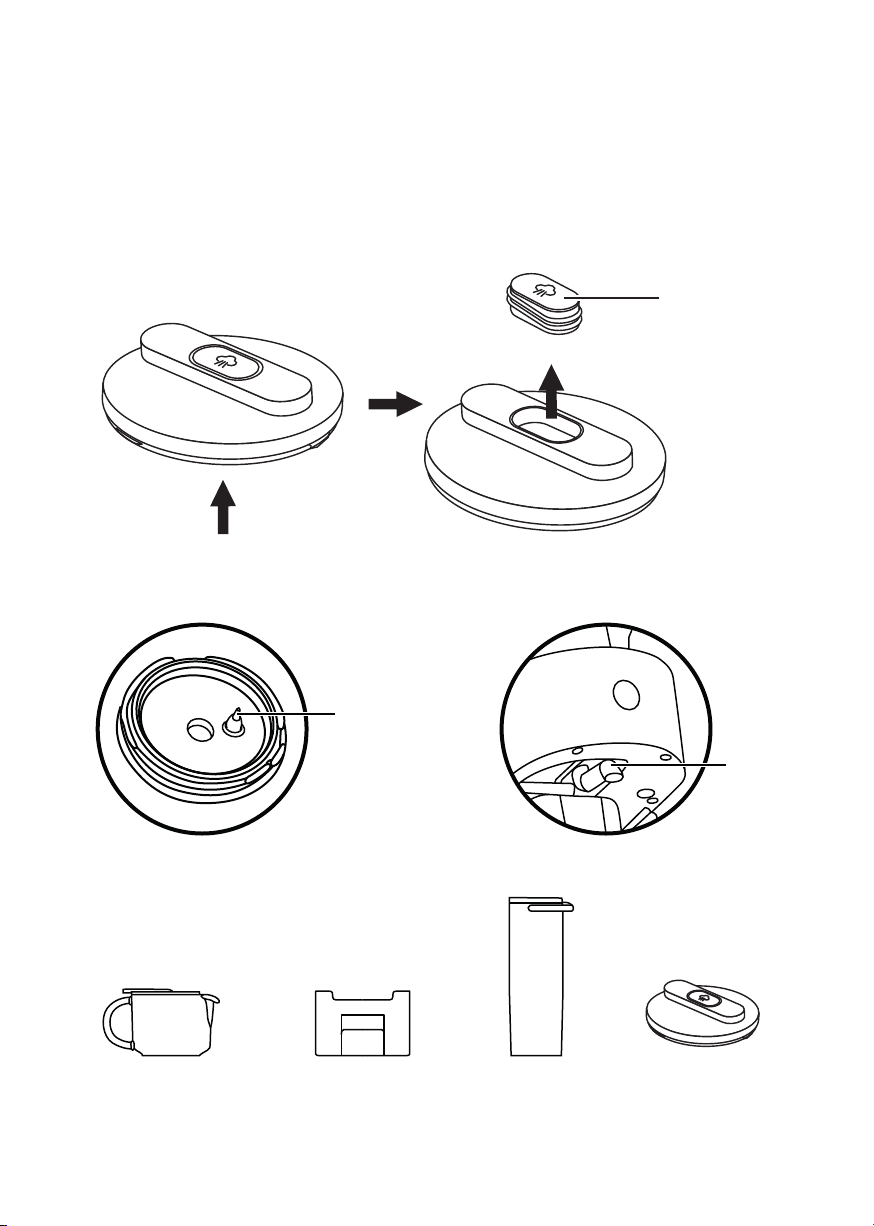
Automatic cleaning (self-cleaning)
After the program is completed, the appliance will automatically enter the self-cleaning
process. At this time, the milk tank can be removed, however, do not take out the water
waste box.
Warning:
1. Add the ingredients based on the recipe amount and in the right order to avoid overflow and
clogging or damaging the appliance.
2. If you want to add in ingredients that are rich in fiber (such as mango or celery), cut it into
small pieces before adding it to the mixing chamber to avoid clogging the outlet.
3. Hard ingredients such as crystal sugar or ice should be added to the mixing chamber as last
to avoid damaging the appliance. Add liquid and soft ingredients firstly.
4. It is recommended to use the deep clean function before first use.
Milk shake
• Add ingredients and water.
• Touch „Program“ to choose „milk shake“.
• Touch the „Start/Cancel“ button – the appliance starts working. Long press of the button
cancels the program.
Sterilize
After finishing all mixing processes, use the „Sterilize“ program for sterilizing and drying the
mixing chamber and the inside of the appliance. This program is suitable not only to clean
the appliance thoroughly, but also to clean it after it has not been used for a long time.
• If the mixing chamber is clean, press the „menu“ button and choose the „Sterilize“ program.
• Press the „Start/Cancel“ button to start the sterilization and drying process.
• After the program is finished, open the mixing chamber lid and let the appliance dry
completely.