6
en Installation and connection
5
Installation and connection
Installati onandconnection
Scope of supply
After unpacking all parts, check for any damage in
transit.
If you have any complaints, contact the dealer from
whom you purchased the appliance or our customer
service.
~"Customer service" on page 23
The delivery consists of the following parts:
▯Built-in appliance
▯Interior fittings (depending on model)
▯Installation material
▯User manual
▯Installation instructions
▯Customer service booklet
▯Warranty enclosure
▯Information on the energy consumption and noises
Technical specifications
Refrigerant, cubic capacity and further technical
specifications can be found on the rating plate.
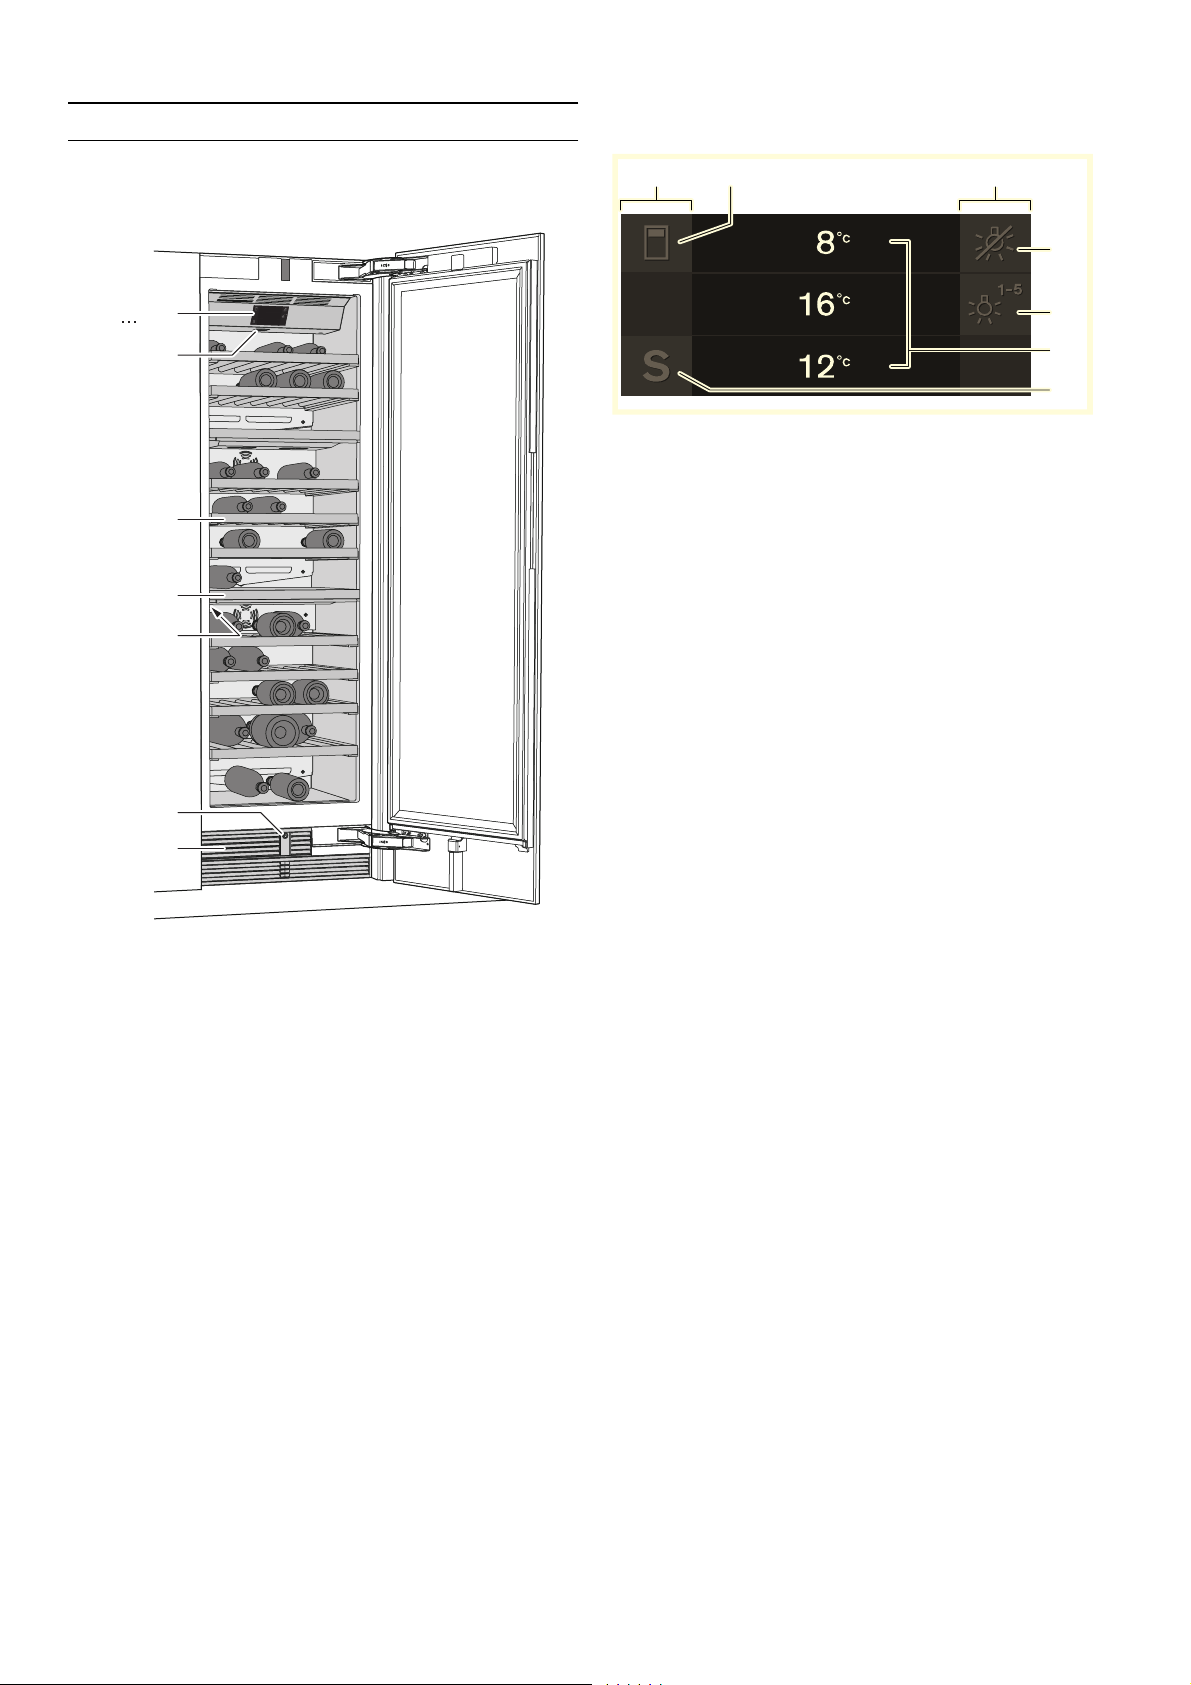
~"Getting to know your appliance" on page 9
Installing the appliance
Installation location
The more refrigerant an appliance contains, the larger
the room must be in which the appliance is situated.
Leaking refrigerant can form a flammable gas-air mixture
in rooms which are too small.
The room must be at least 1 m³ per 8 g of refrigerant.
The amount of refrigerant in your appliance is indicated
on the rating plate inside the appliance.
~"Getting to know your appliance" on page 9
The weight of the appliance may be up to 500 kg
depending on the model. The base must be sufficiently
stable and should not give. If necessary, reinforce the
floor.
Permitted room temperature
The permitted room temperature depends on the
climatic class of the appliance.
Information on the climatic class can be found on the
rating plate.
~"Getting to know your appliance" on page 9
The appliance is fully functional within the permitted
room temperature.
If an appliance of climatic class SN is operated at
colder room temperatures, the appliance will not be
damaged up to a room temperature of +5 °C.
Built-in cut-out
The cut-out must fulfil these criteria:
▯Anti-tilt bracket fitted
▯Cut-out depth min. 610 mm, for flush installation
635 mm
▯Rectangular
▯Stable – the side panels and the top must be min.
16 mm thick and securely attached to the bottom or
wall
▯Depth of shortened side panels min. 100 mm
Side-by-side installation
Observe the specifications in the installation
instructions for a side-by-side installation.
If a partition wall is required between the appliances, it
must be at least 16 mm wide.
Climatic category Permitted room temperature
SN +10 °C ... 32 °C
N+16 °C ... 32 °C
ST +16 °C ... 38 °C
T+16 °C ... 43 °C