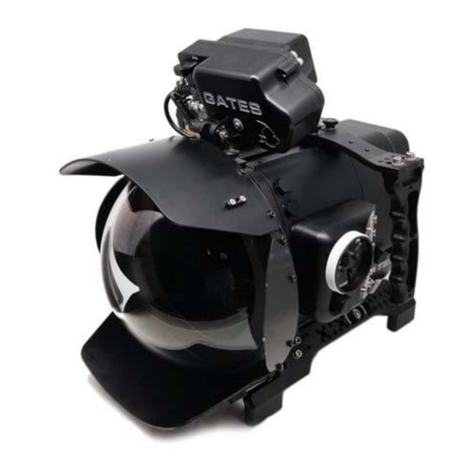
Gates Z3 Housing User manual

Z3 Housing
Setup, Use, and Care Guide

Cautions Page 2
Copyright 2020, Gates Underwater Products, Inc.
This manual and current revision is available in 8.5 x 11 size and full color at
http://www.gateshousings.com/documentation.html
Gates Underwater Products, Inc.
13685 Stowe Drive
Poway, California 92064 USA
Phone: 858.391.0052 outside the U.S.
Fax: 858.391.0053
Web: GatesHousings.com

Cautions Page 3
Table of Contents
Features.....................................................................................4
Warranty Disclaimer ...................................................................4
Unpacking Z3 .............................................................................5
Required Equipment...................................................................6
1: Cautions.....................................................................................7
2: Z3 Setup.....................................................................................8
Z3 Housing Overview .................................................................8
Z3 Housing Preparation............................................................10
Preparing the Z-CAM Camera..................................................15
Preparing the SmallHD 503 Ultrabright LCD.............................16
Camera / Battery Installation.....................................................18
Z-CAM Cables Connect............................................................19
Camera / Camera Tray Install...................................................20
Main Shell Mating.....................................................................21
Install LCD & LCD Front Shell ..................................................22
Cable Management ..................................................................25
Mount Lens...............................................................................26
Lens Gear Drives (LGD’s).........................................................27
Lens Gear Drive (LGD) Size Reference....................................29
Functional System Check.........................................................30
Z-Camera App –a note about wireless camera control............31
Configure SPR’s and Port.........................................................32
Mount Stackable Port Rings (SPR’s) and Port ..........................35
Changing the Port Base............................................................37
Installing the 60-80 SPR Adapter..............................................39
Water Alarm (Optional).............................................................40
Seal Check...............................................................................41
Final Checks.............................................................................41
3: Z3 Operation.............................................................................42
Right Side Controls...................................................................42
Left Side FUNCTION & GCC Control........................................42
Top Controls.............................................................................43
Rear Controls ...........................................................................44
Buoyancy / Trim........................................................................46
Adjustable Handles...................................................................47
Port Options..............................................................................48
Lanyard and Light Mounting (Optional).....................................50
Lighting Systems (optional).......................................................51
Travel / Transport .....................................................................51
4: Z3 Maintenance........................................................................52
Housing Care and Maintenance................................................52
5: Customer Support.....................................................................53

Cautions Page 4
Introducing Z3
Congratulations on owning a new Gates product: the Z3 housing. You’ve selected a
product that will provide years of value and reliable service. We designed Z3 specifically
as a professional action underwater rig for cinema, natural history, surf and research
applications.
Please read through this entire guide to learn about Z3 so you can get the most out of
this imaging tool. In this section, we’ll introduce you to the features of Z3 so you can get
started.
Features
Z3 has several key features:
✓Lens flexibility. Z3 can accommodate a variety of DSLR, mirrorless, and compact
cinema lenses with no change to control locations. Focus, Iris, Zoom remain in the
same location regardless of optics used.
✓Compact and Travelable.Z3 is compact and can fit into a carry-on size case for
travel.
✓Built In Monitor. Z3 incorporates an integrated 5” LCD that can be quickly removed
for topside use.
✓Gates COMMAND / CONTROL module for full iris control, menu access and 4
assignable buttons.
Warranty Disclaimer
Z3 is a tool that, like any tool, requires knowledge and understanding to be effective.
Your responsibility is to learn the proper setup, use and care of Z3. Because we can
only provide you with the information necessary to do so, Gates does not warrant the
contents of your housing (e.g. your camera and lenses) under any circumstance.
We warrant Z3 as an image acquisition tool for a period of 2 years. The Seal Check unit
is warranted for 1 year. Optics (Dome and Flat ports) are warranted for a period of 1
year or 100 hours salt water contact, whichever comes first. Electronics, cables and
connectors for 1 year. You can find full warranty details on Gates website
Gates does not warrant optical performance or image quality.
If you have any questions about the setup, use and care of Z3, contact Gates directly.
Details are in section 5.

Cautions Page 5
Unpacking Z3
After you remove Z3 from its shipping container, carefully inspect it for missing parts or
damage that may have occurred during shipment. If you discover any discrepancies,
contact Gates or your dealer immediately for assistance.
Standard Parts
✓Z3 Housing
✓LCD Power and HDMI cables
✓Lens Gear Drive set
✓Seal Check Lite system
✓Tool Kit / Spare Kit
✓Woven Carry Handle Lanyard
Optional Parts
✓Stackable Port Rings (SPR) for
your choice lens*
✓Port(s) of choice (Dome or Flat in
either glass or acrylic material) and
shade*
✓Light System
✓Water alarm
✓Carry Case
✓HD-SDI surface feed bulkhead
connector and cable
✓Trim Weights
✓Port Cleaner
* Necessary for operation
Nomenclature
In this Setup, Use and Care Guide for Z3, the following terms are used:
✓Z-CAM is the camera body style from Z-CAM Company. At this writing there are
three Z-CAM models compatble with Z3 Housing:
* E2-S6 (Super 35 6K)
* E2-F6 (Full frame 6K)
* E2-F8 (Full frame 8K)

Cautions Page 6
Required Equipment
The required camera and accessory equipment for Z3 is:
✓LCD
•ATOMOS SHINOBI, ATOMOS NINJA V *or* SmallHD 503 UltraBright
✓Camera
•Z-CAM Flagship series E2-S6 (Super 35 6K), E2-F6 (Full frame 6K), or E2-F8
(Full frame 8K)
✓Battery (x2)
•Sony NP-F970
•HEDBOX RP-NPF970
•Equivalent L-Series battery of dimensions:
▪2.34H x 1.5W x 2.19D in (Max Depth)
▪59H x 38.1W x 55D mm (Max Depth)
✓Lenses
•DSLR
•Mirrorless
•Compact Cinema / PL Mount
•Max Lens Envelope:
▪SPR60 Port Rings
oMax lens overall OD: 5.6 in / 142mm
oMax lens gear OD: 4.25 in / 108 mm / 136 Teeth
oMin lens gear OD: 3.1 in / 79 mm / 100 Teeth
▪SPR80 or PR80 Port Rings
oMax lens overall OD: 7.5 in / 190mm
oMax / Min gear OD: same as above.
✓Camera Setup (optional)
•Z-Camera App

Cautions Page 7
1: Cautions
✓SEAL CHECK VACUUM. In a later part of this
manual, Seal Check Lite will be introduced for
verifying seal integrity before diving. You will
learn that the vacuum draw on Z3 should be
about 100 millibars. This is enough to verify
seal integrity.
✓CAMERA TRANSPORT INSIDE HOUSING.
You can transport a securely mounted camera
inside Z3 IF the system is in your possession
and without abusive handling. DO NOT
transport a camera inside Z3 for shipping or
checked baggage as forceful and abusive
handling can cause damage to both camera
and housing.
✓USER RESPONSIBILITY. This Setup, Use and Care guide contains important
detailed procedures for setup and use of Z3. It is the user’s responsibility to read,
understand and employ these procedures. Failure to do so can result in poor or non-
operation of Z3 and may void your warranty.
Contact Gates if you have questions about this manual or using Z3.

Z3 Setup Page 8
2: Z3 Setup
Z3 Housing Overview
Z3 has many features with which you will become familiar.
Z-CAM display view
window with full
pushbutton controls.
Adjustable Handle Grips.
Stackable Port Rings.
Locking, with simple 90
degree bayonet mount.
Bayonet mount Dome
Port (shown) or Flat Port.
Mechanical lens control.
Map to Focus / Iris /
Zoom.
Tactile Record Control.
Port Base. 60 and 80
series sizes are available
for Z3.

Z3 Setup Page 9
Gates COMMAND / CONTROL
Module. Direct Iris, ISO and
Shutter authority. 4
Assignables and Status
Display.
Bulkhead Adapter (x2) for
optional surface control /
video feed cables.
Master Power Switch.
LCD Touchscreen
Controls (SHINOBI SDI
shown).
Angled, rear view LCD.
Seal Check Fitting.

Z3 Setup Page 10
Z3 Housing Preparation
✓Handle Grips Install.
Four screws secure the Handle Grips to
Z3. You can locate the Handle Grips in
several different positions forward / aft
on the housing.
✓Port Removal. Disengage the Port by
rotating 90 degrees in the direction
shown. Gently pull the Port away from
the Port Ring(s)
1
2
TIP: Consistent
lubrication of the Port
and SPR o-rings
allow easy rotation.
Rotate the port 90 degrees as
shown, then gently pull forward to
remove.
Pro Action Shown.

Z3 Setup Page 11
✓Stackable Port Ring (SPR). Remove the SPR’s one at a time or as a group. The
lock pin is shown below in the locked and release position.
✓With the SPR’s unlocked, rotate 90 degrees and separate.
Lock position
Release position.
1
2
Pro Action Shown.

Z3 Setup Page 12
✓Shell Latches. Release 3 locking latches. One on top, 2 on the sides.
✓Separate the two main shells. They will slide apart.
Release 3 Latches.

Z3 Setup Page 13
✓Release Remove Camera Tray. Release the lock arm counter-clockwise as shown,
and the camera tray will slide away to the rear.
Lock arm release.

Z3 Setup Page 14
✓Seperate LCD Front Shell. Use the 3/16 ball driver in the Took Kit to loosen 4
corner screws, as shown. (These are captive screws and do not remove.)

Z3 Setup Page 15
Preparing the Z-CAM Camera
✓GCC Communications. Z-CAM camera requires specific settings within the menu
for operation with the COMMAND / CONTROL Module.
SERIAL COMMUNICATION.
MENU →CONNECT →UART →CONTROLLER
✓USER BUTTONS
MENU →SYSTEM →USER BUTTON →(Set as desired)
NOTE: Z-CAM firmware changes on a regular basis to provide increased functionality,
and may affect these particular setup instructions.

Z3 Setup Page 16
✓Menu Overlay. Z-CAM camera provides menu overlay via the HDMI output.
MENU →CONNECT →HDMI →DISPLAY INFO →ON
MENU →CONNECT →HDMI →OSD LAYOUT →(choose type preferred)
✓WIFI. If you are not using Z-CAM App, turn off WIFI.
MENU →CONNECT →NETWORK →WIFI →OFF
✓Camera Basics. The Z-CAM camera must be stripped down to the bare body, as
shown.

Z3 Setup Page 17
Preparing the SmallHD 503 Ultrabright LCD
✓Auto boot. Setup the 503UB LCD to boot when power is present at the rear
connector.
MENU →POWER →AUTO RECOVER →ON
✓Pages.Refer to the 503UB User Guide for details on the ‘Pages’ feature. The LCD
will boot into a default page that must be set, as follows:
* With the LCD on, navigate to the ‘page’ you wish to use in DEEP KOMODO.
* Turn off the LCD via the POWER button. Then power back on. This ‘sets’ this
page as default for any auto boot.

Z3 Setup Page 18
Camera / Battery Installation
Details of the Z-CAM camera install are shown in the following images.
✓Mate camera to Camera Tray, then tighten the wing screws to secure in place.
✓Install Batteries. Mate and lock batteries into place as shown.
2
Mate the camera to the
camera tray, and secure
with the wing screws.
1
Press battery in and
slide down for a
positive lock.

Z3 Setup Page 19
Z-CAM Cables Connect
At this point several connections between Z-CAM and Camera Tray are required.
✓Power. The power cable will connect on the right rear PWR input on Z-CAM.
✓Communications. Similarly, the communications cable will connect to lower left
rear of Z-CAM, the CTRL port. This connection provides both GCC and record
trigger inputs.
Communications Cable will
connect here.
Power Cable will connect here.

Z3 Setup Page 20
Camera / Camera Tray Install
Next, mount Z-CAM / Camera Tray package into the Z3 front shell.
✓Align the Camera Tray with the dovetail receiver on the front shell. Slide the
camera into the housing until it stops.
✓Lock Camera Tray in position with the lock lever.
INSTALLATION TIP: Position the lock lever horizontal, as shown. This will avoid
interference with the record trigger control.
Position the lock lever as
shown, horizontal (green).
Note: DEEP
KOMODO
shown.
Table of contents
Other Gates Camera Accessories manuals

Gates
Gates CX700 User manual

Gates
Gates EX1R User manual

Gates
Gates F55 User manual

Gates
Gates AVCCAM AG-3DA1 Guide

Gates
Gates ALEXA 35 User manual

Gates
Gates Pro Action User manual

Gates
Gates POVCAM AG-HCK10G Guide

Gates
Gates DEEP WEAPON Upgrade User manual

Gates
Gates AX700 User manual

Gates
Gates Z100 User manual