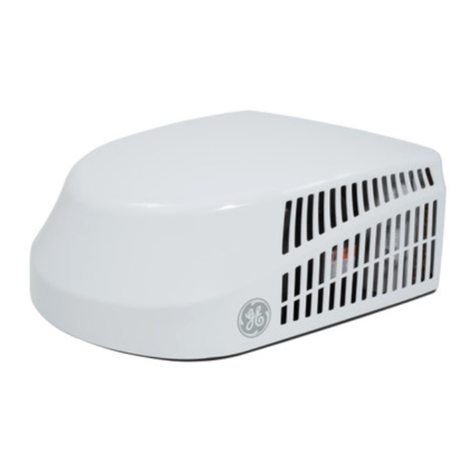
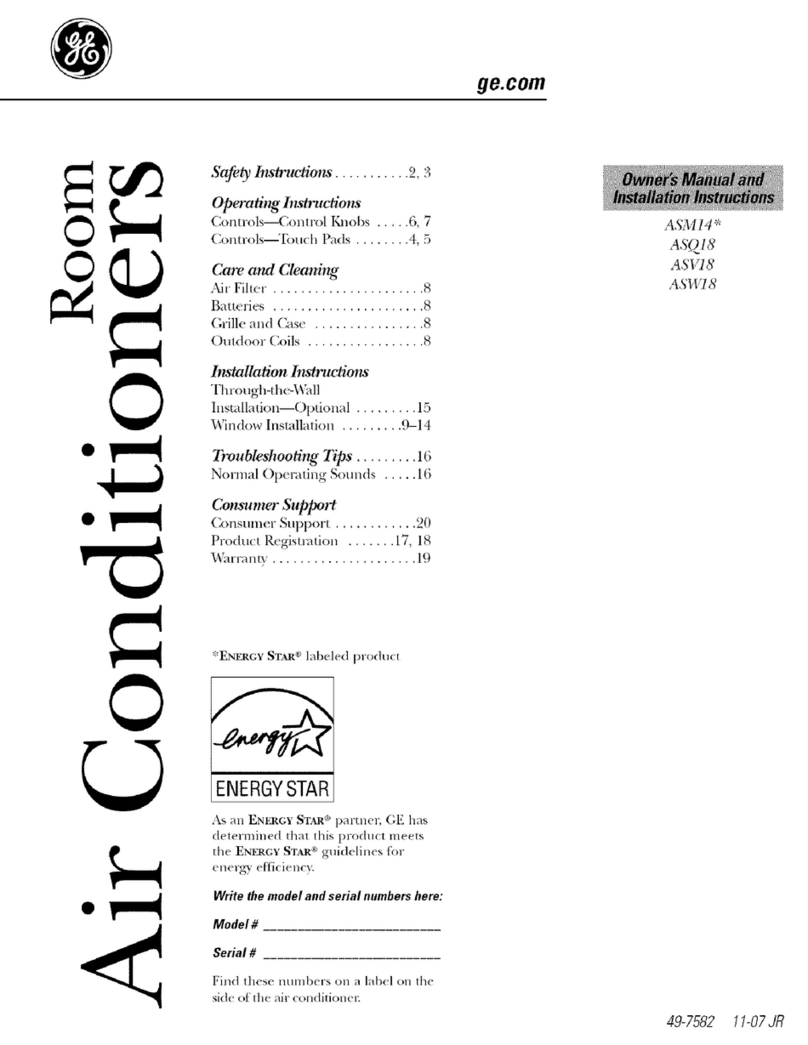
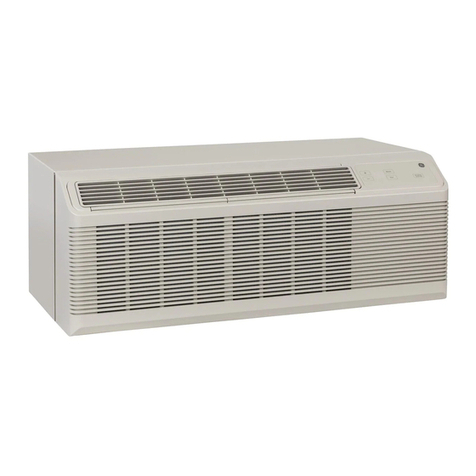
GE ASW06 Operating instructions

ge.com
©
Safety Instructions .......... 2, 3
Operating Instruc_'ons
(2mtrols--Comro[ lZmob ..... 6, 7
Comrols--Tou(h Pads ....... 4, 5
Care and Cleanir_
Air Fiber . .................... 8
Bauefies ..................... 8
Grille and Case ............... 8
()utdoor Coils ................ 8
Installation Insi_ctions .... 9-12
l}vubleshooting llps ........ 1B
Normal ()p( rating Sounds ..... 13
Cb_umer Support
{;onsumel Sul)l)Or ........... 16
AST05
ASW05
A SW06
ASW08
©
Write themodelandserial
numbers here:
Model #
Serial#
Find lhcse nund)crs o1"_a label on
the side of the air (onditioncn 49-7578 11-07JR

IMPORTANTSAFETYINFORMATION.
READALLINSTRUCTIONSBEFOREUSING.
WARNING!
For your safety, the information in this manual must be followed to minimize the risk of fire, electric shock
or personal injurg
SAFETYPRECAUTIONS
_ Use dfis appliance only for its imcn& d
pmlx)se as described in this Owner's
Mmmal.
_¢;This air condition€ r must be properly
installed in accordan_ e with the Installation
[nstructions bei_/re it is used.
{¢;N(_( r unplug your air conditioner 1)ypulling
on*h( l)(we('°(" Mwtvs, ,g l [) )l,gfi'nv.
and pull straight out fl'om the re(eptacle.
_2Replace immediately all elecuic service
cords that have become liv_y_d or othet_vise
damaged, A damaged power- supply co5-d
must be replaced with a new power supply
co_*t obtained fl-om th( mamflhctnrt:r and
not 5-tpaired. Do not us¢ a co5-d that shows
crocks or abrasion damage along its length
o1-at tither flt_ plug or connector end.
_ If the r_ceptacle does not match the plug,
the 5-ccq)tacle ilttlSt be changed out b} a
qualified electrician.
{¢;Turn tll_ unit OFFand unplug yore-air
_onditioner b_ fbrc cleaning.
;_ GE does not supl_ort any se_Mcing of the air
conditiotm5: Wc strongly recomm(nd that
you do not attempt to servic_ die air-
(ondition( r yoursel£
_;_ For >'or IF sat('*}...do DOt StOl'(? Of rise
combustible mat_ rials, gasoline or oilier
flammable vapors or liquids in the vicinity
of this or anv other appliance.
_ _MIair conditk)ners contain refl-igcmnts,
which un&r fi.!deml law nmst b_ r_mov_d
prior to pt-oduc_ disposal. If you arc getting
rid of an oM product with 5-cffigetwnts, che_k
witll the company handling disposal about
what to do.
HOWTOCONNECTELECTRICITY
Do not, under any circumstances, cut or remove
the third (ground) prong from the power cord.
For personal safety, this appliance must be
properly groundecL
DONOTuse an adapterplug with this appliance.
Th_ power cord of fllis appliance is _quipped
witll a 3-prong (grounding) plug which mates
with a standard 3-prong (grounding) _tll
omkt to minimize the possibility of electric
shock hazard fiom this appliance.
Power (ord iDchldes a ( tll5-(![l[ iSHCFYtSpI( I
device. A test and reset button is provided
on the plug case. The device shouM be t_swd
on a periodic basis by fis_t pressing the TEST
l)tstmn and then the RESETbutton while
plugged into the outlet. If tll_ gESgbutmn
does not t_Jp or if the RESETbutton will
51ot stay en_lged, dis(ontinu _. use of tit( air
conditioner and contact a qualitk d sePdce
technician.
tlave tile wall outlet and circuit checked by
a qualified electrician to make sure tile omlet
is properly grounded.
"_\]msc a 2-prong _ndl outleI is encotmt_ r(d,
it is your personal responsibility and obli_ltion
tw have it 5-cpla( ed with a propet-ly grounded
3-prong wall outlet.
The air condition€ r shouM ahvays be plugged
into its own individual elecu'ical omlet which
has a vohage rating that matches the rating
plate.
This provides die best p_ rlbnnanc_ and also
pscvems oxerloading house wiring ( ircuits
which couM cause a fire hazard tiwm
overhealed wir_ s.
Se_ tll(! Installation Instructions, Electrical
Requirements sc_tion l;or spedtk ch,_u'kal
( onnc_ tion rcquircmcms.
2
ge.com
WARNING!
USEOFEXTENSIONCORDS--115-Voltmode&only
Because of potential safety hazards under certain
conditions, we strongly recommend against the
use of an extension cord.
[Iow(_c*,if'yoll must use an extension cord,
it is al)solmcly nec(ssa_ dlat it be a UL-listed,
14 gauge, _wire gromlding type appliance
extensi,.)n cord having a grotmding type [)lug
and otttlet and fllat the electlical _ting of" ill(
cord be 15 aml)ercs (mi_fimmn) and 125 volts.
CAUTION:
DO NOTuse an extension cord with any ofthe
230/208 voltmodels.
READANDFOLLOWTHISSAFETYINFORMATIONCAREFULLY.
SAVETHESEINSTRUCTIONS
3

Aboutthecontrolsontheair conditioner--modelswithtouchpads.
Features and appearance will varg
COOLOn COOLOn FANOn
SAVEROn ENERGY-
II__T r_ SAVEROn
ime
OR Temp
O
Air ConditionerControls Remote
Control
OOn/Off
"Ihrns air (onditioner on and ofl:
ODisplay
Disl)lays Ill(! s('t lelllpel'alHre or lhll(
relllainhlg oll [hllel:
OMode
[s( to s(t th( air (on(lifioner to Cool or Fao
HlOd(.
)Increase •/Decrease •Pads
G [;s( to s(t t(nll)(ratHre wh(n ill Coolmode.
Fan
Lse to set the t_lnspeed at Low, Med or High.
0EnergySaver-(2)mrols file [hn.
OnZ['he tim and compr{*ssor (ycle on and
off. This results ill wider variations ot room
teml)emmre and humidit}. Normally used
when the roonl is unoccupied. Note: The fan
will continue to run for a short time after the
compressorcycles ell
Off---The £m IIlI]S all the time, while the
compr(,_or (?'(:les on and ott.
Tiffs switch llltlSt be set at Off in order to use
the Jhn settings, (on th( mode contrt4).
Timer
On--When tile air con(lition( r is ofl; it can b(
s(t 1o automatically lurn on ill l to 24 hours
at ils previous selling. Each louch will set tile
time in hours.
Off--When th_ air conditioner is on, il can I)_
s(t to amomatically turn oflTin ] to 24 houl's.
Each touch _ill sit th( time in lloul:,.
To cancel th_ timei; l)r_ss Ihe Timerl)ad
until lhe disl)la ? tim_ disappeals.
RemoteControlSignal Receiver
Remote Control
i! To ensure prol)er Ol?(mtion,
_1i111 lhe l-el:lOle COlllFol _11Ihe signal
r( c( iver Oil the _lil collditiOllel:
_,: 1ll( FelllOl( (:OllWol signal h21s a l'_/llge
ofu l) lo 21 feet.
i¢i'Make sure nothing is b(tween th( air condilioller
and the remote (onu-ol that could [)lock lhe
signal.
i{i:.Make sure bauelies art. fi-tMl and installed
correctly--s( e the Care arid Cleaning section.
4

ge.com
Additional controls and important information.
DoNot OperateinFreezingOutdoorConditions
This (ool-onl 7,air conditioner was not (h,signcd tbr
tie_ zing outdoor con(lidons. It must not be used ill
ti-e(zing outdoor con(litions.
When the air conditioner is turned on, it will
automatically start in the setting last used,
Power Outage Recovery Feature
In the _ase ota power outage or interruption, the will r('sct to the original s(uing.'i_)u mm need to s(t
unit will mltomatically restart in the setfing_ last a new time it desired.
used after the power is restored. The Ylmertbature
Cool Mode
tse tile Coolmode with High(3),Med (2)or
Low (1)f$mfbr cooling. Lse lhe Increase •/
Decrease•pads 1o set the desired temperature
between 64°F and 86°F in l°F increments.
A thermostat is used to mainlvlin the room
tempet'dmre. The compressor will ode on and off
to kee l) the room at tile set level ot comfort. Set the
thermostat at a lower number and tl_e indoor air
will become coolen Set tile thermostat at a higher
number and the indoor air will be(olne wannen
NOTE:If theair conditioneris off andis thenturned
onwhile set to Cool,it will takeapproximately3 minutes
fortbe compressortostart and coolingtobegin.
CoolingDescriptions
ForNormalCooling--Sek(t the Coolmo(h
and High(3)or Med (2)fim with a middle set
tenlpel_ture.
ForMaximumCooling--Select the Coolmode
mM High(3)lira with a lower set temperature.
ForQuieter&NighttimeCooling_qdect the
Cool me&' and Low (1)fiJllwith a middle s_t
telllpel'dtll 1"1'.
NOTE"If youswitch from a Coolsetting toOffor to
a fansetting wait at least3 mh?utesbeforeswitching
back to a Coolsetting.
Fan Mode
I st, the Fanat High(3),Med(2)or Low(1)to provide Simc tim-only settings do not l)ro_ide (ooling,
_dr cilxulation mid filtering without cooling, a t_rap( l-dtnre setting will not be displa?ed.
Vent Control (onsome models)
The vent control is located on the inside ot the
air lou_ ors in the lower light colnen
When set al CLOSE, only the air inside lhe room
will be circulat_ d and conditioned. When set at
OPEN,somc insid{ air is _xhausled oulsMe.
f
(/
11 II
Toopen the vent,push the lever to the righ_
Toclose it, push it to the left.
Air Direction--Up and Down (onsomemodels)
Fingmlip pressure on the horizontal louxt, l-s_Mjusts
tile air direction up or down.
Air Directiou--Side-to-Side (onsomemodels)
The side-to-_i(h, all direclioll is a(!justed by the
louver lew'l_.
5

Aboutthecontrolsontheairconditioner--modelswithcontrolknob.
Features and appearance may va_
Controlsto.mode;ssoeq.;ppedj
FQrl
Medium
Cool
OON/OFFSwitch
Turns ai_ conditione_ (m and off,
NOTE:If theairconditionerisoffandisthenturnedonwhile
setinaCoolmode,itwilltakeapproximately3minutesfor
thecompressortostartandcoolingtobegin.
FanSwitch (onsomemodels)
Use to set the t_mspeed to LOor HI.
OModo/TempControl
Use to set the air conditione[ to tile FanOnlyor a
Cool mc_de.
FanOnlyMode
Use FanOnlyat HI or LOFanto provide air
drculatkm and fi]tering_dthout cooling.
CoolMode
tJsea Coolsetting with HIo_ LOFanfb_cooling.
Turn the knob c]ockwise,tow,uxltile ]argz-rblue
area, fb_the indoor area to become coolen Turn
the knob cotmtelz:lock_dse,toward the smaller
blue area, f}.)rthe indoor air u) become uatmeE
The Mode/Temp conuol is used U)maintain the
room tempel',ml_e.When set in a Coolmode, the
compressor willcycleon mid off to keep the room
at the same levelof comfi)rt.
CoolingDescriptions
ForNormalCooling--SelectaCoolmode_dththe
Mode/Temp knob set at the midpoint.
For Maximum Cooling--Select aCoolmode with
the M(ule/Temp knob set toward the larger
blue area.
ForQuieter& NighttimeCooling--SelectaCool mode with
the Mode/Temp knob _t to_ard the smaller l)lue area.
NOTE:If youmoxe the Mode/Temp control knob fi'oma
Coolsettingto the FanOnlysetting, waitat least 3 mimltes
befi:)res_itching back to a Ceolsetting.
6

ge.com
Additional controls and important information.
DoNot Operatein FreezingOutdoorConditions
This cool4mly air conditioner was not (h,sign(,d tor
fl-(ezing outdoor conditions. It must not ])e us(d in
fi-eezing outdoor conditions.
Vent Control (ol7some models)
The vent control is localed on the inside oi the
air louwq_ in fl_e lower right (ornel;
When set at CLOSE,only the air inskl( the room
will be cir(ulated m_d con(lition(d. When set at
OPEN,some inside air is exhausted otllside.
Toopen the vent, push the lever to the right.
Toclose it, push it to the left
A#Direction--Side-to-Side
The side-lo-sid( air direction is a(!jusled l)y 1he
lollv( F leve l_,.
A# Direction--Up and Down (onsomemodels)
Fingellip [)l'(?SSllr( 011 the hol-iZOllta[ [O/l'_(_is a(!jtlsls
Ihe air direclion up or d(gvll,

Careand cleaning oftheair conditioner.
How to Insert the Batteries on the Remote Control (onsome models)
] Remove the batt(ty cover by _diding it
a((ol'dillg to lh( _IFYO_,VdiY(([iol]+
]Insert new I)atleri(s making sure thai the (+)
and (-) oi I)auely are insmll_ d correctly.
] R,.:atta(h th,. co',_r I)7,'sliding it back
into posixion.
NOTES:
;'_ Ise 2 iYk\ (1.5 volt) batteries. Do not use
rechm-geal)le batteries.
i!i_"Remove the 1)all( ties from the remote control if
the !,7,stem is not going to be used f_l- a long time.
Grille and Case
Turn lhe air (onditioner off and r(move th(
phlg from lh( wall oull(t I)(for(: cleaning.
To ckan, use waist and a mild dct_ rgent.
Do not us,. bleach or al)rasb.(s.
Outdoor Coils
The coils ,.)n the outdoor side of the air conditioner
should be checked regulm'l?; It they arc clogged
with dilt or soot, they may b( professionally
clean(d.
Air Filter
"1"11(air fih(r behind th( iiont grille should b{
o
check(d and clean(d at least _x_t?, aO (la}s (.n
more o[ien it necessm T.
Clean the filter with _al-m, soapy wam_;
Rins( and let the filter (ll)" bef;.)rc ruplacing it.
,ACAUTION: Noro erateair
conditioner witboet a filter becausedirt andlint will
cloutit aod reduceperformance
Toremove:
OR
Grabthe tabs on
tbe filter andpoll
it up and out
1.Pullopenthe
inletgrille atthe
bottomandrift
off tore,move
ZPefl tbe top
of the filter
down andout
to remove
8

Installation
Instructions Air Conditioner
Ir_ Questions? Call 80O.GE.CARES (800.432.2737) or Visit our Website at: ge.com
BEFORE YOU BEGIN
Read these instructions completely
and carefully.
• IMPORTANT - Savethese
instructions for local inspector's use.
• IMPORTANT - Observeall
governing codes and ordinances.
• Note to Installer- Be sure to leave these
instructions with the Consumer.
• Note to Consumer- Keep these
instructions for future reference.
• Skill level - Installation of this appliance
requires basic mechanical skills.
• Completion time- Approximately 1 hour
• We recommend that two people install
this product.
• Proper installation is the responsibility
of the installer.
• Product failure due to improper installation
is not covered under the Warranty.
• You MUST use all supplied parts and use
proper installation procedures as described
in these instructions when installing this air
conditioner.
ELECTRICAL REQUIREMENTS
Some models require a 115/120-volt AC,
60 Hz grounded outlet protected with a
15-amp time delay fuse or circuit breaker.
The 3-prong grounding plug minimizes the
possibility of electric shock hazard. If the wall
outlet you plan to use is only a 2-prong outlet,
it is your responsibility to have it replaced with
a properly grounded 3-prong wall outlet.
(_ Some models require 230/208-volt AC,
protected with a time delay fuse or circuit
breaker. These models should be installed
(_ on their own single branch circuit forbest performance and to prevent
overloading house or apartment wiring
circuits, which could cause a possible
fire hazard from overheating wires.
CAUTION:
Do not, under any circumstances, cut or
remove the third (ground) prong from the
power cord.
Do not change the plug on the power cord
of this air conditioner.
Aluminum house wiring may present special
problems--consult a qualified electrician.
TOOLS YOU WILL NEED
Phillips head screwdriver
Pencil Ruler or tape measure
Level Scissors or knife
Power cord includes a current interrupter
device. A test and reset button is provided on
the plug case. The device should be tested on a
periodic basis by first pressing the TEST button
and then the RESET button while plugged into
the outlet. If the TEST button does not trip or
if the RESET button will not stay engaged,
discontinue use of the air conditioner and
contact a qualified service technician.
9

Installation Instructions
PARTS INCLUDED
(appearance may vary)
Top mounting rail
\
Air
conditioner
Window
seal
window gasket __
Left
accordion
panel Right
accordion
panel
Type A (9 or 10)
1/2" screws Type B (7)
3/4" screws Security bracket (3)
10

Installation Instructions
[] WINDOW REQUIREMENTS
• These instructions are for a standard
double-hung window. You will need to modify
them for other types of windows.
• All supporting parts must be secured to firm
wood, masonry or metal.
• The electrical outlet must be within reach
of the power cord.
• Follow the dimensions in the table and
illustration for your model.
Models A B
AST05, ASW05 11 3/4" min. 22"-36"
ASW06 13" rain. 22"-36"
ASW08 13 1/2" rain. 24 1/2"-36"
[ 1
B===G t
A
B I-
With accordion panels) t/ r
f
q- -i'
[] STORM WINDOW REQUIREMENTS
A storm window frame will not allow the air
conditioner to tilt toward the outside and will
keep it from draining properly. To adjust for this,
attach a piece of wood to the sill.
WOOD PIECES -
WIDTH: 2"
LENGTH:Long enough to fit inside the window
frame.
THICKNESS: To determine the thickness, place a
piece of wood on the sill to make it 1/2" higher
than the top of the storm window frame or the
vinyl frame.
Attach securely with nails or screws provided by
the installer. 1/2" higher
1/2"higher
than storm
window
frame
than vinyl frame
_ _ (on some windows)
Sill
Storm
frame Vinyl frame
[] PREPARE AIR CONDITIONER
[] Remove the backing from the top
mounting rail seal strip and attach it
to the bottom of the top mounting rail.
Cut to size.
[]
[]
Install the top mounting rail with 3or 4
type A screws (depending on the number
of holes in the top mounting rail) from the
outside of the case.
Top mounting 1i' V lr
rail -._ ! i I
I I "l" _
Bottom _ _--_*J
mounting rall ---_ _/-
Loosen the lower screw on each side of
the case and hook a security bracket on
each side. To allow for later adjustment,
do not tighten the screws until you install
the unit in the window.
Security
bracket
Security
bracket
11

Installation Instructions
[] PREPAREAIR CONDITIONER
(CONT.)
[] Insert the frames of the accordion panels
into the top and bottom mounting rails.
Attach the accordion panels to the side
of the case using 6 type A screws,
Top mounting
Accordion panels
[] INSTALL AIR CONDITIONER IN
WINDOW
[] Cut the window sash seal to the window
width and stick the adhesive side to the
bottom of the sash.
--Window sash seal
[] Place the air conditioner on the sill
with the bottom mounting rail against
its back edge. Center it and close the
window securely behind the top mounting
rail. It should be level or slightly tilted
to the outside. Use a level; about a 1/3
bubble will be the correct case slant to
the outside.
12
[] INSTALL AIR CONDITIONER IN
WINDOW (CONT.)
[] Extend the left and right accordion
panels to the vertical window sashes and
attach with 4 type B screws.
Type B
screws
_e B
screws
[] Attach the brackets to the sill on both
sides using two type B screws.
[] Tighten the screws to secure the brackets
in place on each side of the air conditioner.
[] INSTALL SECURITY BRACKET
AND FOAM TOP WINDOW
GASKET
[] Attach a security bracket with a type B
screw.
[] Cut the foam top window gasket to the
window width.
[] Stuff the foam between the glass and the
window to prevent air and insects from
getting into the room.
/
Caulk or weather-strip any gaps or
openings to the outside to seal the
installation.
The installation is now complete,

TroubleshootingTips... ge.com
Possible Causes What ToDo
The air conditioner *Make sure the air (on(litioner plug is pushed
is unph_.ged, completel} into the outlet.
'[he fl_se is blown/drctfit * Check the house fuse/circuit breaker box and replace
breaker is tripped, the filse or _t=_t the breaker;
Power failure. *If power taihlre occurs, t/irn the air conditionex Off
When [_)wet is restored, wait 3 mimltes to restart tim ai_
conditioner m prevent tripping dthe compresv)r overload.
The current interntpter *Press the HESEThumm bcated on the power cord plug.
device is tripped. * If th_ RgSgTbuttonwill not sta) _ng'aged, discontinue
use ot the air conditioner and contact a qualitied
ser_ ice technician.
Airflow is resMcted. * Make sure fllere arc no cmtains, blinds o_ fimfitme
blocking the ti*mt of the air conditionen
The temp control may * On models with touch pads: In Cool mode, press the
not be set correctl}: Decrease•pad.
• On models with control knobs, turn the tempenLrure
knob to a higher numbel:
•[he air fdter is dlrl): • (]lean the filwr a le;_st every 30 day
See the Operating Instructions section.
•[he room may have been hot. • X*dmnthe air conditioner is first turned on, >_tl need
to allowti/lle _01" tlle I'{}O/I] I0 C(X)] dox_n,
Cold air is escaping. • Check tbr open tunlace registels and cold air returns.
• Set the air conditioner's vent to the clo_d [x_sition.
Cooling coils have iced up. •See "Air conditioner freezing up"below.
Ice blocks the air flow • On models with control knobs, set tile mode control
and stops the air conditioner at FanOnlyand floe {_ms_dtch to HI.
from cooling the room. • On models with touch pads, set the contlo/s at
HighFanoi HighCool and set the themaosmt to
a higher temperature.
"['he batteries are inserted • (]heck the position of the b;Jtteries. They should be
incorrectly, instated in the opposiw (+) and (-) direction.
The hatteries may he dead. • Replace the batteries.
Hot, hmnid weathe,; • This is hernial.
•['he air conditioner is not • For proper water disposal, make sure tlle air conditioner
tilted to the out,&le, slants slightly fi'om the case fi'_mt to the rein:
Moisture removed from air • This is normal tor a short p_tied in arenas_th little
and th'ains into base pan. humidity, norlnal for alonger i×_r'iod in x_ 3 humid areas.
Ftmction error code. •Unphlg the air conditionel: Wait 3 minuws and phlg it
back in.
A power outage or interruption • In the c_ ot'a power outage or intmmption,
occm'red, tla_ unit Bmerff_uture _,ill les, t to the oliginal setting.
'_)/I lilac* need to set a new tinle if desired.
Normal Operating Sounds
}'>3._)umay hear a pinging noise caus_d b)
water being picked up and thrown against the
condens(r on minv days or when the humidity
is lfigh. Tiffs design feature helps remow
moistxnc and ilnprov< ellici(m3:
}'2_.))11mav h(ar th{ th(rmostaI click when th{
compressor cycks on and olll
_5_Water will coth ct ill the I)as_ i)an during
lfigh lmmidit Tor on rain} days. "['h_ water
may overflow and drip flOln the outdoor side
of th_ unit.
_5_The thn may run mell wh<n the compressor
do(s 110[.
13

,_ NOteS,
€_
_J
_rJ _
kn_.
m
14

GEAir ConditionerWarranty--OneYearLimitedWarranty.
Staple yourreceipt here.
Proof of the original purchase date
is needed to make a warranty claim.
We Will Replace:
One Year Replacement unittbr any i)rodut t whi(h ihils diw t() u dc];:(t in mat(,fi_ds or workm_mshi[).
Th_ rcpl_l( cmcnt unit is w}ul',mt('d fin die r( m_dndcr oi your prodi, t's original on_-v_ _u-
•_an-anly period. Therep/acementunitmayeitherbea newunitora refurbishedunit.
i!i_"Properly pack your unit. _¥e recommend rising i!i_"Include in the package acopy of the sales receipt or other
the original carton and packing materials, evidence of date of original purchase. Mso print your
1"_Retm-n the product to the retail location where name and addre_ and a description of the defect.
it -*_,tspurchased.
_'_Locate yore" original sales receipt mid make a note
of your model mid serial number.
}'_Call GE at 1.866.907.1655 to initiate the product
replacement proce_.
i!i_.You _411be asked to provide your name, address,
date of purchase, model and serial number.
;'_GE will arrange for a carton to be sent to yore" home
to recover the product.
_'_You nmst retm'n the product (postage prepaid I_yGE)
to GE's recovery center before a replacement unit _411be
provided. Please include a description of the defect.
_'_You should receive your replacement product within
7to 10 business days 'after your unit is received.
_'_If you experience any prohlems or delays alter initiating
the replacement process, please call 1.256.796.6610 for
a_sis 'tance.
Customer tr_truciaon. This oxsaaer s mamml provades
information regarding opera_lg instructions and
user controls.
_'_Improper h_stallation. If you have an installation problem,
or if the air conditioner is of improper coolhlg capacity.-
for the iiltended use, contact your dealer or installer.
You are responsible for providing adequate electrical
comlecthlg fa "cdities.
_'_Failm-e of the product resulting from modifications to
the product or due to mlreasonable ttse including failure
to provide reasonable and necessary maintenmlce.
_Replacement of house flises or resetting of ch-cuit
breakers.
_'_Damage to the product cattsed by improper power supply
voltage, accident, fire, floods or acts of God.
_'_Incidental or consequential damage caused by possible
defects with this air conditioner.
IEXCLUSION OFIMPLIED WARRANTIESiyour sole and exclusive remedy is product replacement as provided
in this Limited Warranty. Any implied warranties, including the implied warranties of merchantability or
fitness for a particular purpose, are limited to one year or the shortestperiod allowed by law. I
This warranty is extended to flTeoriginal purchaser and anysucceeding owner for products purchased for home
usewithin the USA,
Some states do not allow the exclusion or limitation of incidental or consequential damages. This warranty gives
you specific legal rights, and you may also have other rights which vary from state to state. Toknow what your
legal rights are, consult your local or state consumer affairs office or your state's Attorney General
Exclusion of implied warranties: Except where prohibited or restricted by law, there are no warranties, whether
express, oral or statutory which extend beyond the description on the face hereof, including specifically the
implied warranties of merchantability or fitness for a particular purpose.
Warrantor: General Electric Company. Louisville, KY 40225 15

ConsumerSupport.
GEAppliancesWebsite ge.com
]lave a question or need assislnnc_ _dlh }ore ,_ppll,n_c(_ h lh_ ( L :\ppliances Websile, any day of:lhe vearl
For gl-_ _11(1-(OllV( lliell(( an([ /_lstel- sels,k _, y_:ll (}ill n(_.v downI< ad ()_,vl]er's _iall!l_lls, Ol- evell ordel- paris
on-line.
RealLifeDesignStudio ge.com
GE supports tll< [niversal Deqgn concept--products, services and environments that <an 1)e used by
people ot all ages, siz<s and capaNlifies. _,_* rcc_Nnize the need to design tot a wide l'ange ot ph}sical
and mental abilities and impairments. For d< mils of GE's [nivel-sal Design applications, including kitch< n
design id<as t})r people with disabilitk s, ch<ck out our'vVcbsite lt_da}. For th< h< aring impair<d, pleas_ <:all
800.TDD.GIL\C (800.833.4322).
PartsandAccessories
Individuals qualified to s<l_'ice lbeir own appliances can brae paris or acc_ ssori_s sent directly to th<ir
homes (VISA, Mast_ rCard and I/iscover cards are accepted). Order on-line today, 24 hours _','_lw'day or
by phon_ at 800.62b.2002 dul lng 13Ol-Illal b/Isiness bellES.
Instructions contained in this manual cover procedures to be performed by any user. GEdoes not support
any servicing of the air conditioner. We stronglyrecommend that you donot attempt to service the air
conditioner yourself.
ge.com
ContactUs ge.com
If you are not satisfied with the selwice you receive tmm (;E, contact us on our Website with all tbe derails
including your phone lmmbe_; or write to: Gen_ ml Manage1; Customer Relations
GE Appliances, Appliance Park
Louisville, IG _40225
]_Printed in China

ge.com
©
°v--q
°v--q
h_strucciones de seguridad ...... 2, 3
Instrucciones de operaci6n
Controles--botoncs de (ontrol ...6, 7
(_ontroles-- e(las (k toque ...... 4, 5
Cuidado ylimpieza
ga_erfi,s ........................ 8
gobinas para extcrior¢ s ........... 8
Fihro de aire .................... 8
Rt jilla y (_ia .................... 8
Instrucciones de instalaci6n
[nstalacichl _n una v_ numa ..... 9-12
Ideas para la identificaci6n
yreparaci6n de problemas ...... 1_
Sonidos novmak s de ope_,(:i6n . . .14
Apoyo al consumidor
Apoyo al (onsumidor. ........... l 6
(k_aant fa ...................... 15
AST05
ASW05
ASW06
ASW08
©
E$cribael modeloy mimero
deserie aquk
N(tmerodemodelo
N(tmerodeserie
I Stt'(l pIK_(I( • CllCOlltlTIl" ('slos ll(llnt*lOS
_d<(_tado d(l _<ondicionador (h' _drc. 49-7578 11-07JR

F
INFORMACIONIMPORTANTEDESEGURIDAD.
LEATODASLASINSTRUCCIONESANTESDEUSAR.
AiADVERTENCIA!
Por su seguriflad, se flebe seguir la informaciSn en este manual para minimizar el riesgo de incendios,
flescargas el#ctricas o lesiones personales.
2
PRECAUCIONESDESEGURIDAD
_EUse este ele( trodomdsfico solamemc para
el prop(;sito detcrminado segfin se des( ribe
en el Matmal del propietario,
{_Es_e acondicionador de aire debe instalarse
(olre(l:liilente de a(t/eYdo (oil ills
h:sml(ciones de insmlacidn antes de su uso.
_2N,.mca d(senchufi' su acondicionador de
aire timndo d(1 cable eldctrico. Siemprc
agarrc tinnememc el ench:ff_ v tire de
dl direcmmente ha(ia afhen,.
_ Rc(ml)lac( inmediammente t(>dos los cabks
eldct:icos qtl_ se hwan [)elado o que s(
hayan daflado de alguna oral manet:,.
Un cable d( cortieme daflado no debe
r_pamrse, sino que &be SeT sustituido pot
uno nuevo que se adquiera (lel fifl)ricam(.
No use ltil cable eldctrico que n:uestle
exid(ncias d( demtioro, o dafios de abn,sidn
etl stl supertkie ell algllno de SIIS extl'emos.
_;_Si el recept_iculo no coinckk co:: el
( nchuf_:, :m electricism califi(ado debe
reemplazar (1 rccept_iculo.
_;_Apague la mfidad y desenchuti' su
acondi(ionador de airc antes de limpim;
?;_(;E no estff no apoya que se le proporcione
ningfin secdcio al acondicionador de ait*.
\\'hementemente rc(omendamos que
usted no inmt:te propot*:ionar setxi(io al
acondicionador d(: airc ust(:d mismo.
{_;Pot su segu:idad,..no ahnac(n_ ni use
matcriah's combustibk s, g_:solina u otros
vaporcs o liquidos inflamables en la
proximidad dc dstc o algfin OtTO
el( ctrodomd'stico.
_;_Todos k)s acondicionadorcs de airc
(ontiene rctiigcmnms, los que pOT Ley
F(d(mn deb(:n set t_.:moxidos am*.!s (k
dese( harlos. Si ust<d planea deshacerse de
alTOn ])rodu( to qu< contenga rcflJgerantes,
pdngv,se en (onmcU) con la coml)aM'a que
se encatga de i('(oger su lvsu[:_ pare que le
it:(liqu(:n qud hac(n
COMOCONECTARLAELECTRICIDAD
Bajo ninguna circunstancia, corte o remueva la
tercem pEta(tierra) flel cable el#ctrico. Enpos
de la seguridad personal, este electrodom#stico
flebe siempre conectarse a fierra.
NO useun enchufeadaptador con este
electrodom#stico.
El caM( el_ct:ico de estc el(ctrodom_stico (st2i
( quil)ado (on un en(huf( de tr(s pfias (ti(n',,)
que (oml)ina con un toma(on'iente est_indar
de tr(s tonlas de pared para minimiz;_r la
posibilidad de una d(sca_ga eldcttica.
El cabk de alimentaci6n incluv_ un
dispositivo l)am im(_trupcidn (k cortienle.
Se in(luye un 1)ot(m d_ p:u_ba y de reinicio
(51 (1 dispositix o. E1 dislsositix o debt! [),.)nerse
a pmeba pefiddicamente: pfimero s(: pr('siona
(1 botdn de TEST (pru(ba) y h,(go RESET
(rdnicio) mientms se (51cHe51tFaenchuthdo
al tomacot rieme. Si el botfn TESTno se dispam
0 si (1 1)oldn RESETno queda engvm( hado,
d@ d( ufilizar el acondicionador de aire y
connmfquese (on un t& ni(o calificado.
Pida a un t&:nico que inspeccione el
[Oll}_5(OYliell[( y el (it-(tsito pal_ (er( iolarse
d(: que el tomaconienm (st:i conecmdo a
tierta de la man(ra apropiada,
I)o51(1(: exista un tomacorrient_ de (los
minas, (s su rcsponsabilidad y obligacidn
personal hacer (pie dicho Iomacorrienm
sea rc(:mplazado 1)o1 11110 (112! 11"1%tomas
COll CoIlexi_)n a tiert_L
El acondicionador (t12:airc deberla siemprc
estar coneclado a tin Iomacorrienm indivkhml
con su circuito de volt_}ie cortx:spondiemv.
Esto pmlsor( iona el tmwor r(ndimiemo y
ademgs evita que los (ircuitos del rcsto de
la casa se sobleCalgll( 51, lo (ual podtia CallSal
inc(ndios pot (1 sobt* calemamiemo d(1
(ableado.
\\'r las Instmcciones de insmlacidn, (n la
seccidn Requisitos_l_ctrieos pan, los rcquisitos
esp(cfficos de conexidn.

ge.com
AiADVERTENCIA!f
USODECABLESDEEXTENSION--Modebsde115voltiossolamente
Debiflo al potencial de riesgos de seguridad
bajo ciertas confliciones, en#rgicamente
recomendamos contra el uso de cables
de extensiSn.
APRECAUCION:
NO USEun cable de extension con niaguao de los
modelos de230/208voltios.
Sin embarg-,.>,si usted seve en Ia nec(sidad
de :_sar un cable (ldctrico de extensidm es
absohnmnentc necesmio qu_ _1 mismo _std
Iist_ldo b_!jo UL, calibre 14, d_ tipo 3 tomas con
_oncxidn _,ficrm pare ch'(_rodomdsfi(os y cl
indice d(be set d( 15 ampe:ios (mfnimo))
125 voltios.
LEAYSIGAESTASINSTRUCCIONESDESEGURIDADCUIDADOSAMENTE.
GUARDEESTASINSTRUCCIONES
3

Acerca de los controlesen el acondicionadorde aire--
modeloscon teclas de toque.
Los funciones y el aspecto pueden variar
Encendida
DEEN£RGiA AHORRADOf_
E_cendido Temp_ 0£ EN£RGJA
{! r_ kV J j Encendido
Jime
0 BIEN Temp
0
Controles del acondicionador de aire Control
remoto
O07/Off (Encendido/apagado)
_pa_'d )ptt nO( 1] atondi(ion_tlor d( aJrt.
OPantalla
i,_ Mtl(slr_ ]a t_rap(rarer':{ de ajustt o t] li(:mpo
1"(2stant( {IX t] Sin(l'Ol/JZ_l(IoL
oodo
I Jsado ])a*a @lsmr cI _(7ondi(:it)_lador tic :_i*t
_dm(_/o Cool (Frio) oFan (Ventilador).
Oeolas de Aumentar •/Reduoir •
[sado 1);_1_1 _!just_ll" h[(l_apt ]_ltt]l_l (t]itndo
s_ (_/ctl( Htr_ 1_/1_1 m_do Cool(Frio).
Oan (Ventilador)
Lsado p _1"__jtlsta_" 1_vtqo(id_d dt_l v_l_til;_tlor
Low (Bajo), Med oHigh (Alto).
OnergySaver(Ahorradordeenergia)
(',(mt_'ola _1 x'_lltiladol:
On (Eoceodido_--El vendlador yel (omprt'so_" ha(-('n
ciclo t'n t'_ct'n(lido ) ;q_g_(/o. E_tt" _'cst_ha t'n
_ali;_cJ()taes I/lil_Ol'LiSeli 1_ t_'mper_tt/r_ de ]_
habit¢*cidn y eta la humed;td. Normalmeme us_do
ctlan(Io la habil_ci6n no es_(_ocup;_(la. Nota: El
vontitador continuar_ funcionando por un corto tiempo
despu#s de que el compresor haya entrado en el ciclo
de apagado.
Off(Apagado_l vt'latilitdo]" {tln(:i()la_ t(xIo t']
tit'mpo, la'_]t'ltt/as q/](" _1 (omprt SOl [._asll pot lo_,
ticlos (it" _'n(:t'ndido _l:>;,gado.
Este inmHt_ptor del-,__ est_ era Off(Apagado) pal',,
usal-los ajt_stes de1 w_ntilador (era {_1(:Ol/t/*)l
de modo).
STimer(Sincmnizador)
On(Encendido_--(illmado tl _t(ondi(iona(lo_ (It _,i_'_
atlt{m_fifi(:amenlv denllw (/_ [a 24 ho_;_s en el ni'_'el
p_t?'_fio. Coda t_que i!it_starfi el liemi.u_ en ho_ws.
Oll(Apagado)---Cumado el :_ ondiciona(Ior de air(:
esl;_ enceladido, puede ajuslarse pm'd que se _q_a,q'lle
atltomfifi(:amenlv denll{) de [a 24 ho_;_s. ('i_da
t{ulue aj/isl_ll-_l el tit mpo el/ hoI_ls.
Paaw (:anci'laa" el sincrxmiza(lor; p_t'si(me la te(:la
Tlmog (Sioc_ooiz_dog) Basra qtlt el tiempo en la
paaalall_a dew,pal* z(:a.
OReoeptor de la se#al del control remoto
4
Control remoto
a((_ndi(iol_dor de aire.
i!_El l-(:ceptor d( sei'lal liene till l_lllgo lll_Sxilno
(le 21 l)i(s.
i!i:"Cer{:idrt_se tie que no haya nada entl'( _el
acondicionad_r de airt* y _1control r(!moto q_le
pueda blo(lu_ ar la sefi_ll.
i_i'Cel-t:i(Srt*se de (lue los bamr/a_s sean tl't_scas y
se instalen (:orr_ctamel_le--ver la Se((idn tie
Cuidado y Limpieza.
This manual suits for next models
3
Table of contents
Languages:
Other GE Air Conditioner manuals

GE
GE Appliances AKW10 Operating instructions

GE
GE AER05 Operating instructions

GE
GE ACU06 Installation instructions

GE
GE AHM06 User manual

GE
GE AJCM12DCD User manual

GE
GE ASV18DL Manual

GE
GE AEC14 Operating instructions

GE
GE AEE12DQ Original instructions

GE
GE AKS05 Operating instructions

GE
GE CLIMATISEUR AEH18* Operating instructions