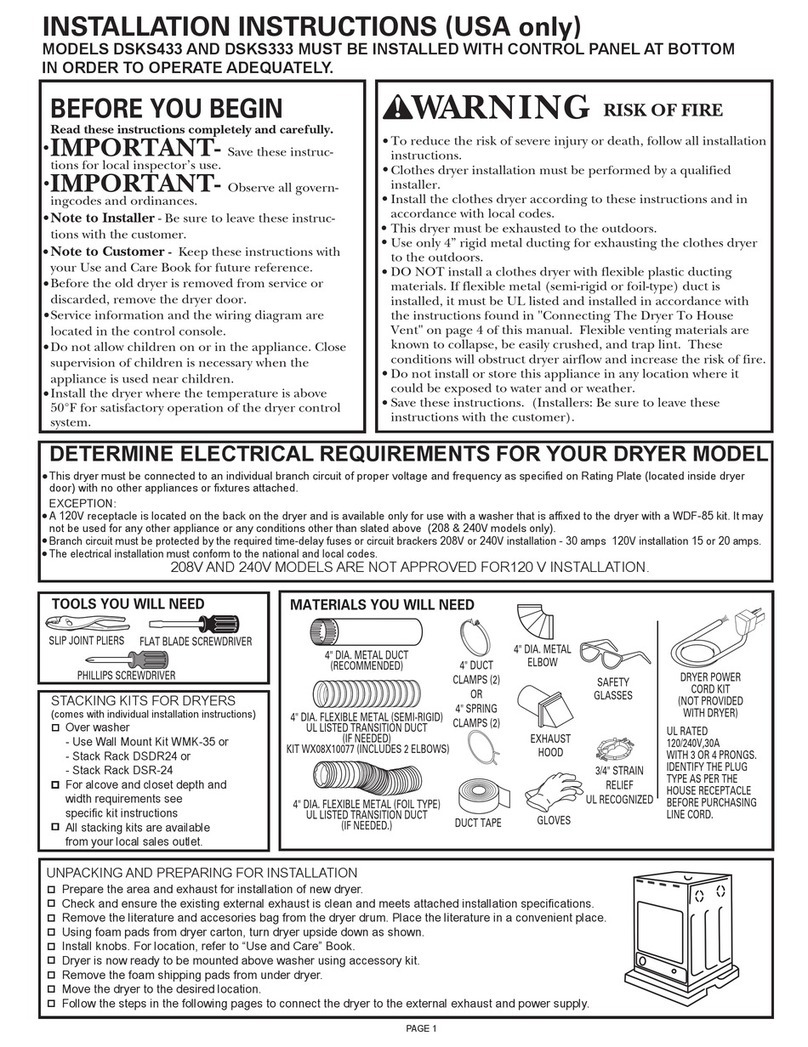
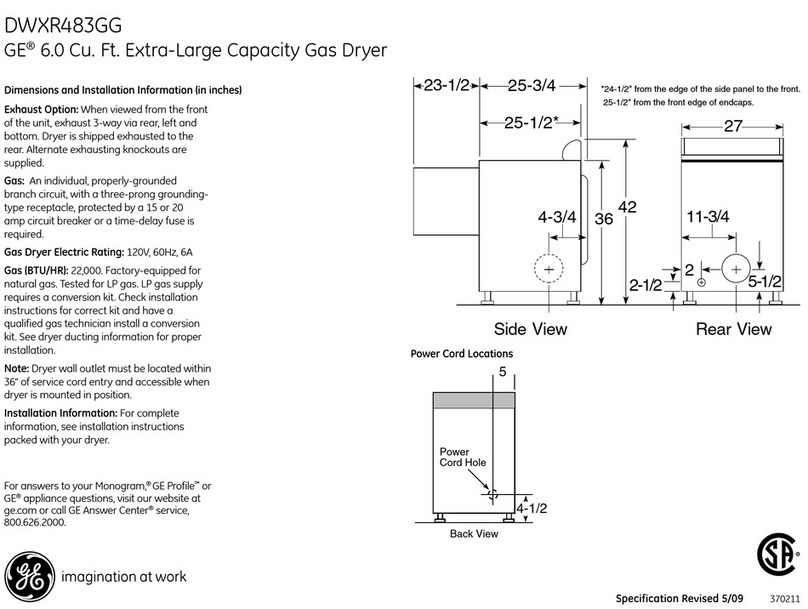
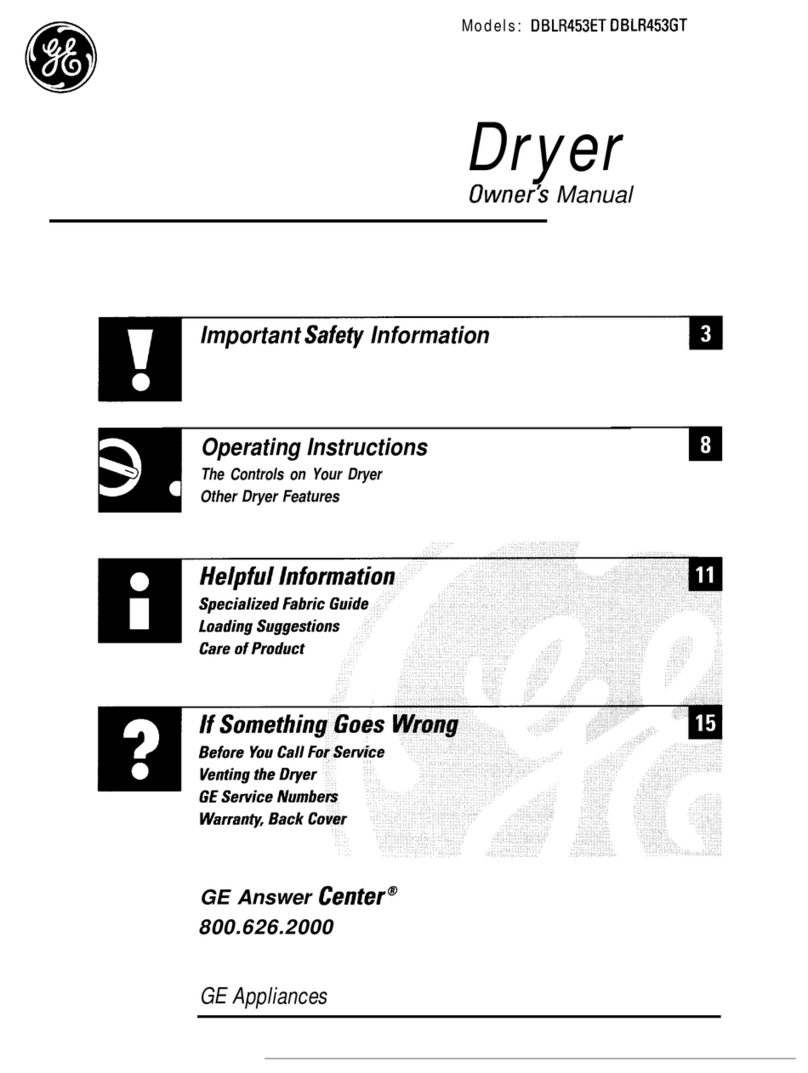
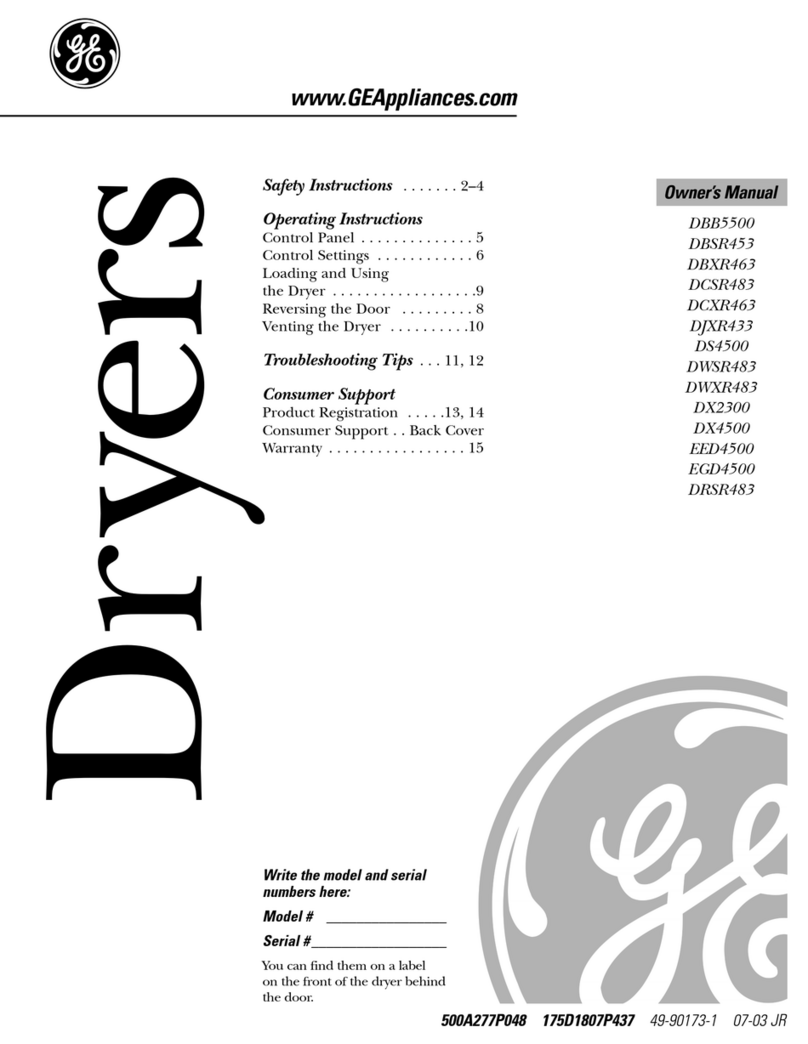
GE 333 User manual

GEAppliances
Models Type: 333
453
473
475
4500
Pa_No. 175D1807P294 Pub.No.49-90027_99JR
500A277P027

,0
,0
q
m
Safety Information ...3-5
Operating Instructions
Controls .................. 6.7
Features..................... 8
ReversingTheDoor........... 9
LoadingandUsngTheDryer... 10
VentingTheDryer............ I1
Troubleshooting Tips
BeforeYouCallForService.22 13
Customer Service
Warranty................... 15
ServiceTelephone
Numbers........... BackCover
2
Congratulations!
YouAre Now Partof theGEFamily.
Welcome to the GE family. We're proud of our quality products and we are committed
to prox4ding dependal)le se_x4( e. You'll see it in tiffs easy-to-use Owner's Manual and
you'll hear it in the fiiendly voi( es of our (ustomer sev_4( e department.
Best of all, you'll experien(e these values each time you use your (hyer. That's
important, because your new (hyer will be pmt of your family fi)r many years. And we
hope you _dll be part of ours fi)r a long time to (ome.
We thank you fo_buying (;E. We app_ eciate yotu ptn chase, and hope you xdll continue
to rely on us whenever you need quality applian( es for your home.
GE&You,A Service Partnership.
IMPORTANT!
Staple sales slip or cancelled check here.
Proof of the original purchase date is needed to obtain se_x-ite
under the w,uranty.
FORYOURRECORDS
Write the model and serial numbershere:
#
#
They are on the label on the flont ofthe (hTer behind the door.
READTHISMANUAL
Inside you xdll find many helpfifl hints on how to use and maintain
your (hyer properly.Just a little preventive cme on your part can save
you a great deal of time and money over the life ofyour (hyer.
PROPERVENTING
For the best (h)4ng pertbrmance the (hyer needs to be properly
vented. The &yet will use more energy and run longer ifit isnot
vented to the specifications outlined in the Venting the Dryersection in
this manual and the Exhaustingsection in the Installation Insuucfions.
IFYOUNEEDSERVICE
You'll find many answers to common problems in the Before You
CallForService secdon. Ifyou rex4ewour (hart of Troubleshooting lips
first, you may not need to (all fi)r sev_4(e at all.
If}xm do need sevvice, you can rel>Lxknowing help is onlya phone
call away. A list of mll-fiee (ustomer service mm_bers is included in
the back section. Or, in the O.&,you can alwaFs call the GE Answer
(enter ®at 800.626.2000, 24 hours a day, 7 daFs a week. In Canada,
call 1-800-361-3400.

iMPORTANTSAFETYiNFORMAtiON.
READALLiNSTRUCtiONSBEFOREUSING
WARNING!
For your safety, the information in this manual must be followed to minimize the risk of fire
or explosion, electric shock, or to prevent property damage, personal injury, or death.
[] Do notstore or usegasoline or other
flammable vaporsand liquidsin the
vicinityof thisor any other appliance.
[] Installation and service mustbe performed
by a qualified installer,service agency or
the gas supplier.
WHATTODOIF YOUSMELLGAS:
[] Do nottry tolighta match, or cigarette,or
turnon anygas or electrical appliance.
[] Do nottouchanyelectrical switch; donot
useanyphone in yourbuilding.
[] Clear the room,buildingor area ofall
occupants.
[] Immediately call yourgas supplier froma
neighbor'sphone. Follow the gas
supplier'sinstructionscarefully.
[] ff youcannot reach yourgassupplier,call
the fire department.
California Safe Drinking Water and ToxicEnforcement Act
This act requires tile governor of Califlwnia to publish a list of substances knoxm to tile state to (ause cancer,
birth defects or other reproductive harm and requires businesses to warn ctlStOlilers of potential exposure
to suchsubstances.
(;as appliances €}Ill catlse IlliIIor exposure 1o fotli of these stll)stailces, ilatllely beilzeile, catbon illoiloxide,
formaldehyde and soot, (aused primarily by tile in( oinplete ( oinbustion of natural gas or I_l_filels.
Properly a(!justed (hyers xxdllminimize incomplete combustion. Exposure to these substances can be
minimized flnther by properly venting the &yeT to the outdoors.
PROPERINSTALLATION
This dryer must be properly instated and located in accordance with the Installation Instructions
before it is used. If you did not receive an Installation Instructions sheet, you can receive one by
calling, toll-free, in theUnited States the GEAnswer Cente_ 800.626.2000.In Canada,call, 1-800-361-3400.
[] Properly ground duet to confi)rm xdd_all
goxerning codes and ordinances. Follow details in
Insmlladon InsU'u(:dons.
[] Install or store xdlere it will not be exposed to
temperatures below fieezing or exposed to tile
weadler.
[] Conne( t to a properly rated, protected and sized
power supply circuit t() avoid electrical overload.
[] Remox e all shmp packing items and dispose of all
shipping materials properly.
Exhaust/Ducting:
[]Gas (h),ers MUSTbe exhausted to tile outside.
[]Exhausting electric dUeTs to tile outside is
stronglyrecommendedt() prexem large amounts
o[IlloisHlre all(| lill[ fl'Otll beillg blo-\vl_ ill[o [lie
I'OOlll.
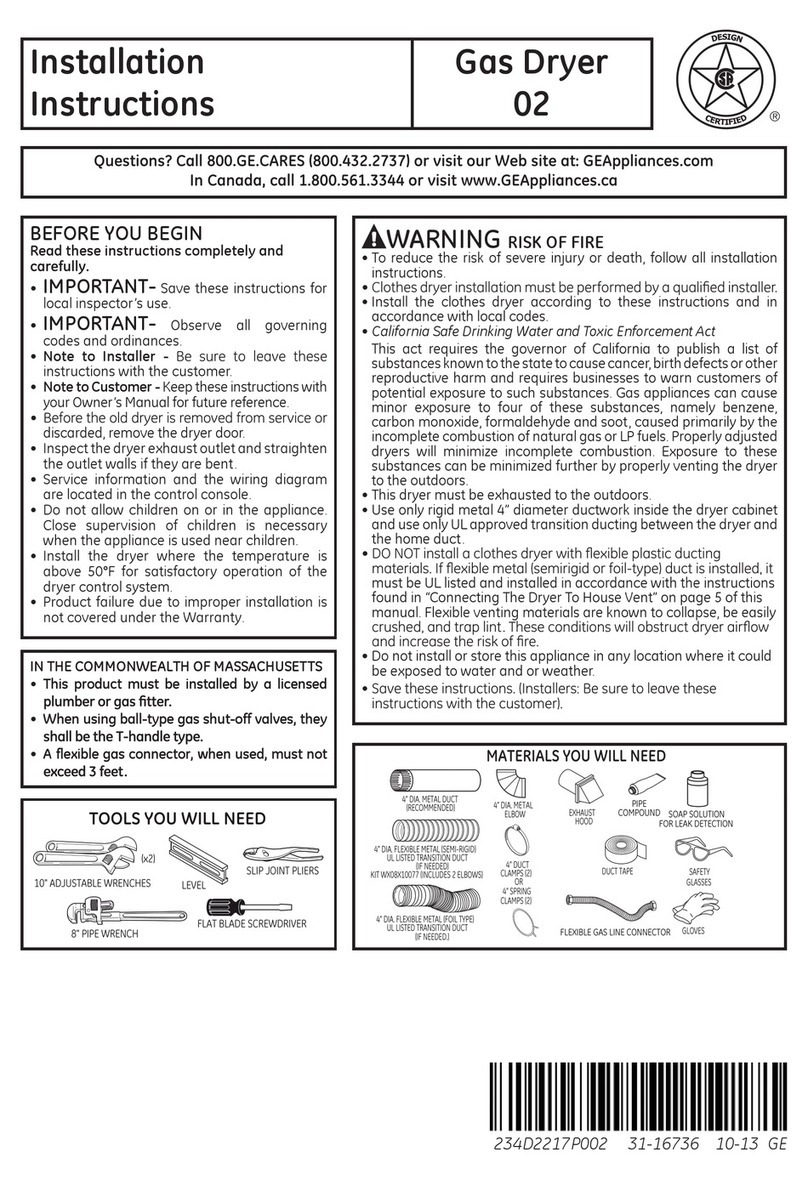
]Use only rigid metal or flexible metal 4"
dimneter du(twork inside tile dryer cabinet or
for exhausting to tl_e outside. USEOFPLASTIC
OROTHERCOMBUSTIBLEOUCTWORKCAN
CAUSEAF/RE.PUNCTUREDBUCTWORKCAN
CAUSEAF/RE/F/TCOLLAPSESORBECOMES
OTHERWISERESTRICTEDIN USEORDURING
INSTALLATION.
For (omplete details, follow tl_e Installadon
Instal( lions. ,3

iMPORTANTSAFETYiNFORMATiON.
READA££iNSTRUCTiONSBEFOREUSING.
WARNING!
YOURLAUNDRYAREA
• Keep the area underneath and m()und your
appliancesfiee of combustible materials, (lint,
paper, rags, etc.), gasoline, chemicals and other
flmnmable vapors and liquids.
• Keep the floor ar()und your appliances clean and
dry to reduce the possibilib_ of slipping.
• (lose super'vision is necess_u7 if this appliance is
used by or nero children. Do not allow children to
play on, with, or inside this or any other appliance.
• Keep all lmmch7 aids (such as detergen/s,
bleaches, etc.) out of the reach ofchikhen,
preti_rably in a locked cabinet. Obse_'ve all
warnings on container labels to avoid in jtn7.
• Never climb on or stand on the dryer top.
WHENUSINGYOURDRYER
• Never reach in/o the d_yer while the drum is
m()ving. Beiine loading, unloading or ad(fing
clothes, w,tit until the thrum has completely
stopped.
• Clean the lint filter betine each load to prevent
lint accumulation inside the dryer or in the room.
DONOTOPERATETHEDRYERWITHOUTTHELINT
FILTERIN PLACE.
• Do not wash or city articles that have been
cleaned in, washed in, soaked in, or spotted
with combustible or explosive substances (such as
w;Lx,oil, paint, gasoline, degweasers, _h)_cleaning
solvenL%ke_osene, etc.) which mW ignite o_
explode. Do not add these substances to the
wash water. Do not use or place these subs/ances
around your washer or d_yer during operation.
• Do not place items exposed to cooking oils in
your d_yer. Items contaminated with cooking oils
may contribute to a chemical reaction that could
cause a clothes load to catch fire.
•Any mticle on which you have used a cleaning
solvent or that contains flammable materials
(such as cleaning cloths, mops, towels used in
bemny salons, restmn'an/s, or bmber shops, etc.)
nmst not be placed in or nero the dryer until
solven/s or flammable mamrials have been
rem()ved. There me many highly flmnmable
items used in homes such as acetone, denatured
alcohol, gasoline, kerosene, some household
cleaners, some spot removers, Unpentines,
wzLxes,wax removers and p_oducts containing
petroleum distillates.
•The lmmd_7 process can reduce the flmne
_etmdan{ T oftitb_ics. To avoid such a _esult,
cmefiflly ti)llow the gmment manutitcltner's
cme instnlctions.
•Do not d_7 mticles con/aining _ubber, plastic,
or similm materials such as padded bras, tennis
shoes, galoshes, bath reals, rags, bibs, baby pan/s,
plastic bags, pilloxvs, etc. that mW meh or burn.
Some _ubber materials, when heated, can under
certain drcums/ances produce fire by
spontane_)us combustion.
•Do not store plastic, paper or clothing that may
bum or melt on top of the d_yer (hning operation.
•G_uments labeled DryAway from Heator Do
Not TumbleDry (such as life jackets containing
Kapok) must not be put in your (hyer.
•Do not d_7 fiberglass articles in your chyer.
Skin irritation could resuh fiom the remaining
particles that m Wbe picked up by clothing
chning subsequent dD_eruses.
•To minimize the possibili D"of electric shock,
unplug this appliance fiom the power supply
or disconnect the chyer at the household
cfistribution panel by remoxing the ti_se or
switching offthe dr(uit breaker bel_)re
attempting any maintenance or cleaning
(except the rem()val and cleaning of the lint
filter). NOTE"Turning the Cycle Selector knob
to an OFFposition does NOTdisconnect the
appliance fl'om the p()wer supply.
4

• Never attempt/o operate this appliance if it is
damaged, malfimcdoning, partially disassembled,
or has missing or broken pmts, including a
dmnaged cord or plug.
• The interior of the machine and the exhm_st (hint
connection inside the &yeT sh{)uld be cleaned at
least once a yem by a qualified technician. See the
Loadingand Usingthe Otyer section.
• If yours is a gas dUeT, it is equipped with an
automatic electric ignition and does not have a
pilot light. DONOTATTEMPTTOLIGHTWITHA
MATCH.Burns may resuh tiom having your hand
in the xicinib_ of the burner when the m_mmafic
ignition turns on.
• You may wish to soften your laundered filbfics
or reduce the static electrid b"in them, by using
a &yeT-applied fitbric soflener or an anti-static
con(fitioner. We recommend )x)u use either a
fabric softener in the wash {Tcle,according to
the mamdacmrer's instructions fin those
producls, or uTa due>added product fi)r
which the mamflhcmrer ,gives x_Tittenassurance
on the package that their pro(h_ct can be salely
used in y_ur (hyer. Service or pedormance
problems caused by use of these pro(h_cts are
the responsibility of the manutilcltuers of those
producls and are not c()vered under the warran b
to this appliance.
WHENNOTUSINGYOURDRYER
• Grasp the plug firmly when (fisconnecting this
appliance to avoid (hmage/o the cord while
pulling. Place the cord away fiom traffic areas so
it will not be stepped on, uipped over or
subjected to damage.
• Do not attempt to repair or replace any part of
this appliam_ or attempt any servicing unless
specifically recommended in this ()_mer's Manual
or in published user-repair insuucfions that y_)u
understand and have the skills to carUout.
• Betore discmding a dUeT, or rem{)x-ing it fiom
set'vice, rem{)ve the (hyer door to prevent
chil&en fiom hiding inside,
• Do not/amper with controls.
Readandfollow thisSafetyInformationcarefully.
SAVETHESEINSTRUCTIONS

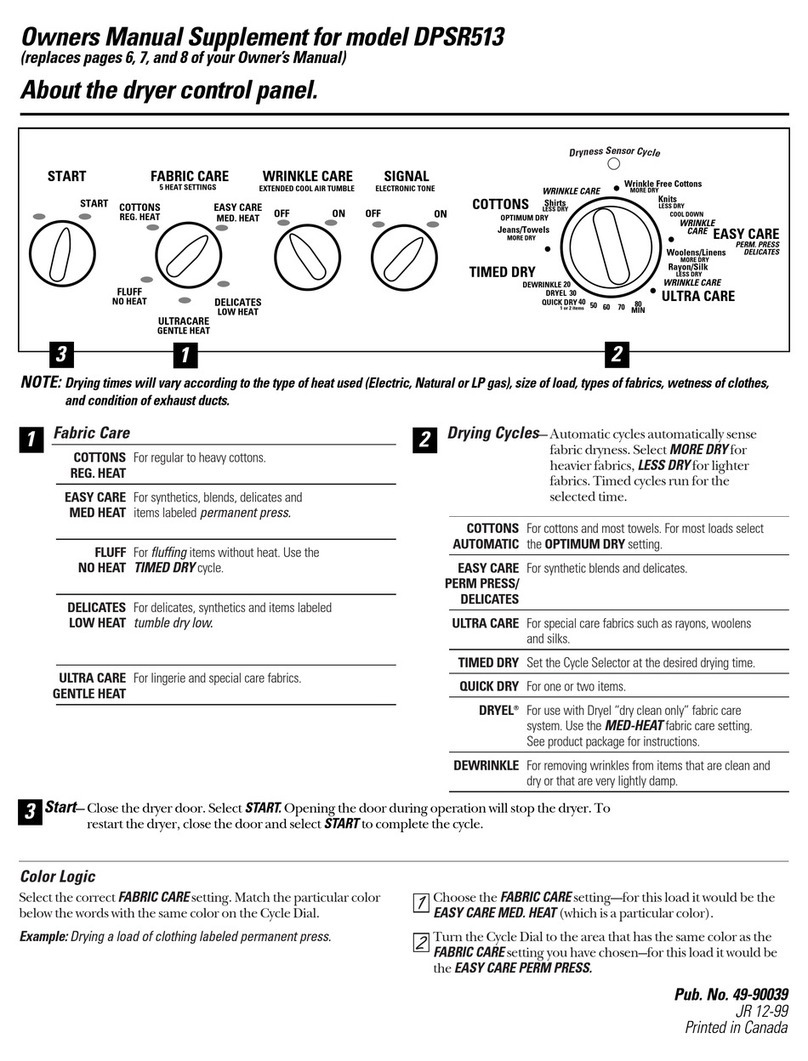
Aboutthedryercontrolpanel.
Youcan locate your model number on the label on the front of the dryer behind the door.
Throughout this manual, features and appearance may vary from your model
Model Type333
START TEMPERATURE
MEDIUM
START REGULAR FLUFF
®@
-D !i
AUTO AUTO
COTTONS PERM
• MORE ORY
EE:SOR_EESS_o_O_EPRESS
_DOWN
MORE D_Y •
70 80 MIN TIMED
30 40 5O DRY
le
Model Type453
START FABRIC CARE
START COTTONS PERM. PRESS
OELICATES NO HEAT
LOW HEAT
AUTOMATIC AUTOMATIC
CO'R'ONS PERMANENT
•MORE DRY PRESS
LESS DRY
LESS ORY COOL
*R_ °°'WN
MORE DRYe
80 MIN
DEW 50 TIMED DRY
DAMP DRY 40
NOTE:
Drying times will vary
according to the type
n
Model Type4500
START FABRIC CARE
irz
AUTOMATIC AUTOMATIC
COTTONS PERMANENT
of heat used (Electric,
Natural or LP gas),
size of load, types of
fabrics, wetness of
clothes and condition
START COTTONS PERM, PRESS
®ils@i:
DELICATES NO HEAT
LOW HEAT
iri
COOL • MORE DRY PRESS
DOWN LESS DRY
LESS DRY COOL
,_ DOWN
DEW D DRY
DAMP DRY 40
irz
of exhaust ducts.
Models Type473 and 475
START FABRIC CARE EXTRACARE SIGNAL
START COTi'ONS PERM. PRESS OFF SET
DELICATES NO HEAT
LOW HEAT
iri
MEOIOM
OFF LOUD
I
I
I
I
I
Optional Feature,
on some models
AUTOMATIC AUTOMATIC
COTTONS PERMANENT
•MOREORY PRESS
EXTRACARE LESSDRY
LESSDRI_COOL DOWN
*EXTRACARE
MOREORY •
•80MIN
DEW TIMED DRY
DAMPORY 40
irz
6

Control Settings
IMPORTANT'.Clean the lint filter each time you use the dryer.
|ri Fahric Care for Models Type453, 473, 475 and 4500
COTTONSForregulartoheavycottons.
REG.HEAT
PERM.PRESSForsynthetics,blends,delicatesanditemslabeledpermanentpress.
MED.HEAT
FLUFFForfluffingitemswithoutheat.Usethe TIMEDDRYcycle.
NOHEAT
KNITS Fordelicates,syntheticsanditemslabeledtumble drylow
DELICATES
LOWHEAT
_r_ Temperature for Models Type333
REGULARForregulartoheavycottons.
MEDIUM Forsynthetics,blends,delicatesanditemslabeledpermanentpress.
FLUFFForfluffingitemswithoutheat.Usethe TIMEDDRFcycle.
Autom;_ti(: (_,1les ;mtom;td(:;tllv determine ii_bri( dl)_ness. Sele(:t MOREDRYfor hea_der t_bri( sLESSDRYfor
lighter t_bri( s Timed (_,(:lesnm ibr _ sele( led dine
FJ Orying Cycles for Models Type 453,473, 475 and 4500
AUTOMATICForcottonsandmostlinens.FormostloadsselectthePreferredRegularSettingmarkedwith an_.
COTTONS
AUTOMATICForsyntheticblendsanddelicates.
PERMANENT
PRESS
TIMEDDRY SettheCycleSelectoratthedesireddryingtime.
DAMP DRY Forleavingitemspartiallydry.
DEWRINKLEForremovingwrinklesfromitemsthatarecleananddryorthatareverylightlydamp.
Drying Cycles for Models Type333
AUTO Forcottonsandmostlinens.FormostloadsselectthePreferredRegularSettingmarkedwith an_.
COTTONS
AUTOPERM Forsyntheticblendsanddelicates.
PRESS
TIMEDDRY SettheCycleSelectoratthedesireddryingtime.
El
_tart- Close tl_e dx_,er door Sele(t START ()pening tile door dming opex_don x_dllslop the d_)_er. To
rest_rt tile d_)_er,/lose tile door m_d sele(t STARTto /omplete tile/3,1 ]e.
7

Aboutyour dryerfeatures.
EXTRACARE Extra Care Option--on somemodels
Use this option to minimize tile wrinkles
in clothes. It provides approximately 15
minutes of no-heat nnnbling after the
clothes are dxT.
This option can only be used with the
Automati( (y(les.
If you have a Cycle Signal knob and you
select the EXTRACAREoption, a signal xdll
sound at the end of the dx)ing time and
sevex>dtimes during the EXTRACARE_ycle.
This xdll remind you that it is time to
rem{)ve the clothes.
SIGNAL
MEDIUM
OFF LOUD
Cycle Signal Option--on somemodels
This signal _dll sound just before the end
of the Q_cleto remind you to remove the
clothes. On some models the signal sound
level cannot be ac{justed.
If you selected the EXTRACAREoption the
signal will sound at the end of the dxTing
time and will sound several times during
the EXTRACAREcycle. This will remind
you that it is time to remove the clothes.
NOTE."
•Remove garments promptly at the sound
of the signal. Place clothes on hangers
so wrinkles won't set in.
•Use the Cycle Signal especially when
drying fabrics like polyester knits and
permanent press. These fabrics should
be removed so wrinkles won't set in.
Automatic Cycle Signal--on somemodels
At the end of each _ycle there is
approximately 15 minutes of no-heat
rambling after the laund Uis (hy.
A reminder signal _411sound perio(fically
during this time to remind you to remove
the laund U.
Drum Lamp--on somemodels
Befi)re replacing the light bulb, be sure to
unplug the (hyer pc)wet cord or disconnect
the duet at the househoM distribution
panel by rem_)ving the fl_se or s_duhing
off the drcuit breaker. Reach ab_)ve (hTer
opening flom inside the dram. Remove the
bulb and replace with the same size bulb.
Drying Rack--on somemodels
A handy &ying rack may be used for duing
articles su(h as sttflted toys, pilh)ws or
washable sweaters.
Hook the rack over the lint fiher so the rack
extends into the dxyer drum.
NOTE."
•The (hying ra(k must be used with tim
TIMEDCYCLE.
•Do not use tiffs(hying ra(k when there
are other clotlms in the (hTer.
i!i!i iljjj ji! !7i(ii!iiji
SensorDry
8
SensorDry--On somemodels
This feature is only a( tivated in the
autolnatic cycles. As the clothes ramble they touch a large
sensor. The SensorDtyfe'ature will stop the
heating cy{le as soon as the clothes have
reached the selected duness.

About reversing the door.
Reversing the Door
Todsneeded
III Standard#2 [] Tape-tlpped
Phi/hpsscrewdriver putty knife [] Needle-nosed
pliers
[] ()pen tl_e door _md remove the filler plugs opposite die hinges. With d_e door
(ompletely open, remove the bottom screw fiom ea(h hinge on die (hyer face. Insert
these s( rews _fl)out h_flf_ay into the TOP holes, fi)r ea(h hinge, on the opposite side
(where you remox ed die filler plugs). Apply firm pressure t() get die s(rew stmled in
um_q)ped holes.
[_ Loosen top s(rew from e_(h hinge on the dlyer fi_(:e lmlfway With one lmnd holding
the top of the door _md the other lmnd holding the bottom, remove the door fiom the
(byer by lifting it UP m_d OUT.
[_ Rotate the door 180 ° .Insert it on the opposite side of the opening by moving the door
IN m_d OOWNunfil the top hinge _md the bottom hinge _re resting }m the top strews
inserted in step l.
[_ Remove fl_e rem_fining screws from the side of the opening from which the door was
remox ed. Wid_ these s(rex, s se(ure each hinge _t the bott(;m. Tighten the tx_o top
s(rews of ea(l_ hinge. Reinsert the plasd( plugs on the side from whi(h the door w_ls
I'eIlloved.

SortingandLoadingHints
As a general nile, ifch)thes are sorted properly fi)r tlle washer, flmy are sorted properly for tile (hTer.
Do not addfabricsoftener sheets oncethe loadhasbecomewarm. Theymay causefabricsoftener stains.
Bounce(_ FabricConditionerDryerSheetshave beenapprovedfor use in all GEDryerswhen usedin accordance
with themanufacturer'sinstructions.
Donotoverload.Thiswastesenergyandcauseswnbkling
Denetdry thefellewingitems; fiberglassitems,woolens,rubber-coateditems,plastics,itemswithplastictnmand
foam-filleditems.
CareandCleaningof theDryer
TheExterior:Wipe or dust any spills or w;ishing
compounds with a damp cloth. D_)'er conu'ol
panel and finishes may be (hmaged bysome
lmmd Upreueatment soil and stain rem{)ver
pro(h_c/s. Apply these products awW fiom the
(hTer. The tabric mW then be washed and dried
normally. Dmnage U)your &Ter cm_se(1by these
products is not o)vered by y_)urwmran/y.
The LintFilter:(lean t lie lint fiher befi)re ea(h
use. Moisten your fingers and rea(h into tlle fiher
opening. Run your fingers a(ross the fiher. Have a
qualified technician vacuum the lint flom tlle (hTer
once a yeat.
The_haust Duct:Inspect and clean the exhmlst
(hinting at least once a year to prevent clogging.
A pmfially clogged exhaust can lengthen the
(hying time.
Follow these steps.
[_ Ttn'n off elecnical supply by disconnecting the
plug flom the wall so( ket.
[_ Disconnect the duct fiom the (hTer.
_] Vacnuiil the dtlct with the hose atta(ThlilenI and
reconnect the duct.
TheExhaust Hoe&Check xdth a mirror tliat the inside
flaps of the hood move fieely when operating. Make
sure that there is not xdldlite (t)irds, insects, et(.)
nesting inside the duct or hood.
FabricCareLabels
Beh)w are tabric care label "s)anbols" fllat affect the ch)thing you will be laundering.
WASH LABELS DRYLABELS
Machine
wash
cycle Nomla[ Permallent PEess/ i Do llot wdllg
wrinkle resistant delicate Hand wash
Water • • • • • •
temperature Ho, W_,m Co_d/_oo_
{50:C/120°F} {40°C/105°F} {30: C/85°F)
BLEACHLABELS
symbols _,,,f)2_2_2d_O,dv_p._,_%,,g_{ooohDo,,o_h_eoch
1o
F-qQro-q
dry DW NoIma[ Pemlanent Piess/ GeIIHe/
wr[E/kle Ees[stant ddicate
Do llot dly
Do llot tumNe dl (used with
do llot wash
.eat ® ®
setting High Medium Low No heat/ail
S ec,a, I I Pq
instructions Lille dly/ DI[_ dly DEyfiat illthe shade
hang to dly

VentingtheDryer
For tile best drying pertorman(:e the dryer needs to be properly vented, The dryer will use more energy
and run longer if it is not vented to the below specifications. Carefully follow the details on Exhausting in
the Installation Instructions.
[] Use only rigid metal or flexible melal 4" diameter
ducm, ork inside d_e dryer cabinet or for exbausdng
to tl_e outside.
[] Do not use plastic or od_er (ombustible ductwork.
[] Use tile shortest length possible.
[] Do not cnlsh or collapse.
[] Avoid resdng the du(t on sharp objects.
[] Ventingmustconformtolocalbuilding codes,
Correct
Venting i
Incorrect
Venting
//

Beforeyoucall forservice...
Troubleshooting tips
Save time and money! Review the charts on the following
pages first and you may not need to call for service.
Possible Causes What ToDo
Dryer is unplugged • Make sure the (hyer plug is pushed completely into
the outlet.
Fuse is blown/circuit breaker is • Che('k the house fi_se/circuit breaker box and
tripped replace fuse or reset breaker. NOTE: Most electric
(h)-ers use two h_ses/breakers.
Fuse is blown/circuit breaker is • Check the house fi_se/circuit breaker box and
tripped, the dryer may tumble replace h_se or resel breaker.
but not heat
Gas service is off • Make sure gas shutoffat &yet and main shutoffare
fiflly open.
Dryer shakes ormakes Some shaking/noise is normal. • Move (hyer to an even tloor space, or a(!just
noise Dryer may be sitting unevenly leveling legs as ne(essaly until even.
Greasy spots on clothes Improper use of fabric softener • Folh)w directions on tabri( soliener pa(kage.
Drying dirtyitems with clean ones • Use your (hyer 1o (hT only clean items. Dirty items (an
stain clean items and the (hTer.
Clothes were not completely clean • Sometimes stains which cannot be seen when [lie
(lo/hes are wel appearafier (h):ing. Use proper
washing procedures beti)re &ying.
Lint on clothes Lint filter is full • (3lean lint s(reen beti)re each h)ad.
Improper sorting • Sort lint producers (like chenille) from lint collectors
(like (orduroy).
Static electricity can attract lint • See suggeslions in tiffs se(lion under STATIC.
Overloading • Separate large h)ads into smaller ones.
Paper, tissue, etc. left in pockets • Empty all pockets befi)re laundering cloflles.
Static occurs No fabric softener was used • T D-a lift)tic soliener.
• Bounce (' Fabri(" (_onditioner DD_er Sheels have been
approved fi)r use in all (iE DueTs when used in
ac(ordan(e with the manula(lurer's inslm(lions.
Overdrying • T D-a tiff)rio sot/chef.
• A({jllsl controls fill"less &ying.
Synthetics, permanent press and • TD_ a fhbric softener.
blends can cause static
Inconsistentdryingtimes Type of heat • Au/on_a/ic dD_ing times xdll vm)_ ,wcor(fing to the [ype
of heat used (electric, n;mmfl or I_l'gas), size of load,
types of tifl)ri(s, wetness of (h)lhes and (ondidon of
exhaust du(-/s.
12

Clothestaketoolong
todry
Possible Causes What ToDo
Improper sorting • Separate hemy items flom liglmveight items (generally,
a well-sorted washer load is a well-sorted &yet load).
Large loads of heavy fabrics (like • I.mge, heaxy f:abrics comain more moisture and take
beach towels) longer to dxy. Sepmate large, heaxy titbrics into smaller
loads to speed dx)dng time.
Controls improperly set • Matdl _ontrol settings to the load you are ch)dng.
Lint filter is full • Clean lint fiher beti)re eveUload.
Improper or obstructed ducting • (heck installation instructions for proper
&_cting/venting.
• Make sure ch_cting is clean, flee of kinks and
unobstructed.
• (heck to see if outside wall dmnper operates easily.
• (heck the Installation Insu_uctions/o make sure the duet
venting is correct.
Blown fuses or tripped circuit • Replace fi_sesor reset drcui/breakers. Since most
breaker &yers use 2 fl_ses/breakers, make sure both m'e
operating.
Overloading/combining loads • Do not put more than one washer load in the &yet at
a/illle.
Underloading • lfy_)u me tiding only one or two items, add a few items to
ensure proper rambling.
Clothes are wrinkled Overdrying • Select a shorter (h)dng time.
•Rem()ve items while they still hold a slight mn__unt of
lllois/ul'e.
Letting items sit in dryer after • Remove items when _Tcle ends and fold or hang
cycle ends ilnmediately.
Clothesshrink Some fabrics will naturally shrink • To avoid shrinkage, ti_llow gm'ment cme labels exacdy.
when washed. Others can be • Some items may be pressed back into shape aller &xdng.
safelywashed, but will shrink •
in the dryer • Ifyou are concerned about slninkalge in a particular item,
do not machine wash or ramble dUit.
/,3

€_
@
m
€_
€_
_fJ
Notes
14

GEDryer Warranty(Forcustomersin the U.S.)
Aft warranty service provided by our Factory Service Centers,
or an authorized Customer Care¢_technician. For service,
carl 800-GE-CARES.
GE Will Replace:
Any part of tile (hyer whMl tails due to a detbct in materials or w_)rkmanship. During this furl
From the date of the _e-year warra_ty"GE _i_ a_s_ pr_dde_ free _f charge"a_ _ab_r and iM1_ne se_ice t_ rep_ace the
originalpurchase detbclive part.
Any extra large or super capacity dryer drumwhi(h tifils due to a dete( t in materials or workmanship.
From the date of the During this five-year limited warranty, you will be responsible tot any labor or in-home sexYi(:e(osts.
originalpurchase
• Service trips to your home to teach you how to use the
product.
•Improper installation.
•Failure of the product if it is abused, misused, or used for
other than the intended purpose or used commercially.
• Replacement of house fuses or resetting of circuit
breakers.
•Damage to the product caused by accident, fire, floods or
acts of God.
•Incidental or consequential damage to personal property
caused bypossible defects with this appliance.
This warranty is extended to the original purchaser and any succeeding owner for products purchased for home
use within the USA. In Alaska, the warranty excludes the cost of shipping or service calls to your home.
Some states do not aflow the exclusion or limitation of incidental or consequential damages. This warranty gives
you specific legal rights, and you may also have other rights which vary from state to state. Toknow what your
legal rights are, consult your local or state consumer affairs office or your state's Attorney General.
Warrantor: General Electric Company.Louisville, KY 40225
/5

ServiceTelephoneNumbers.
GEAnswerCenter_/ntheU.S.:800.626.2000
The (,E Ans_e_ Ceme_ is open 24 horn sa da_, /days a week
In Canada, _ontad: Manager, Consumer Relations, Cameo INC.,l Fa_U)U I.ane, Suite 3 l(t,
( o
Mon_ Urn,N.B., El C 3Ma.
In-HomeRepairService/ntheU.S.:800-432-2737
Expert (;E repair servi( e is only a phone (all away.
InCanada, (all 1-8011-361-3400,
SpecblNeedsServiceIntheU.S.:800.626.2000
GE offers, fiee of dlarge, a brodmre to assistin planning abanier-tiee kiuhen fi)r persons
with limited mobility, IntheU.S.,call 800-TDD-GEAC(800-833-&322).
In Canada,contact: Manager, Consumer Relations, Cameo Inc., 1 Factoi T I,ane, Suite 310,
Moncton, N.B., E1 (9M3.
ServiceContracts/ntheU.S.:800-626-2224
Putdlase a (;E servk e _ontra(t while your warranty is still in effe(t and you'll re{ eive a
substantial discount. (;E ( onsumer Set_dcexdll still be there after your warranty expires.
InCanada,call 1-8011-461-3636.
PartsandAccessories/ntheU.S.:800-626-2002
Individuals qualified to setYice their o_11appliances can have pmts or accessories sent directly
to thdr homes (VISA, MasterCmd and Discover cmds are accepted).
Instructionscontainedinthismanualcoverprocedurestobeperformedbyanyuser.Otherservicing
generallyshouldbereferredtoqualifiedservicepersonnel. Cautionmustbeexercised, since
improperservicingmaycauseunsafeoperation.
Pleaseconsultyour yellowpagesfor yourlocal Camconumber
ServiceSatisfaction
Ifyou are not satisfied with the service you receive flOln GE:
first,contact the people who set_-iced y{)ur appliance.
Next, if you me still not pleased, in the U.S.,x_aiteall the details-including your phone number-m:
Manager, ( ustomer Relations, GE Appliances, Appliance Prok, I,ouisville, KY 40225; or,
in Canada,to Director, Consumer Relations, Camco Inc., 1Facto UI_ane, Suite 310, Moncton, N.B.,
E1C 9M3.
_Printed in Canada
This manual suits for next models
4
Table of contents
Other GE Dryer manuals

GE
GE Profile DPVH880EJ How to use

GE
GE DCCB330GJWC User manual

GE
GE DSXH47EG Manual

GE
GE DBVH512 How to use

GE
GE DuraDrum GTDL310EMWS Manual

GE
GE GFDS350GLWW User manual

GE
GE DBSR453 User manual

GE
GE Profile Harmony DPGT750EC Manual

GE
GE DCCD330EGWC User manual

GE
GE Spacemaker DDP1275G Installation instructions