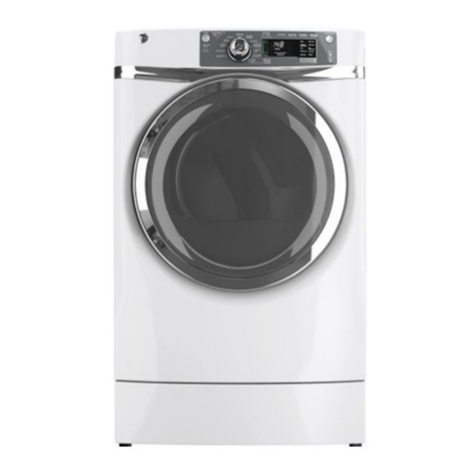
GE Profile DPVH880EJ How to use

GE Appliances
General Electric Company
Louisville, Kentucky 40225
31-9167
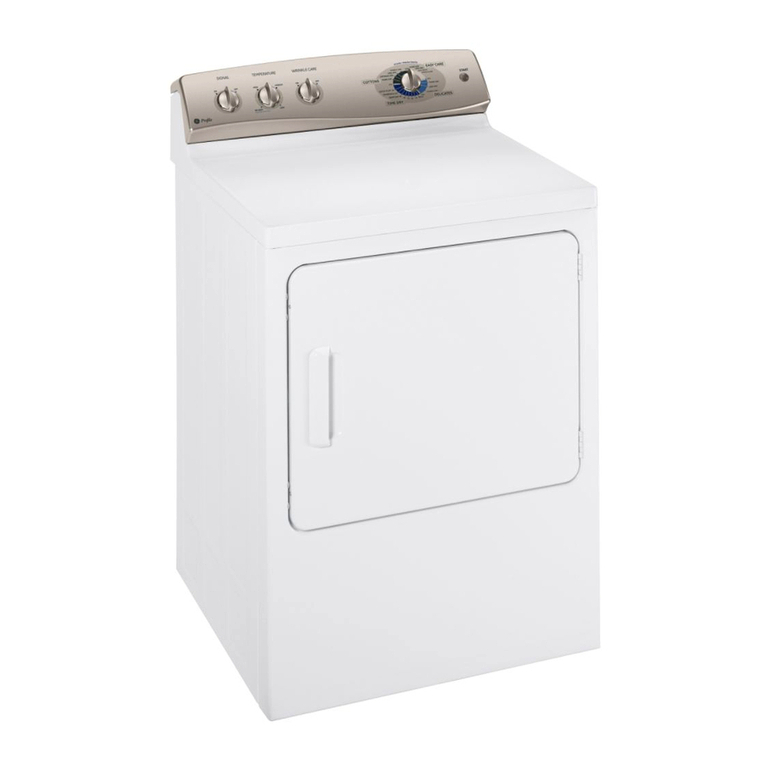
Profile Dryer
DPVH880EJ
DPVH880GJ
Technical Service Guide
August 2008
GE Consumer & Industrial
ELICATS
D
OWER
P
EWRINKLER
D
ARM
W
P
U
IME
T
RY
D
IME
T
RY
D
IR
A
A
LUFF
F
PEED
S
RY
D
CTIVE
A
EAR
W
OTTONS
C
DAMP
ALERT
MY
CYCLE EXTEND
TUMBLE DRUM
LIGHT
LOCK
XTRA
E
RY
D
RY
D
RY
D
OST
M
ACK
B
AMP
D
NTI-
A
ACREAL
B
IGH
H
EDIUM
M
OW
L
ENSOR
S
RY
D
EVEL
L
EMP
T
RY
D
XTRA
E
OW
L
RINKLE REE
WF
ORMAL /
N
IXED OADS
ML
START
RY
D
ESS
L

– 2 –
GE Consumer & Industrial
Technical Service Guide
Copyright © 2008
All rights reserved. This service guide may not be reproduced in whole or in part in
any form without written permission from the General Electric Company.
IMPORTANT SAFETY NOTICE
The information in this service guide is intended for use by individuals possessing
adequate backgrounds of electrical, electronic, and mechanical experience. Any
attempt to repair a major appliance may result in personal injury and property
damage. The manufacturer or seller cannot be responsible for the interpretation
of this information, nor can it assume any liability in connection with its use.
WARNING
If the information in this manual is not followed exactly, fire or explosion may result
causing property damage, personal injury or death. If you smell gas:
– Do not try to light any appliance.
– Do not touch any electrical switch; do not use any phone in the building.
– Immediately call the gas supplier from a neighbor’s phone. Follow the
gas supplier’s instructions.
– If you cannot reach the gas supplier, call the fire department.
WARNING
To avoid personal injury, disconnect power before servicing this product. If electrical
power is required for diagnosis or test purposes, disconnect the power immediately
after performing the necessary checks.
RECONNECT ALL GROUNDING DEVICES
If grounding wires, screws, straps, clips, nuts, or washers used to complete a path
to ground are removed for service, they must be returned to their original position
and properly fastened.

– 3 –
Air Duct Assembly ............................................................................................................................................................34
Airflow ....................................................................................................................................................................................27
Belt Switch............................................................................................................................................................................39
Blower Motor ......................................................................................................................................................................40
Blower Wheel......................................................................................................................................................................42
Burner Assembly and LP Conversion......................................................................................................................46
Component Locator Views...........................................................................................................................................28
Control Board Assembly ...............................................................................................................................................54
Control Features............................................................................................................................................................... 6
Control Panel.......................................................................................................................................................................32
Cycle Options......................................................................................................................................................................10
Display Board.....................................................................................................................................................................55
Door Switch ......................................................................................................................................................................... 35
Drive Belt...............................................................................................................................................................................36
Drum.......................................................................................................................................................................................37
Drum Motor.........................................................................................................................................................................39
Drum Shaft and Bearing................................................................................................................................................38
Drum Slide Assembly......................................................................................................................................................34
Dryer Components...........................................................................................................................................................32
Dryer Features...................................................................................................................................................................12
Dual Idler Assembly.........................................................................................................................................................38
Error Codes .......................................................................................................................................................................... 60
Flame Detector ..................................................................................................................................................................48
Front Panel...........................................................................................................................................................................33
Fuses.......................................................................................................................................................................................36
Gas Valve..............................................................................................................................................................................47
Gas Valve Coils...................................................................................................................................................................46
Heater Assembly...............................................................................................................................................................43
High Limit Thermostat....................................................................................................................................................52
Ignitor.....................................................................................................................................................................................48
Ignitor Circuit Operation................................................................................................................................................49
Inlet Control Thermistor.................................................................................................................................................51
Inlet Safety Thermostat.................................................................................................................................................51
Introduction......................................................................................................................................................................... 5
Moisture Sensor ................................................................................................................................................................35
Nomenclature .................................................................................................................................................................... 4
Operation Overview.........................................................................................................................................................26
Outlet Control Backup Thermostat...........................................................................................................................53
Outlet Control Thermistor .............................................................................................................................................52
Pedestal Installation (Washer and Dryer)..............................................................................................................20
Power Board........................................................................................................................................................................54
Power Board Connector Locator View....................................................................................................................30
Rack Dry Calrod®Element ...........................................................................................................................................50
Rack Dry Thermostat......................................................................................................................................................53
Reversing the Door Swing ............................................................................................................................................14
Sales Demo Mode.............................................................................................................................................................11
Schematics and Wiring Diagrams............................................................................................................................63
Service Test Mode.............................................................................................................................................................56
Stacking Instructions ......................................................................................................................................................23
Top Panel ..............................................................................................................................................................................33
Triac.........................................................................................................................................................................................43
Troubleshooting ................................................................................................................................................................56
Warranty ..............................................................................................................................................................................68
Table of Contents
– 4 –
Nomenclature
The letter designating
the year repeats every
12 years.
Example:
T - 1974
T - 1986
T - 1998
Serial Number
The first two characters of the serial number
identify the month and year of manufacture.
Example: AR123456S = January, 2008
A- JAN 2008 - R
D - FEB 2007 - M
F - MAR 2006 - L
G - APR 2005 - H
H - MAY 2004 - G
L - JUN 2003 - F
M - JUL 2002 - D
R - AUG 2001 - A
S - SEP 2000 - Z
T - OCT 1999 - V
V - NOV 1998 - T
Z - DEC 1997 - S
The nomenclature tag is located on
the front panel inside the door.
Note: The technical sheet is located
inside the control panel.
Model Number
Capacity/Configuration
V = Very Big
D P V H 8 8 0 E J 0 W W
Brand
D = General Electric
Feature Packages
P = Pedestal
Backsplash Control/Platform
H = Horizontal
Color
WW = White
MV = Vermillion (Red)
MG = Champagne
Engineering Revision
Alpha or Numeric
Model Year
J = 2008
Fuel/Voltage
E = 240V 60 Hz.
G = Gas 120V 60Hz.
Nomenclature
Control
Features

– 5 –
The new GE dryer has the following features:
Large 7.5-cubic foot dryer drum - Reverses direction during cycle.•
Integrated Drying Rack for drying delicate items such as washable sweaters.•
Drum Lamp•
My Cycle selection saves a favorite cycle for future use.•
Built-in service test mode. Specific dryer components can be operated. Error codes are recorded and•
accessible on the control panel display.
Dual Thermistors - Thermistors are more sensitive to temperature changes and can relay the•
information faster than thermostats. The dryer utilizes dual thermistors to monitor incoming air
temperature as well as air temperature leaving the drum. The sensors work together with the variable
heater and the blower to provide consistent, even heat.
Moisture Sensor - The moisture sensor allows the control to monitor the fabric for moisture content and•
end the cycle at the desired moisture level.
Flush Door Handle•
Reversible Door (Kit included.)•
UV Stabilizers - The control panel, control panel cover, and door outer panel have UV stabilizers to•
prevent yellowing when exposed to sunlight.
The GE dryer can be installed on top of the GE Front Load Washer. (Stacking kit supplied with washer.)•
Pedestal available at additional cost. White (model number DPVH515EJ0WW), Red (model number•
DPVH515EJ0RR), and Gold (model number DPVH515EJ0GG)
Introduction
Note: The electric dryer DPVH880EJ is
not recommended for 208V installation.

– 6 –
Throughout this manual, features and appearance may vary from your model.
Control Features
(Continued Next Page)
1
49 8
576
3
2
WARNING! To reduce the risk of fire, electric shock, or injury to persons, read the IMPORTANT
SAFETY INSTRUCTIONS before operating this appliance.

– 7 – (Continued Next Page)
2Dry Cycles
The dry cycle controls the cycle time for the drying process. The chart below will help you match
the dry setting with the loads.
Sensor Cycles
COTTONS For cottons and most linens.
NORMAL/ For loads consisting of cottons and poly-blends.
MIXED LOAD
WRINKLE FREE For wrinkle-free/easy care and permanent press items.
ACTIVE WEAR Clothing worn for active sports exercise and some casual wear. Fabrics include new
technology finishes and stretch fibers such as Spandex.
DELICATES For lingerie and special-care fabrics.
SPEED DRY For small loads that are needed in a hurry, such as sports or school uniforms. Can also be
used if the previous cycle left some items damp, such as collars or waistbands.
Timed Dry Cycles
DEWRINKLE For removing wrinkles from items that are dry or slightly damp. This cycle is not
recommended for delicate fabrics.
WARM UP Provides 10 minutes of warming time to warm up clothes.
AIR FLUFF Use this feature to tumble items without heat.
My Cycle (on some models)
MY CYCLE Press to use, create or modify custom dry cycles.
Timed Dry
Use to set your own dry time. TIMED DRY is also recommended for small loads.
To use TIMED DRY:
1. Turn dry cycle dial to TIMED DRY.
2. Select the drying time by pressing the +and –buttons. You can increase the time in 10-minute
increments up to 21⁄2hours.
3. Select the DRY TEMP.
4. Close the door.
5. Press START/PAUSE.
Sensor Dry Level
The sensor continuously monitors the amount of moisture in the load. When the moisture in your
clothes reaches your selected dry level, the dryer will stop.
EXTRA DRY Use for heavy-duty fabrics or items that should be very dry, such as towels.
MORE DRY Use for heavy or mixed type of fabrics.
DRY Use for normal dryness level suitable for most loads. This is the preferred cycle
for energy saving.
LESS DRY Use for lighter fabric (ideal for ironing).
DAMP For leaving items partially damp.
3
4
Power
Press to “wake up” the display. If the display is active, press to turn the dryer off.
NOTE: Pressing POWER does not disconnect the appliance from the power supply.
1

– 8 –
Dry Temp
You can change the temperature of your dry cycle.
ANTI-BACTERIAL This option may only be used with COTTONS or MIXED LOAD cycles. This option reduces
certain types of bacteria by 99.9%, including: Staphylococcus aureus, Pseudomonas
aeruginosa and Klebsiella pneumoniae*. The anti-bacterial process occurs when high
heat is used during a portion of this drying cycle.
NOTE: Do not use this cycle on delicate fabrics.
* The Anti-Bacterial Cycle is Certified by NSF International (formerly National Sanitation
Foundation) to NSF Protocol P154 Sanitization Performance of Residential Clothes Dryers.
HIGH For regular to heavy cottons.
MEDIUM For synthetics, blends and items labeled permanent press.
LOW For delicates, synthetics and items labeled Tumble Dry Low.
EXTRA LOW For lingerie and special-care fabrics.
START/PAUSE
Press to start a dry cycle. If the dryer is running, press it once and it will pause the dryer.
Press it again to restart the dry cycle.
My Cycle (on some models)
Set up your favorite combination of settings and save them here for one touch recall.
These custom settings can be set while a cycle is in progress.
To store a MY CYCLE combination of settings:
1. Select your drying cycle.
2. Change DRY TEMP and SENSOR DRY LEVEL settings to fit your needs.
3. Select any drying OPTIONS you want.
4. Press and hold the MY CYCLE button for three seconds to store your selection. A beep will sound
and the button will light up.
To recall your stored MY CYCLE combination:
Press the MY CYCLE button before drying a load. The light around the button will light up when
MY CYCLE is selected.
To change your stored MY CYCLE combination:
Follow steps 1–4 in “To store a MY CYCLE combination of settings”.
Display
“CLEAN LINT FILTER” (message)
This message stays on for 15 minutes after the cycle finishes. This message is only a reminder.
5
6
8Special Cycle Status OR
Dryer Rack OR Timed Dry
Est. Cycle Time
OR Time to Dry
Delay Time
Status
Lint Filter Status
Screen
7
DELAY TIME
(Continued Next Page)

– 9 –
Specialty Cycles
1. Turn the CYCLE knob to SPECIAL CYCLES. A list of cycle options will appear in the display.
2. Using the cursor buttons, select a CATEGORY.
3. Using the cursor buttons, select a CYCLE.
Press the BACK button to take you back to the CATEGORIES.
4. Press ENTER to select.
5. Press the START/PAUSE button.
SPECIALTY CYCLES include:
Garments
■Jeans
■Khakis
■Coats
■Hosiery/Bras (use mesh bag)
Bed and Bath
■Towels
■Sheets
■Blankets (Cotton)
■Down Pillows/Comforters
Other Specialty
■Throw Rugs
■Pet Bedding
■Performance Garments
■Fleece
■Dryel
■Fragile Cotton
■Dryer Rack
9
Washer Communicated Cycles
To turn on communication, press the SETTINGS
button on the washer control panel. When “DRYER
LINK” appears in the display, press ENTER. Using
the arrow keys, select ON; then press ENTER.
When the washer cycle is completed, the washer
will communicate with the dryer when any button
on the control panel is touched or the door is
opened.
The washer will display, “TRANSFERRING CYCLE
INFORMATION TO THE DRYER” and the dryer will
display, “RECEIVING CYCLE INFORMATION TO THE
DRYER”.
The dryer will only communicate with the washer if
the dryer is not running a cycle.
If the washer starts a new cycle before the
dryer has a chance to communicate with it, the
information will be lost.
_________________________________________________________________________________________

– 10 – (Continued Next Page)
Cycle Options
Extend Tumble
Minimizes wrinkles by adding
approximately 60 minutes of no-heat
tumbling after clothes are dry. The beeper
will sound every 2 minutes to remind you
to remove the clothes. The ESTIMATED TIME
REMAINING display will show 00.
The light around the button will light up when
EXTEND TUMBLE is on.
Damp Alert
This option causes the dryer to beep when
clothes have dried to a damp level. Remove
items that you wish to hang dry. The DAMP
ALERT will only beep when this option is
selected.
Removing clothes and hanging them when
they are damp can reduce the need to iron
some items.
The light around the button will light up when
DAMP ALERT is on.
Drum Light
Press this button to turn on the light in the
dryer.
Press the button again to turn the light off.
This only controls the light when the door is
shut. When the door is opened, the light
comes on automatically.
The light around the button will light up when
DRUM LIGHT is on.
Delay Start
Use to delay the start of your dryer.
1. Choose your dry cycle and any options.
2. Press DELAY START. You can change the
delay time in 1/2 hour increments, using
the +or –arrow pads.
3. Press the START/PAUSE button to start
the countdown.
The countdown time will be shown in the
ESTIMATED TIME REMAINING display.
NOTES:
■If the door is opened while the dryer is
in DELAY, the countdown time will not
restart unless the door is closed and
START/PAUSE button has been pressed
again.
■You can delay the start of a dry cycle up
to 24 hours.
The light around the button will light up when
DELAY START is on.
Lock
You can lock the controls to prevent any
selections from being made. Or you can lock
the controls after you have started a cycle.
Children cannot accidentally start the dryer
by touching pads with this option selected.
To lock the dryer, press the LOCK button. To
unlock the dryer, press and hold the LOCK
button for 3 seconds.
The light around the LOCK button will light up
when the controls are locked.
Even though the controls are locked, the
POWER button is still active in case you have
to turn the unit off.
Press to lock control.
Hold 3 seconds to unlock.
Note: Not all features are available on all dryer models.

– 11 –
Settings
Under the SETTINGS option, you can
adjust the volume or the brightness of
the display.
VOLUME
■End of Cycle (signal) volume can be set
from HIGH, MED, LOW or OFF.
■Control Sounds volume can be set from
HIGH, MED, LOW or OFF.
DISPLAY BRIGHTNESS can be set from
HIGH, MED or LOW.
After you have made your selection,
press enter.
Sales Demo Mode
This mode allows the user to view a dryer cycle.
When in the sales mode, it will not operate through
normal cycles, but will simulate those cycles
electronically on the display.
TO ENTER DEMO MODE:
Unplug dryer. Reconnect power.1.
Within 30 seconds of plugging unit in, open2.
door and press START/PAUSE 4 times within 3
seconds.
DEMO MODE ENTRY3. will appear on display.
TO EXIT DEMO MODE:
Unplug dryer. Reconnect power.1.
Within 30 seconds of plugging unit in, open2.
door and press START/PAUSE 4 times within 3
seconds.
DEMO MODE EXIT3. will appear on display.
Once in Demo mode, if there are no key presses, the
display will begin to scroll “DEMO MODE – TRY ME”.

– 12 –
Dryer Features
Drum Lamp
Before replacing the light bulb, be sure to unplug the dryer power
cord or disconnect the dryer at the household distribution panel by
removing the fuse or switching off the circuit breaker. The bulb is a
120 VAC, 10-watt, threaded base bulb. Reach above dryer opening
from inside the drum. Remove the bulb and replace with the same
size bulb (Part # WE4M305).
Built-in Rack Dry System™ with Tumble Care Baffles™
A handy drying rack may be used for drying items, such as tennis
shoes. Place items flat on the drying rack and block such items as
wool sweaters and delicate fabrics. Dry with low heat.
To install the Built-in Rack Dry System™ with Tumble Care
Baffles™
Make sure the drum of the dryer is oriented so the rack drying1.
system is on the left side of the dryer.
Pull the drying rack screen out from the left side and engage the2.
handle “post” in the opposite baffle slots.
Place the garment on the rack and close the door.3.
Press the4. DRYER RACK button.
Select desired TIME.5.
Press the6. START/PAUSE button.
Note:
On electric models, if the drum light is activated by selecting• DRUM LIGHT on the control panel during the rack dry cycle,
heater operation will stop.
Do not use this drying rack when there are other clothes in the•
dryer.
Make sure to detach the drying rack at the end of the cycle.•
(Continued Next Page)
_________________________________________________________________________________________
Bulb

– 13 –
Drying Rack (Optional Accessory)
A handy drying rack may be used for drying delicate items, such as
washable sweaters. Place items flat on the drying rack and block
such items as wool sweaters and delicate fabrics. Dry with low
heat.
To install the drying rack, pull up the lint filter slightly. Insert the
drying rack into the slots, then push the filter back down.
Note
The drying rack must be used with the TIMED DRY or RACKDRY•
(on some models) cycle.
Do not use this drying rack when there are other clothes in the•
dryer.
To Use the Built-In Hook for Hanging Garments
Make sure the drum of the dryer is oriented so the rack drying1.
system is on the top center of the dryer.
Using your finger, pull the hook out of the baffle.2.
Hang the garment on a hanger, hang the hanger on the hook,3.
and close the door.
Press the4. DRYING RACK button.
Select the desired TIME.5.
Press the6. START/PAUSE button.
_________________________________________________________________________________________

– 14 –
Reversing the Door Swing
Important Notes:
Read the instructions all the way through before•
starting.
Handle parts carefully to avoid scratching paint.•
Provide a non-scratching work surface for the•
doors.
Set screws down by their related parts to avoid•
using them in the wrong places.
All screws must be hand-tightened.•
Normal completion time to reverse the door•
swing is 30–60 minutes.
Important: Once you begin, do not move the
cabinet until door-swing reversal is completed.
These instructions are for changing the hinges from
the right side to the left side―if you ever want to
switch them back to the right side, follow these
same instructions and reverse all references to the
left and right.
Kit Contents
Chrome Door Cap
Chrome Door Hinge Cap
Inner Door Cap
Tools Needed
Phillips-head Screwdriver
Putty Knife or Thin-Blade
Screwdriver
(Continued Next Page)

– 15 –
Door Parts
Hinge Cap
Chrome Door Cover
2 #8 x 0.75" Small Tapping
Screws
Hinge Assembly
Chrome Door Cap
9 #8 x 0.625" Small
Tapping Screws
2 Handle Caps
Outer Handle
Inner Door Cap
4 #8 x 0.50" Machine
Screws
7 #10 x 1.125" Large
Tapping Screws
Inner Handle
2 #10 x 0.750" Large
Tapping Screws
(Continued Next Page)

– 16 –
To reverse the door swing:
Unplug the dryer from its electrical outlet.1.
2. Remove the side hinge cap by opening the dryer
door and removing the screw from behind the
hinge. Then, using your hand, pop the hinge cap
off the dryer.
Hinge
cap
3. Hold the door and remove the 2 hinge (#10 x
0.75-in.) tapping screws. Pull the door away
from the dryer front panel.
Screws
4. Lay the door down on a soft, protected, flat
surface so the inner part faces upward (door
resting on the handle side).
5. Remove the 7 (#10 x 1.125-in.) tapping screws
located around the perimeter of the door.
7 Screws
6. Turn the door assembly over and separate the
chrome cover from the inner door. Put the inner
door aside on a soft, protected, flat surface.
(Continued Next Page)

– 17 –
7. Lay the chrome cover down on a soft, protected,
flat surface so the inner part faces upward
(resting on the handle side).
8. Disassemble the door cap from the chrome
cover on the handle side by removing 2 (#8 x
0.625-in.) tapping screws.
Door
cap
2 screws
9. Disassemble the inner handle from the outer
handle by removing 3 (#8 x 06.25-in.) tapping
screws. Disassemble the outer handle from the
chrome cover by removing 4 (#8 x 0.625-in.)
tapping screws.
Remove
4 screws
(outer
handle)
3 screws
(inner
handle)
(Continued Next Page)
10. Pop the 2 handle caps out toward you and
reassemble on the opposite side of the chrome
cover, where you removed the outer handle.
Handle caps
11. Assemble the outer handle onto the opposite
side of the chrome cover, using 4 (#8 x 0.625-in.)
tapping screws. Reassemble the inner handle to
the outer handle, using 3 (#8 a 0.625-in.) tapping
screws.
Replace
4 screws
(outer
handle)
3 screws
(inner
handle)

– 18 –
12. Assemble the new right-side door cap (from
reversibility kit), using 2 (#8 x 0.625-in.) tapping
screws.
Door cap
Screws
13. Put the chrome cover aside on a soft, protected,
flat surface.
14. Lay the inner door down on a soft, protected,
flat surface so the inner part faces up.
15. Remove the 2 plug buttons on the opposite side
of the hinge, using a putty knife or thin-blade
screwdriver.
16. Disassemble the inner door cap from the inner
door by removing 2 (#8 x 0.75-in.) tapping
screws.
17. Disassemble the hinge from the inner door by
removing 4 (#8-32 x 0.50-in.) machine screws.
Hinge
Remove
4 screws
2 screws
2 plug
buttons
Inner door
cap
18. Assemble the hinge to the opposite side of the
inner door, using 4 (#8-32 x 0.50-in.) machine
screws.
19. Assemble the new inner door cap (from
reversibility kit) on the opposite side of the hinge,
using 2 (#8 x 0.75-in.) tapping screws.
20. Install the 2 plug buttons on the opposite side of
the hinge in the 2 remaining holes.
Replace
2 screws
Hinge
Replace
4 screws
Replace
2 plug
buttons
Inner
door cap
21. Turn the inner door over and place on a soft,
protected, flat surface so that the inner part is
facing down.
(Continued Next Page)

– 19 –
7 Screws
23. Remove the 2 plug buttons on the dryer front
panel, using a putty knife or other flat tool, and
reinstall on the opposite side. Switch the strike
bracket and its cover by removing 2 (#8 x 0.625-
in.) tapping screws for each and reinstalling on
opposite sides.
Strike
bracket
2 Plug
buttons
Strike
cover
24. Place the door back on the dryer front panel,
making sure the latch is engaged and the hinge
is sitting in the two openings in the dryer front.
Assemble the door to the front cabinet, using 2
(#10 x 0.75-in.) tapping screws.
Install screws
25. Install the new left-hand hinge cap (from the
reversibility kit) onto the hinge, by opening the
dryer door and screwing the hinge cap into
place.
Note: Save the remaining caps and covers in case
you want to reverse the hinge again.
Hinge cap
22. Assemble the chrome cover to the inner door by
placing them together. Flip the door assembly
over and assemble, using 7 (#10 x 1.125-in.)
tapping screws.
26. Plug the dryer into its electrical outlet.

– 20 –
Pedestal Installation (Washer and Dryer)
Optional 12-inch-high storage drawer pedestals
with dividers are available to provide convenience
and extra storage space for detergent, dryer
sheets, and other cleaning supplies. The pedestal
installation kit includes 4 support pads, 4 mounting
screws, and a drawer divider.
(Continued Next Page)
4 Support Pads
4 Mounting Screws
Kit Contents
Tools Needed
Drawer Divider
Phillips-head Screwdriver
9/16" Open End Wrench
or Adjustable Wrench
8 mm Socket Wrench
WARNING!
Due to the size and weight of these products, and
to reduce the risk of personal injury or damage to
the product, two people are required for proper
installation.
Installation Preparation
Remove the packaging.•
The drawer divider is taped at the top of the•
shipping carton. Remove the divider and set
aside for final installation.
Flatten the product carton to use as a pad to lay•
the washer or dryer down on its side. Continue
using the carton to protect the finished floor in
front of the installation location.
To install the pedestal:
Carefully lay the washer or dryer on its side to1.
access the leveling legs on the bottom of the
appliance.
Caution: Do not lay the washer or dryer on its back!
Note: Use an open-end wrench to remove the
washer or dryer leveling legs.
Back out and remove
all 4 leveling legs
Spirit Level
Other manuals for Profile DPVH880EJ
2
This manual suits for next models
1
Table of contents
Other GE Dryer manuals