7
B. Tools Recommended for Installation
The following tools will cover most of the
installation sites encountered:
1. 3/8" variable speed electric drill.
2. Extension work light with outlet.
3. Safety glasses.
4. 1¼" porcelain hole cutter kit.
5. 1¼" Greenlee hole punch and 1/8" and
½" metal drill bits for pilot hole.
6. Center punch and hammer.
7. 1¼" wood bit.
8. Concrete drill bits.
9. Assorted wood and metal drill bits including
7/32" metal drill bit.
10. Phillips head and at blade screwdrivers.
11. ½", 9/16" and 5/8" open end wrenches.
12. 10" Crescent wrench with jaws taped to hold
faucet.
13. Basin wrench or 10" pipe wrench.
14. Teon tape.
15. Wide masking tape or duct tape.
16. Plastic tubing cutter.
17. Extra plastic tubing.
18. Low range air pressure gauge.
19. Bicycle hand air pump.
20. Small bottle of liquid chlorine bleach.
21. Graduated measuring cylinder.
22. Paper towels, wisk broom and assorted clean
up materials.
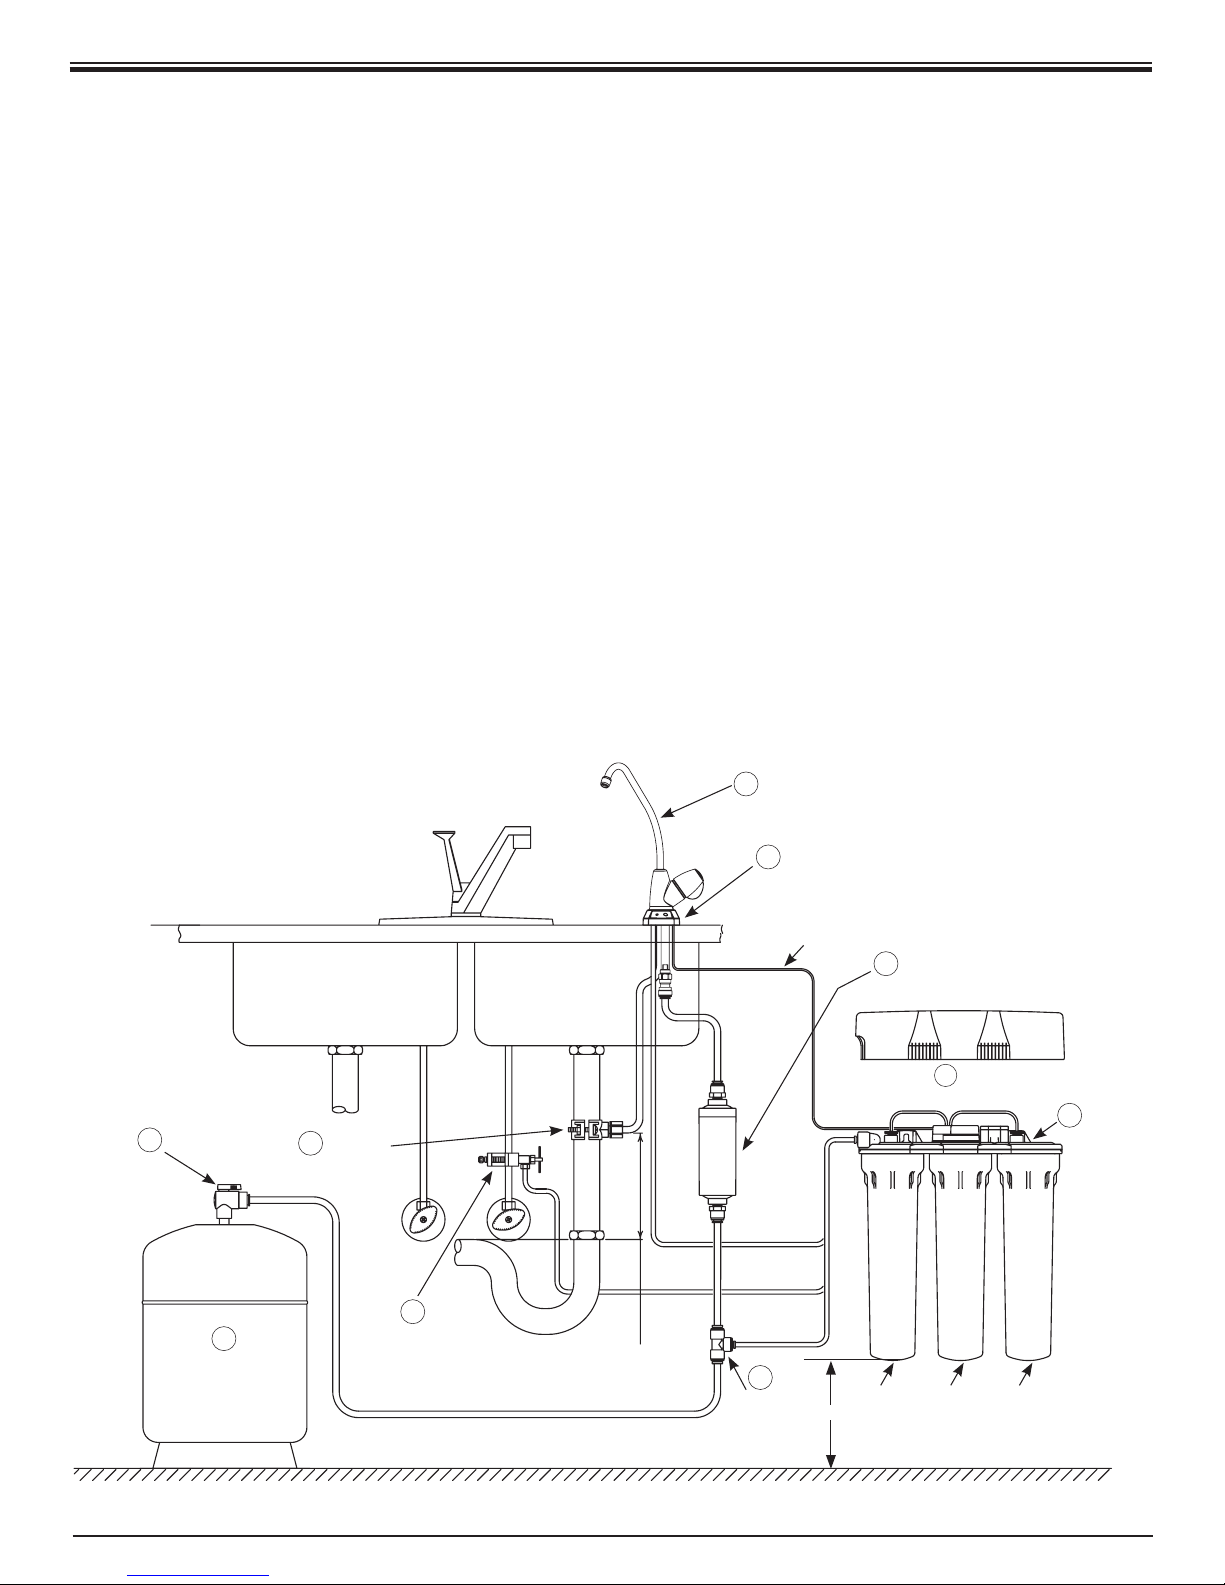
C. Site Selection for Major System Components
The R.O. System was designed to t under a
sink, however, because of space limitations
or other reasons, the system’s exible design
allows for other locations. When determining the
location remember that access to a cold water
tap line, the household drain, and ease of lter
replacement are important considerations.
All components and tubing should be located in
an area not exposed to freezing temperatures. If
winter temperatures are severe, the area should
be above the minimum temperature listed in
Table B, page 4 for proper performance. Do not
expose unit or tubing to direct sunlight.
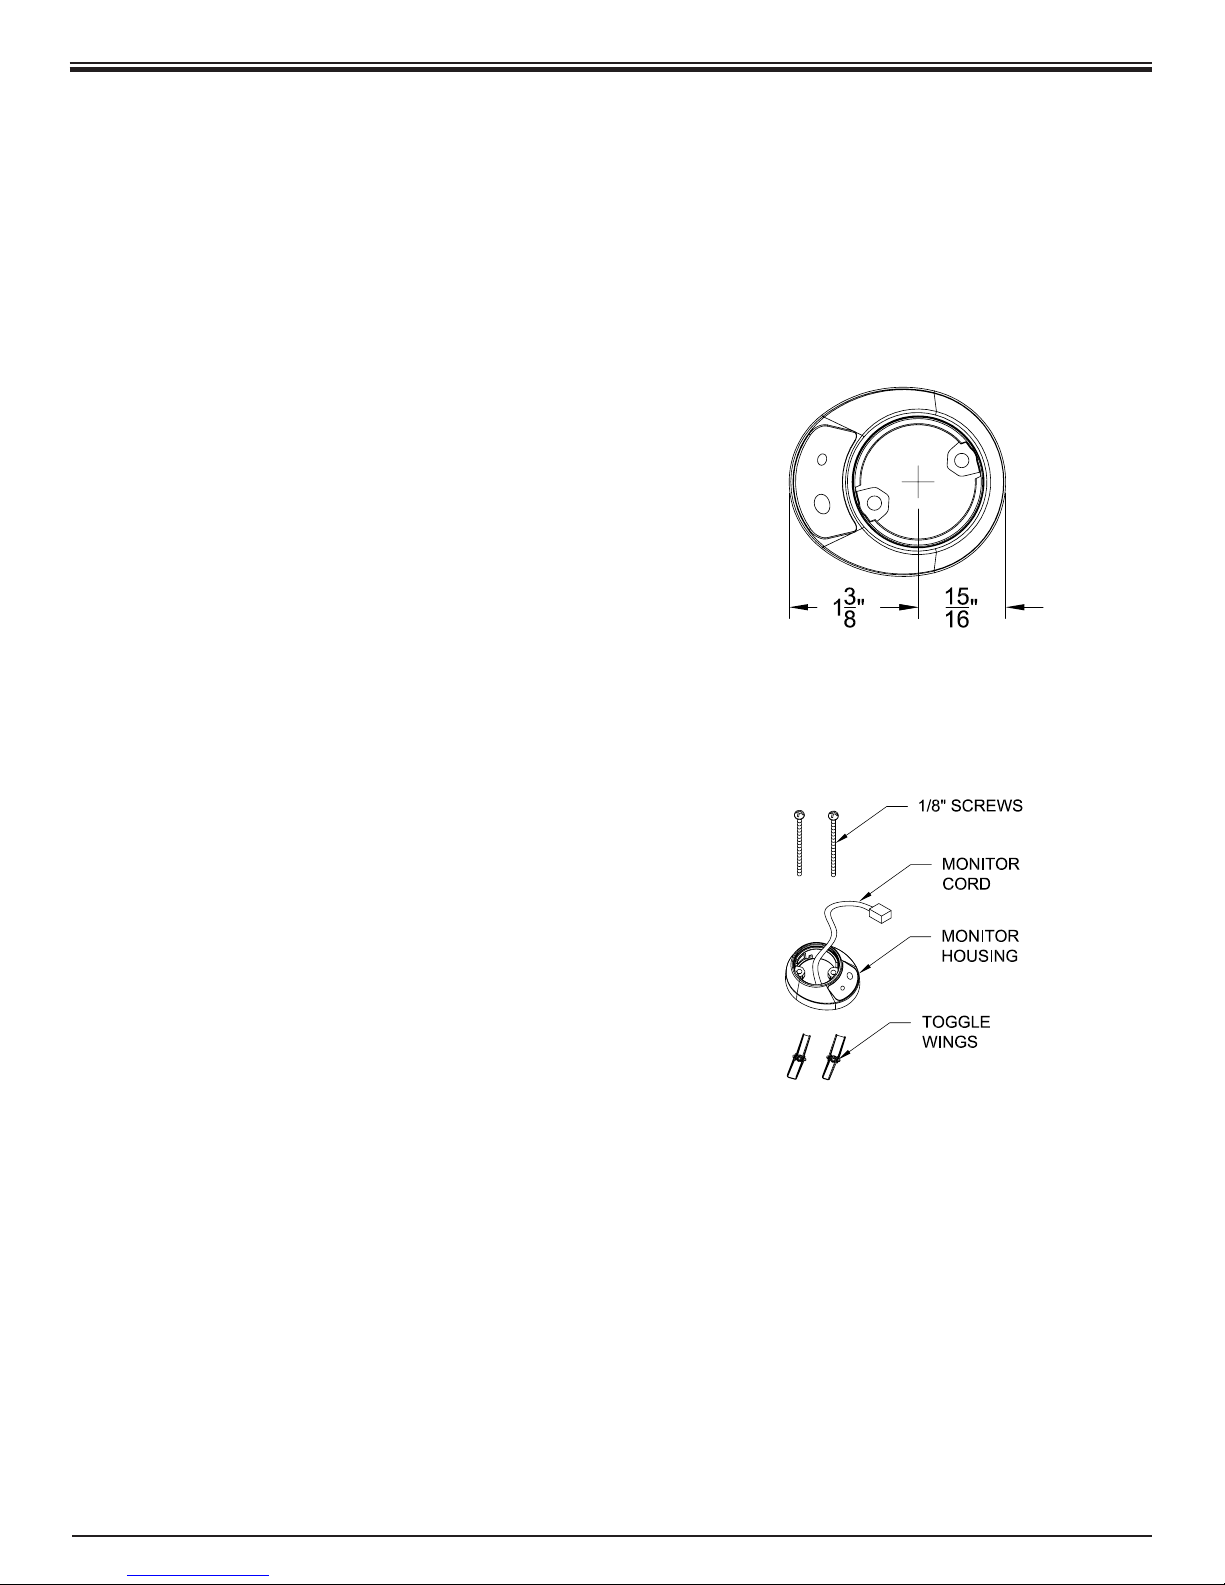
1. Dispensing Faucet–The faucet should be
placed near the sink where drinking water
is normally obtained. Convenience of use
(lling of water pitchers and glasses), and
an open area beneath the faucet under the
sink for attaching product and drain tubing
are considerations. A 2" diameter at surface
is required above and below the installation
site. The thickness of the mounting
surface should not exceed 1¼". Watch for
strengthening webbing on the underside of
cast iron sinks.
2. Drinking Water Holding Tank–The Holding
Tank may be placed where it is convenient
within 10 feet of the faucet; under the sink or
in an adjacent cabinet are best the choices.
If a longer run of tubing is required, the
tubing should be the 3/8" diameter OD size
to prevent a high pressure drop. Remember,
these tanks can weigh up to 30 pounds when
full of water; a rm, level area is required.
3. R.O. Manifold Assembly–The manifold can
be installed on either the right or left side
of the under–sink area or a cabinet. The
right side is recommended because all the
tubing will be to the back of the cabinet and
out of the way. Installation in the basement
is also an option; one location is near the
laundry/utility sink where cold potable water
and drain access are handy. The mounting
location should allow adequate clearance
and accessibility for cartridge changes.
4. Feed Water Connection–The Feed Water
Saddle Valve should be located as close to
the manifold assembly as possible. USE A
POTABLE COLD WATER SUPPLY ONLY.
Softened water is preferred as it will extend
the life of the R.O. Membrane.
5. Drain Connection–The waste water must
go to drain through an anti–siphon air gap.
The air gap is provided for in the base of
the faucet. If discharging into a utility sink
or standpipe, an air gap of greater than 1"
above the ood rim must be provided.
Do NOT connect the system drain line to
the dishwasher drain or near the garbage
disposal. Backpressure from these units may
cause the air gap to overow.