85082, 85085
Electronic Torque Wrench Operation Instruction
Operation Instruction for Electronic Torque
Wrench
Precautions:
- Please read the operation manual of electronic torque
wrench carefully before the use.
- Do not use it when it is shutdown.
- When applying a torque, do not press any button.
- Never loosen the screw and nut with an electronic torque
wrench.
- Do not add an extension rod on the handle. For example:
plastic pipe or iron tube
- Do not apply force at the end of handle. When applying force,
hold the center of handle.
- The force beyond the maximum torque range will cause
damage to the wrench.
- Follow the correct operating method of tools for your own
safety and to avoid the distortion of wrench.
- Do not use the sleeves and accessories that are damaged or
cracked which may cause damage to the torque wrench.
- The sleeve of correct specification shall be used for the nut.
- Make sure that all parts, including the adapter and ratchet
head, are able to withstand the torque you need before use.
- Make sure that the torque you want to apply meets the
torque range of wrench before use.
- Correct this wrench when the applied torque exceeds the
large torque value
- Please read the operation manual of electronic torque
wrench carefully before the use and follow the process
described in the manual.
- Make sure that the ratchet is switched to the correct position.
- Properly adjust the posture to avoid the falling.
- Operator and bystanders shall wear the safety glasses to
protect their eyes.
- Correct it regularly to ensure the accuracy of wrench.
- Do not use electronic torque wrench on live items
- Plastic handle is not insulated and may cause electric shock
and injury.
- Do not dismantle the wrench by yourself except for installing
the battery. 0therwise, the warranty service will be invalid.
Operation instructions of electronic torque wrench
- First confirm that the electronic torque wrench is not
stressed, and then press [ CLR ] Key 3s to start the
machine
- Install the sleeve of correct specification on the electronic
torque wrench.
- Make sure that the tightened object is perpendicular to the
electronic torque wrench.
- Press [CLR] to clear before each use
Ratchet head
Ratchet switching
Forward/Reverse
Screen display &
function options
Back cover of battery
compartment Handle
Description of Appearance Battery
Please install two 2AA alkaline batteries as shown in the figure.
1) Loosen the screws with the PH2 screwdriver.
2) Follow up the instruction
to install 2AA (Alkaline]
batteries.
3) Finally tighten the screws
please restart the torque wrench after the battery is replaced
to maintain the best accuracy.
Only use 2AA alkaline battery. The incorrect battery may cause the damage
or leakage of battery or the damage or malfunction of torque wrench. The
electrolyte will damage the equipment and other objects. Please follow the
instructions below:
- Install the battery correctly along the positive and negative (+/ -) directions
indicated on the instructions.
- If the wrench is stored for a long time, be sure to remove the battery.
- A battery of same type shall be used.
- Replace the exhausted battery as soon as possible.
- Never attempt to charge the alkaline battery.
PS
About Battery
Screen display & function options
Red LED indicator
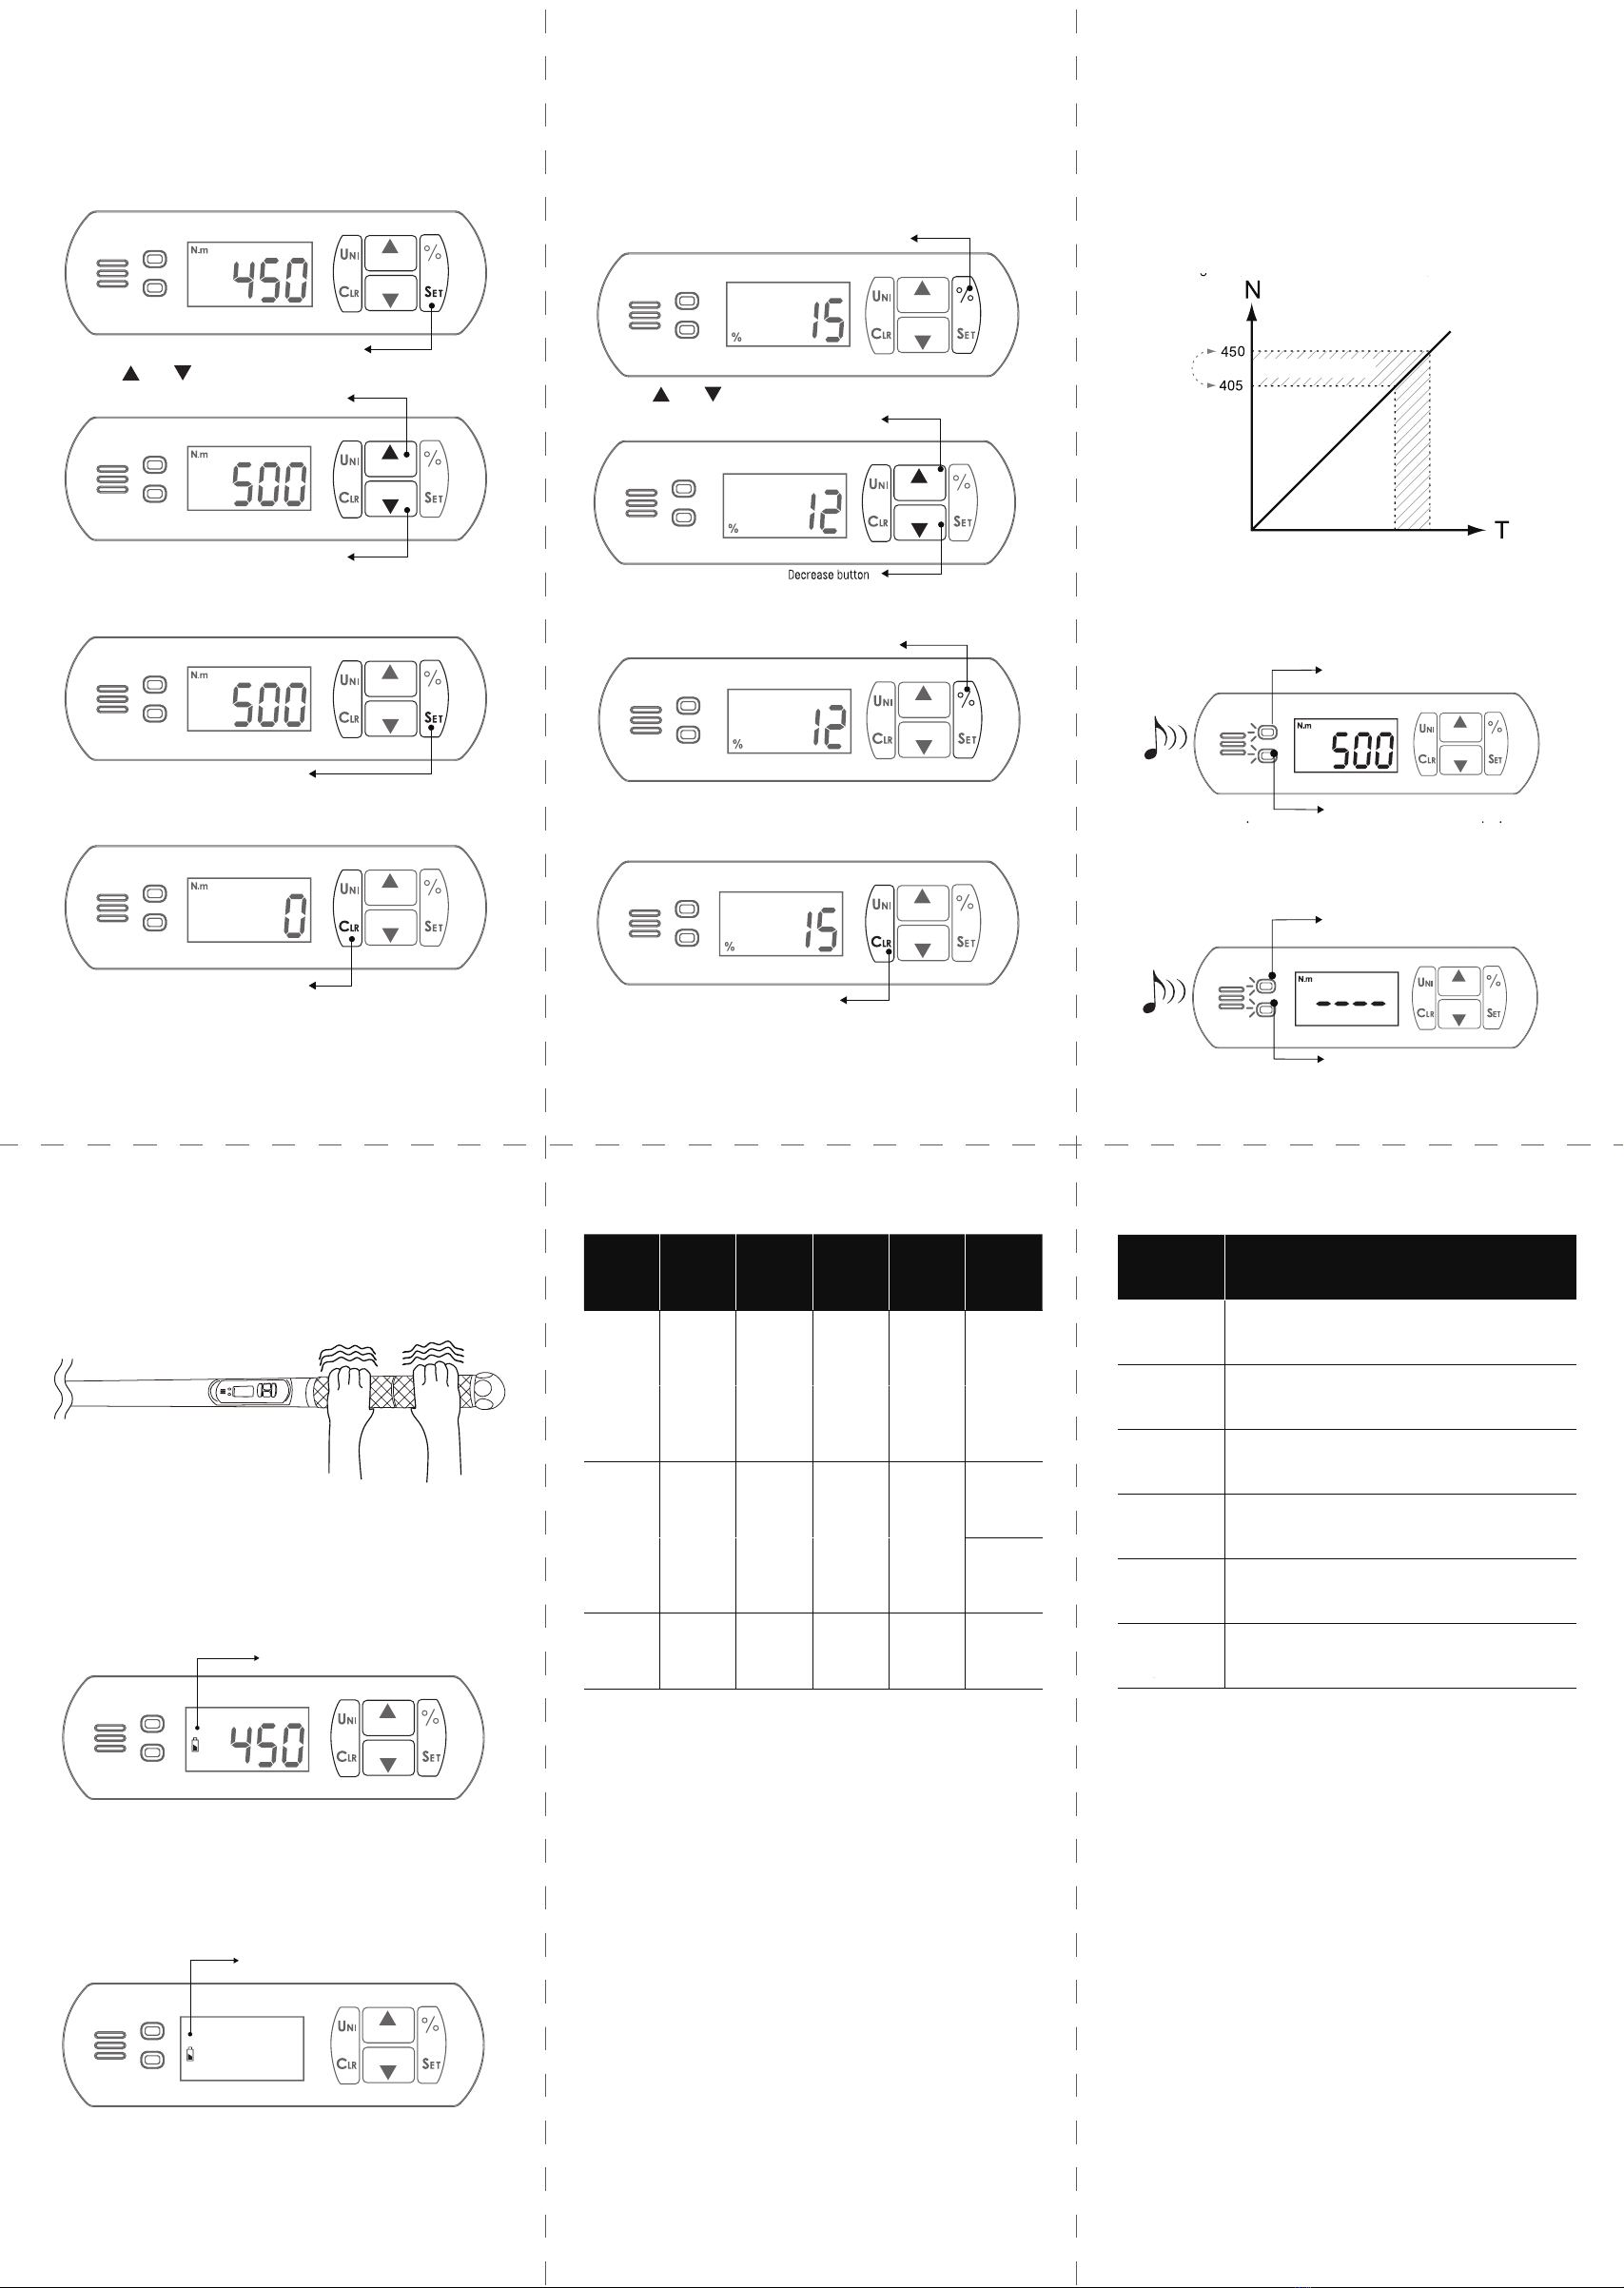
Warning torque value % set button
Increase button
Conversion of torque units:
-Press (CLR) for 3s to power on
PS
Be sure to power on without stress. Otherwise the electronic
torque wrench may be damaged.
Power off -
Conversion of torqueunits:
BuzzerGreen LED indicator
Torque value set/storage
Decrease button
Clear
LCD screen
Auto: Without stress and with "0" on screen, the system will
automatically shut down if no key is pressed within 10 Minute.
Manual shutdown: without the force applied, press and hold
(CLR] for 6s to shut down.
-Press the (UNI) button to switch the torque unit
-5 torque units: Nm, Ibf-ft, lbf-in, kgf-m, kgf-cm
Clear
Conversion of torque units: