manuals.online logo
Brands
  1. Home
  2. •
  3. Brands
  4. •
  5. Gecko
  6. •
  7. Control Unit
  8. •
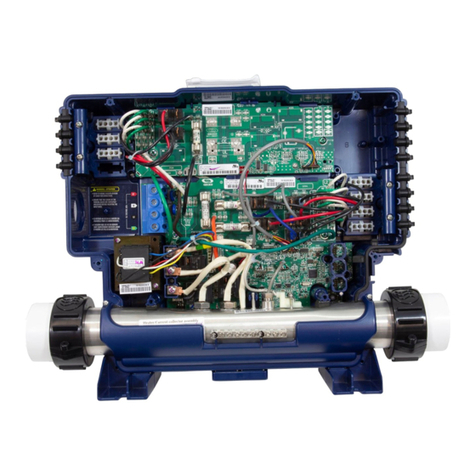
  9. Gecko TSPA-1 Reference guide

Gecko TSPA-1 Reference guide

The Quick Reference Card provides a quick overview of your spa's main
functions and the operations accessible with your digital control pad.
Starting Pump 1:
Press Pump 1 to turn Pump 1 on at low speed. Press a second time to
turn Pump 1 to high speed. A third time turns Pump 1 off. A built-in timer
automatically turns Pump 1 off after 20 minutes, unless it has been
manually deactivated.
The"Pump1"icon lightsup whenPump 1is onat highspeed. Itflashes
whenPump 1is onat lowspeed.
Starting Pump 2:
Press Pump 2 to turn Pump 2 on at low speed. Press a second time to
turn Pump 2 to high speed. A third time turns Pump 2 off. A built-in timer
automatically turns Pump 2 off after 20 minutes, unless it has been
manually deactivated.
The"Pump 2"icon lightsup whenPump 2is onat highspeed. Itflashes
whenPump 2is onat lowspeed.
Starting the blower:
Press Blower to turn blower on at high speed. Pressing a second and a
third time reduces blower speed. A fourth time turns blower off. A built-
in timer automatically turns blower off after 20 minutes, unless it has been
manually deactivated.
The"Blower" iconlights upwhen bloweris onat highspeed. Itflashes
whenblower ison atmedium orlow speed.
Turning the light on:
Press Light to turn light on at high intensity. Pressing a second and a third
time reduces light intensity. A fourth time turns light off. A built-in timer
automatically turns light off after 2 hours, unless it has been manually
deactivated.
The"Light" iconlights upwhen lightison at high intensity.Itflashes
whenlight ison atmedium orlow intensity.
Ifyour spais equippedwith anoptionalfiber box,press Light keyonce toturn
thefiber box(motor &light) on.Pressa secondtime toturn thefiberbox
motoroff andleave thelight on.Athird timeturns bothfiber boxmotor& light
off.A built-in timer automatically turns the fiber box off after 2 hours,
unless it has been manually deactivated. The"Light" iconlights upwhen the
fiberbox lightis on.It flasheswhen bothfiber boxmotor &light areon.
1
1
2
2
TSPA-1SPAPACK
QuickReferenceCard
Pumps have started up for one minute on several occasions and "Filter Cycle"
icon is flashing.
Not a bug but a feature!
Our Smart Winter Mode protects your system from the cold by
turning pumps on for one minute several times a day to prevent water
from freezing in pipes.
TROUBLESHOOTING
"FLO" error message is displayed.
The system detects no water pressure while pumps are running.
Check and open water valves. Check water level. Clean filter. Call your
dealer or service supplier if problem persists.
"FLC" error message is displayed.
A problem has been detected with the pressure switch.
Call your dealer or service supplier.
"Prr" error message is displayed.
A problem has been detected with the temperature probe.
Call your dealer or service supplier.
Filter cycle stops and "Filter Cycle" icon is flashing.
Not a bug but a feature!
To prevent excessive water temperature caused by too long filter cycles,
the system will cancel a filter cycle after 3 hours if water temperature
exceeds Set Point by more than 2˚F (1˚C).
The display is flashing.
A power failure has occurred. Press any key to reset the system. After a
long power failure, you may have to reset the time.
"HL" error message is displayed.
The system has shut the heater down because the temperature at the
heater has reached 119˚F (48˚C).
"HL" error message is flashing.
The system has shut down because the water temperature in the spa
has reached 112˚F (44˚C). Only the Smart Winter Mode will
remain active.
In both cases, do not enter the water! Remove spa cover and allow
water to cool down to 104˚F (40˚C), then press any key to reset the
system.
Call your dealer or service supplier if problem persists.
Temperature display:
In normal mode operation, the display alternates between the hourly
time and the current water temperature. The display toggles every
5 seconds.
Setting water temperature:
Press Up or Down to regulate water temperature. The temperature
setting will be displayed for 5 seconds to confirm your new selection.
The"Set Point"symbol indicatesthe desiredtemperature, NOTthe
currentwater temperature!
Watertemperature canbe adjustedby 1˚increments, from59 to104˚F
(15to 40˚C).
Economy mode:
Press Mode to override the Economy mode programming (see
overleaf). The override will last until midnight.
The "Economy Mode" icon lights up when the system is in
Economy mode.
Automatic water heater start:
When water temperature is 1˚F (0.5˚C) lower than the Set Point, the
heater will automatically turn on until water temperature reaches Set
Point plus 1˚F (0.5˚C).
The"Heater" iconlights upwhen theheater ison.
To unlock the keypad:
1- Enter the programming mode by
pressing the Program key. "Loc" is
displayed.
2- Press Up arrow key.
3- Press Pump 1 key.
4- Press Light key.
The "Lock" icon will disappear and the spa side control will
return to normal mode.
If the unlock process takes more than 15 seconds, the spa
side control will return to normal mode but the keypad will
remain locked.
Loc
1
The system automatically performs two filter cycles per day,
at 12-hour intervals. During a filter cycle, Pump 2 & blower
run for one minute, then Pump 1 runs at low speed for the
programmed number of hours. The ozonator is also acti-
vated and "Filter Cycle" icon is on.
To program a filter cycle, you must enter two parameters:
the start time of the cycle and its duration. If no filtering is
required, the duration must be set to "OFF". If continuous
filtering is required, the duration must then be set to "12:00".
To set the start time of the cycle:
1- Enter the programming mode by
pressing the Program key.
2- Select the Filter cycle start parameter
by pressing the List key until "FIon"
is displayed.
3- Press Enter key to display the
current setting.
4- Use Up or Down arrow key to
change setting.
5- Press Enter key to confirm the
new setting.
The spa side control will return to normal mode.
To set the duration of the cycle:
1- Enter the programming mode by
pressing the Program key.
2- Select the Filter cycle duration
parameter by pressing the List key
until "FIdu" is displayed.
3- Press Enter key to display the
current setting.
4- Use Up or Down arrow key to
change setting.
5- Press Enter key to confirm the
new setting.
The spa side control will return to normal mode.
Water temperature can be displayed in ˚F or ˚C.
To select the temperature display unit:
1- Enter the programming mode by
pressing the Program key.
2- Select the Temperature unit pa-
rameter by pressing the List key
until "Tu" is displayed.
3- Press Enter key to display the
current setting.
4- Use Up or Down arrow key to
change setting.
5- Press Enter key to confirm the
new setting.
The spa side control will return to normal mode.
FIon
10:15
11:30
CL
FIdu
1:00
2:00
CL
Filter cycle start time & duration
Temperature unit
C
F
Tu
1
2
2
1
2
2
CL
1
2
2
Keypad lockout
This function allows you to prevent unauthorized parameter
setting of the unit. The basic functions of the spa will remain
accessible (pump, blower and light outputs) but it will be
impossible to change the temperature Set Point, to override
the Economy mode or to enter the programming mode.
When the keypad is locked, the "Lock" icon will be displayed.
To lock the keypad:
1- Enter the programming mode by
pressing the Program key.
2- Select the Keypad lockout parameter
by pressing the List key until "Loc"
is displayed.
3- Press Enter key to display the
current setting.
4- Use Up or Down arrow key to
change setting.
5- Press Enter key to confirm the
new setting.
The spa side control will return to normal mode, with keypad
locked, and the "Lock" icon will be displayed.
On
OFF
Loc
CL
1
2
2
Economy mode start time & duration
Time of day
CL
2:20 pm
4:30 pm
The Economy mode allows you to lower the temperature
Set Point of the spa by 20˚F (11˚C) during a certain period
of the day. When in Economy mode, the "Economy Mode"
icon will be displayed.
To program the Economy mode, you must enter two
parameters: the start time and the duration. If the Economy
mode is not required, the duration must be set to "OFF".
You can manually override the current Economy status (on
or off) for the rest of the day by pressing the Mode key.
To set the start time of the Economy mode:
1- Enter the programming mode by
pressing the Program key.
2- Select the Economy mode start
parameter by pressing the List
key until "ECon" is displayed.
3- Press Enter key to display the
current setting.
4- Use Up or Down arrow key to
change setting.
5- Press Enter key to confirm the
new setting.
The spa side control will return to normal mode.
To set the duration of the Economy mode:
1- Enter the programming mode by
pressing the Program key.
2- Select the Economy mode duration
parameter by pressing the List key
until "ECdu" is displayed.
3- Press Enter key to display the
current setting.
4- Use Up or Down arrow key to
change setting.
5- Press Enter key to confirm the
new setting.
The spa side control will return to normal mode.
This function allows you to set the internal clock of the
system.
The unit will keep time in memory for about 48 hours in
case of power failure.
To set the time:
1- Enter the programming mode by
pressing the Program key. "CL" is
displayed.
2- Press Enter key to display the
current setting.
3- Use Up or Down arrow key to
change setting.
4- Press Enter key to confirm the
new setting.
The internal clock will be adjusted and the spa side control
will return to normal mode.
11:00 pm
10:00 pm
ECon
CL
8:00
4:00
ECdu
CL
1
2
2
1
2
2
2
2
Filter Cycle
icon
Lock
icon
Economy Mode
icon
Temperature
unit Program
key
Program Mode
icon
Enter
key
List
key
PROGRAMMINGINSTRUCTIONS
Parameter summary
CL Time of day
Flon Filter cycle start
FIdu Filter cycle duration
ECon Economy mode start
ECdu Economy mode duration
Tu Temperature unit (˚F or ˚C)
Loc Keypad lockout
9919-100058-C
1.800.78.GECKO
•
E
Q
U
I
P
P
E
D
W
I
T
H
G
E
C
K
O
'
S
E
X
C
L
U
S
I
V
E
•
Smart
Winter
Mode TM

Other Gecko Control Unit manuals

Gecko in.yt-7 0611-221031-361 Technical manual

Gecko

Gecko in.yt-7 0611-221031-361 Technical manual

Gecko IN.XE-5 0602-221046 Technical manual

Gecko

Gecko IN.XE-5 0602-221046 Technical manual

Gecko In.Touch 0608-521012 User manual

Gecko

Gecko In.Touch 0608-521012 User manual

Gecko in.xe-5 0602-221063-299 Technical manual

Gecko

Gecko in.xe-5 0602-221063-299 Technical manual

Gecko SC-CF-SBD User manual

Gecko

Gecko SC-CF-SBD User manual

Gecko 1001 Reference guide

Gecko

Gecko 1001 Reference guide

Popular Control Unit manuals by other brands

TechNexion PICO-WIZARD-IMX8M-MINI quick start guide

TechNexion

TechNexion PICO-WIZARD-IMX8M-MINI quick start guide

Lumel MR03 Series user manual

Lumel

Lumel MR03 Series user manual

Pentair HYPRO PROSTOP-E Installation and operation manual

Pentair

Pentair HYPRO PROSTOP-E Installation and operation manual

DOEPFER A-100 Series manual

DOEPFER

DOEPFER A-100 Series manual

Hawle HAWIDO 1405 manual

Hawle

Hawle HAWIDO 1405 manual

National Instruments NI 9882 Getting started guide

National Instruments

National Instruments NI 9882 Getting started guide

Emerson Fisherr D2 FloPro instruction manual

Emerson

Emerson Fisherr D2 FloPro instruction manual

LinMot DM01-23 Series installation guide

LinMot

LinMot DM01-23 Series installation guide

Swagelok XS Series Service instructions

Swagelok

Swagelok XS Series Service instructions

Bticino M7000CB manual

Bticino

Bticino M7000CB manual

janitza 800-CON User manual and technical data

janitza

janitza 800-CON User manual and technical data

Toa AT-063Ap instruction manual

Toa

Toa AT-063Ap instruction manual

Meridian 562 user manual

Meridian

Meridian 562 user manual

Keysight VXI Bus 75000 C Series User and programming manual

Keysight

Keysight VXI Bus 75000 C Series User and programming manual

LEGRAND Bticino H4652 manual

LEGRAND

LEGRAND Bticino H4652 manual

Datex-Ohmeda B-CPU5 Technical reference manual

Datex-Ohmeda

Datex-Ohmeda B-CPU5 Technical reference manual

Salcom 12-32-0000 product manual

Salcom

Salcom 12-32-0000 product manual

Endress E-RMA LAN Translation of the original operating manual

Endress

Endress E-RMA LAN Translation of the original operating manual

manuals.online logo
manuals.online logoBrands
  • About & Mission
  • Contact us
  • Privacy Policy
  • Terms and Conditions

Copyright 2025 Manuals.Online. All Rights Reserved.