GemOro AuRACLE AGT1 User manual

STEP 1: AGT1 POWER UP
After the batteries are installed and the pen probe is fully plugged into the unit, turn on the AGT1 by
pushing the switch to BAT if batteries are installed or AC if the AC adaptor is installed, depending on
which power option you wish to use. The AGT1 will then go through its self-check boot up sequence
(flashing LED bar graph and indicators). Once the lights stop flashing the READY light and NA light at the
far right of the bar graph will remain on.
STEP 2: CHECK PEN PROBE & ELECTRICALLY CHARGE IT FOR USE
Remove the pen probe cap, then dab the pen probe’s felt tip on a clean, dry paper towel to clean it and
absorb any excess pen probe solution, leaving the pen probe’s felt tip the consistency of a normal felt tip
pen or marker. Note that if the solution drips from the pen probe’s felt tip and simultaneously touches
both the gold or platinum and the testing plate it will not work. File a small area on the surface of the 14K
yellow gold calibration piece Aand rest it on the testing plate with the filed area facing up. Check that
the pen probe is working by holding it upright at an approximate 90° angle and gently touching the very
end of the pen probe’s felt tip to the filed area of the 14K
yellow gold calibration piece B. Repeat this process 3 times
and wait for the reading to settle each time. By repeatedly
touching the 14K yellow gold calibration piece it is electrically
charging the pen probe for use, which is a vital part of the
start up process. The LEDs on the bar graph will react by
climbing upward or downward. At this point the pen probe is
charging and note that it is not important where the LED
indicator settles C. A distinct calibration point on the LED bar
graph will be found only in the very center of the 14K range in
the calibration process as outlined in STEP 3 below.
GemOro AuRACLE™
AGT1 GOLD & PLATINUM TESTER
EASY OPERATION GUIDE: STEPS 1 & 2
The AGT1 MUST be used while following the below
easy steps and recommendaons to get accurate test results.
A
B
C

STEP 3: CALIBRATION PROCESS
· Always charge the pen probe as described in STEP 2 and calibrate it after each time it is turned on.
Recalibrate it as necessary while in use. It is recommended to use the AC adaptor and keep the AGT1
turned on throughout the day.
· Use only common .583 to .585 14K YELLOW GOLD that is non-plated/non-flashed to calibrate the
AGT1. Be aware that 14K yellow gold with a high silver content above 7% will not provide a proper
calibration. Also, 14K yellow gold with an uncommon mixture of alloys may not provide a proper
calibration. Using the optional AGT1 14K Yellow Gold Calibration Disc is recommended.
· Lightly yet firmly always only touch the very end of the pen probe’s felt tip to the filed area on the
calibration piece at an approximate 90° angle to the gold Dand wait until the reading settles E.
GemOro AuRACLE™
AGT1 GOLD & PLATINUM TESTER
EASY OPERATION GUIDE: STEP 3
E
D

STEP 3: CALIBRATION PROCESS CONTINUED
· Press the CALIBRATION button once Funtil the indicator light labeled CALIBRATED lights up G, and
the LED light in the very center of the 14K range simultaneously lights up H. Then wait an additional 2 to
3 seconds after the CALIBRATED light turns off before removing the pen probe’s felt tip to make certain
the LED in the very center of the 14K range remains lit up and the reading does not drift by even one
LED within its range. This may require 2 to 3 calibration attempts before the calibration locks into place
in the very center of the 14K range and remains there. If the very center LED light in the 14K range
doesn’t light up and remain that way or if it drifts to another position within the 14K range, it is not
calibrated and will not test correctly.
· Once the calibration process has been successfully completed, remove the pen probe’s felt tip from the
calibration piece.
GemOro AuRACLE™
AGT1 GOLD & PLATINUM TESTER
EASY OPERATION GUIDE: STEP 3 CONTINUED
F
G
H
Press the CALIBRATION button once F
and the LED light in the very center of the 14K range
simultaneously lights up H
CALIBRATION STEPS F, G & H
until the indicator light labeled CALIBRATED lights up G

STEP 4: RE-CHECK READINESS
· Touch the pen probe’s felt tip to the gold again Ito make sure that your calibration piece now tests
correctly in the very center of the 14K range J. The AGT1 is now calibrated and ready to use.
· If it does not test correctly when rechecking, dab the pen probe’s felt tip on a clean, dry paper towel and
repeat STEP 3. Trying an alternate piece of filed 14K yellow gold may also resolve the problem.
STEP 5: TESTING GOLD AND PLATINUM
· To test gold and platinum, always first file a small area on the surface of the metal Kand rest it on the
testing plate with the filed area facing up and be prepared to test that area.
· Touch and hold the very end of the pen probe’s felt tip to the filed area on the metal Luntil the reading
settles. Only touch the very end of the pen probe’s felt tip to the gold or platinum being tested. BE
CERTAIN NOT TOUCH THE SIDE OF THE PEN PROBE’S FELT TIP WHEN TESTING GOLD OR THE
TEST RESULTS WILL RISE TO A HIGHER KARAT THAN IT IS. Due to the various shapes of jewelry it
may be beneficial to hold the jewelry on the testing plate with your fingers to stabilize it and make
certain you are making good contact with the pen probe’s felt tip and the metal during the test. Once it
settles, check the reading for the test results and then wait no more than 2 to 3 seconds before
removing the pen probe’s felt tip from the metal. By waiting longer than 2 to 3 seconds the LEDs may
continue to rise to an incorrect reading. Depending on the alloys and percentages of each used to make
the specific karat gold, the test results will vary within the range of that karat. Be aware that platinum will
test as PT or alternate between PT and the NA on the far right of the LED bar graph.
· If inconsistent test results are experienced always dab the pen probe’s felt tip on a clean, dry paper
towel and as needed recalibrate the AGT1 while in use.
· Always replace the pen probe’s cap until it snaps on when not in use to avoid
contamination and keep the pen probe’s felt tip from drying out.
GemOro AuRACLE™
AGT1 GOLD & PLATINUM TESTER
EASY OPERATION GUIDE: STEPS 4 & 5
I
K
L
J

The PATENTED AGT1 is an accurate testing device meant for the purposes of quickly and easily
purchasing standard karat gold as well as platinum. It has been designed with the needs of a gold and platinum buyer
in mind. Although it is considered the most accurate electronic tester in its class, it is not meant to be used as a tool for
rigorous scientific assay. There are many alloys used to create gold jewelry of the various colors (white, yellow, green and
red). As the vast majority of gold being purchased is 10K, 14K and 18K, your AGT1 has been designed to primarily focus
on these ranges, while still providing reasonably good, yet at times inconsistent testing results in the 22K and to a lesser
degree in the 24K ranges.
As the gold content of a piece of gold moves closer to pure, the presence of other metals becomes smaller and the
electro-chemical reaction has less contaminants to detect. As such, gold higher than 18K may test inconsistently
among the higher karat ranges. It is important to note that over 99% of all gold stamped or cast of this quality is
marked or stamped or backed by the mint that has produced it. Coins made of high karat gold are almost exclusively
produced by government mints and there are many reference sources that one can turn to for their identification. From
a practical perspective the gold of this purity is easy to identify by its rich color and you will observe that it is very
heavy in the hand. All high karat gold will test with reasonable accuracy above the 18K+ ranges of your AGT1, but it is
best to rely on the visual karat marks, reference sources and common sense.
TROUBLESHOOTING & HELPFUL TIPS
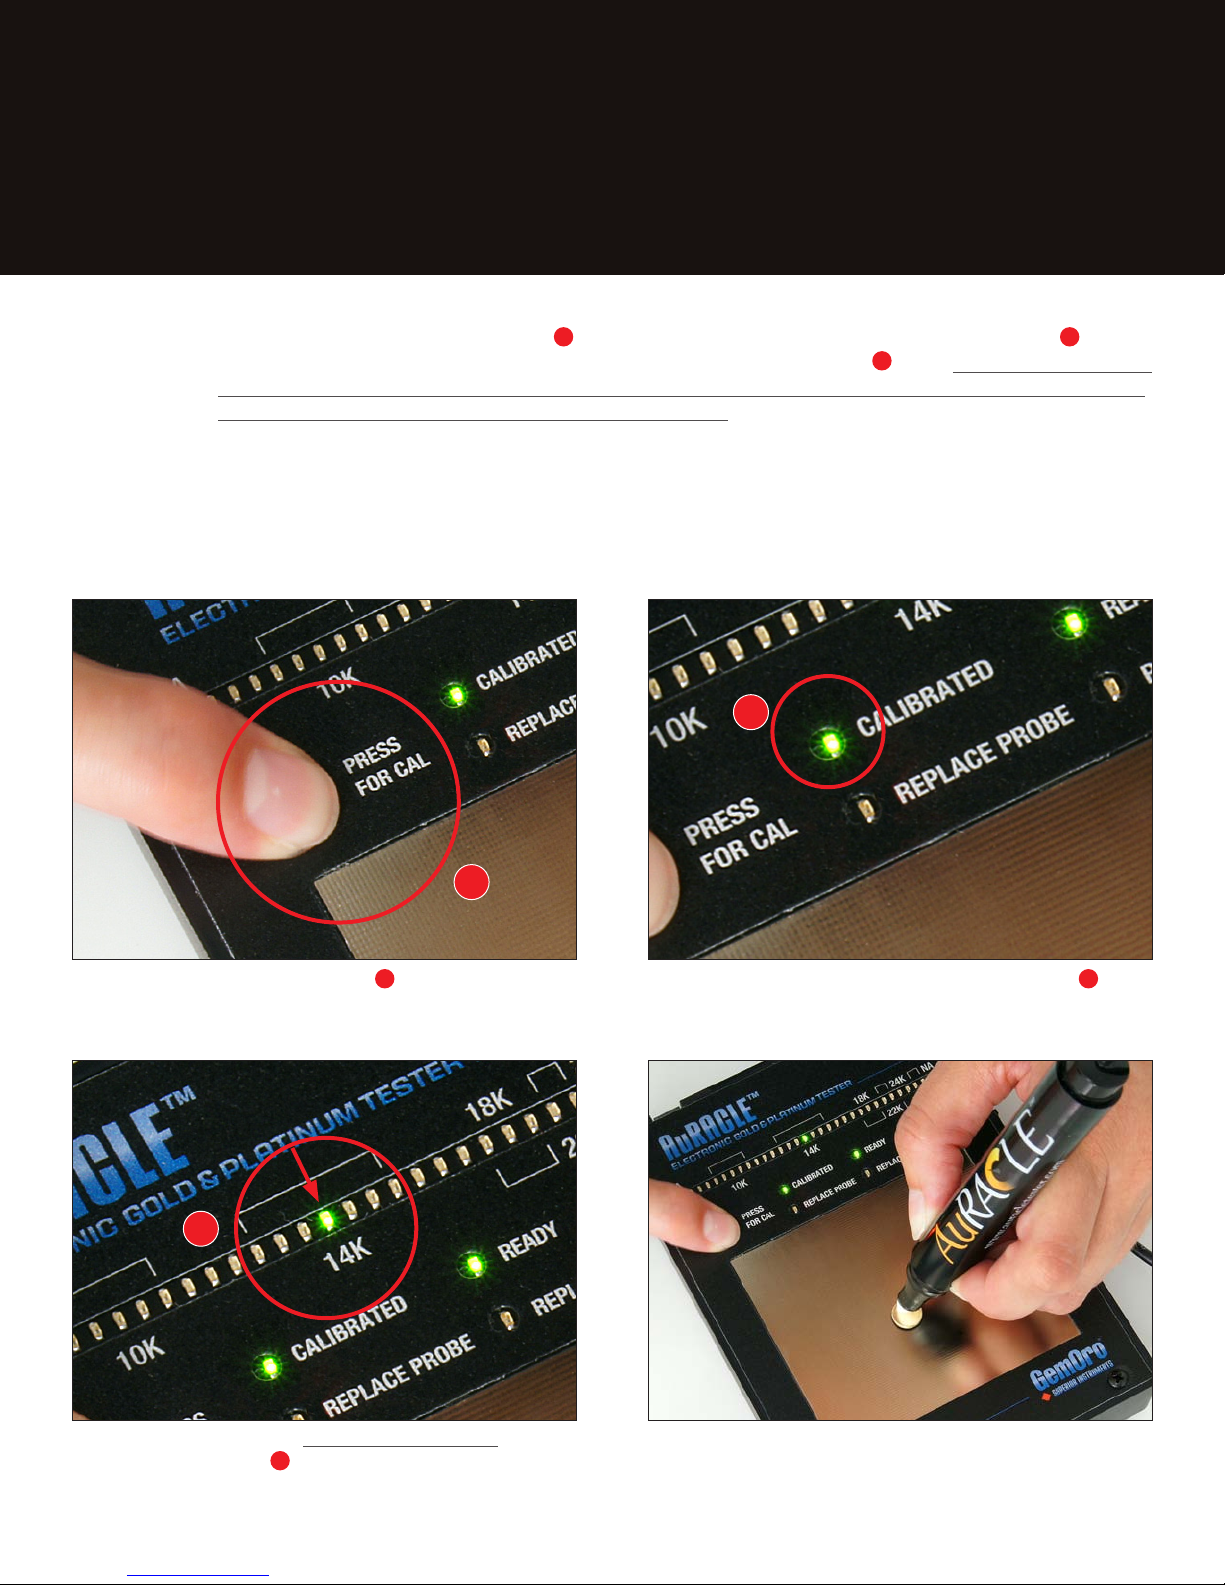
ELECTRICALLY CHARGE THE PEN PROBE, CORRECT FOR INCONSISTENT READINGS AND RECALIBRATE:
Each time the AGT1 is turned on YOU MUST ELECTRICALLY CHARGE THE PEN PROBE (STEP 2) PRIOR TO
CALIBRATING. The AGT1 must then always be calibrated before using (STEP 3). It is also necessary to recalibrate the
AGT1 as needed and dab the pen probe’s felt tip on a clean, dry paper towel if inconsistent results are experienced.
Recognize that the chemistry inside the pen probe is constantly changing over time as it is exposed to gold and other
metals, contaminants, the environment and dirt. By recalibrating the AGT1 periodically and cleaning the pen probe’s felt
tip as needed, this allows the AGT1 to adjust itself to the chemistry in the pen probe at that time. Since the AGT1 can
be calibrated in only a matter of seconds or the pen probe’s felt tip may be quickly and easily cleaned if needed, these
simple steps should be a regular part of problem solving and your testing process.
REPLACE PROBE LIGHT ON?: RECALIBRATION WILL TYPICALLY FIX THIS PROBLEM SINCE THIS INDICATORS
DUAL FUNCTION IS TO ALERT YOU THAT THE AGT1 IS OUT OF CALIBRATION. Make sure the pen probe’s felt
tip is clean by dabbing it with a clean, dry paper towel and then follow the calibration STEP 3 of the Easy Operation
Guide. If the AGT1 will not calibrate, the pen probe may be defective, spent or in need of replacement. Please note
that it is recommended that for best results that you should consider replacing the pen probe if it is worn or it becomes
excessively dirty from repeated exposure to costume jewelry, fake gold or other contaminates. A pen probe in this
condition will begin to deliver erratic readings and these are good indicators that it should be replaced even without the
REPLACE PROBE light illuminating.
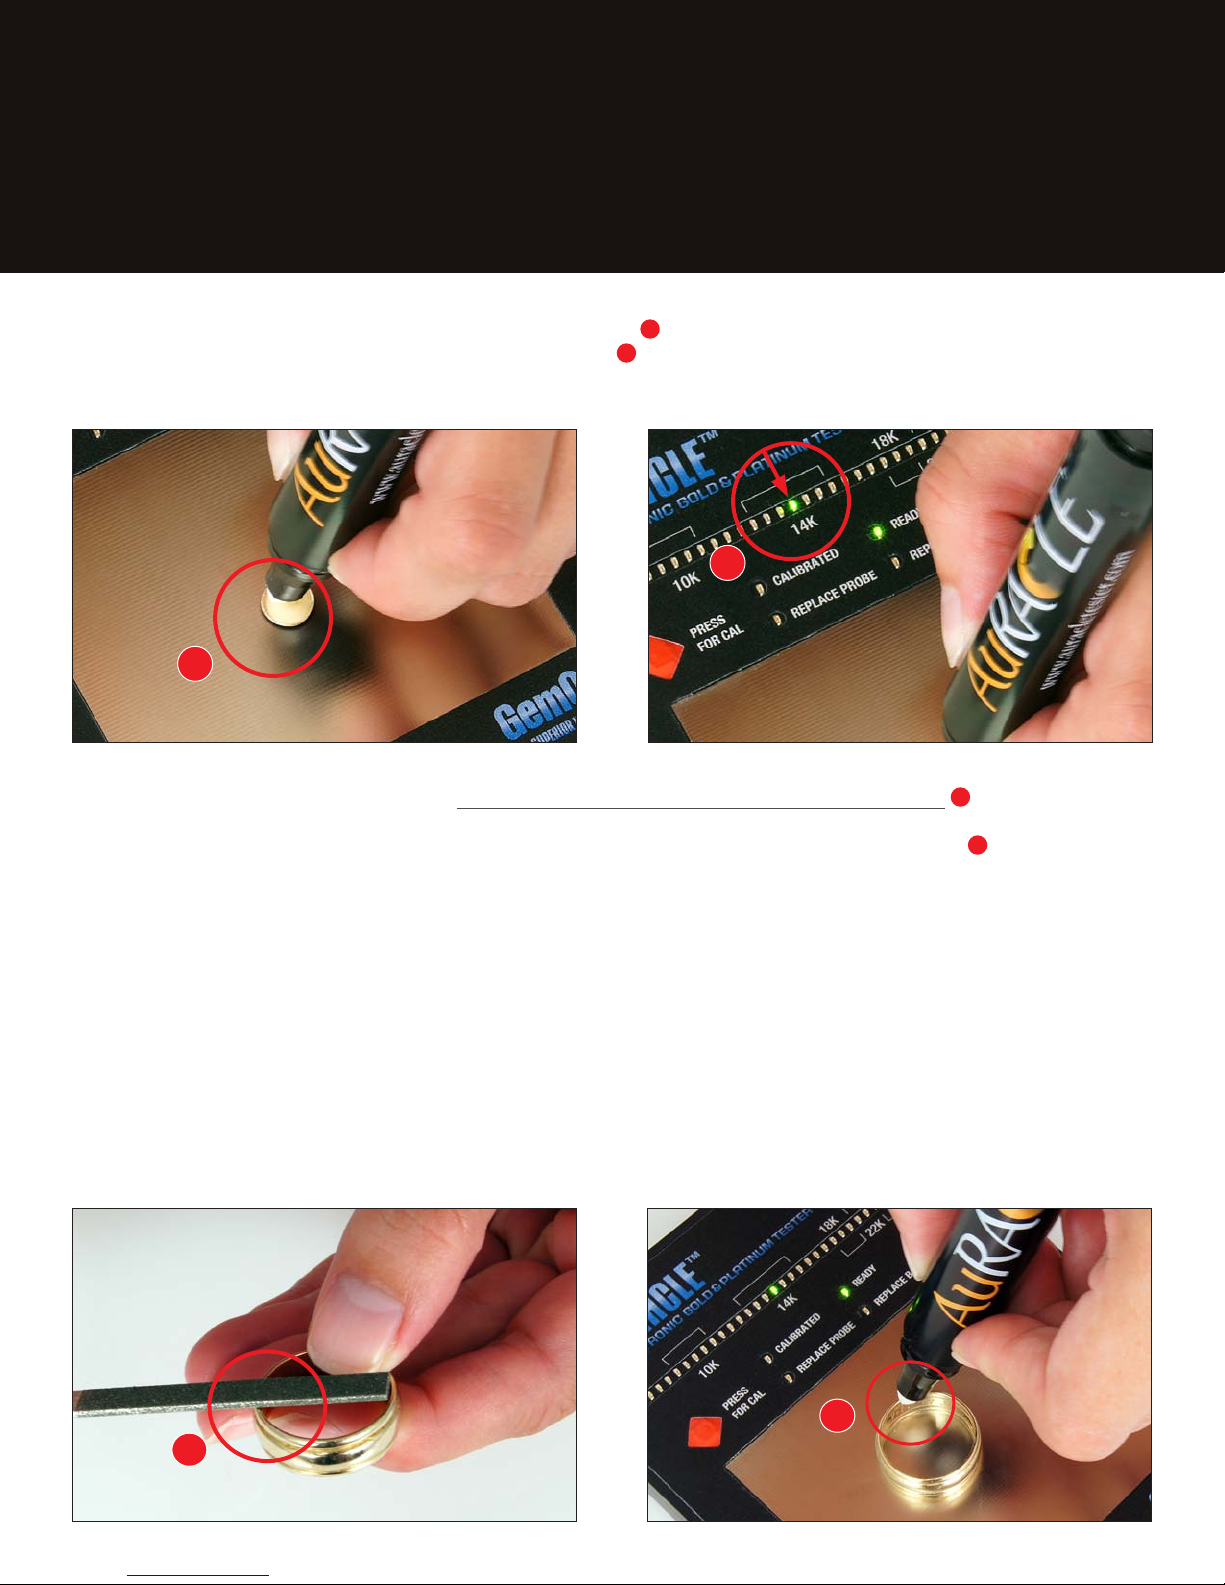
REGULAR CLEANING OF THE PEN PROBE’S FELT TIP AND TESTING PLATE: Always wipe off the gold particles and
other metal particles coming from costume, gold-plated or gold-filled jewelry that may remain on the pen probe’s felt tip
to avoid contamination. The metal particles remaining on the pen probe’s felt tip that are naturally rubbed off during the
testing process, and especially metal filings from other karat gold, copper, brass or other base metals that have been
filed and remain on the pen probe’s felt tip could potentially cause incorrect test results. Therefore, regular cleaning when
needed is important.
The pen probe contains a special saline solution that is safe, non-acidic, and non-toxic. Remove salt crystal buildup by
dabbing the pen probe’s felt tip with a clean and dry paper towel. Salt crystal buildup is a natural occurrence with this
device. Using a warm, moist (from water only) paper towel, wipe off any salt crystal buildup from the 14K yellow gold
calibration piece and the AGT1 testing plate area only. Be aware that the pen probe solution will leave a stain or in
some instances it may ultimately over time produce corrosion on the testing plate if not wiped off immediately
after it makes contact, so cleaning it right after this occurs is advised. While this staining or corrosion may occur,
it will affect the testing plates cosmetic appearance only and not impact the accuracy of the AGT1. Remember to dry
both the 14K yellow gold calibration piece and AGT1 testing plate thoroughly. Never expose the pen probe’s felt tip to
water or other chemicals. Always replace the pen probe cap until it snaps on when not in use.
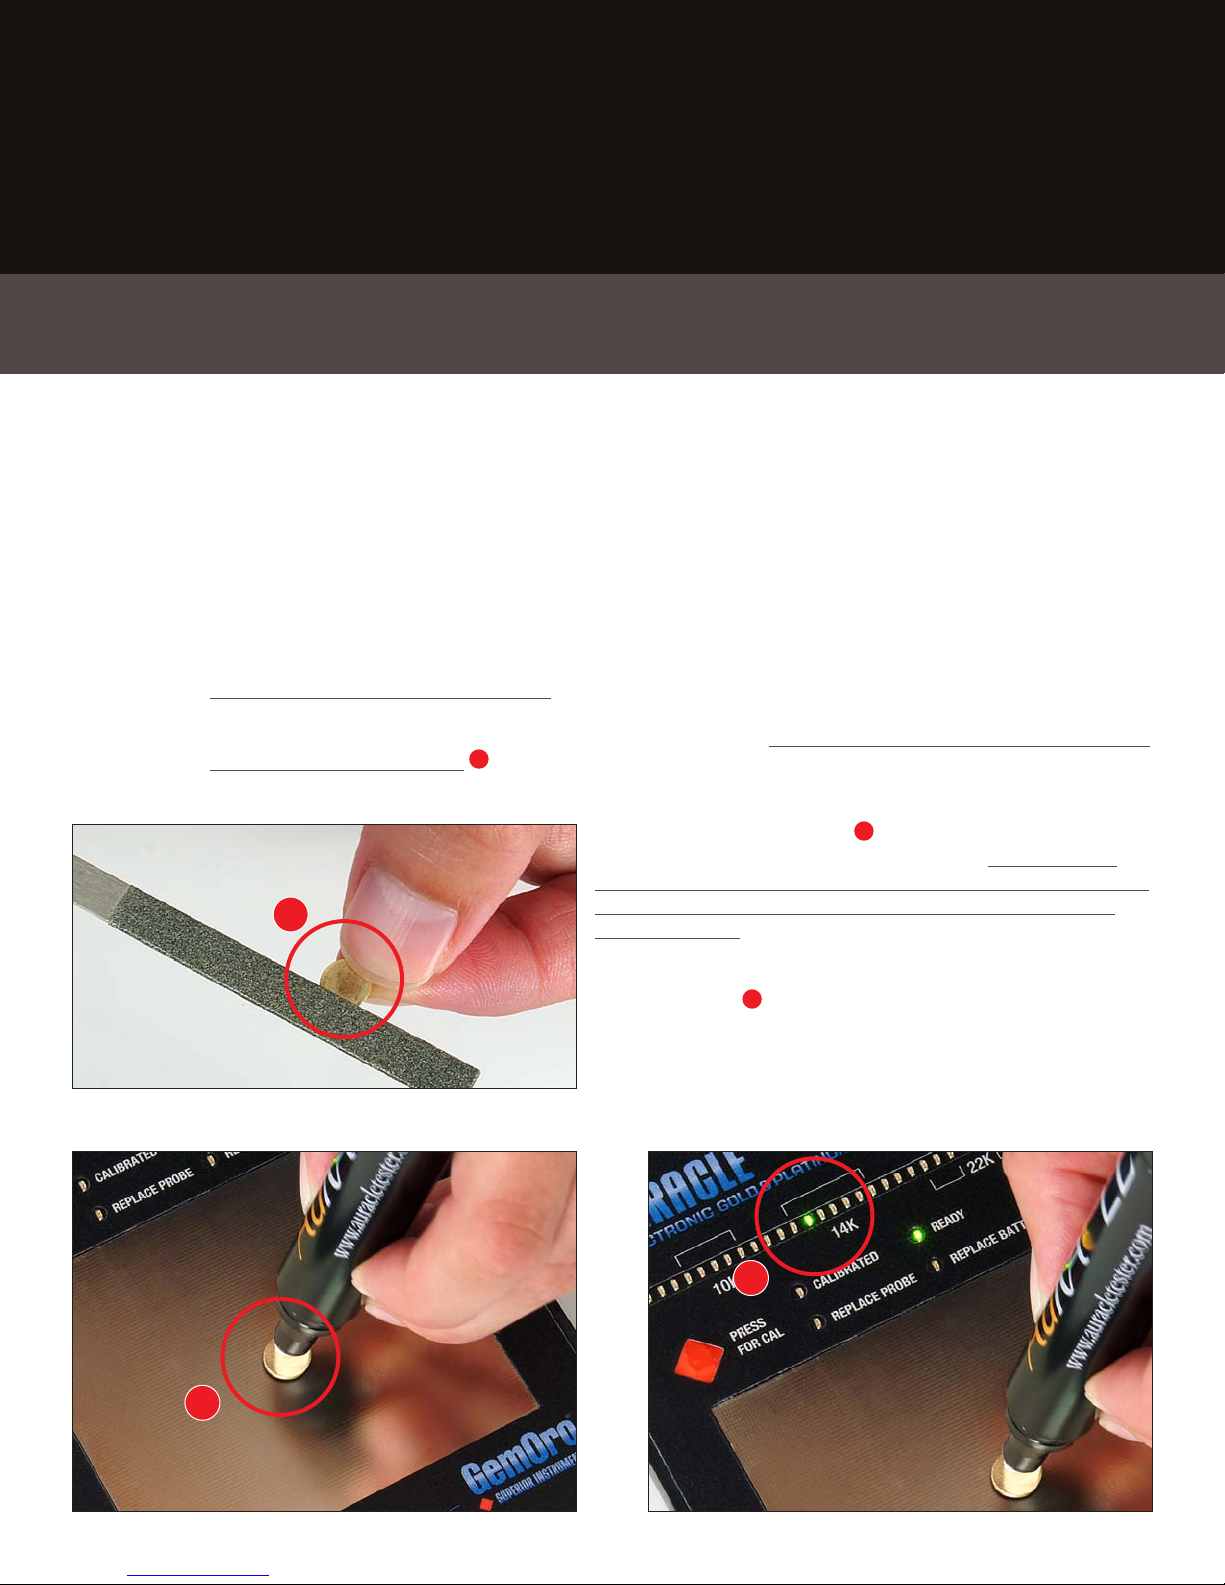
FILE ALL METAL BEFORE TESTING AND CLEAN THE FILE: Gold, platinum, gold-plated, gold-filled, tungsten and
stainless steel must be filed below the surface before testing to produce accurate results. Do not file the metal over the
AGT1 testing plate, as particles of the metal being filed will fall on it and potentially have an effect on the test results. This

Other manuals for AuRACLE AGT1
1
Table of contents
Other GemOro Test Equipment manuals

GemOro
GemOro TESTEROSSA User manual

GemOro
GemOro AuRACLE PRO User guide

GemOro
GemOro PRO-M 3 User manual

GemOro
GemOro AuRACLE AGT1 User manual

GemOro
GemOro AuRACLE User guide

GemOro
GemOro CZ Master Set Pro Installation instructions manual

GemOro
GemOro UltraTester 3+ User manual

GemOro
GemOro AuRACLE AGT2 User manual

GemOro
GemOro PRO-D 3 User manual