German pool CKF-110 User manual

P.1
Please read these instructions and warranty information carefully
before use and keep them handy for future reference.
Online Warranty Registration
Express Healthy Air Fryer CKF-110
USER MANUAL

P.3P.2
Tables of Contents
Safety Instructions 3
Product Structure 5
Operating Instructions 6
Care And Maintenance 16
Technical Specications 17
Warranty Terms & Conditions 31
Please read all of the instructions carefully and retain for future reference.
• When using electrical appliances, basic safety precautions should always be followed.
• Check that the voltage indicated on the rating plate corresponds with that of the local network
before connecting the appliance to the mains power supply.
• Children aged from 8 years and people with reduced physical, sensory or mental capabilities or
lack of experience and knowledge can use this appliance, only if they have been given supervision
or instruction concerning use of the appliance in a safe way and understand the hazards involved.
• Children should be supervised to ensure that they do not play with the appliance. Unless they are
older than 8 and supervised, children should not perform cleaning or user maintenance.
• This appliance is not a toy.
• This appliance contains no user serviceable parts. If the power supply cord, plug or any part of
the appliance is malfunctioning or if it has been dropped or damaged, only a qualied electrician
should carry out repairs. Improper repairs may place the user at risk of harm.
• Keep the appliance and its power supply cord out of the reach of children.
• Keep the appliance and its power supply cord away from heat or sharp edges that could cause
damage.
• Keep the power supply cord away from any parts of the appliance that may become hot during
use.
• Keep the appliance away from other heat emitting appliances.
• Do not immerse the appliance in water or any other liquid.
• Do not operate the appliance with wet hands.
• Do not leave the appliance unattended whilst connected to the mains power supply.
• Do not remove the appliance from the mains power supply by pulling the cord; switch it off and
remove the plug by hand.
• Do not use sharp or abrasive items with this appliance; use only plastic or wooden spatulas to
avoid damaging the non-stick surface.
Safety Instructions

P.5P.4
Safety Instructions
Caution: Hot surface - do not touch any sections or surfaces of the appliance that may become
hot or the heating components of the appliance.
Warning: Keep the appliance away from ammable materials.
• Do not use the appliance for anything other than its intended use.
• Do not use any accessories other than those supplied.
• Do not use this appliance outdoors.
• Do not store the appliance in direct sunlight or in high humidity conditions.
• Do not move the appliance whilst it is in use.
• Always unplug the appliance after use and before any cleaning or user maintenance, unless using
the self-clean function.
• Always ensure that the appliance has cooled fully after use before performing any cleaning or
maintenance or storing away.
• Always use the appliance on a stable, heat-resistant surface, at a height that is comfortable for
the user.
• Use of an extension cord with the appliance is not recommended.
• This appliance should not be operated by means of an external timer or separate remote control
system, other than that supplied with this appliance.
• This appliance is intended for domestic use only. It should not be used for commercial purposes.
Product Structure
1. Ring Extension: Increases the capacity of the appliance to enable larger foods to be cooked. Ideal
for use when the dual rack is used as a high grill.
2. Grid Pan perfect for air frying foods; allows hot air to circulate around the food for even cooking.
3. Dual Rack: Ideal for grilling foods; can be used as a high or low grill rack by turning it over as
required.
Safety handle
Plate
Lifter
Non-stick cooking bowl
Base Unit
3. Dual Rack
2. Grid Pan
1. Ring Extension
Temperature control dial
Timer control dial
Lid

P.7P.6
Operating Instructions
The appliance is great for cooking delicious foods using little or no oil, providing a
healthier way to create meals that the whole family can enjoy. The appliance uses
triple cooking technology so that foods are cooked to perfection, every time.
Control Panel
Timer Temperature
Triple Cooking Technology
CONVECTION air circulates to cook foods evenly.
INFRARED HEAT to cook food from the inside out.
HALOGEN HEAT cooks food golden brown.
Getting Started
Remove the appliance from the box.
Remove any packaging from the appliance.
Place the packaging inside the box and either store or dispose of safely.
Before First Use
STEP 1: Switch off and unplug the appliance from the mains power supply. Using a soft, damp cloth,
wipe the interior and exterior of base unit, as well as the lid. Dry thoroughly.
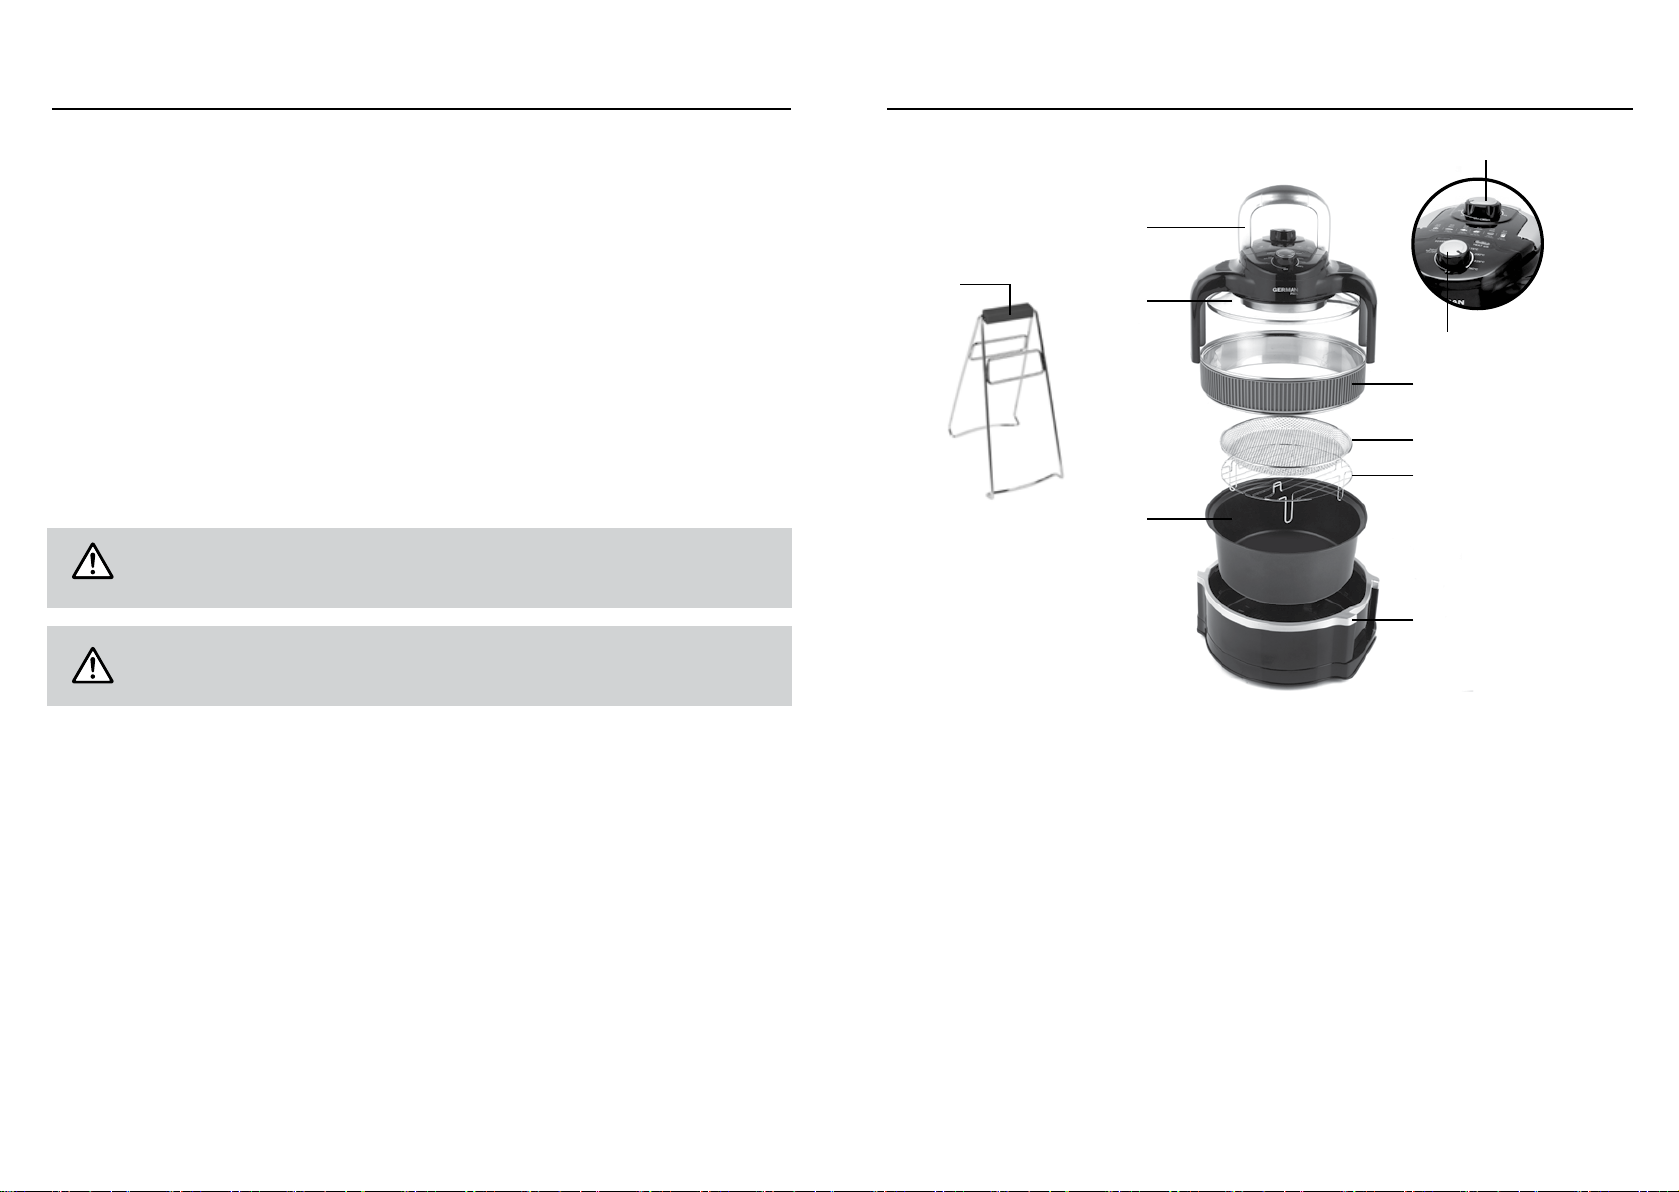
STEP 2: Wash the grid pan, dual rack, plate lifter, ring extension and non-stick cooking
bowl in warm, soapy water. Allow to dry thoroughly.
Do not immerse the appliance base unit or lid in water or any other liquid.
Never use harsh or abrasive cleaning detergents or scourers to clean the appliance or its accessories,
as this could cause damage.
Note: When using the appliance for the rst time, a slight odor may be emitted. This is normal
and will soon subside. Allow for sufcient ventilation around the appliance during use.
Assembling
Switch off and unplug the appliance from the mains power supply before assembling. The extender ring
can be found underneath the non-stick cooking bowl.
STEP 1: Place the non-stick cooking bowl inside the appliance base unit, making sure that it is seated
centrally.
STEP 2: Fit the desired accessories depending upon the food and method of cooking. Grill foods by
placing the dual rack into the non-stick cooking bowl.
Air fry foods by placing the grid pan on top of the dual rack. Cook larger foods by tting the
ring extension onto the top of the non-stick cooking bowl, if required.
STEP 3: Once the required accessories are in place, the lid can then be tted on top of the ring
extension or onto the non-stick cooking bowl.
Operating Instructions
Operating
STEP 1: Once the appliance is assembled, place it onto a at, stable, heat-resistant surface. Fit any
required accessories following the instructions in the section entitled ‘Assembling’.
STEP 2: Place the ingredients to be cooked inside the non-stick cooking bowl or onto the chosen
accessory, taking care not to overll it. Do not place food directly into the appliance base unit
without rst inserting the non-stick cooking bowl.
STEP 3: Place the lid onto the non-stick cooking bowl or the ring extension if using.
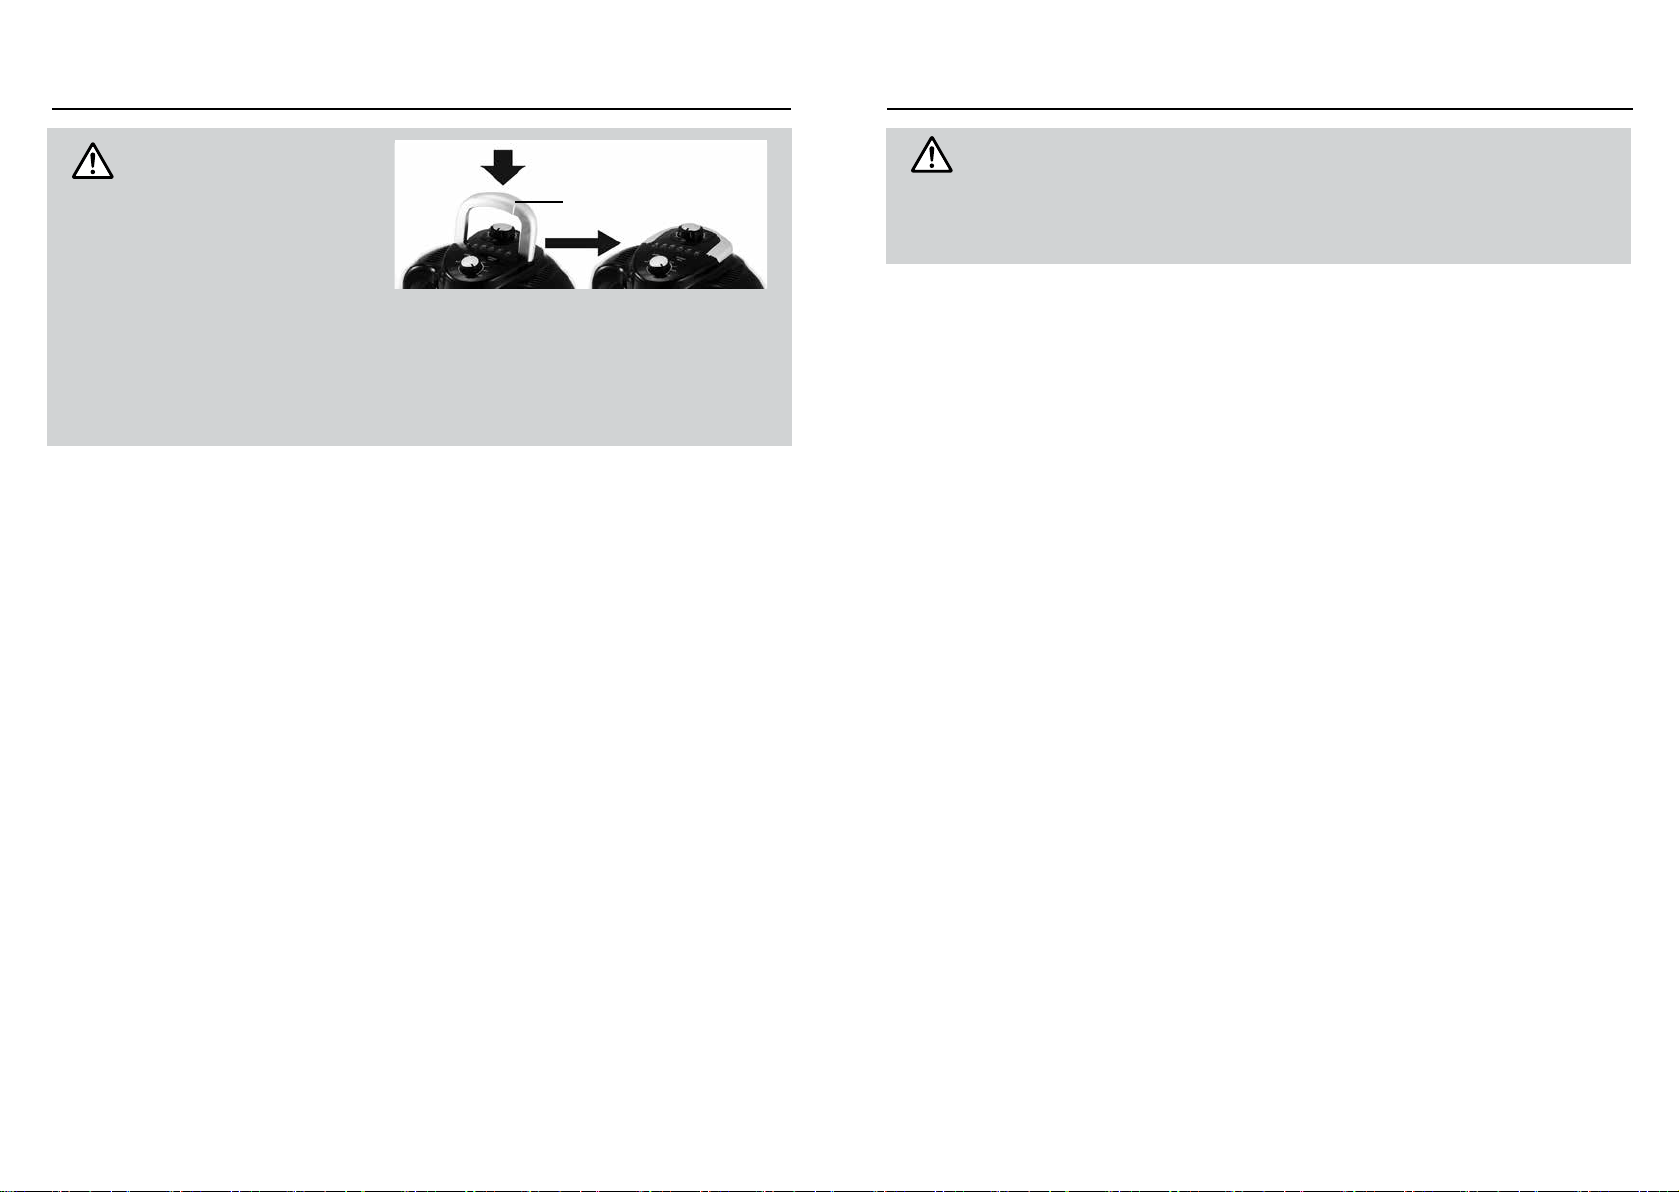
STEP 4: Push the safety handle down.
STEP 5: Plug in and switch on the appliance at the mains power supply. Due to the triple cooking
technology, the appliance does not need to be preheated to work efciently. However, if pre
heating is preferred, set the temperature control to the desired temperature and set the timer
control to 10 minutes. The green indicator light will switch off once the appliance has reached
the desired temperature.
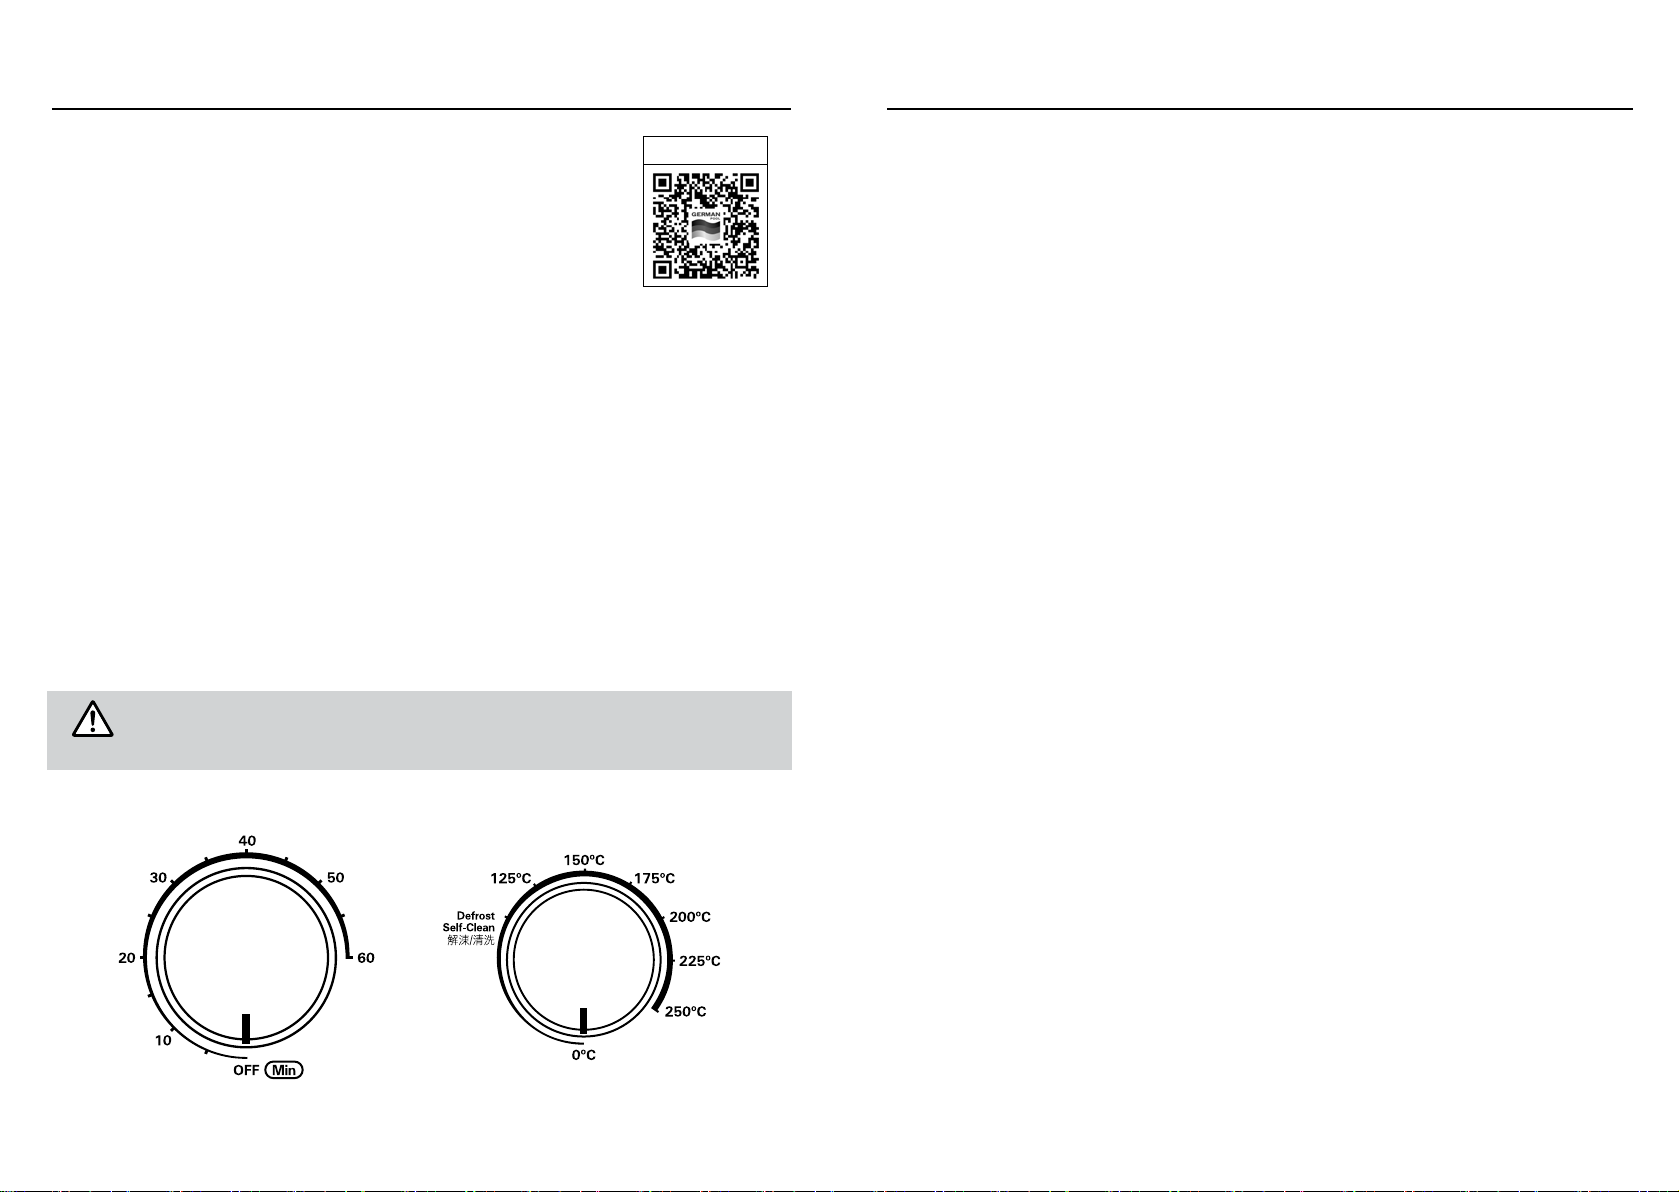
STEP 6: Set the temperature control dial to the required temperature (between 125-250°C).
STEP 7: Determine the cooking time required for the ingredients and set the timer control dial to the
desired time setting. The halogen infrared element and fan will activate. The green and red
indicator lights will illuminate to signal that the appliance is switched on and is heating up to
the desired temperature.
STEP 8: Once the preset cooking time has elapsed, the halogen infrared element and fan will switch
off. Lift the safety handle to remove the lid, taking care to avoid any hot steam escaping and
hot food splashes. To stop the cooking process before the preset time has elapsed, lift the
safety handle.
Watch the video clip

P.9P.8
Operating InstructionsOperating Instructions
Caution: The underside of the appliance will become very hot during use; always use heat-resis-
tant oven gloves to remove the lid. Use the plate lifter to remove the accessories and do not place them
onto any surfaces that may be damaged by heat.
Always check that food is cooked thoroughly and is piping hot before removing it from the appliance.
Functions
When using any of the functions, avoid foods being positioned too close to the halogen heating
element. The extender ring should be used to increase the distance between the food and the halogen
heating element and to create extra space for larger foods or larger quantities.
The cooking time will vary depending on the thickness of the food; a 4 cm thick steak will take longer to
cook than a 2 cm thick steak.
Frozen foods such as burgers are likely to require a longer cooking time. To guarantee an even colour,
foods can be turned periodically during the cooking process using the plate lifter.
Grilling Or Barbecuing Effect
When grilling or barbecuing, make sure that all foods are placed on the dual rack and the temperature
is set between 220-225°C. Use the dual rack as a high or low grill as required.
Air Frying Effect
When air frying, place the foods into the grid pan and position it on top of the dual rack and the tem-
perature is set between 220-240°C.
Note: The safety handle has an
integrated safety switch which needs to be
securely pressed down to allow cooking to
commence. Always remove the lid using the
safety handle to ensure that the safety switch
is activated.
Take care to set the correct time using the timer control dial as turning it in an anticlockwise direction
can cause damage. Turn off the appliance and wait for the timer to count down naturally if the timer
control has been set incorrectly. Other than when preheating the appliance (for 10 minutes), do not
operate the appliance whilst the non-stick cooking bowl is empty.
The green indicator light and the internal halogen lamp will cycle on and off during the cooking process
to maintain a steady temperature.
Safety Handle
Table of contents
Other German pool Fryer manuals

German pool
German pool DFC-516R User manual

German pool
German pool CKF-215 User manual

German pool
German pool ISF-623 User manual

German pool
German pool DFC-515 User manual

German pool
German pool FRY-233 User manual

German pool
German pool FRY-133 User manual

German pool
German pool ISF-620 User manual

German pool
German pool FRY-123 User manual