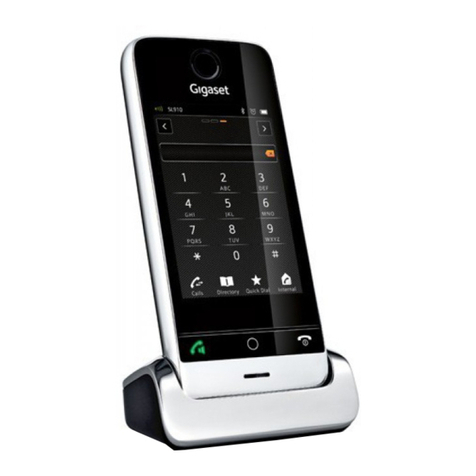
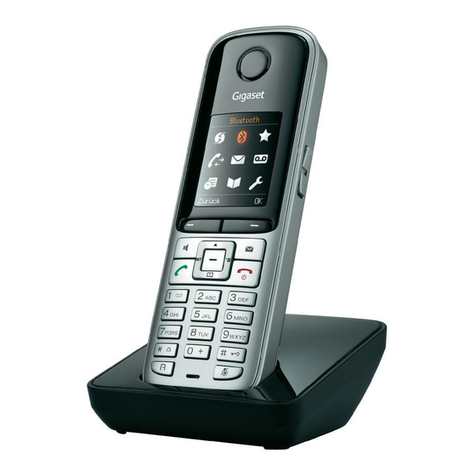
Gigaset SL910h User manual

Gigaset SL910H / IM2 EN / A31008-M2370-R201-1-SM19 / Cover_front.fm / 30.08.2011
Congratulations
By purchasing a Gigaset, you have chosen a brand that is fully committed
to sustainability. This product’s packaging is eco-friendly!
To learn more, visit www.gigaset.com.

Gigaset SL910H / IM2 EN / A31008-M2370-R201-1-SM19 / Cover_front.fm / 30.08.2011

1
Contents
Gigaset SL910H / IM2 EN / A31008-M2370-R201-1-SM19 / SL910H-HS-UGIVZ.fm / 30.08.2011
Version 4.1, 21.11.2007
Contents
Overview of handset . . . . . . . . . . . . . . . . . . . . . . . . . . . . . . . . . . . . . . . . . . . . . . . . . . . . . . 3
Display icons . . . . . . . . . . . . . . . . . . . . . . . . . . . . . . . . . . . . . . . . . . . . . . . . . . . . . . . . . . . . . . 4
Safety precautions . . . . . . . . . . . . . . . . . . . . . . . . . . . . . . . . . . . . . . . . . . . . . . . . . . . . . . . . 6
First steps . . . . . . . . . . . . . . . . . . . . . . . . . . . . . . . . . . . . . . . . . . . . . . . . . . . . . . . . . . . . . . . . . 7
Operating the handset . . . . . . . . . . . . . . . . . . . . . . . . . . . . . . . . . . . . . . . . . . . . . . . . . . . 11
Activating/deactivating the handset . . . . . . . . . . . . . . . . . . . . . . . . . . . . . . . . . . . . . . . . . . . . . . . . . . . . 11
Operating the touchscreen . . . . . . . . . . . . . . . . . . . . . . . . . . . . . . . . . . . . . . . . . . . . . . . . . . . . . . . . . . . . . 11
Handset idle display . . . . . . . . . . . . . . . . . . . . . . . . . . . . . . . . . . . . . . . . . . . . . . . . . . . . . . . . . . . . . . . . . . . . 11
Using the menus . . . . . . . . . . . . . . . . . . . . . . . . . . . . . . . . . . . . . . . . . . . . . . . . . . . . . . . . . . . . . . . . . . . . . . . 13
Scrolling through lists (vertical scrolling) . . . . . . . . . . . . . . . . . . . . . . . . . . . . . . . . . . . . . . . . . . . . . . . . 14
Options . . . . . . . . . . . . . . . . . . . . . . . . . . . . . . . . . . . . . . . . . . . . . . . . . . . . . . . . . . . . . . . . . . . . . . . . . . . . . . . . 15
Entering numbers and text, incorrect entries . . . . . . . . . . . . . . . . . . . . . . . . . . . . . . . . . . . . . . . . . . . . 15
Returning to idle status . . . . . . . . . . . . . . . . . . . . . . . . . . . . . . . . . . . . . . . . . . . . . . . . . . . . . . . . . . . . . . . . 16
Returning to the previous display page . . . . . . . . . . . . . . . . . . . . . . . . . . . . . . . . . . . . . . . . . . . . . . . . . 16
Activating/deactivating key and display lock . . . . . . . . . . . . . . . . . . . . . . . . . . . . . . . . . . . . . . . . . . . . 17
Making calls . . . . . . . . . . . . . . . . . . . . . . . . . . . . . . . . . . . . . . . . . . . . . . . . . . . . . . . . . . . . . 17
Making external calls . . . . . . . . . . . . . . . . . . . . . . . . . . . . . . . . . . . . . . . . . . . . . . . . . . . . . . . . . . . . . . . . . . . 17
Making internal calls . . . . . . . . . . . . . . . . . . . . . . . . . . . . . . . . . . . . . . . . . . . . . . . . . . . . . . . . . . . . . . . . . . . 18
Accepting a call . . . . . . . . . . . . . . . . . . . . . . . . . . . . . . . . . . . . . . . . . . . . . . . . . . . . . . . . . . . . . . . . . . . . . . . . 18
Speaker mode . . . . . . . . . . . . . . . . . . . . . . . . . . . . . . . . . . . . . . . . . . . . . . . . . . . . . . . . . . . . . . . . . . . . . . . . . 18
Switching to mute . . . . . . . . . . . . . . . . . . . . . . . . . . . . . . . . . . . . . . . . . . . . . . . . . . . . . . . . . . . . . . . . . . . . . 18
Security check . . . . . . . . . . . . . . . . . . . . . . . . . . . . . . . . . . . . . . . . . . . . . . . . . . . . . . . . . . . . . . . . . . . . . . . . . 18
Menu tree . . . . . . . . . . . . . . . . . . . . . . . . . . . . . . . . . . . . . . . . . . . . . . . . . . . . . . . . . . . . . . . 19
Menu Settings . . . . . . . . . . . . . . . . . . . . . . . . . . . . . . . . . . . . . . . . . . . . . . . . . . . . . . . . . . . . . . . . . . . . . . . . . 19
Using lists . . . . . . . . . . . . . . . . . . . . . . . . . . . . . . . . . . . . . . . . . . . . . . . . . . . . . . . . . . . . . . . 21
Redial list . . . . . . . . . . . . . . . . . . . . . . . . . . . . . . . . . . . . . . . . . . . . . . . . . . . . . . . . . . . . . . . . . . . . . . . . . . . . . . 21
Missed appointments list . . . . . . . . . . . . . . . . . . . . . . . . . . . . . . . . . . . . . . . . . . . . . . . . . . . . . . . . . . . . . . . 21
Opening lists via the message page in the idle display . . . . . . . . . . . . . . . . . . . . . . . . . . . . . . . . . . . 21
Deleting lists . . . . . . . . . . . . . . . . . . . . . . . . . . . . . . . . . . . . . . . . . . . . . . . . . . . . . . . . . . . . . . . . . . . . . . . . . . . 22
Configuring the display of new messages . . . . . . . . . . . . . . . . . . . . . . . . . . . . . . . . . . . . . . . . . . . . . . . 22
Configuring the scope of the number information in the lists . . . . . . . . . . . . . . . . . . . . . . . . . . . . 22
Using the directory . . . . . . . . . . . . . . . . . . . . . . . . . . . . . . . . . . . . . . . . . . . . . . . . . . . . . . 23
Opening the directory (list of directory entries) . . . . . . . . . . . . . . . . . . . . . . . . . . . . . . . . . . . . . . . . . . 23
Creating a new entry in the directory . . . . . . . . . . . . . . . . . . . . . . . . . . . . . . . . . . . . . . . . . . . . . . . . . . . 23
Order of directory entries . . . . . . . . . . . . . . . . . . . . . . . . . . . . . . . . . . . . . . . . . . . . . . . . . . . . . . . . . . . . . . . 23
Selecting a directory entry, navigating in the directory . . . . . . . . . . . . . . . . . . . . . . . . . . . . . . . . . . 24
Dialling with the directory . . . . . . . . . . . . . . . . . . . . . . . . . . . . . . . . . . . . . . . . . . . . . . . . . . . . . . . . . . . . . . 24
Managing directory entries . . . . . . . . . . . . . . . . . . . . . . . . . . . . . . . . . . . . . . . . . . . . . . . . . . . . . . . . . . . . . 24
Transferring an entry/directory to another handset . . . . . . . . . . . . . . . . . . . . . . . . . . . . . . . . . . . . . . 24
Transferring the directory as a vCard with Bluetooth . . . . . . . . . . . . . . . . . . . . . . . . . . . . . . . . . . . . . 25
Receiving a vCard with Bluetooth . . . . . . . . . . . . . . . . . . . . . . . . . . . . . . . . . . . . . . . . . . . . . . . . . . . . . . . 25
Adding a displayed number to the directory . . . . . . . . . . . . . . . . . . . . . . . . . . . . . . . . . . . . . . . . . . . . 25
Copying a number from the directory . . . . . . . . . . . . . . . . . . . . . . . . . . . . . . . . . . . . . . . . . . . . . . . . . . . 25
Reminder call on an anniversary . . . . . . . . . . . . . . . . . . . . . . . . . . . . . . . . . . . . . . . . . . . . . . . . . . . . . . . . 25
Using Bluetooth devices . . . . . . . . . . . . . . . . . . . . . . . . . . . . . . . . . . . . . . . . . . . . . . . . . 26

2
Contents
Gigaset SL910H / IM2 EN / A31008-M2370-R201-1-SM19 / SL910H-HS-UGIVZ.fm / 30.08.2011
Version 4.1, 21.11.2007
ECO DECT: reducing energy consumption and radiation . . . . . . . . . . . . . . . . . . . 27
Using a handset as a room monitor . . . . . . . . . . . . . . . . . . . . . . . . . . . . . . . . . . . . . . . 28
Setting an appointment (calendar) . . . . . . . . . . . . . . . . . . . . . . . . . . . . . . . . . . . . . . . 29
Displaying missed appointments, anniversaries . . . . . . . . . . . . . . . . . . . . . . . . . . . . . . . . . . . . . . . . . 29
Setting a reminder call . . . . . . . . . . . . . . . . . . . . . . . . . . . . . . . . . . . . . . . . . . . . . . . . . . . . . . . . . . . . . . . . . 30
Setting the alarm clock . . . . . . . . . . . . . . . . . . . . . . . . . . . . . . . . . . . . . . . . . . . . . . . . . . 30
Screensaver, caller pictures and sound pool . . . . . . . . . . . . . . . . . . . . . . . . . . . . . . . 30
Using the handset on the base . . . . . . . . . . . . . . . . . . . . . . . . . . . . . . . . . . . . . . . . . . . 31
Registering a handset to another Gigaset SL910/SL910A base . . . . . . . . . . . . . . . . . . . . . . . . . . . 31
De-registering the handset . . . . . . . . . . . . . . . . . . . . . . . . . . . . . . . . . . . . . . . . . . . . . . . . . . . . . . . . . . . . . 31
Changing the base . . . . . . . . . . . . . . . . . . . . . . . . . . . . . . . . . . . . . . . . . . . . . . . . . . . . . . . . . . . . . . . . . . . . . 31
Configuring the handset . . . . . . . . . . . . . . . . . . . . . . . . . . . . . . . . . . . . . . . . . . . . . . . . . 32
Quick access to functions, QuickDial – customising your own idle display page . . . . . . . . . . . 32
Changing the display language . . . . . . . . . . . . . . . . . . . . . . . . . . . . . . . . . . . . . . . . . . . . . . . . . . . . . . . . . 34
Configuring the keyboard/keypad . . . . . . . . . . . . . . . . . . . . . . . . . . . . . . . . . . . . . . . . . . . . . . . . . . . . . . 34
Setting the display . . . . . . . . . . . . . . . . . . . . . . . . . . . . . . . . . . . . . . . . . . . . . . . . . . . . . . . . . . . . . . . . . . . . . 34
Activating/deactivating auto answer . . . . . . . . . . . . . . . . . . . . . . . . . . . . . . . . . . . . . . . . . . . . . . . . . . . . 34
Changing the earpiece, speaker and headset volume . . . . . . . . . . . . . . . . . . . . . . . . . . . . . . . . . . . . 35
Setting a speaker profile . . . . . . . . . . . . . . . . . . . . . . . . . . . . . . . . . . . . . . . . . . . . . . . . . . . . . . . . . . . . . . . . 35
Setting ringtones . . . . . . . . . . . . . . . . . . . . . . . . . . . . . . . . . . . . . . . . . . . . . . . . . . . . . . . . . . . . . . . . . . . . . . 35
Activating/deactivating silent alert . . . . . . . . . . . . . . . . . . . . . . . . . . . . . . . . . . . . . . . . . . . . . . . . . . . . . 36
Activating/deactivating ringtone/silent alert . . . . . . . . . . . . . . . . . . . . . . . . . . . . . . . . . . . . . . . . . . . . 36
Activating/deactivating advisory tones . . . . . . . . . . . . . . . . . . . . . . . . . . . . . . . . . . . . . . . . . . . . . . . . . 36
Restoring the handset default settings . . . . . . . . . . . . . . . . . . . . . . . . . . . . . . . . . . . . . . . . . . . . . . . . . . 36
Customer Service & Assistance . . . . . . . . . . . . . . . . . . . . . . . . . . . . . . . . . . . . . . . . . . . 37
Questions and answers . . . . . . . . . . . . . . . . . . . . . . . . . . . . . . . . . . . . . . . . . . . . . . . . . . . . . . . . . . . . . . . . . 38
Exclusion of liability . . . . . . . . . . . . . . . . . . . . . . . . . . . . . . . . . . . . . . . . . . . . . . . . . . . . . . . . . . . . . . . . . . . . 38
Authorisation . . . . . . . . . . . . . . . . . . . . . . . . . . . . . . . . . . . . . . . . . . . . . . . . . . . . . . . . . . . . . . . . . . . . . . . . . . 38
Environment . . . . . . . . . . . . . . . . . . . . . . . . . . . . . . . . . . . . . . . . . . . . . . . . . . . . . . . . . . . . 39
Appendix . . . . . . . . . . . . . . . . . . . . . . . . . . . . . . . . . . . . . . . . . . . . . . . . . . . . . . . . . . . . . . . 40
Caring for your telephone . . . . . . . . . . . . . . . . . . . . . . . . . . . . . . . . . . . . . . . . . . . . . . . . . . . . . . . . . . . . . . 40
Contact with liquid . . . . . . . . . . . . . . . . . . . . . . . . . . . . . . . . . . . . . . . . . . . . . . . . . . . . . . . . . . . . . . . . . . . . . 40
Specifications . . . . . . . . . . . . . . . . . . . . . . . . . . . . . . . . . . . . . . . . . . . . . . . . . . . . . . . . . . . . . . . . . . . . . . . . . . 40
Accessing additional functions via the PC interface . . . . . . . . . . . . . . . . . . . . . . . . 40
Index . . . . . . . . . . . . . . . . . . . . . . . . . . . . . . . . . . . . . . . . . . . . . . . . . . . . . . . . . . . . . . . . . . . . 41

3
Overview of handset
Gigaset SL910H / IM2 EN / A31008-M2370-R201-1-SM19 / overview.fm / 30.08.2011
Version 4.1, 21.11.2007
Overview of handset
Status bar (¢page 12)
The internal handset name (e.g., INT 1) and icons
(¢page 4) that display the current settings and the
operating status of the phone
Touch the status bar to display the status page.
Navigation area (¢page 12)
Page position marker , change page ê/ë.
Keypad
Numerical keypad to enter phone numbers
Å Ä Ä
vMenu key
Press briefly: open main menus (¢page 13)
Press and hold: activate/deactivate key and display lock
(¢page 17)
Handset keys:
c Talk key
Dial displayed number, accept call
During call/when establishing a connection: switch
between earpiece mode and speaker mode
In idle status: open redial list (press briefly)
a End call/end key
Press briefly: end (active) call/paging call, reject internal call
Switch off ringtone for external call
Otherwise: return to idle status
Press and hold: activate/deactivate handset
Touchscreen/display (¢page 11)
Sample display: "dial page" for entering phone numbers in
idle mode (one of three idle display pages; ¢page 11).
Option slider (¢page 15)
Displays the possible actions
ÐINT 1 ó¼06:00 V
<
ÅÄÄ
>
ç
123
ABC DEF
456
GHI JKL MNO
789
PQRS TUV wxyz
*0#
˜Âí å
Calls Contacts QuickDial Internal
Underside of the handset: Mini USB connection socket
Connect wire-bound headset or handset to your PC
(Gigaset QuickSync)
Charging contacts
Message LED (¢page 22)
Proximity sensor (¢page 17)

4
Display icons
Gigaset SL910H / IM2 EN / A31008-M2370-R201-1-SM19 / overview.fm / 30.08.2011
Version 4.1, 21.11.2007
Display icons
Icons in the status bar
The following icons are displayed in the status bar depending on the settings and the operating status of
your telephone:
Icon Meaning
Signal strength (Eco Mode+ off)
76%–100%
51%–75%
26%–50%
1%–25%
Red: no connection to the base
Eco Mode+ activated:
White if Eco Mode is off
Green if Eco Mode is on
Answering machine activated
Bluetooth activated or
Bluetooth headset/data device connected
Ringtone deactivated
Alarm switched on and wake-up time set
Ð
White if Eco Mode is off
Green if Eco Mode is on
}
i
Ñ
Ò
¹
¹
Ã
ò
ò ô
ó
¼06:00
Battery charge status:
{White: charged over 66%
{White: charged between 34% and 66%
yWhite: charged between 11% and 33%
yRed: charged below 11%
yFlashing red: battery almost empty
(less than 10 minutes talktime)
Battery charging (current charge status):
xy0%–10%
xy 11%–33%
x{34%–66%
x{ 67%–100%
Icon Meaning

5
Display icons
Gigaset SL910H / IM2 EN / A31008-M2370-R201-1-SM19 / overview.fm / 30.08.2011
Version 4.1, 21.11.2007
Option slider icons
The functions on the option slider change depending on the operating situation.
Icon Action
†Activate speaker mode
†(orange) (Speaker mode is activated)
Deactivate speaker mode
ŽSpeaker profile
–Deactivate handset microphone
–(orange) Reactivate handset microphone
”Deactivate ringtone
”(orange)
(The ringtone is deactivated)
Reactivate ringtone
RSet the volume
—Open call lists
œOpen the directory
¬Copy number to the directory
Create SMS
Send SMS
® Reply to SMS
; Open the draft list
øDe-register handset
‡Open list of internal callers/make
internal call
dCreate new directory entry
PInitiate a consultation call:
P(orange) End a consultation call
Initiate three-way conference call
(orange) End a conference call
¥QuickDial
:Copy list
<Add name, number etc. to an entry
=Copy entry
NEdit entry
m
¾
T
T
QShow keypad
XDetermine free memory in the
media pool
þSearch
Skip settings
Delete
èSave/select
nEnter new appointment
>Calendar: Set selected date to Today
YChange order (sort by last name or
first name)
÷Directory entry:
Delete caller ringtone assignment
\Directory entry:
Delete caller picture assignment
þDelete anniversary
ÿTrust Bluetooth device found
Divert call to answering machine
ûPlay answering machine messages
ý(red) Answering machine: record an
announcement
úAnswering machine: end recording
öAnswering machine: for message
playback: go back five seconds
žInitiate ringback
‰(green) Accept a waiting call
À(red) Reject a waiting call
Icon Action
õ
ü

6
Safety precautions
Gigaset SL910H / IM2 EN / A31008-M2370-R201-1-SM19 / security.fm / 30.08.2011
Version 4.1, 21.11.2007
Safety precautions
uUse only the power adapter supplied.
uUse only the supplied, original batteries (¢page 40) as this could otherwise result in significant
health risks and personal injury. Replacement batteries can be obtained via the Gigaset Service Hotline.
uUsing your telephone may affect nearby medical equipment. Be aware of the technical conditions in
your particular environment, e.g., doctor's surgery.
If you use a medical device (e.g., a pacemaker), please contact the device manufacturer. They will be able
to advise you regarding the susceptibility of the device to external sources of high frequency energy.
Please refer to the "Appendix" chapter for the specifications of this Gigaset product.
uDo not hold the rear of the handset to your ear when it is ringing or when speaker mode is activated.
Otherwise you risk serious and permanent damage to your hearing.
Your Gigaset is compatible with the majority of digital hearing aids on the market. However, perfect
function with all hearing aids cannot be guaranteed.
The handset may cause interference in analogue hearing aids (humming or whistling) or override them.
If you require assistance, please contact the hearing aid supplier.
uDo not install the charger in bathrooms or showers. The handset is not splashproof (¢page 40).
uDo not use your phone in environments with a potential explosion hazard (e.g., paint shops).
uIf you give your phone to a third party, make sure you also give them the user guide.
After purchasing your Gigaset phone, please register it at www.gigaset.com/service – this will ensure
any questions you may have or warranty services you request are dealt with even faster!
For more information about your phone, visit www.gigaset.com/gigasetsl910
If you have any questions about using your phone, please read the tips on troubleshooting (¢page 38)
or contact our Service team(¢page 37).
Warning
Read the safety precautions and the user manual before use.
Explain their content and the potential hazards associated with using the telephone to your children.
Please note
uNot all functions described in this user guide are available in all countries and with all network pro-
viders.
uThe device cannot be used in the event of a power failure. In this case, it is also not possible to trans-
mit emergency calls.

7
First steps
Gigaset SL910H / IM2 EN / A31008-M2370-R201-1-SM19 / starting.fm / 30.08.2011
Version 4.1, 21.11.2007
First steps
Checking the package contents
One Gigaset SL910H handset, one battery cover (rear cover of the handset), one battery, one
charger, one power adapter for the charger and one user guide.
Setting up the charger
The charger is designed for use in dry rooms in a temperature range of +5°C to +45°C.
The phone's feet do not usually leave any marks on surfaces. However, due to the multitude of dif-
ferent varnishes and polishes used on today's furnishings, the occurrence of marks on the surfaces
cannot be completely ruled out.
Please note:
uNever expose the telephone to the effects of heat sources, direct sunlight or other electrical
devices.
uProtect your Gigaset from moisture, dust, corrosive liquids and fumes.
Connecting the handset charger
Setting up the handset for use
The handset's display and keys are covered with a protective film. Please remove the protective
film!
¤Connect the flat plug on the power adapter .
¤Plug the power adapter into the plug socket .
1
2
Remove the plug from the charger:
¤Disconnect the power adapter from
the mains power supply.
¤Press the release button and
disconnect the plug .
3
4
2
1
3
4
Warning
Please do not use any touchscreen styli to operate the handset!
Do not use any protective sleeves/films from other manufacturers, as they may restrict the oper-
ation of your handset.

8
First steps
Gigaset SL910H / IM2 EN / A31008-M2370-R201-1-SM19 / starting.fm / 30.08.2011
Version 4.1, 21.11.2007
Inserting the battery and closing the battery cover
To reopen the battery cover to replace the battery:
¤Insert your fingernail into the cavity on
the bottom of the battery cover and pull
the battery cover upwards.
¤To remove the battery,insert your fin-
gernail into the cavity on the casing and
pull the battery upwards.
Warning
Use only rechargeable batteries (¢page 40) recommended by Gigaset Communications
GmbH, as doing otherwise could result in significant health risks and personal injury. For exam-
ple, the outer casing of the battery could be destroyed or the battery could explode. The phone
could also malfunction or be damaged as a result of using batteries that are not of the recom-
mended type.
¤First insert battery with the contact
surface facing down .
¤Then press the battery downwards
until it clicks into place.
1
2
¤First, align the protrusions on the side
of the battery cover with the notches
on the inside of the casing.
¤Then press the cover until it clicks into
place.
1
2

9
First steps
Gigaset SL910H / IM2 EN / A31008-M2370-R201-1-SM19 / starting.fm / 30.08.2011
Version 4.1, 21.11.2007
Charging the battery
The battery is supplied with a partial charge. Please
charge it completely before use.
¤Charge the handset in the charger for 5 hours.
¤Place your handset back in the charger after
every call.
Registering the handset to the base
Once the handset is sufficiently charged:
Please note
The handset must only be placed in the des-
ignated charger.
Please note
uThe battery is also charged if the handset is connected via a USB connection to a PC with a
power supply of 500 mA.
uThe battery may heat up during charging. This is not dangerous.
uAfter a time, the charge capacity of the battery will decrease for technical reasons.
Please note
We recommend that you operate the handset on the Gigaset SL910 and Gigaset SL910A bases.
On other bases you will not be able to use the full range of functions of your handset. In partic-
ular, you will not be able to configure the base via the handset.
¤Touch Register to start the registration process on
the handset.
The message "Searching for a base which is in regis-
tration mode" appears in the display.
Setting the base to registration mode:
¤Within one minute, press and hold the registration
button on the base for 3 seconds.
5 h
¹V
<
Å Ä Ä
>
˜
Call List
Â
Contacts
April 2011
28
Thursday
Handset not registered
to any base
Register
,

10
First steps
Gigaset SL910H / IM2 EN / A31008-M2370-R201-1-SM19 / starting.fm / 30.08.2011
Version 4.1, 21.11.2007
This will start the installation wizard. If applicable, the values set on the base for the date, time, coun-
try, country code and local area code are displayed. You can also change the display language of the
handset.
The sequence of the installation wizard is described in the user guide for the Gigaset SL910 or
SL910A. Once the installation wizard has finished, the handset returns to idle status (¢page 10).
Handset in idle status
Once you have configured all the necessary settings, your handset switches to idle status. There are
three idle display pages (¢page 11). When you first set up the phone, the configurable page that
you can customise is displayed. Here, you can compile important functions and phone numbers for
quick access (¢page 32). Some are set by default.
Your phone is now ready for use.
If the system PIN 0000 (default setting) is set on the base, the message "‰Handset registered"
appears. Skip the following step.
If the base system PIN is not 0000:
¤Using the keypad displayed, enter the system PIN
for the base.
You can correct incorrect entries using $.
¤Touch èafter entering the PIN to complete the
entry.
After successful registration, the message
"‰Handset registered" appears.
LRegistration
System PIN
ç ‰
1 2 3
4 5 6
7 8 9
0
ÐINT 1 V
<
Å Ä Ä
>
˜
Call List
Â
Contacts
April 2011
28
Thursday
Status bar
Contains the internal handset name (e.g., INT 1) and icons that
display the current settings and the operating status of the
phone.
To discover the meaning of the icons, see page 4.
Touch the status bar to display the status page (¢page 12).
Current date
Time
Open the directory
Open call lists

11
Operating the handset
Gigaset SL910H / IM2 EN / A31008-M2370-R201-1-SM19 / starting.fm / 30.08.2011
Version 4.1, 21.11.2007
Operating the handset
Activating/deactivating the handset
¤Press and hold the end call key ain idle status to deactivate the handset. You will hear a confir-
mation tone.
¤Press and hold the end call key aagain to reactivate the handset.
Operating the touchscreen
The Gigaset SL910H handset is primarily operated using the display and only to a small extent using
the three buttons on the handset.
Icons, list entries, buttons and sliders shown on the display are sensitive areas. You can set up and
activate functions, enter or dial phone numbers and navigate between the various display screens
(pages) by touching these areas and dragging them across the display.
Selecting functions/list entries
To activate a function or select a list item (directory, submenu, call list), simply tap your finger on the
corresponding icon or on the required list entry on the display.
Activating/deactivating functions
Functions, e.g., room monitor, are activated and deactivated via buttons.
If the button slider is to the right, the function is acti-
vated. The area to the left of the slider is highlighted
(on).
If the button slider is to the left, the function is deacti-
vated (off). The area to the right of the slider is black.
There are two ways to operate a button:
¤Slowly drag the slider to the right or left to activate
or deactivate the function.
¤Touch the area to the right or left of the slider
briefly and the slider moves to the right or left to
the area that has been touched.
Handset idle display
The idle display consists of three pages that are shown separately on the display.
uThe configurable page (example ¢page 10)
You can customise this page yourself. More detailed information on configuring this page is avail-
able on page 32.
By default, the date and time are displayed and quick access can be set for call lists and the direc-
tory (¢page 10).
uThe dial page (example ¢page 3)
You will need this page to make calls. The dial page contains a keypad (numerical keyboard) for
entering phone numbers. You can use the options on this page to make internal calls and to dial
numbers from the directory and the call lists.
uThe message page (example ¢page 21)
You can use this page to go straight to the message lists for the phone (dependent on base): call
lists, answering machine list, SMS inbox and network mailbox. An icon and the number of new
and old messages are displayed for each list that contains entries. Touch the icon to open the cor-
responding list.
The default configuration, i.e., after the handset is switched on for the first time, is to display the
configurable page.
on
Slider
Function
activated
on off
Slider
Function
deactivated

12
Operating the handset
Gigaset SL910H / IM2 EN / A31008-M2370-R201-1-SM19 / starting.fm / 30.08.2011
Version 4.1, 21.11.2007
Navigation area, changing the page
You have to scroll right or left to move from one page to the next.
Each idle display page therefore has a navigation area (example):
The page position marker shows which idle display page is currently being displayed.
The example shows the middle page.
¤To scroll to the right, touch the ëicon in the navigation area or place a finger on the display and
drag it to the left.
¤To scroll to the left, touch the êicon or place a finger on the display and drag it to the right.
The scroll function is continuous. On the third page (far right; ), touch ëagain to display
the first page (far left; ).
Status bar and status page
On each of the three pages, a status bar appears in the header.
For the corresponding icons and their meaning, see page 4.
Touch the status bar to display the status page. Via this page, you have direct (quick) access to the
Bluetooth interface, the ringtone settings and the alarm as well as the base functions Eco Mode,
Eco Mode+ and to the base answering machine, if available.
Status page:
uYou can use the button on the right to activate or
deactivate the relevant components directly. To
do this, drag the slider on the touchscreen
to the right (on) or the left (off). Functions that
are not available are greyed out and their
switches are inactive.
uTouching the list entry e.g., Alarm, opens the cor-
responding pop-up menu that you can use to
configure all the settings for the component.
uTouching Show Service Info displays the service
information for your handset. You may need the
service information when you contact our hot-
line.
Closing the status page
¤Touch the icon in the header to return to the
idle display.
<
Ä Å Ä
>
Ä Å Ä
Ä Ä Å
Å Ä Ä
ÐINT Ãòô ó¼06:00 V
>
Eco Mode on
¹
Eco Mode+ off
»Bluetooth on
óDo not disturb off
ÙAlarm
06:00
on
Show Service Info
<

13
Operating the handset
Gigaset SL910H / IM2 EN / A31008-M2370-R201-1-SM19 / starting.fm / 30.08.2011
Version 4.1, 21.11.2007
Using the menus
All the functions for the base and the handset are provided in a menu (main menu).
Open the menu:
¤Briefly press the middle key vwhen the handset is in idle status.
The main menu is divided into two "pages" that are displayed separately. The Applications page
(subsequently referred to as the Applications menu) comprises all the applications offered by your
base or handset. The Settings page (subsequently referred to as the Settings menu) offers all the set-
ting options for the base, handset and telephony.
The following picture shows examples of the menus. The functions/applications that the menus con-
tain depend on the firmware version loaded on the handset and on the base.
Changing between the menu pages
You can switch between the menu pages in the same way as you switch between the pages in idle
mode, using ê, ëor dragging horizontally over the display (¢page 12).
Applications that are currently unavailable and settings that cannot currently be accessed
(e.g., because the handset is out of range of the base) are greyed out.
LApplications
<
ÅÄ
>
Â
Contacts
¾
Write
Text Message
˜
Call List
Á
Room
Monitor
Calendar
×
Sounds
[
Caller
Pictures
Õ
Screensavers
LSettings
<
Ä Å
>
ã
Select
Services
á
Date +
Time
ï
Audio
Settings
Æ
Language +
Location
i
Display +
Keypad
Î
Handsets +
Base
Ï
System
»
Bluetooth
Ë
SMS Service
Centres
ª
Telephony
Ì
Answer
Machine
Ì
Network
Mailbox
Ù
Alarm
Applications menu Settings menu
Page position
marker
Switch to a different main menu page

14
Operating the handset
Gigaset SL910H / IM2 EN / A31008-M2370-R201-1-SM19 / starting.fm / 30.08.2011
Version 4.1, 21.11.2007
Opening the submenu
Touch an icon on one of the main menu pages and it will be highlighted. The corresponding sub-
menu or a new display page is opened up with settings options for the application.
The submenus are displayed as lists. The lists contain the parameters that can be configured and the
current setting, available options or buttons to activate/deactivate.
Scrolling through lists (vertical scrolling)
If lists (not submenus) are longer than the display, i.e., if it is not possible for all the list entries to be
displayed at once, then a drop shadow on the lower and/or upper edge of the display indicates the
direction you have to scroll in to view more of the list.
You have to scroll vertically through lists:
¤Drag from bottom to top over the display to scroll down in the list (i.e., it appears as if you are
pushing the section currently visible upwards out of the display so that the bottom section
appears in the display).
¤Drag from top to bottom over the display to scroll upwards in the list.
As soon as you scroll in a list, a scroll bar is displayed on the right side of the display. This shows the
size and position of the visible section of the list.
Scrolling through lists is not continuous, i.e., you have to scroll back to return to the top from the end
of the list.
LRoom Monitor
Off
Sensitivity
kk
Forward alarm to
Number
1234567890 M
N
Edit
Low High
Internal External
Opens another submenu
Button
Current setting for Number
Available option
Setting options

15
Operating the handset
Gigaset SL910H / IM2 EN / A31008-M2370-R201-1-SM19 / starting.fm / 30.08.2011
Version 4.1, 21.11.2007
Options
Many display pages (especially lists like directories, call lists) have an option slider in the lower sec-
tion. This displays all the actions that you can apply in the current context.
¤Touch an option to perform the corresponding action.
Example (moveable option slider):
If all of the options cannot be displayed at the same time in one row, a moveable option slider is gen-
erally used. You can scroll horizontally using the option slider.
Moving the option slider (horizontal scrolling)
A moveable option slider is identified by an arrow to the right and/or left next to the options (see the
picture above). The arrows indicate that there are additional options to those that are visible.
¤Place a finger on the option slider and drag to the left to view the options to the right.
¤Pull the finger to the right to view the options to the left.
Showing/hiding option slider
While establishing an external connection and during an external call, an option slider with two lines
is used instead of the moveable option slider.
If the space is not sufficient for the options available, the icon is displayed below the option slider.
¤Touch to show further options.
¤Touch to hide them again.
Entering numbers and text, incorrect entries
The appropriate keypads are displayed to enter numbers and text: An keypad (numerical keyboard)
for entering phone numbers or a system PIN; A (typewriter) keypad for entering text.
You use them to enter characters by touching the relevant character on the display. These then
appear in the text or number field displayed on the page.
If several number and/or text fields are displayed (e.g., First Name and Surname in a directory entry),
you must activate the field by touching it before writing. The flashing cursor is displayed in the acti-
vated field.
To avoid unnecessary incorrect entries: Touch a character on the keypad and this character is
enlarged. If the wrong character is enlarged, you can move your finger to the required character
(without lifting it from the display). The character is only copied to the text field once you lift your
finger from the display.
Correcting incorrect entries
Briefly touch $to delete the last character.
Press and hold $to delete the whole content of the number or text field.
Entering text
¤Touch the shift key to change between lower and upper case.
If upper case is activated, the keypad is shown in upper case letters, otherwise it is in lower case.
Upper case is only activated for the next character. Then lower case is automatically reactivated.
When editing a directory entry, the first letter and each letter following a space is automatically
in upper case.
¤Touch §123§ if you want to enter a digit or a special character. Touch More... to view other special
characters. Touch §abc§ to return to the normal keypad (lower case).
•Âí å
Calls Contacts QuickDial Internal
><
ë
ë
ë

16
Operating the handset
Gigaset SL910H / IM2 EN / A31008-M2370-R201-1-SM19 / starting.fm / 30.08.2011
Version 4.1, 21.11.2007
¤You enter special characters (marked/diacritical characters, e.g., umlauts) by pressing and hold-
ing the corresponding initial letter and selecting the required character from the list displayed.
Diacritical characters in the default character set:
Diacritical characters in the Greek character set:
Diacritical characters in the Cyrillic character set:
¤Due to the larger space requirement of the Cyrillic character set, you can also access the following
letters by pressing and holding the bold characters shown below. Touch the required character.
¤Touch °(if necessary several times) to change the character set or the keypad layout.
The following keypad layouts are available:
– Latin (default) character set with the keypad layouts QWERTZ, for Central Europe,
QWERTY (American default) and AZERTY, for the French-speaking area
– Greek character set
– Cyrillic character set
Special features when writing an SMS
If the text of an SMS is so long that it cannot be completely displayed in the text field, the first section
of the text disappears upwards from the visible area. A scroll bar is displayed on the right side of the
text field, which you can use to scroll up and down within the text.
You can position the cursor within the text, e.g., to make corrections or add text. Touch the left half
of a word and the cursor will be positioned at the start of this word. Touch the right half and the cur-
sor will be positioned at the end of this word.
Text entered afterwards will be inserted before this word.
Returning to idle status
¤Briefly press end call key a.
Or:
¤If you do not press any key and do not touch the display, the display automatically reverts to idle
status after approximately three minutes.
Returning to the previous display page
Just like the idle display pages, the ‘icon appears
on the left-hand side of the header on almost every
page.
¤Touch the icon to return to the previous display page (move backwards step by step).
aäáàâã
æå ą cçć eëéèêę iïíìî
lłnńñoöóòôõøősßś uüúùûű
yÿý zźż
αάεέηήιίϊΐ οόσςυύϋΰ ωώ
еэёєийї гґьъ
цйxъжэ
LDisplay Language

17
Making calls
Gigaset SL910H / IM2 EN / A31008-M2370-R201-1-SM19 / starting.fm / 30.08.2011
Version 4.1, 21.11.2007
Activating/deactivating key and display lock
The key and display lock prevents the phone being operated unintentionally.
When the handset is in idle status:
¤Press and hold the vmenu key to activate or deactivate the lock.
When you activate the key and display lock, the message Keys and display locked is displayed
briefly. The display backlight switches itself off.
If you touch the display when the key lock is activated, nothing happens; if you try to press a key, a
corresponding message is displayed.
The lock deactivates automatically when you receive a call. It is reactivated when the call is finished.
Making calls
Making external calls
¤Open the dial page, enter the number, briefly press c.
Or:
¤Open the dial page, press and hold c, enter the number.
You can cancel dialling by pressing a.
Continuing a call on a headset
Bluetooth headset:
Prerequisite: Bluetooth is activated; the Bluetooth headset and the handset are connected
(¢page 26).
¤Press the talk key on the headset.
It may take up to 5 seconds to establish a connection to the handset.
Use [ RVolume] to adjust Headset Volume/Microphone Sensitivity.
For further details about your headset, see the accompanying user guide.
Wire-bound headsets:
Prerequisite: The headset is connected to the handset (¢page 3).
¤Press the push-to-talk key on the headset.
For more information, see the headset's user guide.
Please note
uWhen the key lock is active, you cannot call emergency numbers.
uThe display is automatically locked with the aid of a proximity sensor if you hold the handset
to your ear (display backlight disappears). This lock is deactivated again when you remove
the handset from your ear.
The sensor is located on the right next to the earpiece. If you cover it accidentally with your
finger during a call, the display will also be locked.
Please note
If a wire-bound headset and a Bluetooth headset are connected at the same time, you are unable
to use the wire-bound headset.

18
Making calls
Gigaset SL910H / IM2 EN / A31008-M2370-R201-1-SM19 / starting.fm / 30.08.2011
Version 4.1, 21.11.2007
Making internal calls
Internal calls to other handsets registered to the same base are free of charge.
¤Open the dial page (¢page 11). ¤Touch [ ‡Internal]. ¤If necessary, select the handset from
the list or touch All.
After opening the list, press cto initiate a group call to all handsets.
Accepting a call
You have the following options:
¤Press c.
¤Take the handset out of the charger if Auto Answer is activated (¢page 34).
Accepting a call on a Bluetooth headset
Prerequisite: Bluetooth is activated; the Bluetooth headset and the handset are connected
(¢page 26).
Only press the talk key on the headset once the headset rings.
For further details about your headset, see the accompanying user guide.
Speaker mode
You can configure various profiles for speaker mode (¢page 35).
¤If you are going to let someone listen in, you should tell the other party that this is happening.
Activating while dialling
¤Enter the number, press c twice.
Switching between earpiece and speaker mode
During a call, when establishing a connection and when listening to a (network) answering machine:
¤Press c or touch [†Speaker].
Place the handset in the charger during a call:
¤Press and hold c while placing the handset in the charger and for a further 2 seconds.
Switching to mute
If you deactivate the handset microphone during an external call, the other parties cannot hear you,
but you can still hear the other party.
Switch to mute, cancel muting (activate/deactivate microphone):
¤Touch [ –Mute].
Security check
The handset detects unsecured connections to the base, where third parties could listen in.
When establishing an external call or during an external call:
¤Press and hold any position on the status bar.
If Secure connection to base is displayed, the connection is secure.
If No secure connection to base is displayed, you should end the call.
Other manuals for SL910h
2
Table of contents
Other Gigaset Cell Phone manuals

Gigaset
Gigaset GL390 User manual

Gigaset
Gigaset SL750H PRO User manual

Gigaset
Gigaset S700H PRO User manual

Gigaset
Gigaset SL800 H PRO User manual

Gigaset
Gigaset GS100 User manual

Gigaset
Gigaset GX6 User manual

Gigaset
Gigaset GS160 User manual

Gigaset
Gigaset E630 User manual

Gigaset
Gigaset Gigaset SL37H User manual

Gigaset
Gigaset SL450A GO User manual

Gigaset
Gigaset GX4 User manual

Gigaset
Gigaset GX6 User manual

Gigaset
Gigaset GS4 User manual

Gigaset
Gigaset WIDEX W570 User manual

Gigaset
Gigaset GS110 User manual

Gigaset
Gigaset SL800 H PRO User manual

Gigaset
Gigaset GS80 User manual

Gigaset
Gigaset GX290 User manual

Gigaset
Gigaset GX290 User manual

Gigaset
Gigaset S820 User manual