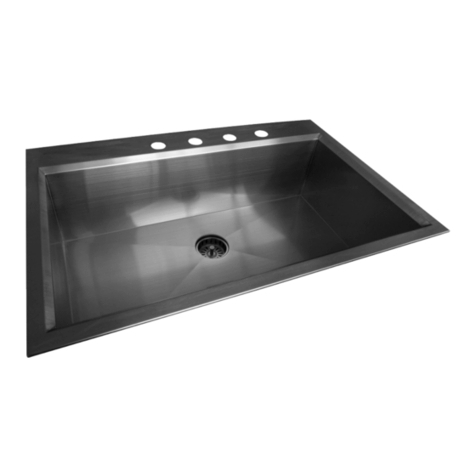
Glacier bay QK011 User manual

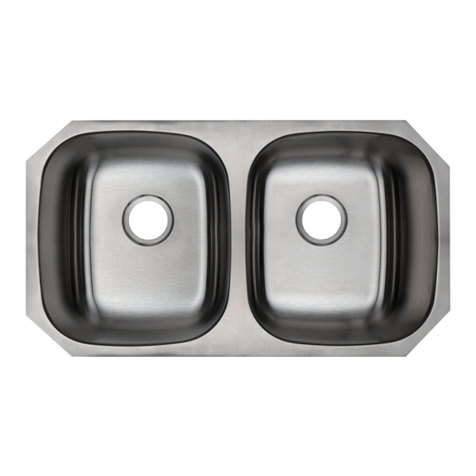
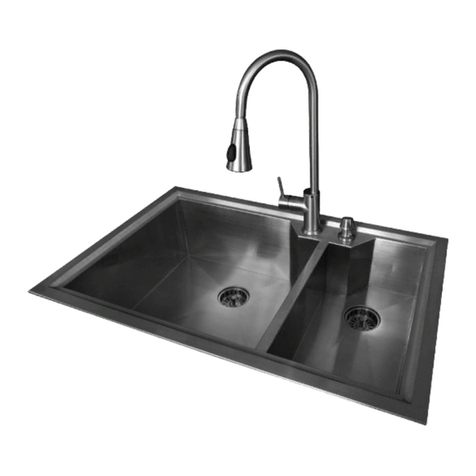
Stainless Steel Offset
Dual-Bowl Sink
Fregadero con dos cubetas
de diferente tamaño de acero inoxidable
#1000839188
#QK011
Owner’s Manual | Guía de uso

QK011 2
ENGLISH
Table of Contents
Table of Contents ...................................2
Safety Information ..................................2
Warranty ...........................................
One Year Limited Warranty...........................3
Warranty Claim Procedure ...........................3
Pre-Installation......................................
Planning Installation ................................4
Tools/Materials Required.............................4
Parts Required ....................................4
Package Contents .................................5
Installation .........................................
Undermount.......................................6
Topmount.........................................9
Installing the Vanishing EdgeTM Strainer ................11
Installing the Garbage Disposer (Optional) ..............11
Care and Cleaning .................................12
Service Parts .....................................13
GUÍA DE USO ................................. 14
Safety Information
READ AND SAVE THESE INSTRUCTIONS
1. Unpack and inspect this product for chips, scratches, cracks,
dents, and scuff marks. Do not install this product if any
damages or defects are identied.
2. Use this unit only in the manner intended by the manufacturer.
If you have any questions, contact the manufacturer.
3. Installation work and plumbing must be done by qualied
person(s) in accordance with all applicable codes and
standards.
4. Protect the entire surface during installation.
CAUTION: Always wear safety goggles and gloves during
installation to prevent personal injury.

3 HOMEDEPOT.COM/GLACIERBAY
Please contact 1-855-HD-GLACIER for further assistance.
ENGLISH
Warranty
ONE YEAR LIMITED WARRANTY
A thorough inspection must be made before installation and any damage must be promptly reported. We will not be liable for failures or damage
that could have been discovered or avoided by proper inspection and testing prior to installation.
We warrant this product to be free from defects in materials or workmanship for one (1) year from the date of purchase. Proof of purchase
(original sales receipt) from the original consumer purchaser must be made available to us for all warranty claims.
This warranty is non-transferable and shall be voided if the unit is removed from its initial installation or if it is not installed following the
manufacturer’s instructions. It does not apply in the event of product damage due to the use of other than our genuine replacement parts,
(Replacement parts may be obtained by calling 1-855-HD-GLACIER between 8:00 am - 7:00 pm, EST, Monday - Friday, 9:00 am - 6:00 pm, EST,
Saturday) installation error, abuse, misuse or improper care and maintenance (whether performed by a plumber, contractor, service provider or
member of the purchaser’s household). The warranty excludes damage due to aggressive air or water conditions, harsh or abrasive cleaners
and/or materials.
Under no circumstance shall we be held liable for personal injury or property damage resulting from improper installation or use of this product.
We will not be held liable for inconvenience caused by loss of use of this product, costs incurred for labour or materials, removal and installation
of replacement units, or any other incidental or consequential damages. Costs relating to obtaining access for repair or replacement are the
responsibility of the user.
Our obligation shall be limited to the repair or replacement of a unit (at our discretion) that may prove, by our sole examination, to be defective
under normal use and service during the warranty period.
Any failure of this product that is not traceable to a defect in material or workmanship is not covered by this warranty. These non-warrantable
items include, but are not limited to:
- Improper installation not in accordance with manufacturer’s instructions.
- Dents and/or scratches incurred during shipping, handling, or installation.
- Change in colour or nish due to chemical usage.
- Damage caused by failure to follow care and cleaning guidelines, including damage caused by the use of abrasive cleaners.
- Alterations made to the unit by the purchaser or installer.
- Damage caused by accidental impact, re, ood, freezing, and normal wear.
- Bends and warping caused by forced connections, over-tightened ttings, and inadequate support during installation.
- Damage caused by use of chlorine-based cleaners.
This warranty does not extend to commercial and institutional installation or use.
WARRANTY CLAIM PROCEDURE
If a claimable defect occurs or replacement parts are needed, please contact our customer service team at 1-855-HD-GLACIER
(8:00 am - 7:00 pm, EST, Monday - Friday, 9:00 am - 6:00 pm, EST, Saturday).
Before you make your call, please ensure that you have:
- Model number or description.
- Proof of sale.
- Details regarding the defect and/or part number.
- Name(s) and address(es) of the owner and/or installer.
QK011 4
ENGLISH
Pre-Installation
PLANNING INSTALLATION
Unpack and inspect this product for chips, scratches, cracks, dents, and scuff marks. If any damages or defects are identied or, if any parts are
missing, please contact the manufacturer.
You may choose to install this sink either undermount (below the counter) or topmount (above the counter). You must install this sink in a counter
at least 36 in. (914 mm) wide with a solid surface that has a minimum thickness of 3/4 in. (19 mm).
Protect the entire surface of the product during installation to prevent damage.
TOOLS/MATERIALS REQUIRED (NOT SUPPLIED)
Measuring tape Carpenter’s square Wrenches (2)
Saber-saw or
Jig-saw
Electric drill with
3/8 in. (10 mm) drill
bit and 1 in. (25.4
mm) hole saw
Pipe wrench
Silicone Sealant Pencil Flathead
screwdriver
Hacksaw Thread Seal Safety gloves
Safety goggles
PARTS REQUIRED (NOT SUPPLIED)
NOTE:
Parts not shown to actual size.
Plastic
ange (2) Tail pipe (2) Connecting
nut (2) Supply lines

5 HOMEDEPOT.COM/GLACIERBAY
Please contact 1-855-HD-GLACIER for further assistance.
ENGLISH
Pre-Installation (continued)
PACKAGE CONTENTS
A
B F
G
D
E
1A
C
Part Description Quantity
1A Sink Mounting Template 1
AStainless Steel Sink 1
BVanishing Edge™ Strainer 2
CStrainer Assembly 2
DTopmount Clips 10
EUndermount Clips 10
FGarbage Disposer Adaptor 1
GRubber Ring 1

QK011 6
ENGLISH
Installation
UNDERMOUNT INSTALLATION
PREPARING THE AREA CUTTING THE COUNTER
NOTE:
Undermount sinks are mounted from below the counter. If you
are installing a topmount or “drop-in” sink, please see “topmount
installation” on page 9.
It is highly recommended that undermounting be performed
by a professional installer. Improper installation will void the
warranty. Sink template (1A) shows cut-lines for both undermount
and topmount installations. Review it carefully and follow the
undermount cut-lines only to install the sink under your counter.
- Remove the sink template (1A) from the box.
- Place the template (1A) on the desired counter space
surface. Keep in mind that the typical setback is
3 1/2 - 4 in. (89 mm - 102 mm) from the front of the
counter to the sink bowl (depending on the cabinet
structure, the counter overhang, the type of sink bowl, and
the deck size).
- Make sure the template (1A) is parallel to the front of the
counter.
CAUTION: Always wear safety goggles and gloves when
using power tools to prevent personal injury.
- Ensure that the template (1A) is placed so that the sink
will clear all objects and the mounting hardware can be
installed. Secure the template to the counter top using
masking tape.
- Place a support underneath the cut-out portion of the
counter to prevent it from falling during cutting. Use an
appropriate saw to cut along the undermount cutline.
1A
Setback
3 1/2 - 4 in.
(89 mm - 102 mm)
Tape
Undermount installation

7 HOMEDEPOT.COM/GLACIERBAY
Please contact 1-855-HD-GLACIER for further assistance.
ENGLISH
Installation (continued)
TESTING THE FIT OF THE SINK
DRILLING THE HOLES FOR THE
UNDERMOUNT CLIPS
- Place the sink (A) underneath the cut-out in the counter to
test its t. Ensure that the reveal is equal on all four sides
when viewed from above. Make adjustments to the cut-out if
necessary.
- When you are satised with the location of the sink (A), mark
the location of the edge of the counter cut-out on top of the
sink and all around the sink ange underneath the counter.
- Set the sink aside and proceed with the rest of the installation.
A
CAUTION: Always wear safety goggles and gloves when
using power tools to prevent personal injury.
- On the underside of the counter, mark the location of the ten
holes for the undermount clips (E). These holes should be
equally spaced around the sink ange outline as shown below.
They should be set back from the sink ange outline by 5/8 in
(15.8mm).
- Using an electric drill with a 3/8 in. (10 mm) drill bit, drill each
hole so that it is 3/8 in. (10 mm) in diameter and 5/8 in. (15.8
mm) deep. Use a drill bit depth stop to ensure you do not drill
through the counter top.
Undermount Clip Hole locations
(Underside of Counter)
5/8 in
15.8 mm
Sink Flange Outline

QK011 8
ENGLISH
Installation
INSTALLING THE SINK
NOTE:
Install the faucet according to the manufacturers instructions before this step. Install the vanishing edgeTM strainer according to the instructions before
completing this step. See page 11.
- Press t the threaded anchor inserts (E) into the holes drilled into the underside of the countertop. Use a bolt to make this process easier if
required.
- Loosely thread the undermount bolts and clips into the threaded anchor inserts and align them parallel to the sink ange outline so they do
not interfere with the placement of the sink.
- Place a small bead of silicone sealant (not included) around the outer top perimeter of the sink ange as shown below.
- Carefully place the sink (A) into its location under the counter, lining up the pencil
marks on the top of the sink that you made when you tested the t of the sink.
- Carefully rotate the clamps of the undermount clips (E) over the clamp bar on the sink (A) and gently tighten the bolts (see tightening
sequence) of the undermount clips (E), working from side to side to fasten the sink (A) rmly. Recheck the alignment visually from above.
- Wipe away any excess silicone and, for best results, allow the bond to rest undisturbed for 8 hours or overnight.
- Install the counter, faucet, and all other plumbing as per manufacturer’s instructions if you hadn’t already done so.
9
6 2 4
3 5 1
7
810
E
Tightening sequence for clips
Silicone
Sealant
A
SUPPLY LINES (NOT INCLUDED)
The supply lines, which connect the faucet to the household water system, are not supplied with this unit. They need to be purchased separately.
Follow the supply line manufacturer’s instructions for proper installation.

9 HOMEDEPOT.COM/GLACIERBAY
Please contact 1-855-HD-GLACIER for further assistance.
ENGLISH
Installation (continued)
TOPMOUNT INSTALLATION
PREPARING THE AREA CUTTING THE COUNTER
NOTE:
Topmount sinks are dropped into the counter from above. If you are
installing an undermount sink, please see “undermount installation”.
Sink template (1A) shows cut-lines for both undermount and
topmount installations. Review it carefully and follow the outer
topmount cut-lines only to install the sink over your counter.
- Remove the sink template (1A) from the box
- Center the template (1A) on the counter so that it is
parallel to the front of the counter (ensuring that it will not
interfere with the inside structure of the cabinet or the
counter). It must clear the overhang of the counter and the
front inside face of the cabinet.
- Keep in mind that the typical setback is 3 1/2 - 4 in.
(89 mm - 102 mm) from the front of the counter to the
sink bowl (depending on the cabinet structure, the counter
overhang, the type of sink bowl, and the deck size).
- Ensure there is adequate clearance to install the mounting
hardware underneath the counter.
CAUTION: Always wear safety goggles and gloves when
using power tools to prevent personal injury.
- Secure the sink template (1A) to the counter top using
masking tape.
- Place a support underneath the cut-out portion of the
counter to prevent it from falling during cutting. Use an
appropriate saw to cut along the topmount cutline.
- Insert the sink (A) into the cut-out in the counter to test
the t. Make adjustments to the cut-out, if necessary.
Topmount installation
1A
Setback
3 1/2 - 4 in.
(89 mm - 102 mm)
Tape

QK011 10
ENGLISH
Installation (continued)
INSTALLING THE SINK
NOTE:
Install the faucet according to the manufacturers instructions before completing this step. Install the vanishing edgeTM strainer according to the
instructions before completing this step. See page 11.
- Apply silicone sealant (not included) around the underside of the ange of the sink (A) on all four sides as shown below.
- Install the topmount clips (D) into the clip channels of the sink (A) as shown in the gures below.
- Carefully lower the sink (A) into the counter, ensuring that the topmount clips (D) do not catch on the counter edges.
- Adjust each topmount clip (D) along the rails so that they are evenly spaced around the sink (A).
- Rotate the clamps of the topmount clips (D) such that they engage the counter, and tighten the screws progressively (see
tightening sequence below) until the sink ange is ush with the counter. Check the alignment as you tighten so that the front of
the sink (A) is parallel to the front of the counter. Adjust and re-tighten if necessary. Do not over tighten.
- Wipe away any excess sealant with a rag and allow it to set before proceeding with the rest of the installation.
9
6 2 4
3 5 1
7
810
Tightening sequence for clips
A
A
D
Silicone
Sealant
Clamp Screw
SUPPLY LINES (NOT INCLUDED)
The supply lines, which connect the faucet to the household water system, are not supplied with this unit. They need to be purchased separately.
Follow the supply line manufacturer’s instructions for proper installation.

11 HOMEDEPOT.COM/GLACIERBAY
Please contact 1-855-HD-GLACIER for further assistance.
ENGLISH
Installation (continued)
INSTALLING THE VANISHING EDGE™ STRAINERS
NOTE:
If you are installing a garbage disposer (not supplied), do not install the strainer.
Included with this item is a garbage disposer adaptor. This will replace the
ange from your garbage disposer. Install the garbage disposer according to the
manufacturer’s installation instructions replacing the ange for the adaptor.
1
2
A3
4
5
6
7
8
9
Not supplied
- Apply a small amount of plumbers putty (not included) in the notch
around the drain hole of the sink (A).
- Connect the upper strainer body (3) and the strainer ring (4), and insert
them into the drain hole from the top of the sink (A).
- Connect the strainer gasket (5) and lower strainer body (6), and insert
them into the drain hole from underneath the sink (A).
- Insert the strainer screw (2) through the entire assembly, from the upper
strainer body (3) to the lower strainer body (6). Tighten with a athead
screwdriver.
- Connect the plastic ange (7) and the tail pipe (8), and thread the
connecting nut (9) through the tail pipe and ange up to the lower
strainer body (6). Tighten the connecting nut by hand.
NOTE:
The plastic ange (7), tail pipe (8), and connecting nut (9) are not supplied.
INSTALLING THE GARBAGE DISPOSER
NOTE:
If you are installing a garbage disposer (not supplied), do not install a
strainer in the sink. Adaptor (F) is intended for use with metal waste
disposer mounting anges.
- To install a garbage disposer, place the rubber ring (G) around
the underside lip of the adaptor (F).
- Insert the adaptor (F) into the drain hole of the sink (A).
- Install the garbage disposer to the adaptor (F) according to the
garbage disposer manufacturer’s installation instructions.
A
F
G

QK011 12
ENGLISH
Care and Cleaning
Your sink is manufactured with the highest grade stainless steel and will provide you many years of enjoyment with the proper care.
Do Do Not
- After use, always rinse your sink with tap water to
dilute and remove deposits.
- Towel dry the sink after use whenever possible
to prevent water spots. Should water spots occur,
clean with a mild solution of vinegar and water
followed by a thorough rinse.
- Use liquid soap, a general household cleaner, or
a weak solution of vinegar and water for regular
cleaning.
- Only use plastic scouring pads recommended for
use in stainless steel sinks, and only use them in
the bowl of the sink. Scrub in the direction of the
grain (original polish lines).
- Do not allow any food, detergent, soap or grease to
dry or sit for extended periods of time on the surface
of the sink.
- Never use abrasive cleaning products, as they will
dull and scratch the nish.
- Do not use scouring pads on the deck, as they will
dull the mirror nish.
- Never use steel wool pads, as they will leave iron
particles on the sink, which will cause corrosion.
- Never leave steel or cast iron pans in your sink
for extended periods of time, as this can cause
corrosion.
- Never use chlorine-based cleaners in your new sink,
they could lead to rust spots and discolouration. If
you must use them, rinse sink thoroughly with fresh
water immediately after use. If any chemicals or
glue make contact with the sink during installation,
wipe clean and rinse thoroughly with fresh water.
SCRATCH, SPOT, AND BLEMISH REMOVAL AND SURFACE RESTORATION:
Little rust spots and blemishes that periodically appear in the sink are typically the result of the steel interacting with the chemicals
found in the vast spectrum of substances that sinks are commonly exposed to. They may also get transferred from other objects
placed or left in the sink. Scratches are the result of regular wear and tear.
To remove scratches, spots, and blemishes from the sink, rub them with a non-metallic scouring pad (e.g. Scotch-Brite®) combined
with a mild abrasive cleaner (e.g. Barkeeper’s Friend®). Always rub the surfaces in the direction of the grain of the steel. When
nished, rinse the sink with water and dry it with a towel to allow the sink to form a protective outer layer. This procedure can also be
used to renew all of the surfaces of the sink.

13 HOMEDEPOT.COM/GLACIERBAY
Please contact 1-855-HD-GLACIER for further assistance.
ENGLISH
Service Parts
If you are missing parts or if you require replacement parts, please call our customer service team at 1-855-HD-GLACIER,
8:00 am - 7:00 pm, EST,
Monday - Friday, 9:00 am - 6:00 pm, EST, Saturday
. Identify the required part(s) and have the part number(s) ready.
B C
F
D E
Part Description Code Quantity
BVanishing Edge™ Strainer QHS113 2
CStrainer Assembly QHS155 2
DTopmount Clips QHS108 10
EUndermount Clips QHS109 10
FGarbage Disposer Adaptor and Gasket QHS112 1

QK011 14
ESPAGÑOL
Tabla de materias
OWNER’S MANUAL ............................. 2
Tabla de materias ..................................14
Información de seguridad ...........................14
Garantía ...........................................
Garantía de un año contra defectos de fábrica ..........15
Proccedimiento de reclamación de garantía ............15
Preinstalación.......................................
Planicación de la instalación .......................16
Herramientas/Materiales necesarios. . . . . . . . . . . . . . . . . . . 16
Piezas requeridas ................................16
Contenido del paquete.............................17
Instalación ........................................
Montaje inferior ...................................18
Montaje supercial ................................21
Cómo instalar el colador sin bridas ....................23
Cómo instalar el triturador de basura (opcional) ..........23
Cuidado y limpieza.................................24
Piezas de repuesto.................................25
Información de seguridad
LEA Y GUARDE ESTAS INSTRUCCIONES
1. Examine la unidad antes de proceder. Verique si la supercie
presenta defectos o daños, abolladuras, curvaturas, golpes o
marcas por rozaduras. Si observa algún daño, no le instale.
2. Utilice esta unidad exclusivamente de la manera concebida
por el fabricante; si tiene preguntas, comuníquese con el
fabricante.
3. La instalación debe cumplir con todos los códigos locales de
fontanería. Solicite los servicios de un instalador calicado
para realizar o aprobar la instalación.
4. Proteja la supercie total del producto durante la instalación
para evitar daños.
PRECAUCIÓN : Use guantes y gafas de seguridad en
todo momento para evitar lesiones personales.

15 HOMEDEPOT.COM/GLACIERBAY
Por favor, llamé al 1-855-HD-GLACIER para obtener más ayuda.
ESPAGÑOL
Garantía
GARANTÍA LIMITADA DE UN AÑO
Debe hacerse una inspección a conciencia antes de la instalación y cualquier daño debe ser reportado inmediatamente. No seremos
responsables de las fallas o daños que pudieran haberse descubierto o evitado con una inspección y pruebas adecuadas antes de la instalación.
Garantizamos este producto contra todo defecto en los materiales o en la fabricación, durante un (1) año. Una prueba de compra (factura
original) del comprador/consumidor deberá acompañar toda reclamación hecha a nosotros.
Esta garantía no es transferible y será anulada si la unidad se quita del lugar donde se instaló inicialmente o si no se instala de acuerdo
con las instrucciones del fabricante. La garantía no se aplica en caso de daños al producto debido al uso de otros repuestos, (las piezas de
repuesto pueden obtenerse por llamando al 1-855-HD-GLACIER, 8 a 19 horas, hora del este, lunes a viernes, 9:00 a.m. - 6:00 p.m., hora del este,
sábado) error de instalación, abuso, mal uso, cuidado incorrecto o mal mantenimiento (ya sea realizada por un plomero, fontanero, contratista,
proveedor de servicios o un miembro de la familia del comprador). La garantía excluye los daños causados por condiciones agresivas de aire,
agua, abrasivos, limpiadores y/o materiales.
Bajo ninguna circunstancia seremos responsables de lesiones personales o daños a la propiedad que resulten de una instalación o de un
uso inapropiado de este producto. No seremos responsables por inconvenientes ocasionados por pérdida de uso de este producto, costos
incurridos en mano de obra o materiales, retiro e instalación de unidades de remplazo, ni ningún otro daño incidental o consecuente. Los
costos relacionados con la reparación o el reemplazo son la responsabilidad del usuario.
Nuestra obligación se limita a la reparación o reemplazo de una unidad (a nuestra discreción) que pueda comprobarse, únicamente al
examinarla por nosotros, que tiene defectos bajo un uso y servicio normal durante el periodo de garantía.
Cualquier falla de este producto que no sea identicable como un defecto en materiales o de fabricación no estará cubierto por la garantía.
Estos artículos que no se pueden garantizar incluyen, pero no se limitan a:
- Instalación indebida que no siga las instrucciones del fabricante.
- Abolladuras, golpes y marcas ocasionadas durante el transporte, manejo o instalación.
- Cambio de color o en el acabado debido al uso de productos químicos.
- Daños ocasionados por no seguir las instrucciones de cuidado y limpieza, incluyendo daños ocasionados por el uso de limpiadores
abrasivos.
- Alteraciones hechas a la unidad por parte del comprador o el instalador.
- Daños ocasionados por impacto accidental, fuego, inundaciones, congelamiento y por el desgaste normal.
- Dobleces y deformaciones a consecuencia de conexiones forzadas, accesorios apretados en exceso y soporte inadecuado durante
la instalación.
- Daño provocado por el uso de limpiadores a base de cloro.
Esta garantía no cubre el uso o la instalación comercial ni institucional.
PROCEDIMIENTO DE RECLAMACIÓN DE GARANTÍA
Si ocurre un defecto por el que se puede presentar una reclamación, por favor contacte nuestro equipo de servicio al cliente al
1-855-HD-GLACIER (8 a 19 horas, hora del este, lunes a viernes, 9:00 a.m. - 6:00 p.m., hora del este, sábado).
Antes de llamar para presentar una reclamción, por favor asegúrese que tiene:
- La descripción o el numéro de modelo.
- El comprobante de venta.
- Los detalles del defecto.
- Nombre(s) y domicilio(s) del proprietario y del instalador.

QK011 16
ESPAGÑOL
Preinstalación
PLANIFICACIÓN DE LA INSTALACIÓN
Examine la unidad antes de proceder. Verique si la supercie presenta defectos o daños, incluidos abolladuras, curvaturas, golpes o marcas por
rozaduras. Si observa algún daño, no la instale. Informe sobre los daños inmediatamente.
Puede optar por instalar este fregadero de dos formas: montaje inferior (desde abajo de la encimera) o montaje superior (desde arriba de la
encimera). Debe instalar este fregadero únicamente en una encimera de al menos 36 pulg. (914 mm) de ancho con una supercie sólida que
tenga un grosor mínimo de al menos 3/4 pulg. (19 mm).
Proteja la supercie total del producto durante la instalación para evitar daños.
HERRAMIENTAS/MATERIALES REQUERIDOS (NO SUMINISTRADOS)
Cinta de medir Escuadra de
carpintero Llaves (2)
Cierra
reciprocante
Taladro eléctrico
con broca para
taladro de 3/8 pulg.
(10 mm) y sierra
perforadora de
1 pulg. (25,4 mm)
Llave de tubos
Sellador de
silicona Lapiz Desarmador plano
Sierra de mano Cinta adhesiva Guantes de
seguridad
Gafas de seguridad
PIEZAS REQUERIDAS (NO SUMINSTRADAS)
NOTA:
Las piezas no se muestran al
tamaño real.
Brida plástica (2) Tubo nal (2) Tuerca de
conexión (2)
Líneas de
alimentación

17 HOMEDEPOT.COM/GLACIERBAY
Por favor, llamé al 1-855-HD-GLACIER para obtener más ayuda.
ESPAGÑOL
Preinstalación (continuación)
CONTENIDO DEL PAQUETE
A
B F
G
D
E
1A
C
Pieza Descripción Cantidad
1A Plantilla para montaje 1
AFregadero de acero inoxidable 1
BColador sin bridas 2
C Conjunto de colador 2
DPresillas de montaje supercial 10
EPresillas de montaje inferior 10
F Adaptador del triturador de basura 1
GEmpaquetadura de goma 1

QK011 18
ESPAGÑOL
Instalación
MONTAJE INFERIOR
NOTA :
Los fregaderos bajo encimera se instalan desde la parte inferior de
la encimera. Si está instalando un fregadero de montaje supercial
o de encastre, consulte la sección correspondiente a “montaje
supercial”, en la página 21.
Recomendamos que un instalador profesional realice la instalación
bajo encimera. Una instalación incorrecta anulará la garantía. La
plantilla para montaje (1A) indica las líneas de corte para ambos tipos
de montaje: bajo encimera y supercial. Examínela atentamente y siga
las líneas de corte correspondientes al montaje bajo encimera solo
para instalar el fregadero por debajo de la encimera.
- Retire la plantilla para montaje (1A) de la caja.
- Coloque la plantilla (1A) sobre el espacio de la encimera que
preera. Tenga presente que la distancia lateral que se suele
utilizar es de 3 1/2 - 4 pulgadas (89 mm - 102 mm) desde el
frente de la encimera hasta el recipiente del fregadero (según
la estructura de la alacena, el voladizo de la encimera, el tipo
de recipiente del fregadero y el tamaño de la plataforma).
- Procure que la plantilla (1A) quede paralela a la parte
delantera de la encimera.
PRECAUCIÓN: Use guantes y gafas de seguridad en
todo momento para evitar lesiones personales.
- Procure que la plantilla (1A) se ubique de forma tal que
el fregadero quede alejado de todos los objetos y que
se puedan instalar los accesorios de montaje. Sujete
la plantilla a la parte superior de la encimera, con
cinta adhesiva.
- Coloque un soporte debajo de la abertura a realizar en
la encimera, para evitar que se caiga durante el corte.
Utilice una sierra adecuada para cortar por la línea
de corte correspondiente al montaje inferior.
1A
Distancia lateral:
3 1/2 - 4 pulgadas
(89 mm - 102 mm)
Cinta
adhesiva
Montaje inferior

19 HOMEDEPOT.COM/GLACIERBAY
Por favor, llamé al 1-855-HD-GLACIER para obtener más ayuda.
ESPAGÑOL
Instalación (continuación)
CÓMO PROBAR EL ENCAJE DEL FREGADERO
CÓMO PERFORAR LOS ORIFICIOS PARA LOS
GANCHOS DE MONTAJE INFERIOR
- Coloque el fregadero (A) debajo del corte de la encimera para
probar su encaje. Procure que el mochete sea igual en los
cuatro lados, cuando se lo ve desde arriba. Realice ajustes en
caso de ser necesario.
- Cuando esté conforme con la ubicación del fregadero (A),
marque la posición del borde de la abertura de la encimera,
en la parte superior del fregadero y en todo el contorno de la
brida del fregadero, por debajo de la encimera.
- Aparte el fregadero y continúe con el resto de la instalación.
A
PRECAUCIÓN: Use guantes y gafas de seguridad en
todo momento para evitar lesiones personales.
- En la parte inferior de la encimera, marque la ubicación de los
diez oricios para las presillas de montaje inferior (E). Estos
oricios se deben ubicar a intervalos regulares, en el contorno
de la brida del fregadero, tal como se muestra más abajo. Es
necesario separarlos del contorno de la brida del fregadero,
alrededor de 5/8 pulgadas (15,8 mm).
- Con ayuda de un taladro eléctrico provisto de una broca
de 3/8 pulgadas (10 mm), perfore cada oricio para que mida
3/8 pulgadas (10 mm) de diámetro y 5/8 pulgadas
(15,8 mm) de profundidad. Utilice un tope de profundidad
de la broca para asegurarse de no perforar la parte superior de
la encimera.
Ubicaciones de los orificios para las presillas
de montaje inferior
(Parte inferior de la encimera)
5/8 pulgadas
(15,8 mm)
Contorno de la brida del fregadero

QK011 20
ESPAGÑOL
Instalación (continuación)
CÓMO INSTALAR EL FREGADERO
NOTA :
Antes de este paso, instale el grifo de acuerdo con las instrucciones del fabricante. Antes de completar este paso, instale el escurridor Vanishing edgeTM
siguiendo las instrucciones. Consulte la página 23.
- Ajuste a presión los insertos roscados (E) en los oricios de la parte inferior de la encimera. Si es necesario, utilice un tornillo para facilitar
este proceso.
- Coloque, sin apretar demasiado, los tornillos y las presillas en los insertos roscados, y ubíquelos en línea, en forma paralela al contorno de
la brida del fregadero, para que no intereran con la colocación del fregadero.
- Coloque una linea de sellador de silicona (no incluido) alrededor del perímetro superior externo de la brida del fregadero, como se muestra
más abajo.
- Ubique cuidadosamente el fregadero (A) en su lugar, debajo de la encimera, alineando las marcas que realizó con lápiz en la parte superior
del fregadero, cuando probó el encastre.
- Gire cuidadosamente las abrazaderas de las presillas de montaje inferior (E) sobre la barra de abrazadera del fregadero (A) y ajuste
suavemente los tornillos (consulte la secuencia de ajuste) de las presillas de montaje inferior (E), trabajando de lado a lado para ajustar
rmemente el fregadero (A). Controle nuevamente la alineación, observando desde arriba.
- Limpie todo exceso de silicona y, para obtener mejores resultados, deje secar durante ocho horas o toda la noche.
- Instale la encimera, el grifo y la plomería, según las instrucciones del fabricante.
9
6 2 4
3 5 1
7
810
E
Secuencia de ajuste de las presillas
Sellador de
silicona
A
ENSAMBLAJE DE LOS TUBOS DE ABASTECIMIENTO DE AGUA (NO SUMINISTRADOS)
Las líneas de abastecimiento, que conectan el grifo al suministro de agua de la casa, no vienen incluidos con en esta unidad. Se compran por
separado. Siga las instrucciones del fabricante para instalar las líneas de abastecimiento de manera adecuada.
Table of contents
Languages:
Other Glacier bay Kitchen Appliance manuals

Glacier bay
Glacier bay QL050 User manual

Glacier bay
Glacier bay QK024 User manual

Glacier bay
Glacier bay QK001 User manual

Glacier bay
Glacier bay QL046 User manual

Glacier bay
Glacier bay QK053 User manual

Glacier bay
Glacier bay VT3322D1 User manual

Glacier bay
Glacier bay QK004 User manual

Glacier bay
Glacier bay VR415A1 User manual

Glacier bay
Glacier bay QL033Y User manual

Glacier bay
Glacier bay QK008 User manual