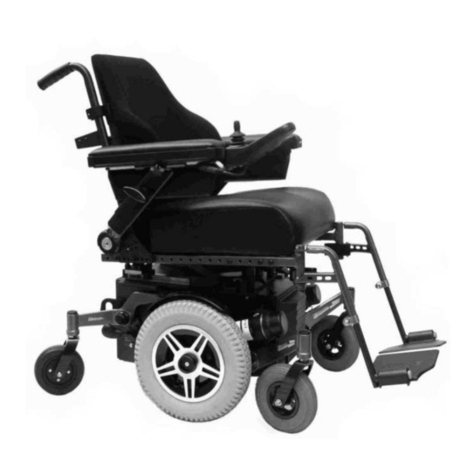
Glide Rehabilitation Products User manual

Rehabilitation Products
Power Assist Unit
Owner/Users Manual
For your safety and comfort read carefully and understand all of the features prior to
using your new Glide Rehabilitation Products Power Assist Chair.
Misuse may result in electrical or mechanical damage

TABLE OF CONTENTS
SECTION 1. INTRODUCTION
SECTION 2. STANDARD FEATURES
SECTION 3. GENERAL WARNINGS
SECTION 4. CHARGING THE BATTERY
SECTION 5. USING THE HANDRIMS FOR OPERATION
SECTION 6. REMOVING THE WHEELS
SECTION 7. MAINTENANCE
SECTION 8. SPECIFICATIONS
SECTION 9. WARRANTY.

SECTION 1. INTRODUCTION
Thank you for choosing the Glide Rehabilitation Products Power Assist
Wheelchair.
With proper care and operation your wheelchair will provide years of
trouble free mobility.
Please take the time to familiarise yourself with the functions and
features of your power assist chair by reading this owners manual. If
you have any queries about the functions of the chair you can call Glide
Rehabilitation Products or your nearest Glide Rehabilitation Products
dealer.
GLIDE REHABILITATION PRODUCTS
25 LEDGAR RD
BALCATTA
PERTH. WA. 6021
AUSTRALIA
PH +61 8 9345 3400
Fax +61 8 9345 1384

SECTION 2. STANDARD FEATURES

SECTION 3. GENERAL WARNINGS
WARNING
Understand the characteristics of the Power Assist Unit before using.
•Do not lift the front castors using the hand rims while the power
is on. Always turn the power off before lifting the castors
•Do not operate power assist unit in wet conditions. Hand rims
tend to slip when wet.
WARNING
Always be accompanied by an attendant in the following situations.
•Crossing railway lines. (There is a possibility of castors catching
in the tracks)
•Cross – hatched covers on side ditches or drainage ditches.
(There is a danger of the castors catching in the cover)
•Do not go down hill with the power unit turned off. (There is
danger when the speed increases to the point where you cannot
stop by yourself)
•Areas where the chair inclines sharply to the right or left
•Other areas that you are unfamiliar with the environment.
WARNING
Traveling without the anti-tip rollers fitted or traveling with the anti-tip
rollers incorrectly adjusted may cause a rollover. Always ensure that
they are fitted and adjusted correctly. When adjusted correctly you will
have approximately 75mm clearance between the floor and the anti-tip
roller when chair is fitted with 175mm diameter front castors.
WARNING
Crossing roads and riding on the shoulder of the road may involve
danger. Always be accompanied by an attendant when travelling in
unfamiliar areas.
•Pay attention to traffic from the right and left when crossing
roads without pedestrian signals.

WARNING
When the battery warning light blinks and the buzzer makes a
“beeping” sound, replace the battery as soon as possible. If you
continue power assisted travel and the battery completely runs out, the
battery warning light will come on and the buzzer will make a beeping
sound. The Power Assist Unit will come to a stop. It is very dangerous
when you get into a situation where you can’t move about. Make sure to
replace the battery, using the following procedure.
•Move to a safe area. Then turn the power off and replace the
battery with the spare battery. If you do not have a spare battery
with you, travel with the power turned off.
•If you cannot replace battery by yourself have an attendant help
you.
WARNING
If the battery warning light suddenly comes on and the Power Assist
System comes to a stop, with the buzzer making a “beeping” sound
during operation, there may be a malfunction in the system. Stop power
assisted travel.
WARNING
Adding modifications to the JW-2 init or to the mounting portion may
adversely affect its performance or safety. Never add modifications.
•If you feel something is wrong, contact your nearest agent or
Glide Rehabilitation Products.
WARNING
It is very dangerous to let children or people who do not know how to
operate it ride in this wheelchair. Make sure to detach the battery when
it is not in use.
WARNING
Do not hold (or let anyone hold) the hand rims, battery, or cable when
lifting (or having someone lift) the wheelchair. This may cause damage
to the unit. There is a danger of a rollover or a fall, especially when

lifting with someone in the wheelchair. Be sure to follow the following
precautions.
•Lock the brakes so the wheels do not spin
•Turn off the power
•Always hold the frame portion of the wheelchair when lifting.
WARNING
The JW – 2 has a small sized battery but it stores a large volume of
energy. Incorrect use may cause damage to the unit or, depending on
the situation; it may cause a burn or fire.
•Use the specified charger (JWC – 2) when charging the battery.
•Always put on the protective cap when the battery is not in use.
•Do not connect the (+, - ) terminals of the battery with the wires
or other metals.
•Avoid sharp impact to the battery, and do not disassemble or
modify it.
•Do not use the battery on units other than the specified
equipment.
•Do not heat or throw the battery into fire or water.
•Use the specified fuse.
•Keep the battery out of reach of children and third parties.
WARNING
Never take chair onto stairs or escalators

SECTION 4. CHARGING THE BATTERY
This section presents basic information on the characteristics of the
battery designed for the JW-2, and on the dedicated charger for the unit.
List of names of parts of the battery
1. Capacity display lamp. The charging and discharge statuses,
and any problems that occur, are displayed here.
2. Display Switch
3. Release Button. This button releases the battery from the
unit.
4. Battery Fuse. This fuse protects the battery, and should not
be removed unless there is a problem with it.
5. Contact points. Current and battery information is
transmitted by the contact points.
6. Protective Cap. This
prevents short-circuits
and protects the
contact point
7. Spare Battery Fuse.
This can be used as a
replacement if the
main unit fuse blows

Battery Characteristics
1. The travel distance may be shorter than usual, depending on the
terrain, temperature, and the method used to charge the battery.
•When using the wheelchair in locations where there are frequent
inclines and numerous curbs, the battery consumes more power
than under ordinary travel conditions, resulting in a shorter
travel distance.
•At low temperatures, battery operation is somewhat weaker, and
the travel distance is shorter.
•If the battery is repeatedly charged before it has completely run
down, the capacity decreases, and the travel distance is shorter.
(If refresh charging is done properly, this can be avoid)
•The above problem is particularly likely to occur if the battery is
charged with a high ambient temperature. (The recommended
ambient temperature range is 10 to 30 degrees C.
2. Even if the battery is correctly used, the performance
deteriorates gradually with the passage of time.
•The service life of a nickel hydrogen battery varies depending
on the way it is used, but is approximately one year or 300
cycles. (This can also be judged by looking at the capacity
display after the battery has been charged.)
•As the level of deterioration advances, the capacity display
becomes less stable. We advise consulting the dealership where
the battery was purchased, and replacing it with a new without
waiting until deterioration has proceeded too far.
3. The capacity diminishes naturally even if the battery is not used
(self discharging).
•Even if the battery is not used for a long period of time, the
remaining capacity display should be checked periodically, and
the battery recharged at appropriate intervals. If the battery is
being stored for a long period of time and it is not possible to
charge it, the fuse should be removed from the battery, to
suppress self – discharging. (When the fuse is removed, the
capacity display lamp no longer lights correctly, but operation
returns to normal when the battery is charged again.)

•Self – discharging is affected by the temperature at which the
battery is stored, and accelerates at high temperatures. (0 to 30
degrees C is the recommended storage temperature range.)
•If the JW – 2 is stored with the battery installed, a small amount
of battery power continues to be consumed. If the JW – 2 is not
to be used for a long period of time, the battery should be
removed and stored separately.
Names of parts of the charger
1. Power supply cord. This supports an input power
supply of 100 to 240 VAC, 50/60Hz.
2. Charging lamp (Green). This lights while the battery
is charging, and flashes in stand-by mode.
3. Refresh lamp (Yellow) .This flashes when refresh
charging is needed and lights during refresh
charging. If a problem occurs, both lamps flash to
alert the user.
4. Refresh switch. This is used if the refresh lamp is
flashing.
5. Battery insert inlet
6. Contact points (in 4 places). These transmit current
and battery information

Functions of the dedicated charger
1. When refresh lamp is flashing alerts the user to the
refresh charging timing. If nickel hydrogen batteries are
charged after they have completely discharged, the
battery performance can be recovered, and a shortening
of the travel distance can be avoided. The dedicated
charger reads information from the battery on the refresh
charging timing, and notifies the user by means of the
display lamps.
2. Charging is controlled by means of temperature
information. The temperature of the battery when it is
charged significantly affects the service life of the
battery. The dedicated charger reads temperature
information from the battery and controls charging based
on that information.
3. Alerts the user to battery and charger problems. If a
problem occurs with the battery or the charger during
charging, the display lamps flash, notifying the user of
the location of the problem.
4. Worldwide voltages supported. The charger supports
input power supplies ranging from 100 to 240 VAC,
50/60 Hz. (An adapter for the power supply plug may be
necessary in some counties.)
Select a place to Charge
Select one of the following places to charge the battery.
•A cool and well ventilated place indoors.
•A location where the temperature can be kept at 10 to 30
degrees C while charging.
•A level and stable place.
CAUTION
Avoid the following areas.
•High temperature areas such as exposed to direct sunlight or
near a stove. In cold regions, where the temperature drops
to below zero in the winter. Charging will not start when the
battery temperature is too high or too low.

•Outdoors where it is exposed to rainfall or near a sink where
water may splash. This may cause a short circuit or electric
shock.
•Do not place objects on or around the charger. The charger
will generate heat during charging, and this may adversely
affect its function.
•Within reach of children or pets. May cause injury or
damage to the unit.
Install the battery in the Charger
Use only the specified charger (JWC-2). Failing to do so may cause
fire or damage to the unit.
1. Hold the plug and plug in the power cord of the charger to a
240V household outlet.
2. Confirm that the power switch of the charger is turned off.
3. Before charging, allow the battery to cool naturally until it feels
cool to touch. 10 to 30 degrees C is the appropriate temperature
range for charging.
Caution:
To protect the battery, a hot battery will not start charging until the
battery is cooled off to an appropriate temperature. The battery,
immediately after use on a hot summer day, is likely to be hot. Cool the
battery to an appropriate temperature before charging it.
4. Insert the battery firmly until it hits the battery insert inlet of the
charger.
WARNING
Do not drop or jolt the battery. This may cause it to malfunction.
Caution:
•Do not put your hands or other objects in the battery insert
inlet.
•Check that there are no foreign objects in the battery insert
inlet. Remove any objects before installing the battery.
•Do not deform or damage the connecting point of the
charger.

Start Charging
There are two ways to charge the battery: “rapid charging”, in which
the battery is charged in a short time, and “refresh charging”, in which
the battery is charged while recovering the battery performance.
Rapid Charging Procedure
1. Turn on the power after installing the battery. If the battery
temperature is appropriate, the charging light (green) will light,
and charging will start. Charging is completed in approximately
one to two hours.
2. When the battery temperature is (40 C or above) or low (0 C or
less), the stand – by light (yellow) will light until the battery
reaches the appropriate temperature. When the battery
temperature is appropriate, the charging light (green) will light,
and charging will start automatically. The stand-by time will
vary depending on conditions, but it will take approximately one
to two hours.
3. When charging is completed, the charging light (green) will go
out automatically.
Caution
Do not charge a battery that is already charged. The temperature
will increase and it will shorten the life of the battery.
Caution
As the deterioration of the battery advances, some of the display
lamps no longer light, even though the charger has been completed.
First the 5
th
light fails to light, then the 4
th
, and so on. If the 5
th
and
4
th
lamps no longer light after charging has been completed, the
battery should be replaced.

Refresh charging Procedure
1. Install the battery in the charger and turn on the power.
2. The refresh lamp (yellow) flashes when refresh charging is
needed. If the refresh lamp is flashing push the refresh switch
while the refresh lamp is flashing (about 10 seconds). Then the
refresh lamp comes on and discharging starts.
3. During the discharging, the capacity display lamp indicates the
status of discharging.
4. Discharging automatically terminates and then charging starts.
(The charging process is the same as the rapid charging.)
CAUTION
If you disregard the refresh charging alert and continue rapid
charging, the capacity display lamp may go off inaccurately. Make
sure refresh charging is done before the third alert.
NOTE
•Refresh charging normally takes 3 to 13 hours. (In case of
high temperatures, it may take longer.)
•It is a good idea to do refresh charging while sleeping.
•If the refresh lamp flashes but you have no time for refresh
charging, you can do rapid charging instead of refresh
charging.
•If the charger is not touched for 10 seconds, rapid charging
starts.

Problems during Charging
If a problem occurs with the battery or the charger during charging, the
“Charging” lamp and “Refresh” lamp on the charger, and the battery
capacity display lamp, light to alert the user to the problem.
BATTERY CHARGER FAULT
1
ST
, 3
RD
,
and 5
TH
light
flashing
The temperature of the battery is not
appropriate for charging. Wait until the
battery temperature has reached an
appropriate level before beginning to charge
it.
4
TH
Flashing
Both green and
yellow are flashing
simultaneously
There is a problem inside the battery. Replace
the battery with a new one.
9 green and yellow
are flashing rapidly
and alternately.
1. There is a possibility of a faulty contact
point. Inspect the contact points on the
battery side and the charger side, and if
there is any dirt or dust, remove it. If the
contact points are dirty, wipe them clean
with a dry cloth, being careful not to
scratch or cause deformation of the
contact points. 2. There is a possibility
that the battery fuse has blown. Open the
fuse cover on the side of the battery, and
inspect the fuse. If it has blown, replace it
with the spare fuse on the protective cap
Warning - Using the wrong type of
fuse can cause a fire. Use only the
specified type of fuse (30A blade fuse).
Never use a wire or any other material
Flashing
sequentially in the
order of green-
green-yellow
There is a problem with the charger. Replace
it with a new charger.
Flashing
sequentially in the
order of green –
green – green -
yellow
There is a problem with the charger. Replace
it with a new charger.

After Charging
1. When charging has been completed, remove the charged battery.
WARNING
Store the detached battery with the protective cap on. There is a
danger of a short – circuit when the connecting strips/terminals are
exposed.
2. Unplug the power cord from the outlet by holding the plug
portion.
CAUTION:
Do not pull on the power cord. This can cause breakage to the wires.
3. Storing the battery for a long period.
If the battery is stored for a long period, the battery capacity will
decrease due to self discharging. Before using it, recharge any
battery that has not been in use for over one week.
4. Recycling the battery
Dead batteries are valuable resources that can be recycled. Contact
the dealer shop when asking for recycling.

SECTION 5. USING THE HAND RIMS FOR OPERATION
(TYPE A & TYPE B)
1. Before Use
1. Check the remaining battery
capacity, pressing the display
switch to confirm the capacity
on the display lamps. When the
display switch is pressed, the
lamps light for several seconds.
NOTE: The remaining battery
capacity is displayed in a 5 step
display (when new).
As the deterioration of the
battery advances, some of the
display lamps no longer light,
even though the charging has
been completed. The travel
distance also decreases.
2. Check to see if the anti – tip
wheel has been properly
installed.
WARNING: Traveling
without the anti – tip wheel,
or with the wheels set to a
shorter than “correct length”
may cause a rollover. Never
travel without making
adjustments.
3. Get in the wheel chair
WARNING: There is a
danger of the wheelchair
moving unexpectedly, causing
a rollover or a fall if you get
in and out of the wheelchair
incorrectly. Be sure to get in
and out of the wheelchair
using the proper procedure as
described by your therapist.

STARTING & STOPPING
4. Confirm that he power
switch is turned off, and install
the battery. Insert the battery
until it makes a “clicking”
sound.
WARNING: Do not drop or
jolt the battery. This can
cause malfunction
CAUTION: Do not put your
hands or other objects in the
battery insert inlet.
Check that there are no
foreign objects in the battery
insert inlet. Remove any
objects before installing the
battery.
Do not deform or damage the
contacting points.
5. Sit tightly so you will not fall
off the wheelchair.
CAUTION: Do not forget to
wear a seat belt if you usually
use it.

Starting and Stopping cont’d
1. Confirm that the brakes for both wheels are locked.
2. Turn on the power switch. Power assisted travel is enabled when the RED
light goes out after a long beep.
NOTE:
•After the warning lamp has lighted for 3 seconds, it flashes the same
number of times as the number of battery capacity display lamps, at
intervals of 2.5 seconds, and then repeats this twice, to alert the user to
the remaining battery capacity.
•If force is applied to the hand rims when turning on the power, a
warning beep will be heard and the safety system will be activated,
inhibiting travel. Stop applying force to the hand rims, and turn on the
power again.
•You cannot ride the wheelchair if the “RED” battery warning light is on
immediately after replacing the battery. There may be a malfunction in
the system. Contact your nearest dealer or agent.
3. Release both brakes.
4. Before traveling, be sure you understand the characteristics of the Power
Assist System, and then make every effort to ride safely.

SECTION 6. REMOVING THE WHEELS
1. Detach the battery so the power will not turn on during
operation.
WARNING: Store the detached battery with the protective cap
on. There is a danger of a short circuit when the contacts are
exposed.
2. Pull of the coupler of the left wheel by slightly turning the end.
NOTE: Wind the removed coupler to the right wheel to prevent it
from being damaged.
3. Lift the cam shaft lever on the left wheel. Pull the lever and
remove the wheel.
4. If necessary, remove the right wheel by following the same
procedure.
Table of contents
Other Glide Wheelchair manuals

Glide
Glide COMFORT-PLUS DELUXE User manual

Glide
Glide 4 Series User manual

Glide
Glide NipperGlide User manual

Glide
Glide TS TILT User manual

Glide
Glide G2 Series User manual

Glide
Glide CentroGlide User manual

Glide
Glide 6 Series User manual

Glide
Glide Centro User manual

Glide
Glide RoboGlide User manual

Glide
Glide COMMODE User manual