manuals.online logo
Brands
  1. Home
  2. •
  3. Brands
  4. •
  5. GMI
  6. •
  7. Measuring Instrument
  8. •
  9. GMI PS200 series Operating instructions

GMI PS200 series Operating instructions

PS200 Series
QUICK OPERATING INSTRUCTIONS
Switch ON
•Press and hold the Right Hand button
for one second to switch the instrument ON and
initiate a warm-up routine.
•The display will show the serial number,
software version, battery status and calibration
gas. Next, the date and time are shown, followed
by the Calibration Due date. If expired, press the
button to acknowledge.
•Lastly, a sensor check is run. If sensors are
working OK and were zeroed correctly, a
symbol is displayed adjacent to the gas type. If a
sensor fails the zero check, the display will be
red, the audible / visual alarms activate and a
symbolisdisplayedadjacenttothefaultygastype.
To acknowledge this fault, press the button.
Switch ON - Manual Bump Test
Press and hold the button to switch the
instrument ON and initiate a Manual Bump Test
(after the warm-up routine is complete). When
concluded, the instrument will operate as normal.
Refer to Essential Health and Safety Requirement (EHSR) and PS200
Series User Handbook before first use.
Backlight / MAX & MIN
Press the button once to switch the backlight
ON. (After 20 seconds it will automatically switch
OFF.) Press again to view MAX readings and a further
press to view the MIN readings. To reset MAX / MIN
readings, press and hold the button for 2
seconds when either MAX / MIN screen is displayed.
Alarms Reset /Acknowledge
In alarm condition, the display will be red and the
audible and visual alarms are activated. When the
gas readings (of a Latching Alarm) are safe, press
and hold the button to reset / acknowledge the
alarm. (If alarms are Non-Latching, the audible and
visual alarms reset automatically when gas readings
are safe.)
Normal Operation
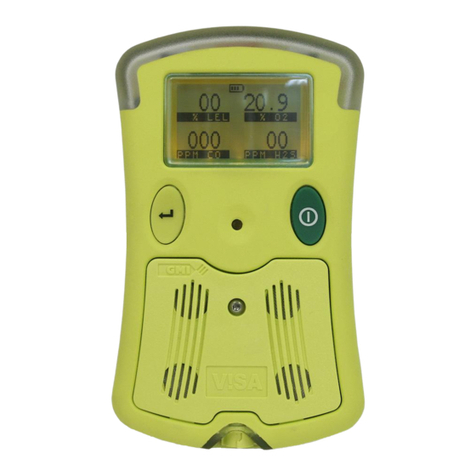
The standard operating screen for the 4 Gas model
is shown here. Other models will report the relevant
gases they are capable of detecting.
Switch Pump ON / OFF
Press and hold the button to toggle the pump ON / OFF
(Pumped instruments only).
Manual Datalog
Press the button once to perform a manual datalog, briefly indicated on
the display as ‘LOGGING’.
Switch OFF
Press and hold both and buttons, for 3 seconds, to switch the
instrument OFF.
WARNINGS
LOW BATTERY
Flashes when approximately 30 minutes operating time remains. The display
flashes red, the audible alarm sounds once every two seconds and the red
LED’s flash. Note: Gas alarms will continue to operate as normal.
BAT FAULT
Flashes when approximately 3 minutes operating time remains. The display
will be red, the audible alarm sounds continuously and the red LED’s remain
on. After approximately 3 minutes the instrument automatically switches off.
CAL EXPIRED
Displayed every 30 seconds if the calibration expiry date has been exceeded.
ZERO FAULT (and flashing symbol)
Appears after warm-up if the instrument is switched on in gas or the instrument
has been unable to zero all sensors. The display will be red, the audible alarm
soundsonceevery2 seconds, and the red LED’sflash(start-uponly).However,
the instrument can still be used to detect and alarm on the other sensor(s)
fitted.
Note:
1) If a flashing symbol is alternating with a gas value, leave instrument on
for 30 minutes then switch OFF, and then ON again in fresh air. If the fault
remains, return instrument to a GMI approved Service / Repair facility.
2) If the symbol is displayed constantly, then the sensor may require
replacement. Return instrument to a GMI approved Service / Repair facility.
FLOW FAULT (Pumped instruments only.)
Flashes to indicate a sample fault . The display will be red, the audible alarm
sounds continuously and the red LED’s remain on. Check sample line / filters
/ and probe for blockage. Clear the blockage and restart pump by a press and
hold of the button.
----------------------------------------------------------------- Part Number: 64191 Issue 3 07/07/2011 -----------------------------------------------------------------
SINGLE PRESS PRESS & HOLD
Backlight ON
Manual Datalog
SWITCH OFF
&
SWITCH ON
Pump ON / OFF
Acknowledge / Mute Alarm
Reset MAX / MIN
Switch ON - Manual Bump
Self Test
MAX
MIN
()
displayed
when
LOCATING SLOT
LOCATING TONGUE
CHARGING CLIP
USB CHARGING
CABLE
Refer to User Handbook for
alternative charging options.
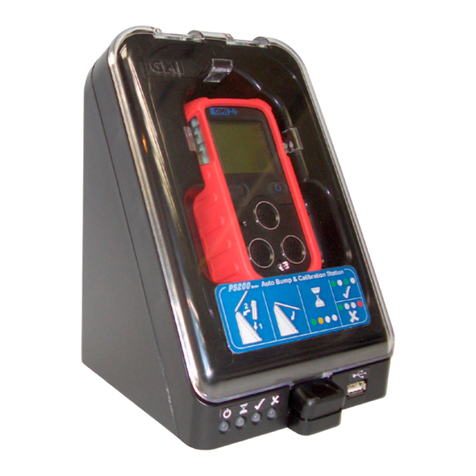
CHARGING
Before first use the PS200 instrument should be charged for up to 4 hours or
until the ‘CHARGE COMPLETE’ message appears on the display.
The PS200 Series uses a Li-Ion (Lithium Ion) rechargeable battery. To
recharge, securely connect the charging clip to the bottom of the
instrument.Connect one end of the cable to the charging clip and the other to
the universal charging adaptor (supplied) or any standard USB socket.
BUTTONOPERATION

Other manuals for PS200 series

4

Other GMI Measuring Instrument manuals

GMI Gasurveyor 500 Series Installation guide

GMI

GMI Gasurveyor 500 Series Installation guide

GMI PS200 series User guide

GMI

GMI PS200 series User guide

GMI PS200 series User manual

GMI

GMI PS200 series User manual

GMI First Responder Instruction Manual

GMI

GMI First Responder Instruction Manual

GMI V!SA Instruction Manual

GMI

GMI V!SA Instruction Manual

GMI GT series Instruction Manual

GMI

GMI GT series Instruction Manual

GMI GT series Instruction Manual

GMI

GMI GT series Instruction Manual

GMI PS241 Instruction Manual

GMI

GMI PS241 Instruction Manual

GMI PS1 User guide

GMI

GMI PS1 User guide

GMI GDUnet Instruction Manual

GMI

GMI GDUnet Instruction Manual

GMI PS500 Installation guide

GMI

GMI PS500 Installation guide

GMI PS200 series User manual

GMI

GMI PS200 series User manual

GMI PS1 Instruction Manual

GMI

GMI PS1 Instruction Manual

GMI PS200 series Instruction Manual

GMI

GMI PS200 series Instruction Manual

GMI Gasurveyor 6 - 500 Instruction Manual

GMI

GMI Gasurveyor 6 - 500 Instruction Manual

GMI GT series User manual

GMI

GMI GT series User manual

Popular Measuring Instrument manuals by other brands

GE AMP1B1 manual

GE

GE AMP1B1 manual

Hanna Instruments HI 4015 instruction manual

Hanna Instruments

Hanna Instruments HI 4015 instruction manual

NIVELCO MicroTREK HT User and programming manual

NIVELCO

NIVELCO MicroTREK HT User and programming manual

Inficon Sniffer line SL3000XL Translation of the original operating instructions

Inficon

Inficon Sniffer line SL3000XL Translation of the original operating instructions

Keysight Technologies M9370A Configuration guide

Keysight Technologies

Keysight Technologies M9370A Configuration guide

RJM Radiodetection RD8200 Quick Locating Guide

RJM

RJM Radiodetection RD8200 Quick Locating Guide

PCE Instruments PCE-2800 manual

PCE Instruments

PCE Instruments PCE-2800 manual

Svantek SVAN 106 user manual

Svantek

Svantek SVAN 106 user manual

nimble N5 Starter Guide

nimble

nimble N5 Starter Guide

Laserworld CS-1000RGB manual

Laserworld

Laserworld CS-1000RGB manual

Thermo Scientific Prima PRO user guide

Thermo Scientific

Thermo Scientific Prima PRO user guide

Met One 831 manual

Met One

Met One 831 manual

Bender RCMA421H manual

Bender

Bender RCMA421H manual

Anritsu FieldMaster MS2080A Maintenance manual

Anritsu

Anritsu FieldMaster MS2080A Maintenance manual

SolarEdge SE-MTR240-NN-S-S1 installation guide

SolarEdge

SolarEdge SE-MTR240-NN-S-S1 installation guide

Milwaukee MA871 instruction manual

Milwaukee

Milwaukee MA871 instruction manual

Dakota Digital MCL-4027S manual

Dakota Digital

Dakota Digital MCL-4027S manual

EINHELL 41.327.76 Original operating instructions

EINHELL

EINHELL 41.327.76 Original operating instructions

manuals.online logo
manuals.online logoBrands
  • About & Mission
  • Contact us
  • Privacy Policy
  • Terms and Conditions

Copyright 2025 Manuals.Online. All Rights Reserved.