manuals.online logo
Brands
  1. Home
  2. •
  3. Brands
  4. •
  5. Go Rhino
  6. •
  7. Automobile Accessories
  8. •
  9. Go Rhino 3128MB User manual

Go Rhino 3128MB User manual

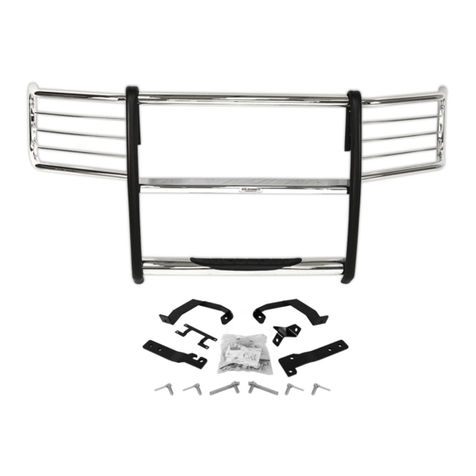
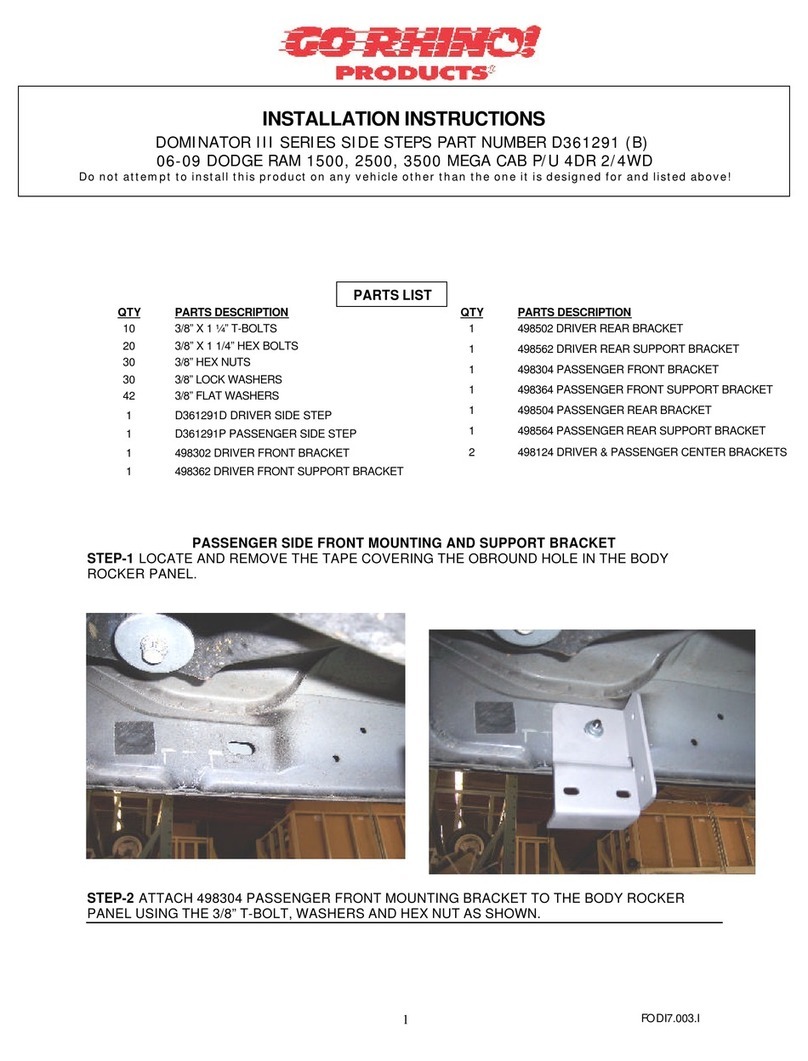
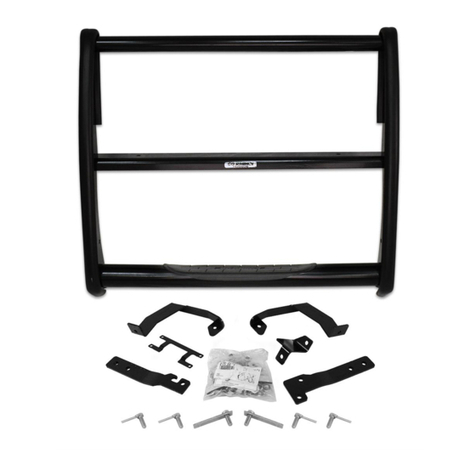
PARTS LIST
QTY
QTYQTY
QTY PART DESCRIPTION QTY
QTYQTY
QTY PART DESCRIPTION
4 ¼” x 1” button head bolt 2 312 3AA side plate
5/16” x 1” button head bolt 1 321 P passenger brush guard
5/16” lock nut 1 321 D driver brush guard
3/ ” x 1 1/4” button head bolt 1 D6P passenger head light protector
4 3/ ” x 1 1/4” hex bolt 1 D6D driver head light protector
3/ ” lock washer 1 ST3934 3” x 39 ¾” bottom step tube
4 3/ ” hex nut 1
1
312 AA 2” x 39 ¾” top tube
CP3934L 39 ¾” center plate
4 3/ ” flat washer
5/16” flat washer
Assembly
AssemblyAssembly
Assembly
Read the assembly and installation instructions completely before you begin.
Read the assembly and installation instructions completely before you begin.Read the assembly and installation instructions completely before you begin.
Read the assembly and installation instructions completely before you begin.
This installation requires cutting the bumper air dam.
This installation requires cutting the bumper air dam.This installation requires cutting the bumper air dam.
This installation requires cutting the bumper air dam.
Step 1.
Step 1. Step 1.
Step 1. Begin the assembly by laying the components out on a protective surface.
Step 2.
Step 2. Step 2.
Step 2. Position the grille guard side plates with the front edge down and the top and bottom step tube
between the side plates.
Step 3.
Step 3.Step 3.
Step 3. Attach the top tube to the side plates using (2) 3/ ” x 1 1/4” hex bolts and lock washers. Do not tighten.
Step 4.
Step 4.Step 4.
Step 4. Attach the step tube to the side plates using (4) 3/ ” x 1" button head bolts. Do not tighten.
Step 5.
Step 5.Step 5.
Step 5. Position the center plate between the grille guard side plates, with the slotted holes
slotted holesslotted holes
slotted holes in the center plate
down. Attach the center plate to the side plates using (4) 3/ ” x 1” button head bolts, flat washers, lock
washers and hex nuts. Do not tighten.
Step 6.
Step 6. Step 6.
Step 6. Align the grille guard, and tighten only the center plate and step tube nuts and bolts.
Do not tighten the top tube.
Do not tighten the top tube.Do not tighten the top tube.
Do not tighten the top tube.
Begin the installation. After completing steps 1-9 of the installation, refer to the assembly instructions
diagram to attach the brush guards and head light protectors.
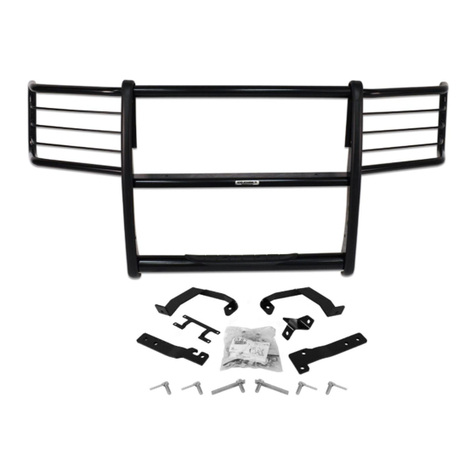
3000 SERIES STEPGUARD
3000 SERIES STEPGUARD3000 SERIES STEPGUARD
3000 SERIES STEPGUARD
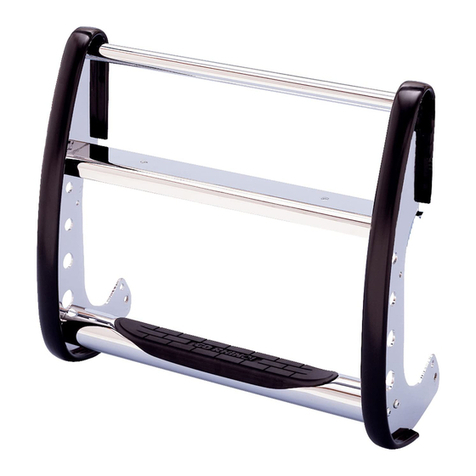
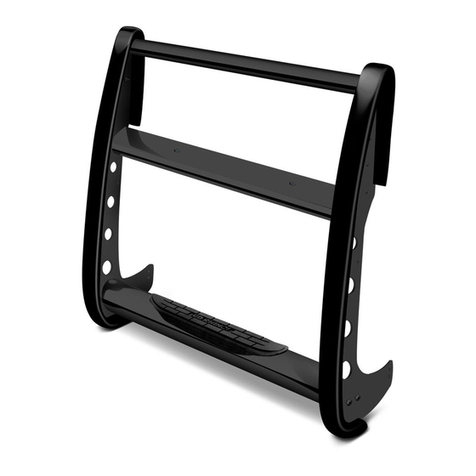
COMPLETE GRILLE & BRUSH GUARD
ASSEMBLY INSTRUCTIONS
PART NO. 312 MB & 312 MC 2009/2013 DODGE RAM 1500 2/4WD
Do not attempt to install this product on any vehicle other than the one it is designed for and listed
Do not attempt to install this product on any vehicle other than the one it is designed for and listedDo not attempt to install this product on any vehicle other than the one it is designed for and listed
Do not attempt to install this product on any vehicle other than the one it is designed for and listed
above!
above!above!
above!
5/16” x 1” button head bolts
Bottom step tube
¼” x 1” button head bolts
Center plate
5/16” x 3/4” button head bolts
3/ ” x 1 ¼” hex bolt & lock washer
3/ ” hex nuts, lock &
flat washers
Top tube
Head light protector
3/ ” x 1 ¼” hex bolt & lock washer
Brush guard
3/ ” x 1” button head bolts
5/16” lock nuts
Side plate 3/ ” x 1” button head bolts
3000 SERIES STEPGUARD
COMPLETE GRILLE & BRUSH GUARD
INSTALLATION INSTRUCTIONS
PART NO. 3217MB & 3217MC 2009 DODGE RAM 1500 2/4WD
Do not attempt to install this product on any vehicle other than the one it is designed or and listed above!
PARTS LIST
Item QTY Code Description Max Torque
1 1 Set 524244AA Main brackets set
2
4
1 Set 21711 Extension bracket
3 1set 504234AA Auxiliary bracket
4 2 pcs 21730 Rectangular spacer
5 6 pcs 1/2 x 1 1/2” hex head bolt 70 l-b. Ft.
6 16 pcs 1/2” flat washer
7 6 pcs 1/2” lock washer
6 pcs 1/2” nut 70 l-b. Ft.
9 4 pcs 1/2 x 1 1/2” carriage bolt 70 l-b. Ft.
10 4 pcs 1/2” flat washer
11 4 pcs 1/2” lock washer .
12 4 pcs 1/2” nut 70 l-b. Ft.
13 2 pcs 7/16 x 5” hex. head bolt 45 l-b. Ft.
14 4 pcs 7/16” flat washer
15 2 pcs 7/16” lock washer
16 2 pcs 7/16” nut 45 l-b. Ft.
Required Tool:
A. Ratchet w/5” extension
B. 5/ ” Wrench or Socket
C. 11/16” Wrench & socket
D. 10mm Socket
E. 3/4” Wrench or socket
F. Flat screwdriver
G. Utility knife
H. 1 mm wrench or socket
1. Before beginning the installation read all instructions thoroughly and verify that all hardware is
accounted for. if there are any listed parts missing, please notify your distributor immediately.
2. To maintain and care this product keep it clean and do not use abrasive cleaners or polish waxes. It
is recommended to use only non-abrasive automotive wax such as pure carnauba to avoid scratches
and rust.
3. The approximate installation time is 45 min.
45 min. 45 min.
45 min.
3000 SERIES STEPGUARD
3000 SERIES STEPGUARD3000 SERIES STEPGUARD
3000 SERIES STEPGUARD
COMPLETE GRILLE & BRUSH GUARD
INSTALLATION INSTRUCTIONS
PART NO. 312 MB & 312 MC 2009/2013 DODGE RAM 1500 2/4WD
Do not attempt to install this product on any vehicle other than the one it is designed for and listed above!
Do not attempt to install this product on any vehicle other than the one it is designed for and listed above!Do not attempt to install this product on any vehicle other than the one it is designed for and listed above!
Do not attempt to install this product on any vehicle other than the one it is designed for and listed above!
C
4. Beginning with the passenger side, scribe 2 vertical lines the width of the outer rib in the bumper air
dam. Measure and scribe 2 horizontal lines as shown. Use a utility knife or dremel tool to cut and
remove the rectangular section between the lines. PHOTO# 1 y 2.
NOTE:
NOTE:NOTE:
NOTE: verify the measurements before cutting.
Repeat the above procedure on the driver side.
5. Locate the nuts and studs that secure the bumper bracket to the passenger side frame rail.
Remove the (2) outer nuts and install (1) rectangular spacer is only used on models equipped with
factory tow hooks.
6. Position the passenger side frame bracket over the studs and secure the bracket to the frame using
the (2) factory nuts. Do not tighten. Photo#3
7. Insert the passenger side extension bracket up through the opening cut in the air dam. Attach the
extension bracket to the frame bracket using (2) 1/2" x 1 1/2" carriage bolts, flat washers, lock washers
and hex nuts. Do not tighten. PHOTO # 4
Repeat the above procedure to install the driver side frame and extension bracket.
PHOTO 1
PHOTO 1PHOTO 1
PHOTO 1 PHOTO 2
PHOTO 2PHOTO 2
PHOTO 2
PHOTO 3
PHOTO 3PHOTO 3
PHOTO 3 PHOTO 4
PHOTO 4PHOTO 4
PHOTO 4
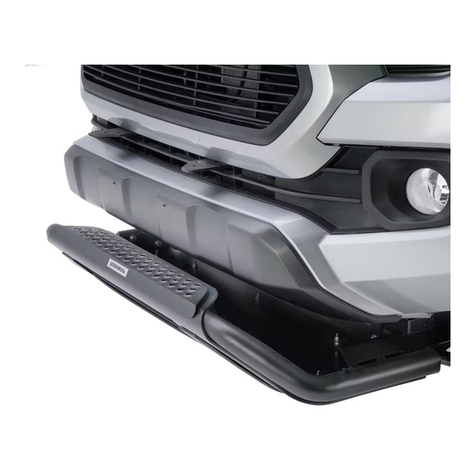
. To install the auxiliary bracket use the provided template to cut out the bumper's lower cover
position the auxiliary bracket through the opening cut out in the lower cover. PHOTO #5
Secure to the tow hook support using a 7/16" x 5" hex bolt, flat and lock washers, and hex nut. Also
Attach to the lower bolt of the main bracket. Do not tighten yet repeat the procedure to the opposite
side PHOTO #6
9. Attach the defender with 1/2" x 1 1/2" hex bolts, flat and lock washer and hex nut hand tighten.
PHOTO # 7 y
PHOTO 7
PHOTO 7PHOTO 7
PHOTO 7 PHOTO
PHOTO PHOTO
PHOTO
PHOTO 6
PHOTO 6PHOTO 6
PHOTO 6
PHOTO 5
PHOTO 5PHOTO 5
PHOTO 5
10. Align the grille guard assembly whith the front of the vehicle and tighten all assembly and
installation nuts and bolts. PHOTO # 9
11. Periodically it may need a bolts re-tighten.
12. Fill the warranty card and place it inside your vehicle´s glove box.
PHOTO 9
PHOTO 9PHOTO 9
PHOTO 9
Discover other grille guards & bull bars on our website.

This manual suits for next models

1

Other Go Rhino Automobile Accessories manuals

Go Rhino Road Defender Push Bumper 5000 Series User manual

Go Rhino

Go Rhino Road Defender Push Bumper 5000 Series User manual

Go Rhino 5934048T User manual

Go Rhino

Go Rhino 5934048T User manual

Go Rhino 3096MB User manual

Go Rhino

Go Rhino 3096MB User manual

Go Rhino XE Series User manual

Go Rhino

Go Rhino XE Series User manual

Go Rhino Dominator Series Programming manual

Go Rhino

Go Rhino Dominator Series Programming manual

Go Rhino 23174B User manual

Go Rhino

Go Rhino 23174B User manual

Go Rhino Rhino! Charger 5565 User manual

Go Rhino

Go Rhino Rhino! Charger 5565 User manual

Go Rhino 34389T User manual

Go Rhino

Go Rhino 34389T User manual

Go Rhino 3000 Series User manual

Go Rhino

Go Rhino 3000 Series User manual

Go Rhino Lightning Series Programming manual

Go Rhino

Go Rhino Lightning Series Programming manual

Go Rhino GRH-4412B User manual

Go Rhino

Go Rhino GRH-4412B User manual

Go Rhino 230121T User manual

Go Rhino

Go Rhino 230121T User manual

Go Rhino 3219MC User manual

Go Rhino

Go Rhino 3219MC User manual

Go Rhino 3000 Series User manual

Go Rhino

Go Rhino 3000 Series User manual

Go Rhino 37201 User manual

Go Rhino

Go Rhino 37201 User manual

Go Rhino 3293B User manual

Go Rhino

Go Rhino 3293B User manual

Go Rhino 3000 Series User manual

Go Rhino

Go Rhino 3000 Series User manual

Go Rhino D361291 User manual

Go Rhino

Go Rhino D361291 User manual

Go Rhino 310B User manual

Go Rhino

Go Rhino 310B User manual

Go Rhino 3160MB User manual

Go Rhino

Go Rhino 3160MB User manual

Go Rhino 28296T User manual

Go Rhino

Go Rhino 28296T User manual

Go Rhino 565460T User manual

Go Rhino

Go Rhino 565460T User manual

Go Rhino 390325 User manual

Go Rhino

Go Rhino 390325 User manual

Popular Automobile Accessories manuals by other brands

Corvette BLU-C5 Quick start installation guide

Corvette

Corvette BLU-C5 Quick start installation guide

BlackWing CT4-V instruction manual

BlackWing

BlackWing CT4-V instruction manual

Thule Rapid 1007 Fitting instructions

Thule

Thule Rapid 1007 Fitting instructions

Guardsman G1632 FITTING INSTRUCTION

Guardsman

Guardsman G1632 FITTING INSTRUCTION

Brink 2737 Fitting instructions

Brink

Brink 2737 Fitting instructions

TOP VEHICLE TECH GRKST02 installation manual

TOP VEHICLE TECH

TOP VEHICLE TECH GRKST02 installation manual

Cruz Alu-Cargo Assembly instructions

Cruz

Cruz Alu-Cargo Assembly instructions

Directed Directechs DS3 installation guide

Directed

Directed Directechs DS3 installation guide

Prorack K377 manual

Prorack

Prorack K377 manual

Whelen Engineering Company Outer Edge installation guide

Whelen Engineering Company

Whelen Engineering Company Outer Edge installation guide

Thule CIRCUIT 526 Manuel

Thule

Thule CIRCUIT 526 Manuel

BeltUpp Straight Up Safety FITTING INSTRUCTION

BeltUpp

BeltUpp Straight Up Safety FITTING INSTRUCTION

Prorack K1027 manual

Prorack

Prorack K1027 manual

bosal 043-928 manual

bosal

bosal 043-928 manual

BrandMotion ADAS-1000V3 install guide

BrandMotion

BrandMotion ADAS-1000V3 install guide

Trailboss KM23L installation instructions

Trailboss

Trailboss KM23L installation instructions

Axxess GMOS-LAN-10 installation instructions

Axxess

Axxess GMOS-LAN-10 installation instructions

Witter Towbar Systems ZEKAD001CN Fitting instructions

Witter Towbar Systems

Witter Towbar Systems ZEKAD001CN Fitting instructions

manuals.online logo
manuals.online logoBrands
  • About & Mission
  • Contact us
  • Privacy Policy
  • Terms and Conditions

Copyright 2025 Manuals.Online. All Rights Reserved.