manuals.online logo
Brands
  1. Home
  2. •
  3. Brands
  4. •
  5. Goodmans
  6. •
  7. Stereo System
  8. •
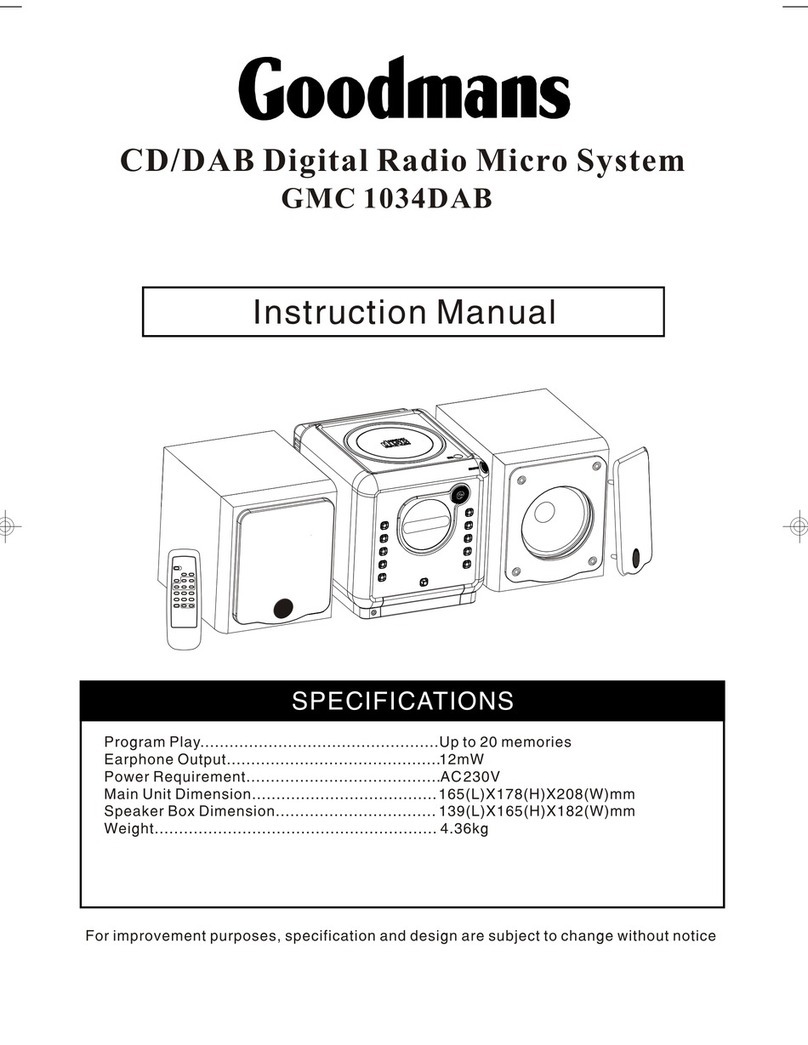
  9. Goodmans GMC1034DAB User manual

Goodmans GMC1034DAB User manual

This manual suits for next models

1

Other Goodmans Stereo System manuals

Goodmans IPHONE MICRO1468I User manual

Goodmans

Goodmans IPHONE MICRO1468I User manual

Goodmans MICRODAB16BT User manual

Goodmans

Goodmans MICRODAB16BT User manual

Goodmans MICRO1470DABI User manual

Goodmans

Goodmans MICRO1470DABI User manual

Goodmans 329582 User manual

Goodmans

Goodmans 329582 User manual

Goodmans MICRO1530 User manual

Goodmans

Goodmans MICRO1530 User manual

Goodmans MICRODAB18BT User manual

Goodmans

Goodmans MICRODAB18BT User manual

Goodmans GMC 1034DAB User manual

Goodmans

Goodmans GMC 1034DAB User manual

Goodmans GMN02BT User manual

Goodmans

Goodmans GMN02BT User manual

Goodmans 336723 User manual

Goodmans

Goodmans 336723 User manual

Goodmans Micro 1455 User manual

Goodmans

Goodmans Micro 1455 User manual

Goodmans 2719 User manual

Goodmans

Goodmans 2719 User manual

Goodmans GMS950R User manual

Goodmans

Goodmans GMS950R User manual

Goodmans GMS880 User manual

Goodmans

Goodmans GMS880 User manual

Goodmans 4212 User manual

Goodmans

Goodmans 4212 User manual

Goodmans GMN10040MP3 User manual

Goodmans

Goodmans GMN10040MP3 User manual

Goodmans MICRO1467I User manual

Goodmans

Goodmans MICRO1467I User manual

Goodmans GMC1042MP3 User manual

Goodmans

Goodmans GMC1042MP3 User manual

Goodmans GDVX702 User manual

Goodmans

Goodmans GDVX702 User manual

Goodmans 6160 User manual

Goodmans

Goodmans 6160 User manual

Goodmans 335105 User manual

Goodmans

Goodmans 335105 User manual

Goodmans Micro 1990 DVDF User manual

Goodmans

Goodmans Micro 1990 DVDF User manual

Goodmans MICRO1106DAB User manual

Goodmans

Goodmans MICRO1106DAB User manual

Goodmans MICRO 1109 User manual

Goodmans

Goodmans MICRO 1109 User manual

Goodmans GSPK30IP User manual

Goodmans

Goodmans GSPK30IP User manual

Popular Stereo System manuals by other brands

Sony HCD-VX88 Service manual

Sony

Sony HCD-VX88 Service manual

Philips MCM398D/12 user manual

Philips

Philips MCM398D/12 user manual

Sony CMT-SPZ90DB operating instructions

Sony

Sony CMT-SPZ90DB operating instructions

LG OM4560 owner's manual

LG

LG OM4560 owner's manual

JVC UX-G3 instructions

JVC

JVC UX-G3 instructions

Odys ODYS - LOOP instruction manual

Odys

Odys ODYS - LOOP instruction manual

Aiwa NSX-AJ700 Service manual

Aiwa

Aiwa NSX-AJ700 Service manual

Panasonic SC-AK100 operating instructions

Panasonic

Panasonic SC-AK100 operating instructions

Sharp CD-G10000V Operation manual

Sharp

Sharp CD-G10000V Operation manual

Bogen NEARSCAPES 4.1 manual

Bogen

Bogen NEARSCAPES 4.1 manual

Panasonic SCPM29 - MINI HES W/CD PLAYER operating instructions

Panasonic

Panasonic SCPM29 - MINI HES W/CD PLAYER operating instructions

Meyer LD-3 operating instructions

Meyer

Meyer LD-3 operating instructions

THOMSON MIC302U manual

THOMSON

THOMSON MIC302U manual

Philips MCM530 Service manual

Philips

Philips MCM530 Service manual

Sony SS-CEP50 Service manual

Sony

Sony SS-CEP50 Service manual

Cetacea Sound CVS-II user guide

Cetacea Sound

Cetacea Sound CVS-II user guide

Sony MHC-V21D Service manual

Sony

Sony MHC-V21D Service manual

Denon UCD-250 Service manual

Denon

Denon UCD-250 Service manual

manuals.online logo
manuals.online logoBrands
  • About & Mission
  • Contact us
  • Privacy Policy
  • Terms and Conditions

Copyright 2025 Manuals.Online. All Rights Reserved.

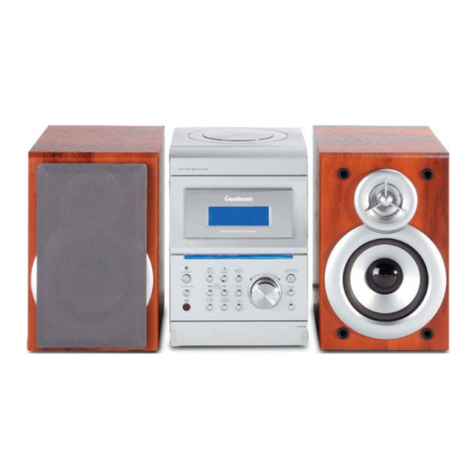
CD/DAB Digital Radio Micro System
GMC 1034DAB
Program Play.................................................Up to 20 memories
Earphone Output............................................12mW
Power Requirement........................................AC 230V
Main Unit Dimension...................................... 165(L)X178(H)X208(W)mm
Speaker Box Dimension................................. 139(L)X165(H)X182(W)mm
Weight.......................................................... 4.36kg
For improvement purposes, specification and design are subject to change without notice
Goodmans product Information Helpine 08708730080
Instruction Manual
SPECIFICATIONS
Goodmans product Information Helpine 08708730080
Features and controls...................................5
Features and controls...................................6
Remote control............................................ 6
Putting the batteries
into the remote control unit........................... 6
Switching your radio on for the first time........ 7
Listening to your radio............................... 7-8
Storing and recalling the stored stations........ 8
Factory reset............................................... 9
Display modes............................................. 9
Listening to your compact discs................10-11
Sleep function(remote control only)............... 11
Timer function..............................................12
Mute function(remote control only)................ 12
Preset EQ................................................... 12
12
X-bass function(remote control only).............
Display backlight..........................................12
Aux input.....................................................12
Headphone jack...........................................13
Compact disc...............................................13
Specification............................................... 14
Troubleshooting guide................................. 15
Important safeguards .................................. 1
Important notes............................................2
Power Sources ............................................3
Player Maintenance .....................................3
Disc cleaning, power failure ..........................4
To prevent fire or shock harzard, do not expose
the unit to rain or moisture.
To avoid electrical shock, do not open the
cabinet. Refer servicing to qualified personnel
only.
1. As the laser beam used in this compact disc
player is harmful to the eyes, do not attempt
to disassemble the casing.
2. Stop operation immediately if any liquid or
solid object should fall into the cabinet.
Unplug the unit and have it checked by
qualified personnel.
3. Do not touch the lens or poke at it. if you do,
you may damage the lens and the player
may not operate properly.
4. Do not put anything in the safety slot. If you
do, the laser diode will be ON when the lid
is still opened.
5. This unit employs a laser. The use of
controls or adjustments or performance of
procedures other then those specified
herein may result in exposure to hazardous
radiation.
SAFETY PRECAUTIONSTABLE OF CONTENTS
WARNING
Player operation
For your convenience a mains plug with a fuse has been fitted to this appliance. For your safety please
observe the following.
1. Should the fuse fail in the plug remove the plug from the wall socket and replace the fuse with a 3 Amp
ASTA approved to BS1362.
2. Never use the plug without the fuse cover fitted. Replacement fuse covers are available from your
dealer or most electrical retail
Outlets.
3. IF the mains plug is cut off from the cable, rewire the replacement plug in accordance with the
instruction given in this manual.
4. Under no circumstances should the discarded plug be inserted into the mains socket. To
CAUTION:
prevent a sock hazard carefully dispose of the discarded plug. Do not leave the plug lying around where
children might see it.
WARNING: To prevent fire of shock hazard, do not expose this unit to rain or moisture.
CAUTION: DANGEROUS VOLTAGES EXIST INSIDE THIS UNIT, DO NOT REMOVE COVER (OR BACK).
NO USER SERVICEABLE PARTS INSIDE. REFER SERVICING TO QUALIFIED SERVICE PERSONNEL
DISCONNECT FROM MAINS SUPPLY WHEN NOT IN USE.
MAINS PLUG WIRING DETAILS
accordance with following wiring codes: The wires in this mains lead are coloured in accordance with
thefollowing wiring codes:
Blue-------------------------------------------Neutral
Brown-----------------------------------------live
The wires in this mains lead must be connected to the
terminalsin the plugs as follow:
Blue Wire-----------------------------------N or Black
Brown Wire---------------------------------L or Red
Only a 3 Amp fuse should be fitted in the plug or a 5 Amp fuse
atthe distribution board.
WARNING: UNDER NO CIRCUMSTANCES MUST THE LIVE OR NEUTRAL WIRES BECONNECTED
TO THE EARTH TERMINAL IN A 3-PIN MAINS PLUG.
This symbol means that this unit is double insulated.
An earth connection is not required.
CAUTION
CLASS 1 LASER PRODUCT
Use of Controls or adjustments or performance of
procedures other than those specified herein may
result in hazardous radiation exposure.
CLEANING
Always disconnect unit from power supply before
attempting to clean it. Use soft cloth moistened with
soapy water, wipe gently.
Do not use solvents or abrasive material.
LASER SAFETY
This unit employs a laser. Only qualified service
personnel should attempt repair.
DANGER: INVISIBLE LASER RADIATION
WHEN OPEN AND INTERLOCK FAILED OR
DE FE ATED. AVOID DIRECT EXPOSURE TO
BEAM.
CA UTI ON : H AZARD OU S L ASER R AD IAT ION
WHEN OPEN AND INTERLOCK DEFEATED.
1. IMPORTANT SAFEGUARD
1
Goodmans product Information Helpine 08708730080
Your hearing is very important to you and to us, so please take care when operation this equipment.
The following guidelines are provided for your information.
ESTABLISH A SAFE SOUND LEVEL
Over time your hearing will adapt to continuous loud sounds and will give the impression
that the volume has in fact been reduced. What seems normal to you may in fact be harmful. To
guard against this BEFORE YOUR HEARING ADAPTS set the volume at a low level.
Slowly increase the level until you can hear comfortably and clearly and without distortion.
Damage to your hearing is accumulative and is irreversible.
Any ringing or discomfort in the ears indicates that the volume is too loud.
Remember listening for prolonged period of time at high volume levels will harm your hearing.
Once you have established a comfortable listening level, DO NOT INCREASE THE SOUND LEVEL
FURTHER.
The following list of typical sound levels may assist you in recognising just how loud you have set the
volume level.
DECIBEL
Level dB Example
30dB
40
50
60
70
Quiet library, soft whisper.
Living room, fridge freezer bedroom away from traffic.
Normal conversation, quiet office, light traffic.
Electric sewing machine.
Vacuum cleaner, hair dryer, noisy restaurant.
THE FOLLOWING NOISE CAN BE HARMFUL UNDER CONSTANT EXPOSURE
80dB
90
100
120
140
180
Average city traffic, alarm clock buzzer at 1 Metre, food mixer.
Motorcycle, heavy goods vehicle, petrol lawn mower.
Pneumatic drill, chain saw, garbage truck, discotec/night-club.
Rock band concert, thunderclap, fast train passing by.
THRESHOLD OF PAIN Gunshot, jet plane taking off.
Rocket Launching pad.
2. IMPORTANT NOTES
2
Goodmans product Information Helpine 08708730080
Plug the AC 230V Power Cord into an AC
household outlet.
3. POWER SOURCES
Power connection
Cleaning the Cabinet
IMPORTANT :
Disconnect from Main Sup-ply before cleaning.
Wipe with a soft cloth. If the cabinet is very dirty,
dampen the cloth with a weak solution of neutral
detergent and water, and then wipe clean.
Cleaning the Lens
A dirty lens will cause sound skipping and, if the lens is
very dirty, the CD may not work. Open the disc cover
and clean the lens as follow :
Dust Dry Particles
Using a camera lens brush/blower, blow on the lens
couple times, then wipe it lightly with the brush to
remove dust. Then, blow on the lens once more.
Finger prints
If the lens cannot be cleaned by using a brush/blower,
use a dry cotton swab.
4. PLAYER MAINTENANCE
3
Goodmans product Information Helpine 08708730080
5. DISC CLEANING, POWER FAILURE
1. Notes on handling discs
Removing the disc from its storage case and
load it with label side facing up.
* Do not touch the reflective recorded surface.
* D
o not stick paper or write anything on the
surface.
* Do not bend the disc.
2. To wipe a disc, use only a soft cloth. Do not
use benzene or thinner which will damage
the disc. The disc should always be wiped in a
straight line from the centre to the edge. It
should never be wiped in a circular motion.
3. Never place the disc on other equipment or
near any heat source. Avoid positions where
the disc would be subjected to direct sunlight
for long periods.
1. Electronic products should never be subjected
to extreme temperatures nor high humidity to
ensure good performance and a long life-time.
The clock radio should not be placed in
bathing areas, or around stoves and radiators,
etc. Always leave sufficient space around the
unit for ventilation.
2. If necessary, only clean the cabinet of the unit
with a soft dampened piece of cloth (be sure
the AC power cord is unplugged from the
outlet). Never use a polish or a strong
detergent for cleaning since this can damage
the finish of the cabinet.
Cleaning the Disc
Maintenance and care
Goodmans product Information Helpine 08708730080
4
Goodmans product Information Helpine 08708730080
F E AT U R E S A N D C O N T R O L S F E AT U R E S A N D C O N T R O L S
1
3
4
5
6
7
8
9
10
12
13
14
15
16
17
18
19
20
21
22
23
24
2
11
6. FEATURES AND CONTROLS
25
26
27
5
1. STANDBY/ON BUTTON
2. DAB BUTTON
3. CD BUTTON
4. PROG/SELECT BUTTON
5. REPEAT/AUTOTUNE BUTTON
6. EQ BUTTON
7. MUTE BUTTON
8. AUX BUTTON
9. STOP/ PRESETS BUTTON
10. PLAY/PAUSE BUTTON
11. SKIP/SEARCH FR/SELECT DN BUTTON
12. SKIP/SEARCH FF/SELECT UP BUTTON
13. RANDOM BUTTON
14. DISPLAY/INFO BUTTON
15. X-BASS BUTTON
16. SLEEP BUTTON
17. VOLUME DN BUTTON
18. VOLUME UP BUTTON
Press on the side of the compartment cover, take the
cover off to open the compartment. Place the two
(UM3), (AA), (1.5V) batteries in the remote
control according to the polarity markings ("+" and " -
") inside the compartment and on the batteries. Place
the cover over the compartment, press down lightly,
until it snaps on.
NOTE : Remove the batteries from the remote
control if not in use for long period of the time. Do
not mix normal batteries with rechargeable batteries,
when the batteries become weak, remote control will
not function and replace with new batteries.
1. CD DOOR
2. OPEN/CLOSE BUTTON
3. VOLUME UP BUTTON
4. IR SENSOR
5. VOLUME DN BUTTON
6. CD BUTTON
7. PLAY/PAUSE BUTTON
8. STOP/ PRESETS BUTTON
9. BACKLIGHT BUTTON
10. EQ BUTTON
11. HEADPHONE JACK
12. LCD DISPLAY
13. SKIP /SEARCH FR BUTTON
14. SELECT UP BUTTON
15. STANDBY ON BUTTON
16. SELECT BUTTON
17. SKIP /SEARCH FF BUTTON
18. SELECT DN BUTTON
19. DAB BUTTON
20. REPEAT/AUTOTUNE BUTTON
21. DISPLAY/INFO BUTTON
22. TIMER BUTTON
23. AUX BUTTON
24. OPEN BUTTON (LINE IN)
25. SPEAKER TERMINALS
26. DAB WIRE ANTENNA
27. AC POWER CORD
2
**BATTERIES NOT INCLUDED**
1
2
3
4
5
6
7
8
910
11 12
13 14
15 16
17 18
1
8. RE M OTE CO N TROL
7. FE ATURES A ND CONT ROLS
9. PU T TI N G THE BAT TER IES IN T O
THE R E MOTE C O NTRO L U NIT
6
When the system is connected to the power for the
first time, it will be in Standby, the display will first
show the greetings and then the clock. Press the
STANDBY button once will turn the system ON, the
DAB mode will be automatically selected and
perform auto tune full scan function. (F1) (F.2) (F.3)
When the system is first power up, the system will automatically enter into the DAB mode and perform
DAB auto tune quick scan function, the display will show a slide bar to indicate the progress of the
scan. Unlike normal radio, the separate signals from a number of stations are grouped together and
transmitted in a single frequency; these groups are referred to as multiplexes and ensembles. Every
time one of these groups has been found, the name of that group will be displayed on the bottom half
of the display.
There are two types of auto tune modes, one is quick scan and the other is full scan. Quick scan will only
search for the UK DAB Band III channels and full scan will search all DAB Band III channels. Once the
scan has finished, the radio will select the first alphanumerically found station.
1. To activate the quick scan, press the AUTOTUNE button once, the display will show "Autotune Quick
scan" and then a progressing slide bar and "Searching..." (F.4)
To
2. activate full scan, press and hold the AUTOTUNE button until the display shows "Autotune Full
scan". (F.5)
3. To explore the stations that have been found, press the SEL or SEL button.
DAB MODE
Auto tune modes
F 1
F 5
F 4
F 3
This unit carries a lead wire DAB antenna, to obtain the best performance, you should fully extend the
wire antenna and adjust the position as well as the direction until you find the best reception. For ideal
DAB reception, always maintain the lead wire antenna in a vertical position (holding it upward or
downward behind the unit) is highly recommended.
Hints for better reception
10. SWITCHING YOUR RADIO ON FOR THE FIRST TIME
11. LISTENING TO YOUR RADIO
F 2
7