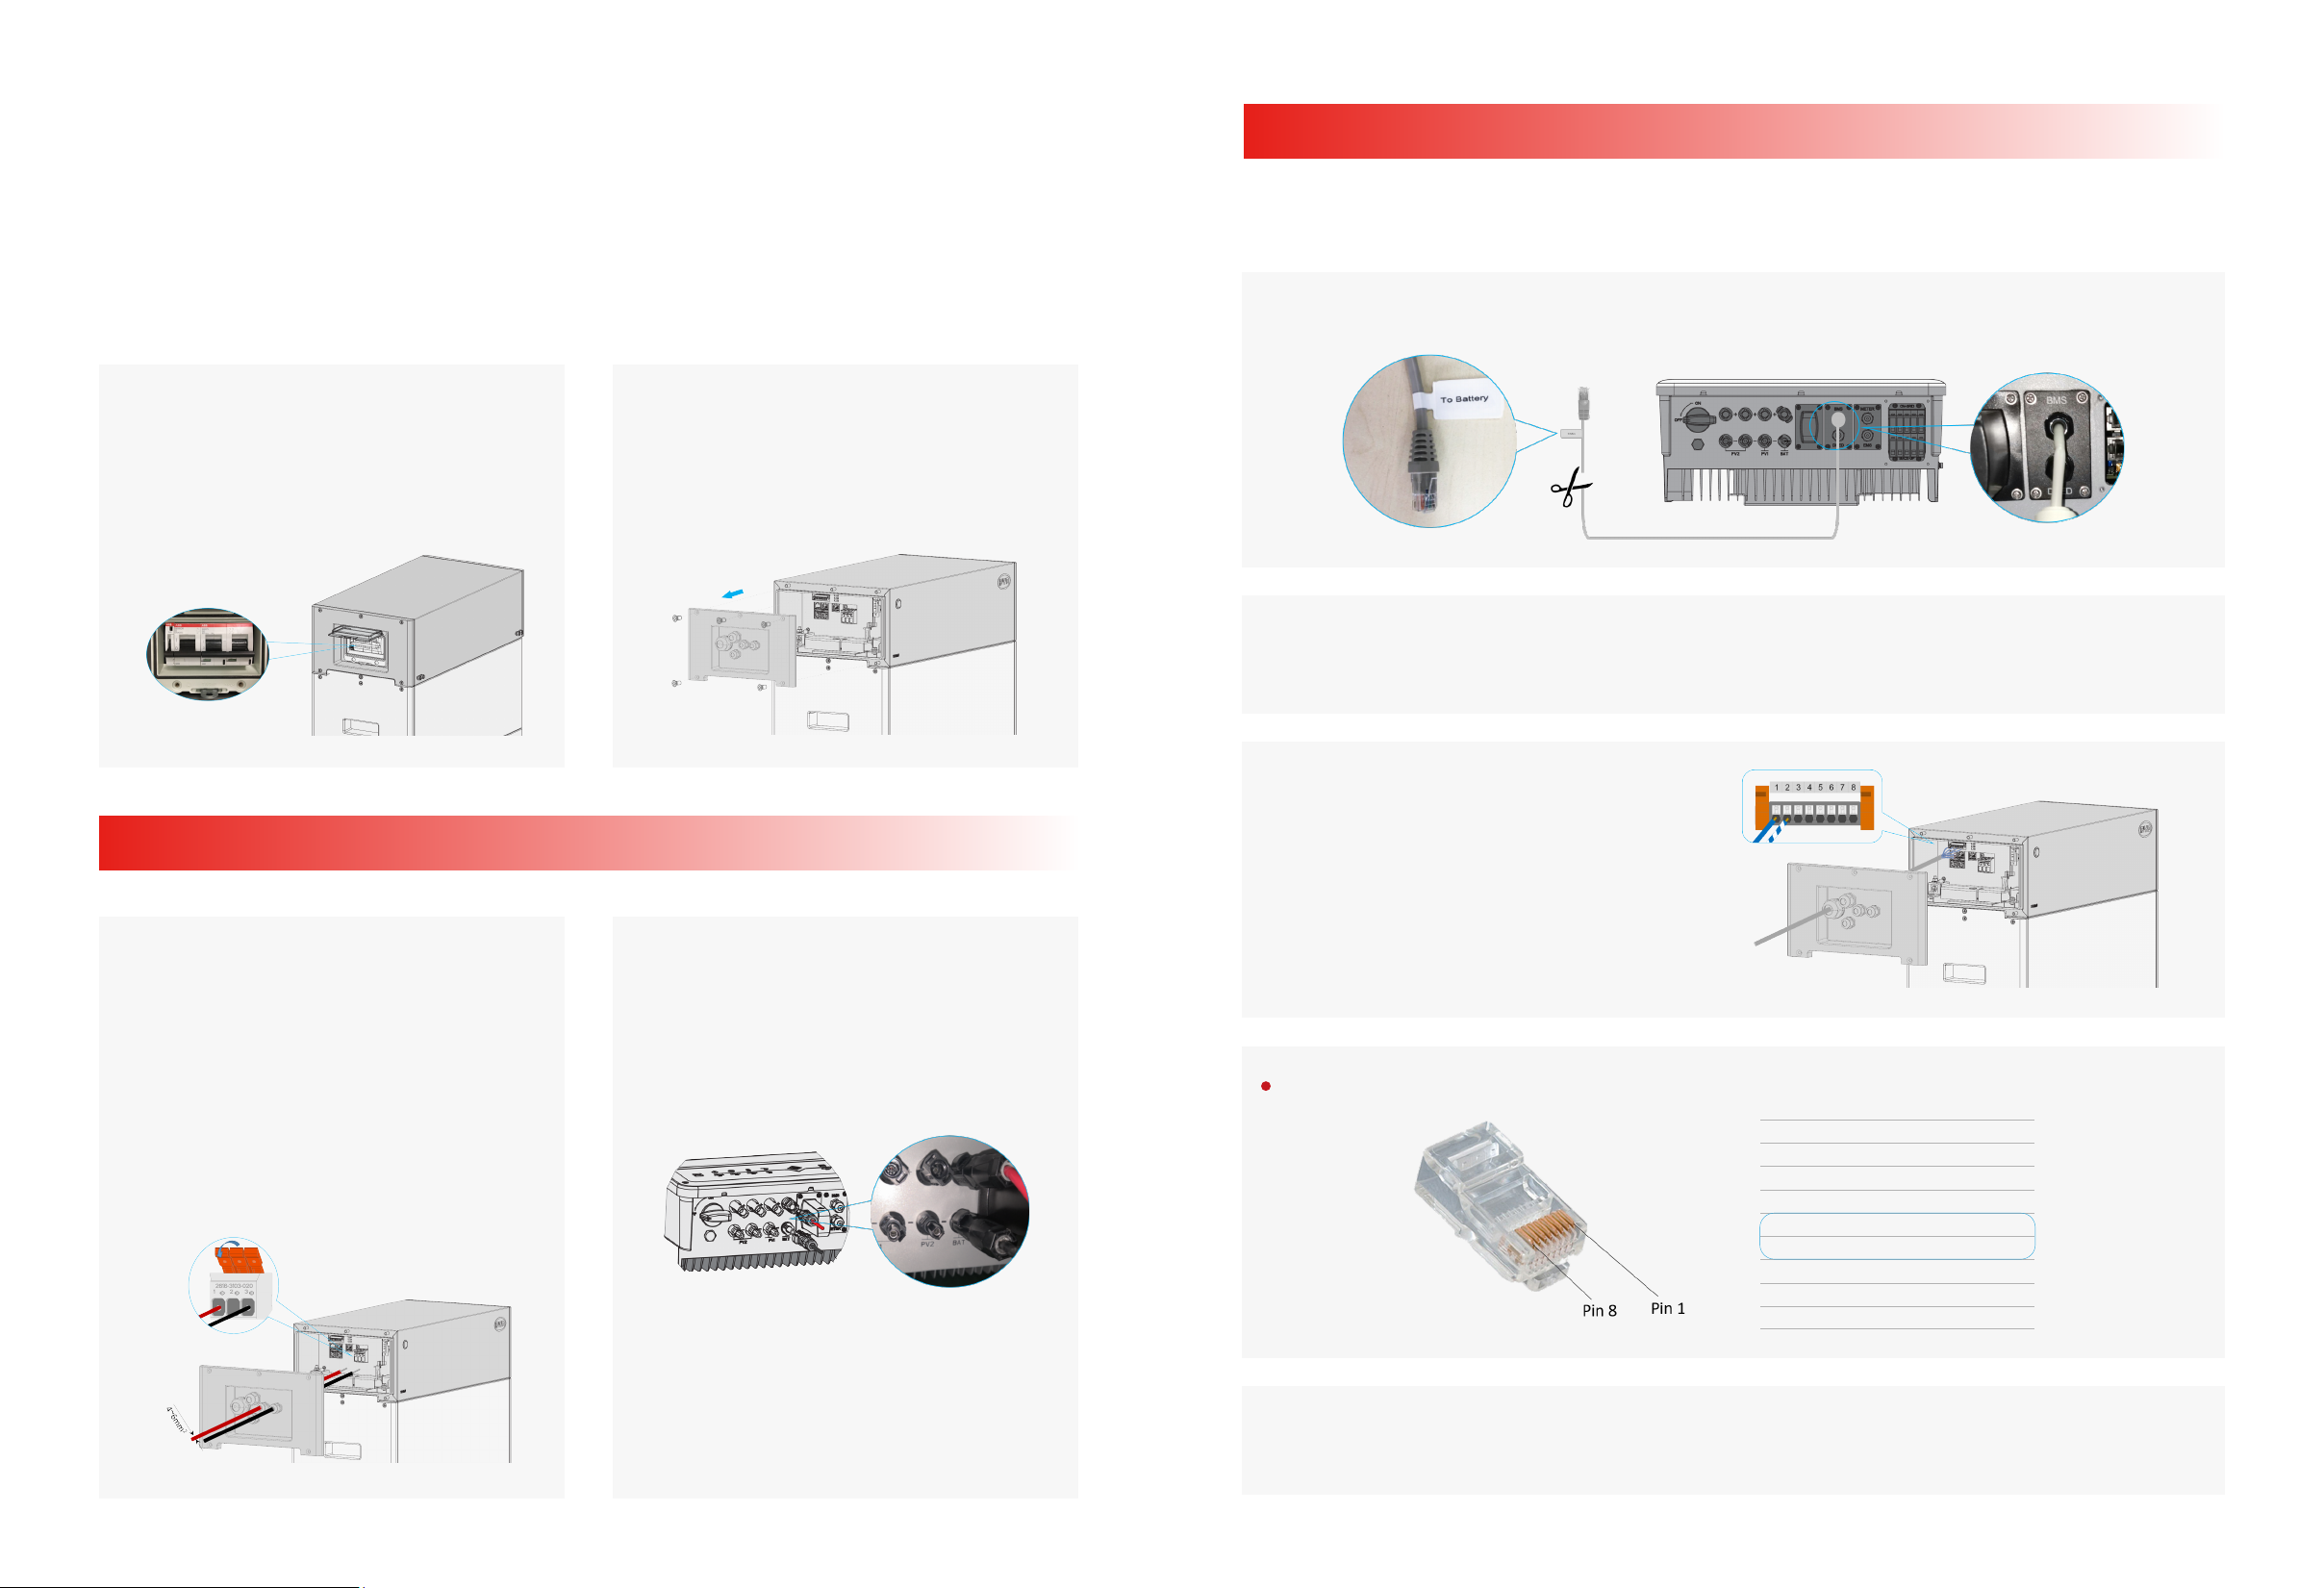
Cut off the preset BMS communication cable (“To Battery” cable) attached on inverterA.
This is an instruction for quick installation of GoodWe HV series energy storage inverters
(ARM version 11or higher) and BYD-Box Premium HVM or HVS battery. For details of the
connection or commissioning, please go to user manual of the inverter and the battery if you
cannot find it in this instruction. Here we take GoodWe ET inverter and BYD Premium HVM
battery as an example for connection and commissioning.
On battery manual, there are various connection ways for communication or a general wiring
system. Please follow this instruction for HVM or HVS communication with GoodWe inverters.
Precautions
Step 1: Power Cable Wiring
Step 2: Communication Cable Wiring
Pin Function of BMS Communication Connector on Inverter Side
Make sure battery and inverter are
not damaged and battery breaker
is turned off before making any
further move
A
Connect other side of the power cable
to inverter.
Note: Please use the battery connectors
in the components box of solar inverter
B
C.
D.
Connect CAN_H (Blue) and CAN_L
(Blue & White) to port 1 and port 2
Note: If you make a new CAT-5 cable to
take place of or extend the preset BMS
communication cable, please refer to
Pin functions below
Split up pin cables inside the cableB.
Note: Please user professional tools to do build up communication cable
After power and communication cable installation, put the cover plate back properly. Then
battery is ready to be started up before battery commissioning
Loss the screws on battery control unit
and move the cover plate to see all the
connectors for battery
B
Put battery power cable through
battery cover plate and press cable
into the right port.
Power cable dimension: 4~6mm2
Note: Please follow inverter’s requirement
to select power cable if there is conflict
on ET and Battery manual
A
1 Orange&white 485_A2
2 Orange NC
3 Green&white 485_B2
4 Blue CAN_H
5 Blue&white CAN_L
6 Green NC
7 Brown&white NC
8 Brown NC
Position Color BMS Function


