OPERATING INSTRUCTIONS
10 11
BEFORE FIRST USE
• Unpack the box with care, keeping all the packaging materials until
you are satised everything is included and in working order.
• Remove all packaging and foils and store it for later use.
• Before using the appliance for the rst time please clean the pot
and the accessories, as described under the chapter “Cleaning and Care”
to remove dust or production residues.
OPERATING INSTRUCTIONS
OPERATING INSTRUCTIONS
1
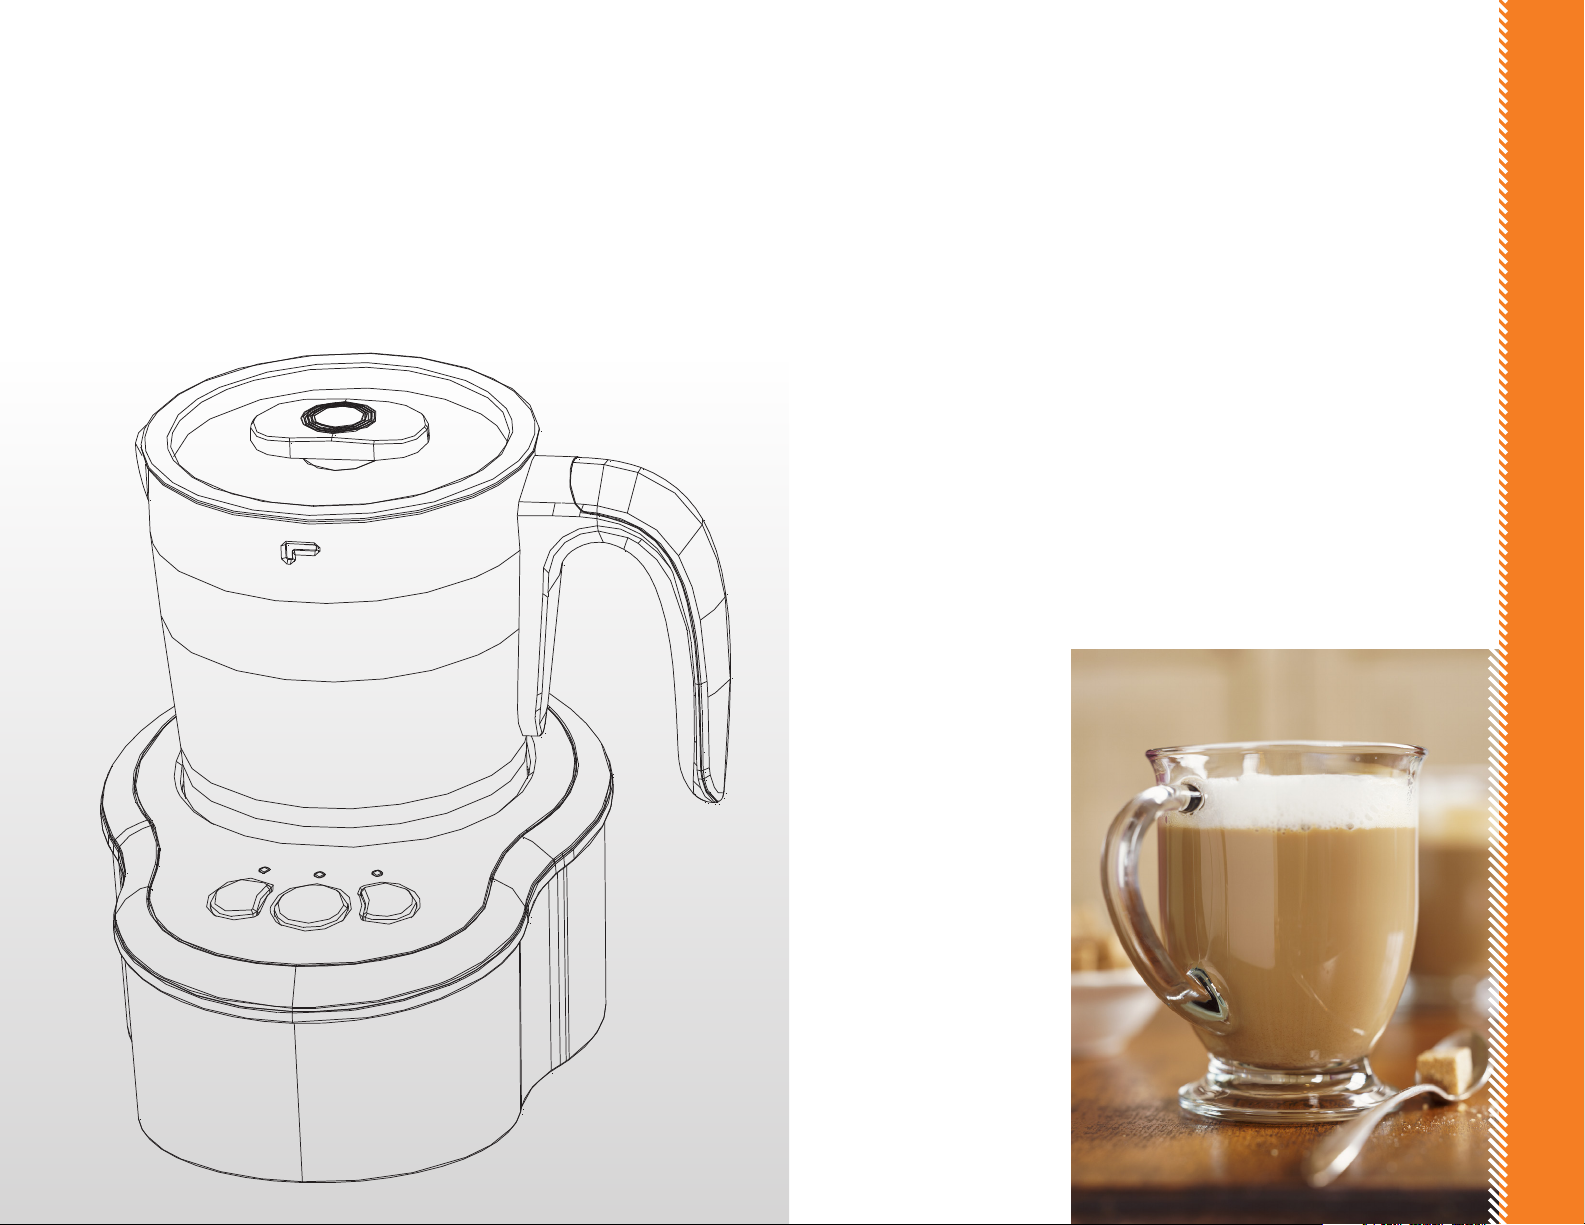
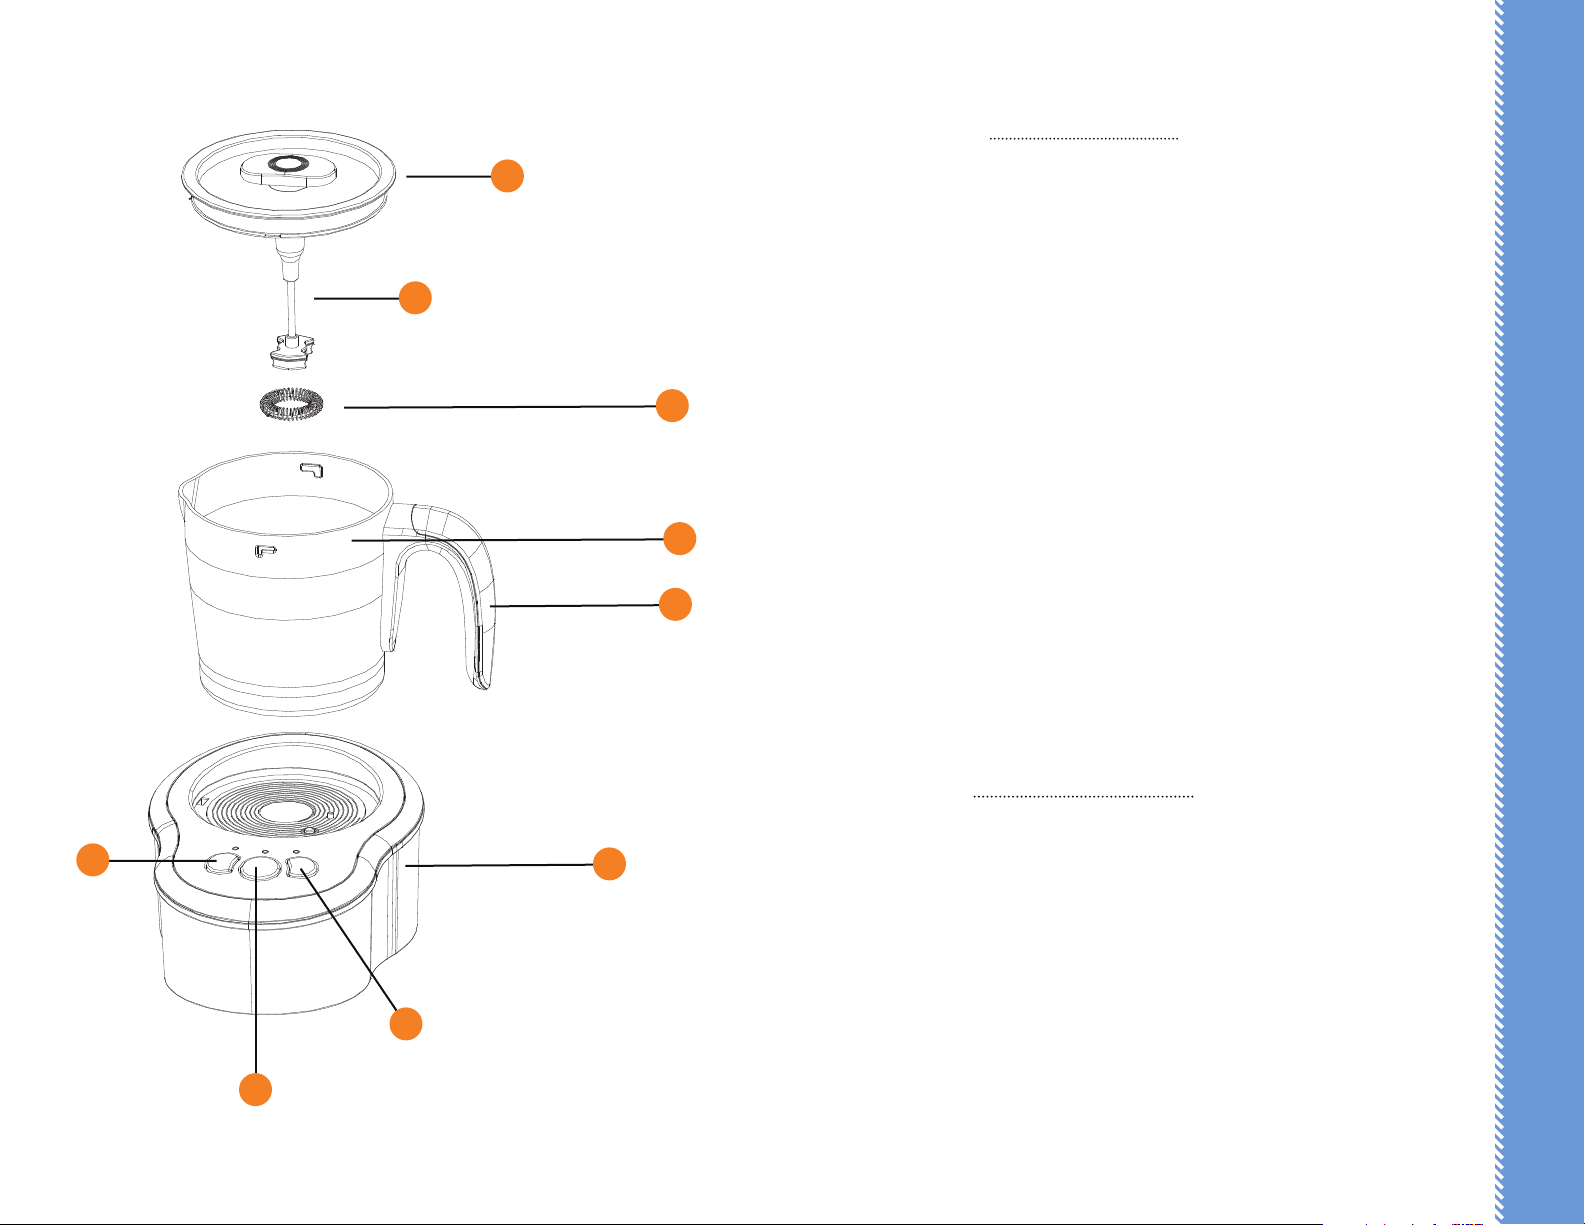
Frothing
1. Place the appliance on a at surface.
2. Fill the pot with the desired amount of milk, and replace the lid.
NOTE: the maximum milk quantity permitted to add is 150ml, to avoid milk
overowing after frothing.
3. Place the pot on the power base and connect the plug into a power outlet.
4. Press the froth button once, the corresponding indicator will turn on, the
mixing paddle and frothing ring will rotate separately for frothing milk. The
Frother will automatically stop rotating after frothing is done.
Note: You can cancel at any time by pressing the froth button.
5. When the Frother is done, open the lid, pour out the frothed milk and enjoy!
Caution: Allow at least 3 minutes between using again. The appliance will
automatically shut o after 5 cycles of continuous operation. The working
indicator light will ash for about 10 minutes and go into standby mode, at
which time you can continue to use.
6. Always disconnect the power supply when not use.
Heating
1. Place the appliance on a at surface.
2. Open the lid and take out the frothing ring from the mixing paddle.
3. Fill the pot with the desired amount of milk, and replace the lid.
NOTE: The maximum amount of milk is 250 ml, to avoid milk overowing after
heating.
4. Place the pot on the power base and connect the plug into a power outlet,
the indicator light will turn on.
5. Press the heat button once, the indicator light will turn on. The Frother will
automatically start. Once the temperature of milk has achieved about 70±10°C,
the mixing paddle will stop rotating automatically.
Note: During operation, you can cancel at any time by pressing the heat button
once. Note: The function of the mixing paddle is only used to avoid sticking. It
will not froth the milk.
6. When the appliance has nished heating up the milk, open the lid, pour out
the warm milk and enjoy!
7. Always disconnect the power supply when not use.
Frothing & Heating
1. Place the appliance on a at surface.
2. Fill the pot with the desired amount of milk, and replace the lid.
NOTE: NOTE: The maximum amount of milk is 150 ml, to avoid milk overowing
after frothing.
3. Place the pot on the power base and connect the plug into a power outlet.
The indicator light will turn on.
4. Press the Froth & Heat button once, the indicator light will turn on. The
Frother will automatically start. Once the temperature of milk has achieved about
70±10°C, the mixing paddle will stop rotating automatically.
5. When the appliance has stopped operating, open the lid, pour out the
warmed and frothed to enjoy it.
6. Always disconnect the power supply when not use