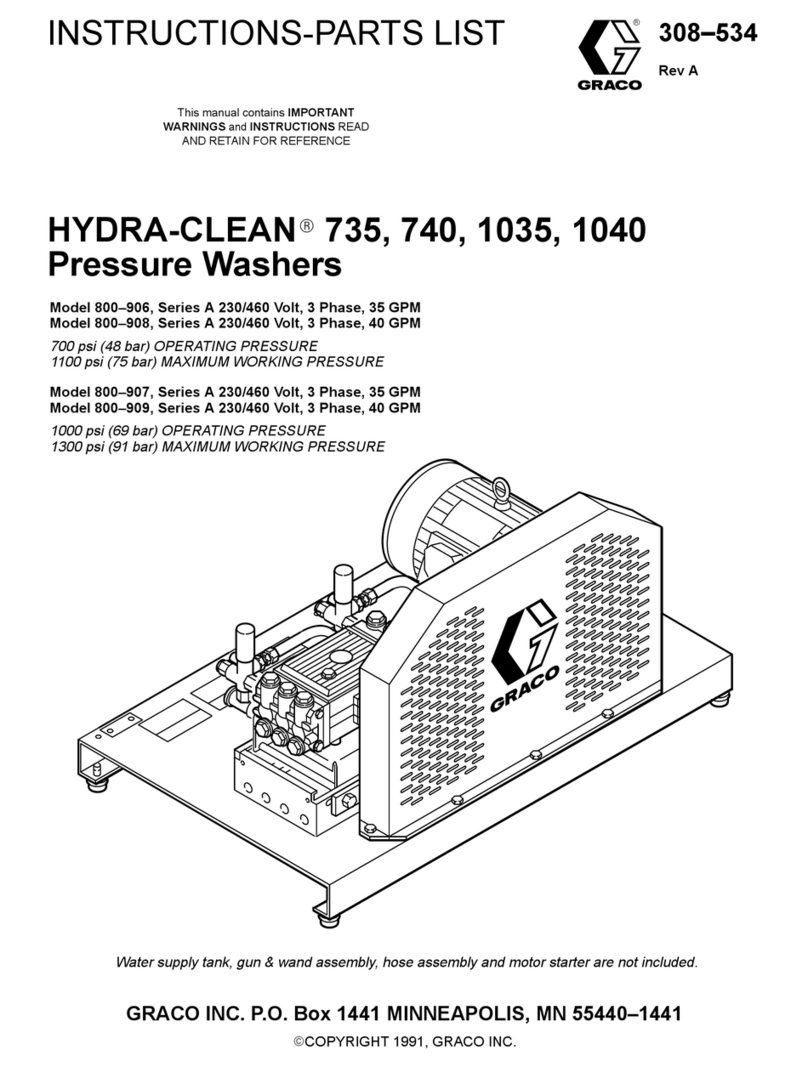
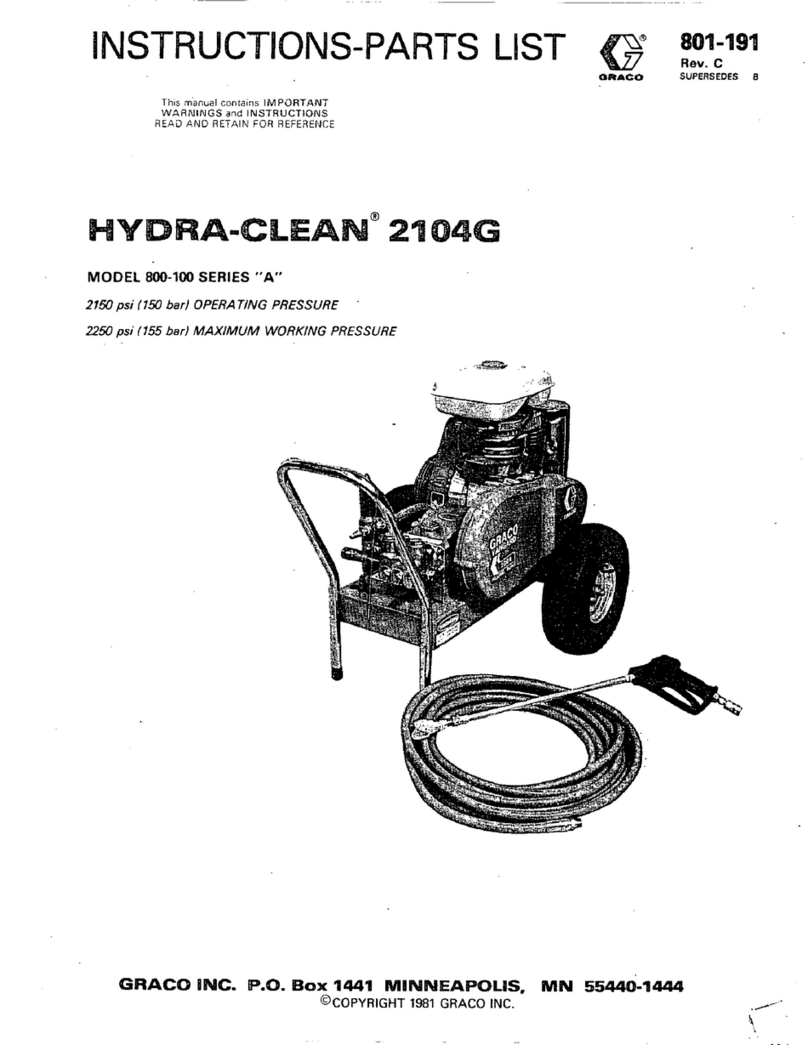
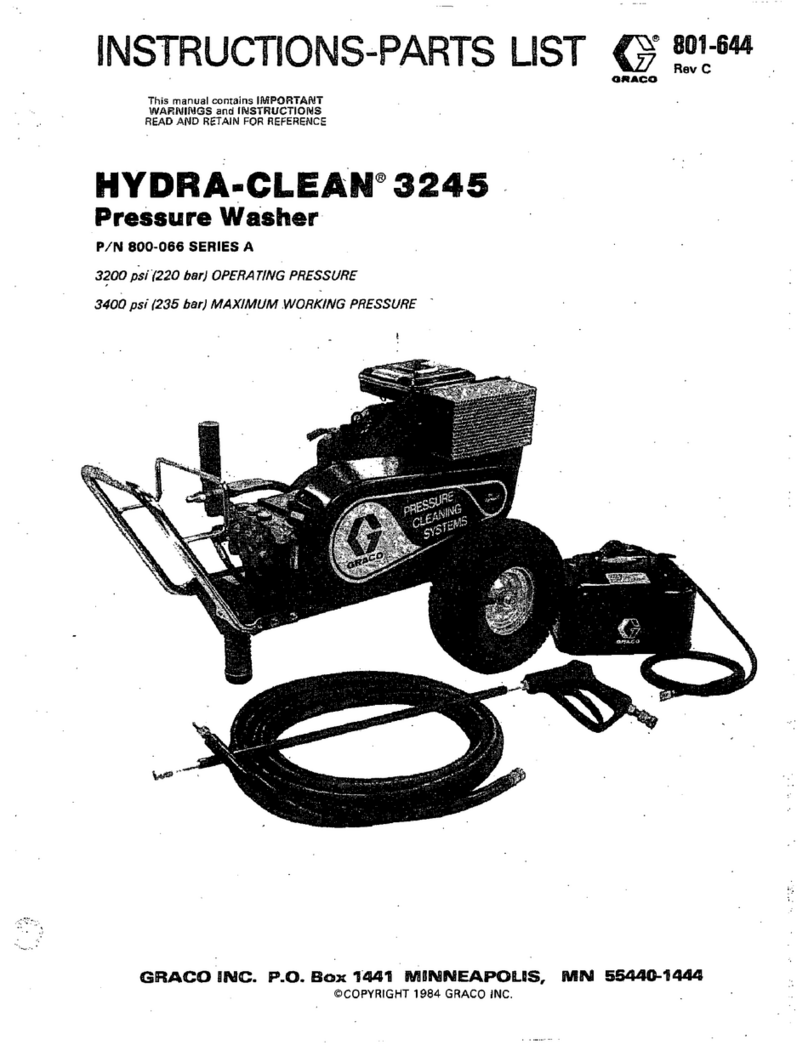
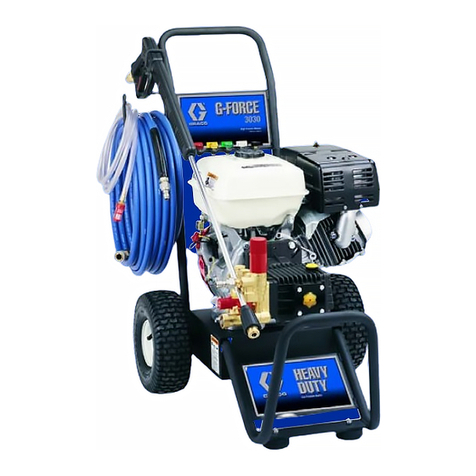
manuals.online logo
Brands
  1. Home
  2. •
  3. Brands
  4. •
  5. Graco
  6. •
  7. Pressure Washer
  8. •
  9. Graco Hydra-Clean 6880242 Series Operation manual

Graco Hydra-Clean 6880242 Series Operation manual

6000134
Rev. H
First
choice when
quality counts.

INSTRUCTIONS-PARTS
LIST
INSTRUCTIONS
This
manual contains important
warnings and information.
READ AND KEEP FOR REFERENCE.

PORTABLE, STAINLESS STEEL
Hydra-Clean
Pressure W
ashers
193 bar ( 2800 psi ) Maximum Working Pressure
Model
6880242*, Series D (shown)
The
Graco warranty will not apply if cleaning
solutions other than those recommended by
Graco are used in these units. Only use
solutions that are not harmful to the wetted
parts. See the T
echnical Data on page 9.
GRACO N.V. ; Industrieterrein ’’ Oude Bunders ’’
Slakweideweg 31 , 3630 Maasmechelen , Belgium
COPYRIGHT
1999, GRACO INC.
Tel. : 32 89 770 700 ; Fax : 32 89 770 777
238 bar(3400 psi ) Maximum Working Pressure
Model
965389, Series A
II 2 G
28:1
Ratio
King
34:1 Ratio Premier
* Package only available in Europe.
2 6000134
Table
of Contents
Warnings 2.
. . . . . . . . . . . . . . . . . . . . . . . . . . . . . . . . . . . . .
Installation 4
. . . . . . . . . . . . . . . . . . . . . . . . . . . . . . . . . . . .
Operation 6
. . . . . . . . . . . . . . . . . . . . . . . . . . . . . . . . . . . . .
Troubleshooting 8
. . . . . . . . . . . . . . . . . . . . . . . . . . . . . . . .
Parts 10
. . . . . . . . . . . . . . . . . . . . . . . . . . . . . . . . . . . . . . . .
Pump
Performance Chart
9.
. . . . . . . . . . . . . . . . . . . . . .
Technical
Data
9.
. . . . . . . . . . . . . . . . . . . . . . . . . . . . . . . .
Graco
W
arranty
. . . . . . . . . . . . . . . . . . . . 16
Graco
Phone Number
.
. . . . . . . . . . . . . . . . . . . . . . 16
Symbols
Warning Symbol
WARNING
This
symbol alerts you to the possibility of serious
injury or death if you do not follow the instructions.
Caution Symbol
CAUTION
This
symbol alerts you to the possibility of damage to
or destruction of equipment if you do not follow the
instructions.
WARNING
EQUIPMENT MISUSE HAZARD
Equipment
misuse can cause the equipment to rupture or malfunction and result in serious injury
.

This equipment is for professional use only
.

Read all instruction manuals, tags, and labels before operating the equipment.

Use the equipment only for its intended purpose. If you are unsure about usage, call your Graco
distributor.

Do not alter or modify this equipment. Use only Graco parts and accessories.

Check equipment daily
. Repair or replace worn or damaged parts immediately
.

Do not exceed the maximum working pressure stated for your equipment. Do not exceed the
maximum working pressure of the lowest rated component in your system.

Do not lift pressurized equipment.

Handle hoses carefully
. Do not pull on hoses to move equipment.

Route hoses away from traffic areas, sharp edges, moving parts, and hot surfaces. Do not expose
Graco hoses to temperatures above 82

C (180

F) or below –40

C (–40
F).
W
ear hearing protection when operating this equipment.

Comply with all applicable local, state, and national fire, electrical, and safety regulations.
TOXIC FLUID HAZARD
Hazardous
fluid or toxic fumes can cause serious injury or death if splashed in the eyes or on the skin,
inhaled, or swallowed.

Know the specific hazards of the fluid you are using.

Store hazardous fluid in an approved container
. Dispose of hazardous fluid according to all local,
state and national guidelines.

Always wear protective eyewear
, gloves, clothing and respirator as recommended by the fluid and
solvent manufacturer
.
3 3
WARNING
INJECTION HAZARD
Spray
from the gun, leaks or ruptured components can inject fluid into your body and cause extremely
serious injury, including the need for amputation. Fluid splashed in the eyes or on the skin can also
cause serious injury
.

Fluid injected into the skin is a serious injury
. The injury may look like just a cut, but it is a serious
injury
. Get immediate medical attention.

Do not point the gun at anyone or at any part of the body
.

Do not put your hand or fingers over the spray tip.

Do not stop or deflect leaks with your hand, body
, glove or rag.

Always have the tip guard and the trigger guard on the gun when spraying.

Be sure the gun trigger safety operates before spraying.

Lock the gun trigger safety when you stop spraying.

Follow the
Pressure Relief Procedure
on page 6 if the spray tip clogs and before cleaning,
checking or servicing the equipment.
T
ighten all fluid connections before operating the equipment.

Check the hoses, tubes, and couplings daily
. Replace worn, damaged, or loose parts immediately
.
FIRE AND EXPLOSION HAZARD
Improper
grounding, poor ventilation, open flames or sparks can cause a hazardous condition and re
-
sult in a fire or explosion and serious injury
.

Ground the equipment and the object being sprayed. Refer to
Grounding
on page 4.

If there is any static sparking or you feel an electric shock while using this equipment,
stop spray-
ing immediately
.
Do not use the equipment until you identify and correct the problem.

Provide fresh air ventilation to avoid the buildup of flammable fumes from solvents or the fluid
being sprayed.

Keep the spray area free of debris, including solvent, rags, and gasoline.

Before operating this equipment, electrically disconnect all equipment in the spray area.

Before operating this equipment, extinguish all open flames or pilot lights in the spray area.

Do not smoke in the spray area.

Do not turn on or of
f any light switch in the spray area while spraying or while operating if fumes
are present.

Do not operate a gasoline engine in the spray area.
4 6000134
Installation
Grounding
WARNING
FIRE AND EXPLOSION HAZARD
Before operating the pump, ground the
system as explained below
. Also read
the section
FIRE AND EXPLOSION
HAZARD
on page 3.
Grounding is essential to maintain a safe operating
system.
T
o reduce risk of static sparking, ground pump. Check
local electrical code for detailed grounding instructions
for area and type of equipment. Be sure to ground all
equipment.
1.
Pump:
use the ground wire and clamp (supplied).
See Fig. 1. Loosen the grounding lug locknut (W)
and washer (X). Insert one end of the ground wire
(Y) into the slot in lug (Z) and tighten the locknut
securely
. Connect the other end of the wire to a
true earth ground.
2.
Air and fluid hoses:
use only electrically conductive
hoses. Use a maximum of 500 feet (150 m) com
-
bined hose length to ensure grounding continuity
.
3.
Spray gun:
ground through connection to a prop
-
erly grounded fluid hose and pump.
4.
Fluid supply container:
follow your local code.
5.
Object being sprayed:
follow your local code.
6.
Solvent pails used when flushing:
follow your local
code. Use only metal pails, which are conductive,
placed on a grounded surface. Do not place the
pail on a nonconductive surface, such as paper or
cardboard, which interrupts the grounding continu
-
ity.
7.
T
o maintain grounding continuity when flushing or
relieving pressure
, hold a metal part of the spray
gun firmly to the side of a grounded
metal
pail,
then trigger the gun.
Fig. 1
XW
Y
Z
04111
5
Installation
06649A
Fig. 2
41
39
36
B
A
47
46
E
D
F
G
20
H
43
C
Pump Setup
See
Fig. 2. Connect the suction hose (36) between the
pump inlet (A) and the suction tube (39), using thread
sealant on the male threads. Screw on the suction
tube filter (B). Place the suction tube in the supply
drum, and adjust it so it is 1 in. (25 mm) of
f the bottom
of the drum. T
ighten the thumbscrew (41) of the pipe
hanger onto the drum.
Connect the spray hose (46) to the pump outlet mani
-
fold (43). Connect the spray gun (47) to the hose (46).
Use thread sealant on the male threads.
Fill the displacement pump wet-cup (C) 1/2 full with
Throat Seal Liquid, or a compatible solvent.
Refer to the separate instructions, supplied, for instruc
-
tions on filling and adjusting the air line oiler (F),
Close the air shutof
f valve (G). Then, connect a 3/4” ID
(minimum) air supply hose (D) to the 3/4 npt (m) air
manifold (H) swivel.
Ground the system as described on page 4.
An important step in installing this sprayer is to read
and understand each of the instruction manuals sup
-
plied with sprayer
. These manuals contain additional
warnings, cautions, and detailed instructions about
installing, operating, and servicing the various system
components.
for Model 6880242 only.
NOTE: The previous paragraph applies to Model 6880242
only. Model 965389 comes without suction hose and
tube, to allow different feed options.
6 6000134
Operation
Pressure Relief Procedure
WARNING
INJECTION
HAZARD
Fluid under high pressure can be in
-
jected through the skin and cause seri
-
ous injury
. T
o reduce the risk of an injury
from injection, splashing fluid, or moving parts, fol
-
low the
Pressure Relief Procedure
whenever you:

are instructed to relieve the pressure,

stop spraying/dispensing,

check or service any of the system equipment,

or install or clean the spray tips.
1.
Engage the gun safety latch.
2.
Close the air regulator
.
3.
Open the bleed-type air shutof
f valve.
4.
Disengage the gun safety latch.
5.
Hold a metal part of the gun firmly to the side of a
grounded metal pail, and trigger then gun to relieve
pressure.
6.
Engage the gun safety latch.
If you suspect that the spray tip or hose is completely
clogged, or that pressure has not been fully relieved
after following the steps above, very slowly loosen the
tip guard retaining nut or hose end coupling and relieve
pressure gradually
. Then, loosen completely
. Clear the
tip or hose obstruction.
Pump Operation
Prepare
the cleaning solution according to the
manufacturer’
s instructions. For your own safety
, be
sure to observe all warnings. If you are using pow
-
dered cleaners, mix them thoroughly in a separate pail
before adding them to a supply drum. Undissolved
powders are extremely abrasive and may damage
pump parts.
WARNING
W
ear appropriate protective clothing, such as
waterproof outerwear and eye goggles, according
to the cleaner manufacturer
’
s recommendations.
Cleaning chemicals may be toxic, and cause
serious irritation to your eyes or skin.
See Fig. 2. T
o start the pump, close the air shutof
f
valve (G), close the air regulator (20) by turning the
t-handle all the counterclockwise until the spring ten
-
sion is relieved. Open the shutof
f valve, hold a metal
part of the gun firmly to the side of a grounded metal
pail, trigger the gun, and slowly open the regulator until
fluid comes from the gun. Release the trigger; the
pump will stall against pressure.
When supplied with an adequate air pressure and
volume, the pump will start and stop as the spray valve
is opened and closed.
Use the air regulator (20) to control pump speed and
fluid pressure. Always use the lowest pressure neces
-
sary to get the desired result. Higher pressures will
waste the material and cause early spray tip and pump
wear.

Operation
WARNING
T
o reduce the risk of overpressurizing the sprayer
,
NEVER exceed the Maximum Working Pressure
(see the Technical Data). Be sure all accessories
are rated to withstand the Maximum Working
Pressure of the sprayer.
Model 6880242 only:
through the sight glass when the pump is running.
Refer to the separate instruction manual, supplied, for
adjustment instructions.
Useful Hints
WARNING
To
reduce the risk of serious injury whenever you
are instructed to relieve pressure, always follow the
Pressure Relief Procedure
on page 6.
Protect surfaces that may be damaged by the cleaning
solution. Rinse the solution of
f before it dries.
Hold the spray nozzle about 2 feet (2/3 meter) from the
surface and completely mist-wet the object you are
cleaning. Let the object soak briefly
, then use the
spray to “chisel” the dirt of
f. Keep the nozzle about
6 in. (153 mm) from and at an angle to the surface. If
some dirt remains, wet the surface again, let it soak a
little longer, then hold the nozzle close to the surface to
blast the dirt of
f. A heated cleaning solution may work
better; check with your cleaner manufacturer
.
After all dirt is cleaned of
f, rinse all the solution of
f with
clean, cold water. Relieve the Pressure whenever you
stop spraying.
Always stop the pump at the bottom of its stroke to
prevent material from drying on the rod and damaging
the packings.
CAUTION
Never let the pump run dry
. A pump that is running
too fast can damage itself. Shut the pump of
f imme
-
diately
, then check and refill the supply container to
prevent air from being sucked into the system, keep
liquid in the supply container at all times.
WARNING
Check the air shutof
f valve (24) weekly to be sure it
relieves all air in the motor when in the closed
position. If it is not completely relieved, the pump
could cycle unexpectedly and cause serious bodily
injury
. Replace the valve immediately it it is, or
appears to be faulty
.
Shutdown and Care of the Sprayer
WARNING
To
reduce the risk of serious injury whenever you
are instructed to relieve pressure, always follow the
Pressure Relief Procedure
on page 6.
Check the air line lubricator to ensure that it contains
enough oil.
Relieve the pressure
, and check the displacement
pump packing nut adjustment often. The packing nut
should be tight enough to stop leakage, but no tighter
.
Keep the displacement pump wet-cup (C) 1/2 full at all
times. The TSL helps protect the pump packings. See
Fig. 2.
Adjust the air line oiler to about 2 drops per minute
8 6000134
Troubleshooting
NOTE:
Refer to the separate instruction manuals
which were supplied with this sprayer
, and the manuals
which were supplied with any accessories you added,
for complete operation, troubleshooting and repair
instructions.
NOTE:
Check all possible problems and solutions
before disassembling the unit.
WARNING
T
o reduce the risk of serious injury whenever you
are instructed to relieve pressure, always follow the
Pressure Relief Procedure
on page 6.
NOTE: Relieve the pressure
before checking or
servicing the equipment.
Problem Cause Solution
Will not spray
Insuf
ficient air supply
See performance chart on page 9.
Will not spray
Closed or clogged air regulator
, valve,
supply line, etc.
Open, clear
.
Obstructed spray tip, valve, or hose
Clear
, use larger tip.
W
orn or damaged pump parts
See manual 308–148.
V
alve will not stop pump operation
Clogged fluid intake filter
Clean.
V
alve will not stop pump operation
Exhausted cleaning solution supply
Refill.
W
orn or damaged pump parts
See manual 308–148
V
alve will not stop fluid spray
Incorrect valve adjustment
Adjust
V
alve will not stop fluid spray
Obstructed or worn valve stem or
seat Clear
, replace
Fluid leaking from valve at needle
Closed or clogged air regulator
, valve,
supply line, etc.
Open, clear
.
W
orn needle packings or loose pack
-
ing nut
T
ighten
Fluid will not come from pump
(h d)
Insuf
ficient air supply
See performance chart on page 9.
Fluid will not come from pump
(hose removed)
Closed or clogged air regulator
, valve,
supply line, etc.
Open, clear
.
Obstructed spray tip, valve, or hose
Clear
, use larger tip.
Clogged fluid intake filter
Clean.
Exhausted cleaning solution supply
Refill.
W
orn or damaged pump parts
See manual 308–148
Pump operating, but output low
Obstructed spray tip, valve, or hose
Clear
, use larger tip.
Pump operating, but output low
Exhausted cleaning solution supply
Refill.
W
orn or damaged pump parts
See manual 308–148
Fluid leaking from valve handle
Spray valve swivel packings worn
Replace
9 6000134
Technical Data
Model 6880242
Model 965389
Delrin®is a registered trademark of the DuPont Company.
Ratio 28:1
Maximum fluid working pressure 193 bar (19,3 MPa, 2800 psi)
Maximum air input pressure 7 bar (0,7 MPa, 100 psi)
Pump cycles per 3.8 liters (1 gallon) 9
Recommended pump speed for continuous operation 50 cycles/min
Maximum flow 21,8 liters/min at 50 cycles/min
Air motor piston effective area 506 cm2(78,5 in.2)
Stroke length 120 mm (4,75 in.)
Displacement pump effective area 18 cm2(2,79 in.2)
Maximum pump operating temperature 65°C (150°F)
Air inlet size 3/4 npsm(f)
Fluid inlet size 2 in. npt(f)
Fluid outlet size 1-1/2 in. npt(m)
Weight approx. 138 kg
Wetted parts 304 and 329 grades of stainless steel, tungsten carbide, Delrin, PTFE,
ultra-high molecular weight polyethylene
Sound pressure level (dBa) measured at 1 meter from unit,
at 15 cycles/min
at air pressure 2,8 bar (0,28 MPa, 40 psi): 78,8
at air pressure 4,8 bar (0,48 MPa, 70 psi): 82,7
at air pressure 6,3 bar (0,63 MPa, 90 psi): 90,5
Sound power level (dBa) tested in accordance with
ISO 9614-2, at 15 cycles/min
at air pressure 2,8 bar (0,28 MPa, 40 psi): 86,5
at air pressure 4,8 bar (0,48 MPa, 70 psi): 88,7
at air pressure 6,3 bar (0,63 MPa, 90 psi): 97,7
Ratio 34:1
Maximum fluid working pressure 238 bar (23,8 MPa, 3400 psi)
Maximum air input pressure 7 bar (0,7 MPa, 100 psi)
Pump cycles per 3.8 liters (1 gallon) 6,5
Recommended pump speed for continuous operation 60 cycles/min
Maximum flow 34,6 liters/min (9,2 gpm)
Air motor piston effective area 800 cm2(124 in.2)
Stroke length 120 mm (4,75 in.)
Displacement pump effective area 24 cm2(3,72 in.2)
Maximum pump operating temperature 82°C (180°F)
Air inlet size 3/4 npsm(f)
Fluid inlet size 1 in. npt(f)
Fluid outlet size 1-1/2 in. npt(m) or M42 x 2.0
Weight 182 kg
Wetted parts 304, 329, and 17-4 PH grades of stainless steel, tungsten carbide, Del-
rin, PTFE, ultra-high molecular weight polyethylene
Sound pressure level (dBa) measured at 1 meter from unit,
at 15 cycles/min
at air pressure 2,8 bar (0,28 MPa, 40 psi): 82,5
at air pressure 4,8 bar (0,48 MPa, 70 psi): 82,4
at air pressure 7,0 bar (0,70 MPa, 100 psi): 83,0
Sound power level (dBa) tested in accordance with
ISO 9614-2, at 15 cycles/min
at air pressure 2,8 bar (0,28 MPa, 40 psi): 90,6
at air pressure 4,8 bar (0,48 MPa, 70 psi): 90,6
at air pressure 7,0 bar (0,70 MPa, 100 psi): 95,9
Parts
10 6000134
TI0320
10 23
19 & 20
43
48
47
46
A
11
6,7,8,9
36
37
38
40
41
39
42
35
45
Model
6880242
Parts
Detail Dura – Flo 1800 Stainless Steel pump
11 6000134
0567C
10
12
‡
18
‡
13
‡
15
16
‡
14
17
‡
Model
6880242
Parts
Ref.no. Qty. Description
A244530
Cart assembly
(includes parts 1 to 8)
1 113361 2 Cart tube cap
2 113362 2 Cart wheel
3 154628 2 Washer 3/4"
4 113436 2 Retaining ring
5 191605 1 Bracket , stiffener
6 100131 4 Nut , hex 0.38-16
7 100133 4 Lockwasher , spring 0.38’’
8 113743 4 CAPSCREW, hex hd; 3/8–16 unc–2a ; 4 in. (102 mm) long
9 238767 1 Spacer , big ring welded
10 245111 1 King air motor , see manual 309347 for parts
11 244524 1 Ground wire
12 184451 ‡ 1Adapter , connecting rod
13 184096 ‡ 1 Nut , coupling
14 184278 ‡ 1 Wrench , packing nut
15 687055 1Dura-Flo 1800 displacement pump , see manual 308148 for parts
16 106166 ‡ 3Nut , hex M16x2.0
17 184452 ‡ 3Rod , tie 265 mm shoulder to shoulder
18 184130 ‡ 2 Collar , coupling
19 103347 1 Valve , safety relief
20 244720 1
Air control kit ,
see manual 309341 for repair and maintenance
23 238374 1 Hose , air 19 mm (3/4 in) internal diameter
35 6878110 1 Elbow , reducing
36 214959 1 Hose coupled
37 103977 1 Swivel
38 166629 1 Coupling , hex pipe 1’’ npt
39 166630 1 Suction tube 1’’ npt
40 205770 1 Pipe hanger
41 100085 1 Screw , thumb 0.25 – 20 x0.5’’
42 165447 # 1 Filter , fluid intake 1’’ npt (f)
43 6878109 1 Manifold , outlet
45 235208 1 Union , swivel
46 244783 # 1Hose , pressure; see page 13 for parts and specifications
47 244784 1 Gun and wand assembly
48 805546 # 1 Spray tip , Q-type
# Recommended spare parts. Keep these parts on hand to reduce down time.
‡ These parts are included in connection kit no. 235414.
For applications requiring stainless steel tie rods , order kit no.222-913.
Part No.
12 6000134
Model
6880242
Parts
High pressure hose part 244783
13 6000134
TI0317
Item Part nbr.
B1 197428 male quick release coupling
B2 801569 quick release coupling
Note t: Apply sealant p/n 070408 to threads on hose before assembly
Specifications :
Type : high pressure fluid hose for pressure washer
Rating : 280 bar / 28 MPa / 4000 psi maximum working pressure
Dimensions : internal diameter 3/8 ‘’
Couplings : carbon steel , zinc plated and black PVC hose bend restrictors
B1
B2
t
t
14 6000134
Parts
Model 965389
1
28, 3, 4, 52
41
40
39 6 44, 45
43
5
46
4742
19, 20
15 6000134
Parts
Model 965389
Ref.
No. Part No. Description Qty.
1 241649 PUMP, Premier 800, 34:1; see
308152
1
3 184470 FITTING, outlet; 3/4 npt(m) 1
4 161490 COUPLING, reducing; 3/4 npt(f) x
3/8 npt(f)
1
5 189956 FRAME, cart 1
6 100088 ELBOW, street; 2 in. npt (m x f) 1
19 101566 NUT, lock; 3/8-16 3
20 100023 WASHER, flat; 3/8 3
24 805546 TIP, spray 1
28 155665 UNION, adapter, swivel; 3/8 npt(m)
x 3/8 npsm(f)
1
29 805566 TIP, spray 1
39 804474 HOSE, fluid, high pressure; 3/8 in.
(10 mm) ID; 3/8 npt (mbe); 50 ft
(15.2 m)
1
40 801568 COUPLING, quick release, male 1
41 244450 GUN, spray 1
42 237569 GROUND WIRE; 25 ft (7.6 m) 1
43 112860 WHEEL, pneumatic 2
44 107146 RING, retaining 2
45 154628 WASHER 2
46 112853 PLUG, tubing 2
47 236989 KIT, air regulator; see 308168 1
52 109213 O-RING; PTFE 1
Ref.
No. Part No. Description Qty.
16 6000134
Graco
W
arranty
Graco
warrants all equipment listed in this manual which is manufactured by Graco and bearing its name to be free from defects in
material
and workmanship on the date of sale by an authorized Graco distributor to the original purchaser for use. With the exception
of
any
special extended or limited warranty published by Graco, Graco will,
for a period of twelve months from the date of sale, repair or
replace
any part of the equipment determined by Graco to be defective. This warranty applies only when the
equipment is installed,
operated
and maintained in accordance with Graco’
s written recommendations.
This
warranty does not cover
, and Graco shall not be liable
for general wear and tear
, or any malfunction, damage or wear caused by
faulty installation, misapplication, abrasion, corrosion, inadequate or improper maintenance, negligence, accident, tampering, or
substitution
of non-Graco component parts. Nor shall Graco be liable for malfunction, damage or wear caused by the incompatibility of
Graco
equipment with structures, accessories, equipment or materials not supplied by Graco, or the
improper design, manufacture,
installation,
operation or maintenance or structures, accessories, equipment or materials not supplied by Graco.
This
warranty is conditioned upon the prepaid return of the equipment claimed to be defective to an authorized Graco distributor for
verification
of the claimed defect. If the claimed defect is verified, Graco will repair or replace free of charge any defective parts. The
equipment
will be returned to the original purchaser transportation prepaid. If inspection of the equipment does not disclose any defect
in
material or
workmanship, repairs will be made at a reasonable charge, which charges may include the costs of parts, labor
, and
transportation.
Graco’s
sole obligation and buyer
’
s sole remedy for any breach of warranty shall be as set forth above.
The buyer agrees that no other
remedy (including, but not limited to, incidental or consequential damages for lost
profits,
lost sales, injury to person or property
, or any
other incidental or consequential loss) shall be available. Any action for breach of warranty must be brought within two
(2)
years of the
date
of sale.
GRACO
MAKES NO W
ARRANTY
, AND DISCLAIMS ALL
IMPLIED W
ARRANTIES OF MERCHANT
ABILITY AND FITNESS FOR
A
P
ARTICULAR PURPOSE IN CONNECTION WITH ACCESSORIES, EQUIPMENT
, MA
TERIALS OR COMPONENTS SOLD BUT
NOT MANUFACTURED BY GRACO. These items sold, but not manufactured by Graco (such as electric motors, gas engines,
switches,
hose, etc.), are subject to the warranty
, if any
, of their manufacturer
. Graco will provide purchaser with reasonable assistance
in
making any claim for breach of these warranties.
In
no event will Graco be liable for indirect, incidental, special or consequential damages resulting from Graco supplying equipment
hereunder,
or the furnishing, performance, or use of any products or other goods sold hereto, whether due to a breach of contract,
breach
of warranty
, the negligence of Graco, or otherwise.
FOR
GRACO CANADA CUST
OMERS
The
parties acknowledge that they have required that the present document, as well as all documents, notices and legal proceedings
entered into, given or instituted pursuant hereto or relating directly or indirectly hereto, be drawn up in English. Les parties
reconnaissent
avoir convenu que la rédaction du présente document sera en Anglais,
ainsi que tous documents, avis et procédures
judiciaires
exécutés, donnés ou intentés à la suite de ou en rapport, directement ou indirectement, avec les procédures concernées.
All
written and visual data contained in this document reflects the latest product information available at the time of publication.
Graco reserves the right to make changes at any time without notice.
GRACO N.V. ; Industrieterrein ’’ Oude Bunders ’’
Slakweidestraat 31 , 3630 Maasmechelen , Belgium
Tel. : 32 89 770 700 & Fax : 32 89 770 777
PRINTED
IN Belgium , 6000134 , August 2004

This manual suits for next models

1

Other Graco Pressure Washer manuals

Graco Hydra-clean 800-101 Operation manual

Graco

Graco Hydra-clean 800-101 Operation manual

Graco HYDRA-CLEAN 3540 Operation manual

Graco

Graco HYDRA-CLEAN 3540 Operation manual

Graco Hydra Clean 2245 Operation manual

Graco

Graco Hydra Clean 2245 Operation manual

Graco Hydra-Clean 308-530 Operation manual

Graco

Graco Hydra-Clean 308-530 Operation manual

Graco Hydra-Clean 800-232 Operation manual

Graco

Graco Hydra-Clean 800-232 Operation manual

Graco 3A0592B User manual

Graco

Graco 3A0592B User manual

Graco AquaMax 804594 A Series Operation manual

Graco

Graco AquaMax 804594 A Series Operation manual

Graco 2730B User manual

Graco

Graco 2730B User manual

Graco COMMANDER 2040 Operation manual

Graco

Graco COMMANDER 2040 Operation manual

Graco 2525DD Use and care manual

Graco

Graco 2525DD Use and care manual

Graco Hydra-Clean 308-517 Operation manual

Graco

Graco Hydra-Clean 308-517 Operation manual

Graco Hydra-Clean 720 Datasheet

Graco

Graco Hydra-Clean 720 Datasheet

Graco Hydra-Clean 800-094 Operation manual

Graco

Graco Hydra-Clean 800-094 Operation manual

Graco G-Force II 3325 HA-DD Use and care manual

Graco

Graco G-Force II 3325 HA-DD Use and care manual

Graco Hydra-Clean 1235 Instructions- Operation manual

Graco

Graco Hydra-Clean 1235 Instructions- Operation manual

Graco Hydra-Clean 2510 Operation manual

Graco

Graco Hydra-Clean 2510 Operation manual

Graco Hydra-Clean 800-233 Operation manual

Graco

Graco Hydra-Clean 800-233 Operation manual

Graco HYDRA-CLEAN 1535 Operation manual

Graco

Graco HYDRA-CLEAN 1535 Operation manual

Graco Hydra-Clean 2540 Operation manual

Graco

Graco Hydra-Clean 2540 Operation manual

Graco HYDRA-CLEAN 2104ET Operation manual

Graco

Graco HYDRA-CLEAN 2104ET Operation manual

Graco Hydra-Clean 2510 Operation manual

Graco

Graco Hydra-Clean 2510 Operation manual

Graco HYDRACLEANR 4043 Operation manual

Graco

Graco HYDRACLEANR 4043 Operation manual

Graco AquaMax 3540GHW User manual

Graco

Graco AquaMax 3540GHW User manual

Graco AquaMax 2330E User manual

Graco

Graco AquaMax 2330E User manual

Popular Pressure Washer manuals by other brands

North Star M157595BK owner's manual

North Star

North Star M157595BK owner's manual

Kärcher WD 4 manual

Kärcher

Kärcher WD 4 manual

cecotec HYDROBOOST 2000 CAR&GARDEN PRO instruction manual

cecotec

cecotec HYDROBOOST 2000 CAR&GARDEN PRO instruction manual

Champion 76511 Owner's Manual and Operating Instructions

Champion

Champion 76511 Owner's Manual and Operating Instructions

Vax PowerWash VPW4 user manual

Vax

Vax PowerWash VPW4 user manual

Stanley SXEW217501 manual

Stanley

Stanley SXEW217501 manual

Excell ZR2800 Operation manual

Excell

Excell ZR2800 Operation manual

sunjoe SPX2599-MAX user manual

sunjoe

sunjoe SPX2599-MAX user manual

RIDGID RD80944 Operator's manual

RIDGID

RIDGID RD80944 Operator's manual

Powermate pw0501400 operating instructions

Powermate

Powermate pw0501400 operating instructions

Landa ZG3-2300 Operator's manual

Landa

Landa ZG3-2300 Operator's manual

Craftsman 580.752420 Operator's manual

Craftsman

Craftsman 580.752420 Operator's manual

Stihl RE 150 PLUS instruction manual

Stihl

Stihl RE 150 PLUS instruction manual

Hotsy Trailer 3500 Operator's manual

Hotsy

Hotsy Trailer 3500 Operator's manual

Kärcher HDS-E 8/16-4M Service manual

Kärcher

Kärcher HDS-E 8/16-4M Service manual

Di4 Acqua Rs3 Original instructions

Di4

Di4 Acqua Rs3 Original instructions

Kärcher K 2.97 M operating instructions

Kärcher

Kärcher K 2.97 M operating instructions

Campbell Hausfeld PW1676 Assembly instructions

Campbell Hausfeld

Campbell Hausfeld PW1676 Assembly instructions

manuals.online logo
manuals.online logoBrands
  • About & Mission
  • Contact us
  • Privacy Policy
  • Terms and Conditions

Copyright 2025 Manuals.Online. All Rights Reserved.