GrainPro COCOON Cargo User manual

GRAINPRO® COCOON™CARGO
INSTRUCTION MANUAL
MA4042TSD1014-3

2/24
GrainPro® Cocoon™ Cargo Instruction Manual
MA4042TSD1014-3
GrainPro®, Inc.
200 Baker Ave., Suite 309 Concord, MA 01742 USA
Phone: +1 978 371 7118 Fax: +1 978 371 7411 Website: www.grainpro.com
GrainPro® Philippines, Inc.
Lot 46 Efficiency Avenue, Subic Bay Gateway Park I, Subic Bay Freeport Zone 2222 Philippines
Phone: +63 47 252 7884 Fax: +63 47 252 7885 Website: www.grainpro.com
Email: salesasia@grainpro.com
GrainPro® Kenya
Shop A2, Space Apartments Mai Mahiu Road, Near T Mall Nairobi, KENYA
Phone: +254 710 933 717 Website: www.grainpro.com
Email: saleseafrica@grainpro.com
GrainPro® Mexico
Garona No. 903, Secc. Tres, Col. Amberes, CP 37235, León, Gto., México
Phone (Mobile): +52 1 (477) 392-0851 Website: www.grainpro.com
Email: guillermo@grainpro.com
GrainPro® Costa Rica
Paseo Colón, Centro Colón, en Bufete Robles Oreamuno District Merced, San José, Costa Rica
Phone: +506 4701-1173 Website: www.grainpro.com
GrainPro® India Postharvest Technology Pvt Ltd
B305, Grande View 7 Hsg. Soc. Ltd., Phase - I, Near Ashok Leyland, Ambegaon BK, PUNE,
Pune, Maharashtra, India, 411046
Phone (Mobile): +91 9970157263 Website: www.grainpro.com

3/24
GrainPro® Cocoon™ Cargo Instruction Manual
MA4042TSD1014-3
TABLE OF CONTENTS
1. INTRODUCTION ........................................................................................................................................ 4
2. CHECKLIST................................................................................................................................................. 5
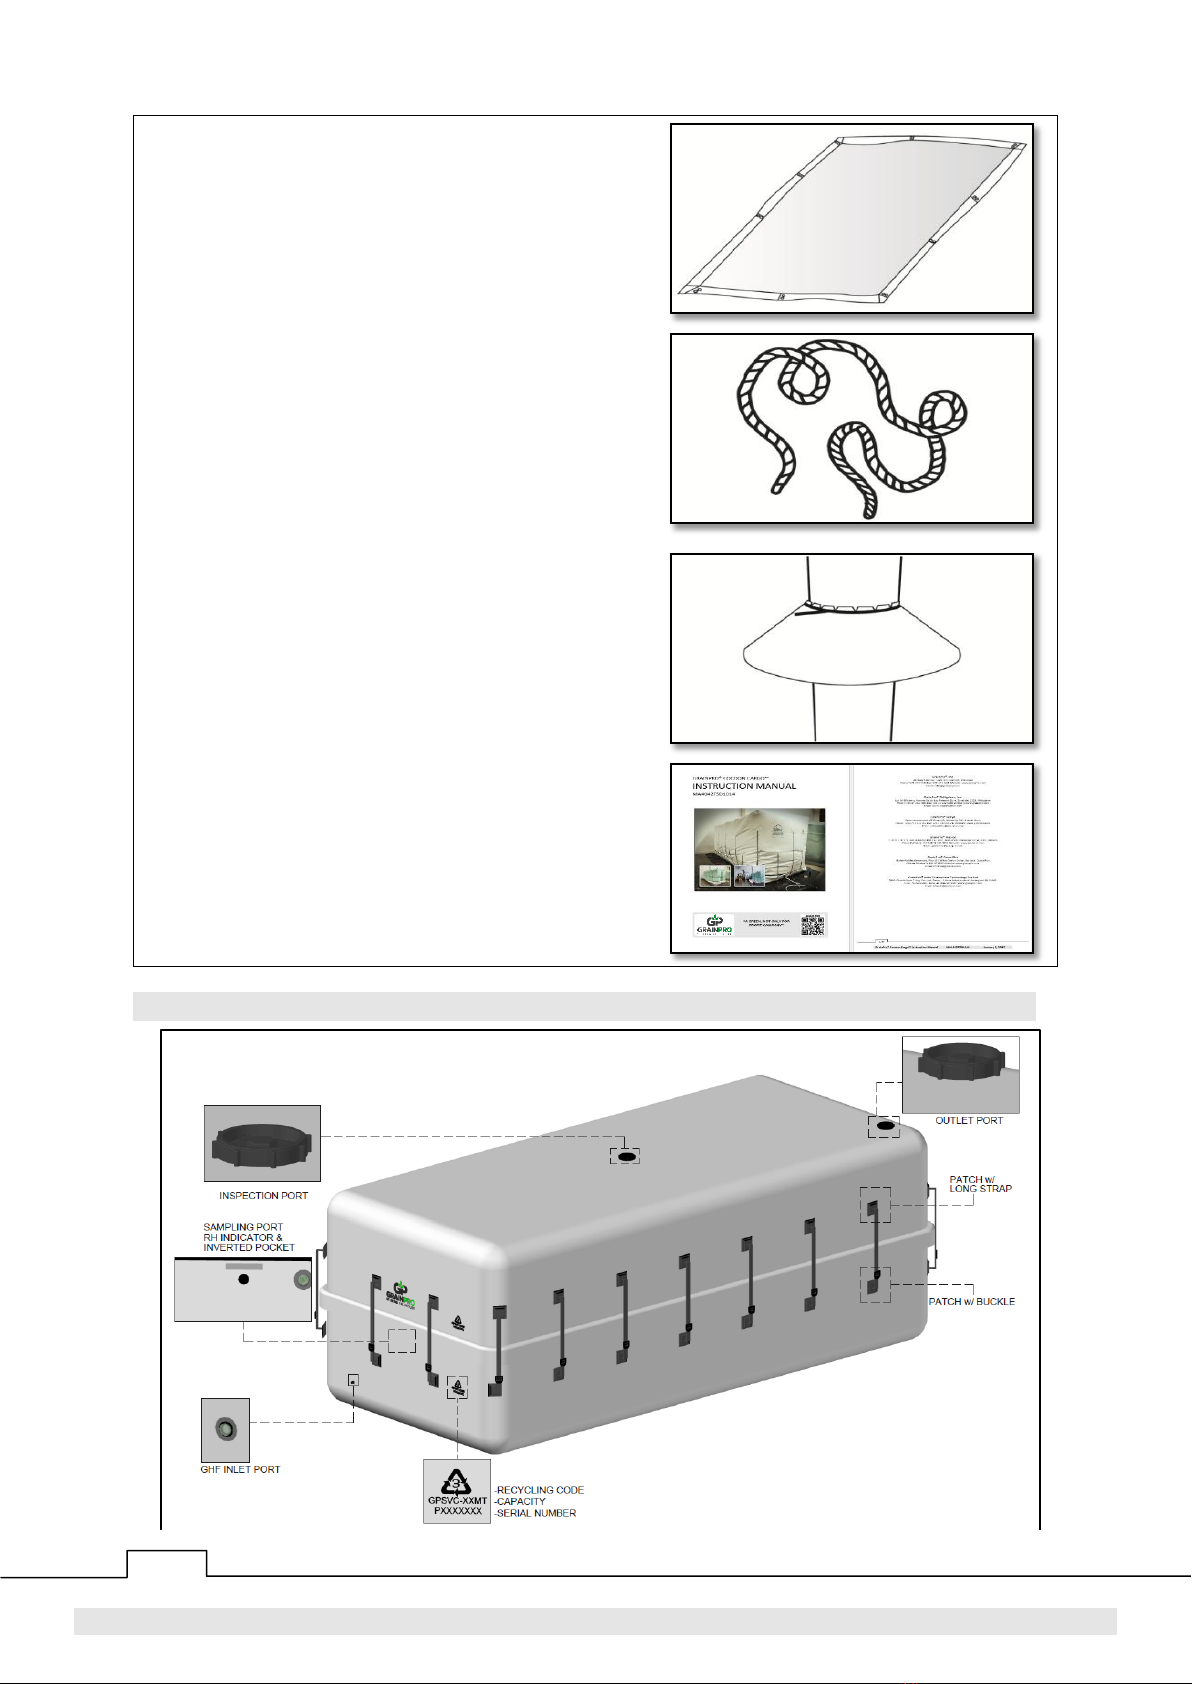
3. COMPONENTS .......................................................................................................................................... 6
4. SPECIFICATIONS........................................................................................................................................ 7
5. INSTALLATION .......................................................................................................................................... 7
Site selection....................................................................................................................................... 7
Loading ............................................................................................................................................... 7
Positioning the top section................................................................................................................. 8
Use of Desiccant (Calcium Chloride, CaCl2) –(Recommended).......................................................... 9
Zipping ................................................................................................................................................ 9
Pressure (vacuum) decay test........................................................................................................... 11
Tensioning of straps (protecting zipper)........................................................................................... 12
Carbon dioxide (CO2) safety.............................................................................................................. 12
Procedure for purging with carbon dioxide...................................................................................... 13
Using oxygen analyzer for monitoring.............................................................................................. 15
Using carbon dioxide analyzer for monitoring ................................................................................. 16
Monitoring relative humidity (%RH)................................................................................................. 17
Using GrainPro EcoWiSe for wireless monitoring............................................................................. 17
Dismantling ...................................................................................................................................... 18
6. PREVENTING CONDENSATION ............................................................................................................... 18
Why condensation occurs ................................................................................................................ 18
Moisture content (MC) requirement for safe storage...................................................................... 18
Setting-up the GrainShade (Outdoor installation)............................................................................ 19
7. MAINTENANCE AND CARE ..................................................................................................................... 19
Regular examination......................................................................................................................... 19
Physical inspection ........................................................................................................................... 19
Repairing punctures and other damages ......................................................................................... 20
Prohibited items for air shipment .................................................................................................... 20
Cleaning top and bottom sections.................................................................................................... 20
Folding .............................................................................................................................................. 21
Safekeeping ...................................................................................................................................... 21
Platform installation of rodent guard............................................................................................... 21
Termite control................................................................................................................................. 22
Recycling........................................................................................................................................... 23
8. FREQUENTLY ASKED QUESTIONS ........................................................................................................... 23
9. WARRANTY CLAUSE................................................................................................................................ 24

4/24
GrainPro® Cocoon™ Cargo Instruction Manual
MA4042TSD1014-3
1. INTRODUCTION
The GrainPro® Cocoon™Cargo is designed to address the growing market demand of transporting
agricultural commodities in Big Bags (officially known as Flexible Intermediate Bulk Container or FIBC;
also called “tote bags” in the USA). Very often, commodities are infested before loading into the
container or are found to be infested upon arrival at destination ports even if they were fumigated with
phosphine prior to loading into containers.
Twenty (20) bags of 700-1000 kg or 10 bags of 1000-1500 kg fit in a standard 20-foot shipping
container. GrainPro developed a Cocoon with the same capacity as a 20-foot container that can
accommodate 20 small or 10 large Big Bags. The Cocoon Cargo zipper is located near the ground to
facilitate handling bulk with forklifts. A sturdier and more durable 1250 g/m2PVC allows for outdoor
storage which can handle extreme pressure. The Cocoon Cargo is equipped with a CO2or phosphine
treatment port and an air outlet port, which makes it ideal for fumigation.
1.1. FEATURES:
1.1.1. Easy to use and ensure the safety of all dry agricultural commodities
1.1.2. An ideal fumigation chamber for infested crops before shipment or on arrival
1.1.3. Preserves the quality (aroma, freshness, color, etc.) of the stored products
1.1.4. Ideal for organic fumigation using CO2
1.1.5. Facilitates temporary storage of goods at departure or destination ports
1.1.6. Applicable for commodities in Big Bags, but also for smaller bags with or without pallets
1.1.7. Minimizes condensation, inhibits/controls mold growth, and infestation
1.1.8. A “green” technology for organic product storage (certified safe for organic grain storage as secondary
packaging)
1.2. PRODUCT GUARANTEE:
1.2.1. In accordance with the terms and conditions herewith, GrainPro, Inc., guarantees the quality of this
product per its written warranty provided it is used according to the instructions in this manual.
1.2.2. Please read and understand the manual thoroughly before using the Cocoon Cargo.
1.3. COMMENTS, COMPLAINTS, AND/OR CLARIFICATIONS:
1.3.1. Please contact cu[email protected],
we shall be glad to address any of your concerns.

5/24
GrainPro® Cocoon™ Cargo Instruction Manual
MA4042TSD1014-3
2. CHECKLIST
Please inspect your GrainPro Cocoon Cargo to ensure that the package includes the following items:
PART NAME
DESCRIPTION
IMAGE
2.1. CARRY BAG
2.1.1. Contents:
a. Cocoon Cargo
(Top and Bottom)
b. GrainShade™
c. Small parts
d. Repair kit
e. Instruction manual
2.2. ZIPPER PULL
2.2.1. For zipper sealing
One (1) set
(left and right)
2.3. PATCHING
MATERIAL
2.3.1. White-colored PVC roll
for patching holes and
other damages
(30cm x 1.5m)
One (1) piece
2.4. PVC GLUE
2.4.1. For patching PVC
materials
(One) 1 tube
2.5. SILICON SPRAY
2.5.1. For zipper lubrication
One (1) can
2.6. TAPE MEASURE
2.6.1. For checking the height
of the stack
One (1) piece

6/24
GrainPro® Cocoon™ Cargo Instruction Manual
MA4042TSD1014-3
2.7. GRAINSHADE™
2.7.1. Reflective cover material
for outdoor installation
One (1) piece
2.8. EXTRA ROPE
2.8.1. For tying the
GrainShade™
Forty (40) meters long
(minimum)
2.9. RODENT GUARD
2.9.1. To prevent rodents from
climbing up the platform
when storing an empty
and folded Cocoon
Cargo
Four (4) pieces per pack
2.10. INSTRUCTION
MANUAL
2.10.1.Installation instructions
2.10.2.Maintenance
instructions
2.10.3.Frequently asked
questions
2.10.4.Warranty clause
3. COMPONENTS

7/24
GrainPro® Cocoon™ Cargo Instruction Manual
MA4042TSD1014-3
4. SPECIFICATIONS
4.1. MATERIALS
PARAMETERS
DETAILS
Material
Reinforced Polyvinyl Chloride (Re-PVC)
Thickness, mm (inch)
0.97 (0.04) ±5%
Color
White
Material weight
1,250 g/m2
Oxygen Transmission Rate (OTR)
<500 cm3/m2/day @ 0.1 MPa
Water Vapor Transmission Rate (WVTR)
<9 g/m2/day
Product life
15 years
Warranty
5 years
Sealing method
PVC Hermetic Zipper
Capacity, Big Bags @ 700-1000 kg for small/
1000-1500 for large
20 small or 10 large Big Bags
Dimensions (L x W x H)
640cm x 285cm x 235cm (252 in. x 112 in. x 93 in.)
Packed weight
125 kg (276 lbs)±5%
Packed dimensions
110 cm x 100 cm x 30 cm (43 in. x 39 in. x 12 in.)
Packed volume
0.3 m3(11 ft3)
5. INSTALLATION
5.1. SITE SELECTION
5.1.1. The Cocoon Cargo can be installed indoor or
outdoor. For indoor installation, look for:
a. A flat area away from standing or running
water.
b. Cleared of any sharp objects (stones,
broken glass, nails, etc.) that may puncture
the Cocoon.
c. Sufficient space to accommodate the
Cocoon Cargo, the GrainShade and an
inspection path around (at least 50 cm
each side).
5.1.2. If the Cocoon Cargo is going to be installed on
soil or turf, put a layer (5cm) of fine sand (or
any equivalent) on top as ground foundation.
5.1.3. During loading, make sure that workers do not
wear shoes with spikes that may damage the
Cocoon Cargo. Preferably, choose a site that
offers ease in loading/unloading, away from
crowded areas and rubbish. For indoor
installation, clean the area to remove sharp
objects.
5.2. LOADING
5.2.1. Check the moisture content of the commodity
to ensure the MC is at a safe level. (Excessive
moisture levels can lead to condensation,
mold and aflatoxin growth among others).
Safe moisture level for long term storage is
different for every commodity.

8/24
GrainPro® Cocoon™ Cargo Instruction Manual
MA4042TSD1014-3
5.2.2. Loading the bottom section:
a. Unfold the bottom section of the Cocoon
Cargo and lay it out on the prepared site.
b. Roll down the wall. Stretch the floor of the
bottom section by pulling the corners
before loading the bags.
5.2.3. Start the loading of Big Bags using a
mechanical loader or a forklift.
5.2.4. Continue loading by placing the Big Bags as
close as possible to each other. Load the
second layer of Big Bags the same way as the
first layer.
5.2.5. Place desiccants (calcium chloride) bags on
strips on top.
5.3. POSITIONING THE TOP SECTION
5.3.1. Place the top section over the stack. There are several ways to place the top section:
a. By rolling.
b. By using a forklift or conveyor.

9/24
GrainPro® Cocoon™ Cargo Instruction Manual
MA4042TSD1014-3
Rolling method
Use of forklift
Use of conveyor
5.3.2. Unfold the top section over the stack. Make sure that top and bottom section arrows are aligned and
the tension straps are outside.
5.3.3. One pair of arrows is painted green. Match these arrows for correct front and back orientation of the
Cocoon.
5.3.4. Pull the sides covering the entire pile.
NOTE: Do not use tensions straps to pull or carry the top section.
5.3.5. Use silicon spray in closing the Cocoon with zipper pull.
5.4. USE OF DESICCANT (CALCIUM CHLORIDE, CaCl2) –(Recommended)
5.4.1. Required dosage of Calcium Chloride, CalCl2:
5.4.2. Place the desiccants (Calcium Chloride, CaCl2) at the middle-top portion of the bags inside the
Cocoon Cargo before zipping.
5.4.3. For six (6) months of storage, spread-out the desiccant packs on top portion of the bags inside the
Cocoon Cargo before Zipping.
COCOON CARGO
Desiccant Require (CaCl2) for
1 month of Storage
Desiccant Required (CaCl2) for
6 months of Storage
grams
grams
GP Cocoon Cargo
300
1800
5.5. ZIPPING
5.5.1. Preparing to zip:
a. Insert one hand inside the inverted pocket
and engage the zipper track of the top and
bottom liners by pressing the zipper.
b. Manually close the zipper track to a length
of 10 cm before using the zipper pulls.
NOTE:
There are zipper pulls that zip to the right for right-handed users *marked with “RIGHT”+ and
zipper pulls that zip to the left for left-handed users *marked with “LEFT”+.
5.5.2. Engaging the zipper pull:
a. Open the zipper pull by moving the black
plastic handle, projecting the large wheel
away from the flexible pulling loop.

10/24
GrainPro® Cocoon™ Cargo Instruction Manual
MA4042TSD1014-3
b. Starting from the inverted pocket, place
the smaller black running wheel inside the
liner facing upward to engage the zipper
track of the bottom liner.
c. Place the larger wheel outside the liner
facing upward, to engage the zipper track
of the top liner.
5.5.3. Using the zipper pull:
a. Rotate the zipper pull’s plastic handle 180°
toward its pulling loop, forcing the tongues
and grooves of the two zipper tracks
together. Slide the zipper pull around your
Cocoon Cargo.
b. To make zipping easier, a second person
should pull the top and bottom liners’
zipper tracks close to each other as the
zipper pull is advancing.
c. Apply the silicon spray to the zipper track
to ensure ease of pulling the zipper pull.
5.5.4. Completing the zipping process:
a. Take note of the marks (“arrows”) printed
on both top and bottom sections in pairs.
b. The markings at the top section are located
on the protective flap. If you reach a pair
that does not match, you can slide the
already zipped tracks by pulling the top
and bottom liners in opposite directions
until the marks meet.
NOTES:
If marks do not align, the two zippers may have been exposed to different temperatures which
might result in elongation of the zipper.
Expose the Cocoon sections under the sun for 30 minutes to remove zipper length difference.

11/24
GrainPro® Cocoon™ Cargo Instruction Manual
MA4042TSD1014-3
5.5.5. Removing the zipper pull:
a. From the inverted pocket, take the zipper
pull off the track by rotating the plastic
handle 180° from the zipper pull loop.
b. Close the last few centimeters of the zipper
track by sliding your fingers into the
inverted pocket behind the zipper track,
located at the front section of the Cocoon
Cargo.
5.5.6. Ensuring a complete hermetic closure:
a. Check to ensure that the entire length of
the zipper track is fully closed.
b. If not, press the zipper by hand.
NOTE:
Dirt or other objects on the zipper track
can prevent it from closing.
5.6. PRESSURE DECAY TEST (PDT)
5.6.1. After completely zipping and closing all the
ports of the Cocoon Cargo, perform a Pressure
{Vacuum} Decay Test (PDT) to ensure gas-
tightness:
a. Use digital manometer
b. Or use commercially available or
improvised U-tube manometer to monitor
the pressure
5.6.2. Connect the manometer hose into the flexible
inlet of the Cocoon Cargo.

12/24
GrainPro® Cocoon™ Cargo Instruction Manual
MA4042TSD1014-3
5.6.3. Use a vacuum pump [at least 2.3 cubic meters
per minute with 600 Watts (0.80 horsepower)
centrifugal pump]:
a. Connect the vacuum pump hose to the
inlet port of the Cocoon Cargo.
b. Create at least -250 Pascals (Pa) or -25
millimeters’ water (mm H2O) negative
pressure. Doing this can also help engage
the zipper tracks properly.
c. To be sufficiently airtight, the final pressure should not be greater than one-half (½) of the initial
pressure (created by the vacuum pump) within five (5) minutes. For -250 Pascal, the pressure should
not be greater than -125 Pa.
d. If PDT test fails, check for holes/tears and improperly sealed zippers then repeat the PDT procedure.
5.7. TENSIONING OF STRAPS (PROTECTING ZIPPER)
5.7.1. Pull the protective flap down over the zipper
track. Tighten the straps to pull any slack away
from the ground. Check the protective flap
over the zipper track. The protective flap
should not be displaced.
5.7.2. The tension straps are long enough to raise
and apply tension to the sides of the Cocoon
Cargo, even if it is only three-quarters full. The
required tension can be achieved by attaching
the cords to the buckles of the Cocoon Cargo.
(Tensioning straps prevents folds on sides to
prevent rodent getting a tooth hold).
5.8. CARBON DIOXIDE (CO2) SAFETY
5.8.1. Carbon dioxide does not support life. It can act as a simple asphyxiant by diluting the concentration of
oxygen in air below the levels necessary to support life. As it is heavier than air it will tend to
concentrate at lower levels.
5.8.2. Avoid breathing gas. Do not get in eyes, on skin, or on clothing. Wear leather safety gloves and safety
shoes when handling cylinders.
5.8.3. Protect cylinders from physical damage. Do not drag, roll, slide or drop. While moving cylinder, always
keep in place removable valve cover. Never attempt to lift a cylinder by its cap; the cap is intended
solely to protect the valve. When moving cylinders, even for short distances, use a cart (trolley, hand
truck, etc.) designed to transport cylinders.
5.8.4. Never insert an object (e.g., wrench, screwdriver, and pry bar) into cap openings; doing so may damage
the valve and cause a leak. Use an adjustable strap wrench to remove over-tight or rusted caps. Slowly
open the valve. If the valve is hard to open, discontinue use and contact your supplier.
5.8.5. Close the container valve after each use; keep closed even when empty.
5.8.6. Never apply flame or localized heat directly to any part of the container. High temperatures may
damage the container and could cause the pressure relief device to fail.
5.9. PROCEDURE FOR PURGING CARBON DIOXIDE (CO2)

13/24
GrainPro® Cocoon™ Cargo Instruction Manual
MA4042TSD1014-3
5.9.1. Calculation:
a) Total Volume –Volume Occupied by the Commodity.
b) Every 2.0 kg of CO2replaces 1 cubic meter of air.
c) Formula: (1 minus bulk density) x Volume (in m3) x 2
COMMODITY
AMOUNT OF CARBON DIOXIDE (CO2) FOR
PURGING, kg
BULK DENSITY
MT/m3
Barley
0.62
32.7
Cashew nuts
0.50
43.0
Chia seeds
0.68
27.5
Chickpeas
0.74
22.4
Cocoa beans
0.56
37.8
Coffee beans
0.59
35.3
Cotton seed
0.40
51.6
Cowpea
0.75
21.5
Maize
0.72
24.1
Millet
0.63
31.8
Mung bean
0.75
21.5
Oats
0.43
49.0
Paddy
0.60
34.4
Paddy, rice bran
0.55
38.7
Peanuts, shelled
0.64
31.0
Rice, milled
0.80
17.2
Rye
0.72
24.1
Sesame
0.59
35.3
Sorghum
0.72
24.1
Soybean
0.75
21.5
Sunflower
0.41
50.7
Wheat
0.77
19.8
5.9.2. CO2application:
a. Make sure that enough CO2is available on
site. The weight of the CO2in the cylinder is
indicated by the industrial companies (i.e.
22kg standard capacities which can be used
to calculate the number of cylinders
required). CO2cylinders are available with
or without syphon (dip tube).
NOTES:
For rapid flushing, the cylinder should be inverted using mechanical inverter.
Cylinder with syphon should be in upright position during flushing.

14/24
GrainPro® Cocoon™ Cargo Instruction Manual
MA4042TSD1014-3
b. If a mechanical inverter is not available, a
makeshift inverter can be made using sand
bags or any available tools. The cylinder
should be inverted with its top resting on
one sand bag and the bottom end resting
on pile of two or three sandbags.
c. A Snap-on standard high-pressure hose
(optional; available from GrainPro) should
be connected between the cylinder and the
gas inlet valve.
NOTES:
The hose should withstand a pressure of
88 atmospheres (1,300 psi or 92
kg/cm2).
Ensure that all connections are done properly and gaskets are installed as required.
The high-pressure hose should have a length of about 2 meters to facilitate easy connection to the
inlet valve.
d. Open the outlet port located at the back
(top) of the Cocoon Cargo to displace air
during purging.
e. Open the gas inlet valve connected to the
inlet port and then open the cylinder tap.
NOTES:
During purging, the liquid CO2enters the
liner and evaporates. This pushes the air
upward starting from the bottom.
Following a piston effect, the air is
displaced through the outlet port.
5.9.3. Safety warning
Caution: CO2, although not poisonous, is an
asphyxiant and displaces oxygen. Use either
large vented room or duct attached to outlet
port venting to outdoor.
5.9.4. Ice formation along the pressurized hose
during CO2 flushing
a. During this procedure, some ice may form
around the gas inlet and high pressure
hose.
b. If this happens do not touch the PVC liner
because it becomes brittle, loses its
flexibility and may crack!

15/24
GrainPro® Cocoon™ Cargo Instruction Manual
MA4042TSD1014-3
c. Flushing (emptying of the cylinder) depends on the amount of CO2 to be applied. Emptying one 22kg
cylinder should only take about 20 to 30 minutes. If the pressure hose or the inlet valve gets blocked
with ice, this indicates that the CO2is being released too quickly. If this happens, the cylinder should
be closed until the ice melts. Then, the cylinder valve should be adjusted to reduce the flow.
d. An additional indication that the gas is being released too quickly is when the liner begins to balloon
because pressure begins to build-up. If this happens, the gas flow should be adjusted through the
cylinder valve. The rate in which the air is expelled through the outlet port should be almost equal to
the rate of CO2entering the liner.
e. If necessary, weighing scales can be used to control the weight of the gas delivered.
5.9.5. Since CO2is heavier than air, the air inside the liner is pushed upwards and is expelled through the outlet
port. Complete displacement is not possible as there is always some mixing of air and CO2. The final CO2
concentration should reach 80% after flushing. This mixing of the CO2with the remaining air, and
absorption of CO2by the commodity, take 12-24 hours approximately. Take the carbon dioxide or oxygen
reading after 24 hours.
5.9.6. After the required weight of CO2has been
applied, immediately:
a. Close the CO2cylinder valve and the inlet
port of the liner.
b. Close the outlet port after flushing.
5.9.7. To control insects:
a. Maintain CO2above 50% for 10 days, or CO2above 35% for 15 days to sufficiently provide complete
control. After which the liner may be opened.
b. Higher temperatures accelerate insect control.
5.10. USING OXYGEN ANALYZER FOR MONITORING
5.10.1.Recommended pest reduction timeline:
a. Leave the Cocoon Cargo closed for two weeks at a minimum of 35% CO2(13% O2) concentration to
eliminate insects in all life stages and achieve best results.
b. When storing commodities for longer periods, keep the Cocoon Cargo sealed until it is unloaded
completely to prevent re-infestation.
5.10.2.Use of an oxygen analyzer:
a. During the first 15 days of installation,
oxygen levels should be checked daily using
the oxygen analyzer.

16/24
GrainPro® Cocoon™ Cargo Instruction Manual
MA4042TSD1014-3
b. Succeeding monitoring should be done
twice a week. Normally, oxygen levels
should drop 1-2% per day to a level less
than 3% (though lower levels have been
observed as well). Oxygen levels go up by a
few percent but must not exceed 7%.
Otherwise, sealing is probably
compromised and the commodity may not
be adequately protected.
5.10.3.When purging with CO2, the approximate CO2concentrations can be determined by measuring O2
concentrations using below conversion table:
O2
CO2
O2
CO2
O2
CO2
O2
CO2
O2
CO2
O2
CO2
O2
CO2
0.0
100
3.0
85.7
6.0
71.3
9.0
56.9
12.0
42.6
15.0
28.3
18.0
13.9
0.2
99.0
3.2
84.7
6.2
70.3
9.2
56.0
12.2
41.6
15.2
27.3
18.2
12.9
0.4
98.1
3.4
83.7
6.4
69.4
9.4
55.0
12.4
40.7
15.4
26.3
18.4
12.0
0.6
97.1
3.6
82.8
6.6
68.4
9.6
54.1
12.6
39.7
15.6
25.4
18.6
11.0
0.8
96.2
3.8
81.8
6.8
67.5
9.8
53.1
12.8
38.8
15.8
24.4
18.8
10.1
1.0
95.2
4.0
80.9
7.0
66.5
10.0
52.2
13.0
37.8
16.0
23.4
19.0
9.1
1.2
94.3
4.2
79.9
7.2
65.6
10.2
51.2
13.2
36.8
16.2
22.5
19.2
8.1
1.4
93.3
4.4
79.0
7.4
64.6
10.4
50.2
13.4
35.9
16.4
21.5
19.4
7.2
1.6
92.3
4.6
78.0
7.6
63.6
10.6
49.3
13.6
34.9
16.6
20.6
19.6
6.2
1.8
91.4
4.8
77.0
7.8
62.7
10.8
48.3
13.8
34.0
16.8
19.6
19.8
5.3
2.0
90.4
5.0
76.1
8.0
61.7
11.0
47.4
14.0
33.0
17.0
18.7
20.0
4.3
2.2
89.5
5.2
75.1
8.2
60.8
11.2
46.4
14.2
32.1
17.2
17.7
20.2
3.4
2.4
88.5
5.4
74.2
8.4
59.8
11.4
45.5
14.4
31.1
17.4
16.8
20.4
2.4
2.6
87.6
5.6
73.2
8.6
58.9
11.6
44.5
14.6
30.1
17.6
15.8
20.6
1.4
2.8
86.6
5.8
72.3
8.8
57.9
11.8
43.5
14.8
29.2
17.8
14.8
20.8
0.5
5.11. USING CARBON DIOXIDE ANALYZER FOR MONITORING
The GrainPro CO2analyzer uses a non-dispersive infrared radiation (NDIR) sensor for the detection of
carbon dioxide. When a sensor encounters a target gas, voltage signal is generated in proportion to the gas
concentration. This voltage signal is amplified, digitized and displayed on the instrument’s OLED display.
5.11.1.Recommended pest reduction timeline:
a. Leave the Cocoon closed for 15 days at 35% CO2concentration (minimum) or 50% CO2for 10
days to eliminate insects in all life stages and achieve best results.
b. When storing commodities, leave the Cocoon sealed until it is unloaded completely.
5.11.2.Using the carbon dioxide analyzer:
a. During the first 15 days of installation,
carbon dioxide level should be checked
daily using the carbon dioxide analyzer.

17/24
GrainPro® Cocoon™ Cargo Instruction Manual
MA4042TSD1014-3
b. Succeeding monitoring should be done
twice a week. Carbon dioxide level may go
down by several percent but must not
approach 0%. Otherwise, check for any
source of leak or damage. Sealing is
probably compromised, and the
commodity may not be adequately
protected.
5.11.3.When carrying-out a CO2treatment, the approximate CO2concentrations can be determined by
measuring CO2concentrations using the carbon dioxide analyzer. Details of using CO2analyzer are
discussed in the analyzer’s instruction manual.
5.12. MONITORING RELATIVE HUMIDITY (%RH)
5.12.1. Use of humidity indicator:
a. The humidity indicator is a special circular paper with moisture-sensitive chemical. Its color changes
from brown to green when relative humidity exceeds 65%, and vice versa.
b. The humidity indicator provides an affordable and quick reference to relative humidity inside the
Cocoon Cargo.
c. It is easy to use and does not require meticulous preparation for installation.
d. The material is non-toxic and disposal does not need any special treatment.
e. Procedures on how to use the humidity indicator:
Get a humidity indicator from the pack
Put the humidity indicator inside the
transparent plug using the clip
Attach the transparent plug to the
threaded flange tightly
Hide the humidity indicator with the zipper
cover
5.13. USING GRAINPRO ECOWISE FOR WIRELESS MONITORING
The GrainPro® EcoWiSeTM is a wireless sensing system designed to remotely monitor the environment
within a hermetic storage unit in real time. The sensor collects and sends out data such as relative humidity
(%RH), temperature (°C) and CO2levels (%) to a receiver that is connected to a computer. The software
transmits the information via the Internet to designated users who can monitor the data on their computers
or smartphones.

18/24
GrainPro® Cocoon™ Cargo Instruction Manual
MA4042TSD1014-3
5.13.1. EcoWise Standard remits data on RH and
temperature
5.13.2. EcoWiSe Plus provides data on RH,
temperature and CO2levels.
5.13.3. Details of using wireless monitoring are discussed in the EcoWiSe instruction manual.
5.14. DISMANTLING
5.14.1. Although CO2is not toxic, it is an asphyxiant and it is advisable to unzip the Cocoon Cargo and wait
until most of the CO2has dispersed.
5.14.2. Cocoon Cargo may be progressively filled for several days during harvest, provided that commodity
has uniform moisture content. However, it is not recommended to load the partially filled Cocoon
Cargo with another batch of commodity from a new harvest. When the new commodity is placed on
top, the old commodity from the previous harvest is left at the bottom.
5.14.3. Commodity should be unloaded at the end of storage.
a. Unfasten the tension straps.
b. Use a coin to twist the zipper (sharp objects should not be used for opening the zipper).
c. Gently pull the two sections apart, taking off the top section completely.
d. Unload the commodities (a stairway of sacks might make the job easier).
6. PREVENTING CONDENSATION
6.1. WHY CONDENSATION OCCURS?
6.1.1. Condensation is caused by temperature differences i.e. hot temperature by day and cool temperature
at night or sudden rain in a hot sunny day. When air collides with a cool surface at dew point, the
vapor in the air condenses on the surface. Air movement inside the Cocoon Cargo follows the natural
convection current in which hot air rises and cool air sinks (except for the phenomenon called
inversion). Hence, when warm air inside the Cocoon Cargo rises and hits the cool surface of Cocoon
Cargo top cover at dew point, condensation occurs.
6.1.2. Therefore, avoid trapping warm air inside the Cocoon Cargo to prevent condensation at the top layer.
The GrainShade prevents the heating up of air inside the Cocoon Cargo by reflecting solar radiation.
Condensation can be checked manually through opening the sampling port on the top section of
Cocoon. Close the sampling port properly after checking.
6.2. MOISTURE CONTENT (MC) REQUIREMENT FOR SAFE STORAGE
6.2.1. Commodities should be dried before storage to at least 12% MC for sorghum, 9-10% millet, 12-14% for
paddy and maize, and 13% for wheat. When the commodity is properly dried, microbial growth is
inhibited due to absence of available water.
6.2.2. Maintain safe moisture of stored commodity by protecting dried product from ambient air (with high
%RH) using hermetic technology. Use desiccant per section, 5.4.

19/24
GrainPro® Cocoon™ Cargo Instruction Manual
MA4042TSD1014-3
6.3. SETTING-UP THE GRAINSHADE (OUTDOOR INSTALLATION)
6.3.1. Ensure that the poles are rigid and stable:
a. Use poles (pipe, lumber, or bamboo) at
least 1.5 meters from each corner and
1.0 meter higher than the Cocoon Cargo.
b. Connect the corners of the GrainShade
to the apex of the poles, maintaining at
least 1-meter clearance between the top
surface of the Cocoon Cargo and the
GrainShade.
c. Additional guy wires might be used to reinforce the pole by tying the top. The other end is pegged
to the ground away from the pole.
6.3.2. If poles are not available, tie the GrainShade to nearby posts, walls, tree branches, or pegs for support.
6.3.3. To prevent the GrainShade from sagging and flapping during rain and strong wind, install wire or rope
beneath and above the GrainShade.
7. MAINTENANCE AND CARE
7.1. REGULAR EXAMINATION
7.1.1. Measure oxygen or carbon dioxide
concentration using the analyzer.
a. First-two weeks –Daily
b. Succeeding days –Twice a week
7.1.2. Check for possible condensation by opening
the sampling port at least once a week. Make
sure that the port is properly closed after
checking.
7.2. PHYSICAL INSPECTION
7.2.1. Check the zipper track for any small openings
and press any open track section found by
hand.
7.2.2. No slack material should develop near the
ground.

20/24
GrainPro® Cocoon™ Cargo Instruction Manual
MA4042TSD1014-3
7.2.3. If slacks are observed, re-adjust the tension
straps to pull slacks away from the ground.
7.2.4. During rainy season, the upper surface of the
Cocoon Cargo should be regularly inspected
for accumulated water and holes that would
permit water to seep into the Cocoon Cargo.
The stored commodity is not adequately
protected if the Cocoon Cargo is not
completely sealed.
7.2.5. Re-secure the tension of the guy wires to
prevent the GrainShade from sagging and
flapping during rain and strong wind.
7.3. REPAIRING PUNCTURES AND OTHER DAMAGES
7.3.1. Use the patching material and glue from the
repair kit.
a. Clean the area to be patched with a damp
cloth or organic solvent.
b. Apply glue (150-200g) on both surface with
a brush or spatula.
c. Let it dry for 5-10 minutes. Stick the patch
and apply sufficient pressure.
7.3.2. Protective maintenance:
a. Check the patched PVC occasionally. Replace or re-patch if necessary.
7.4. PROHIBITED ITEMS FOR AIR SHIPMENT
7.4.1. The Silicone spray (for zipper lubrication) and Glue (for patching PVC materials) are not allowed to be
shipped through air cargo.
7.4.2. These items will be removed from the package.
7.4.3. The client is advised to purchase locally available PVC glue.
7.5. CLEANING TOP AND BOTTOM SECTIONS
7.5.1. If necessary, use with soap and water.
7.5.2. Air dry or dry under the sun.
Table of contents
Other GrainPro Packaging Equipment manuals
Popular Packaging Equipment manuals by other brands

Evers
Evers BPT-L19 Operating and safety instructions

Minipack-Torre
Minipack-Torre Tunnel 50 Twin Installation, operation and maintenance

Orion
Orion L55S-13 instruction manual

Pregis
Pregis SHARP SX Operator's manual

Signode
Signode PRHR-34 Operation, parts and safety manual

ITATOOLS
ITATOOLS ITA 27 Operation manual