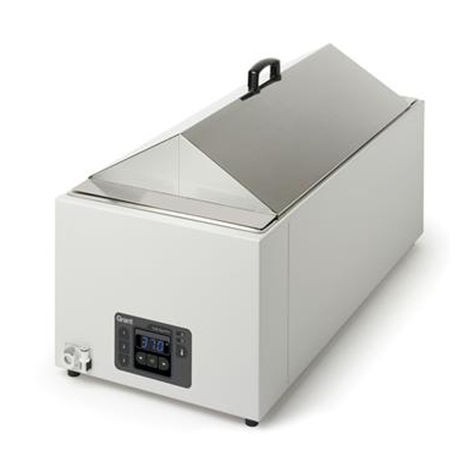
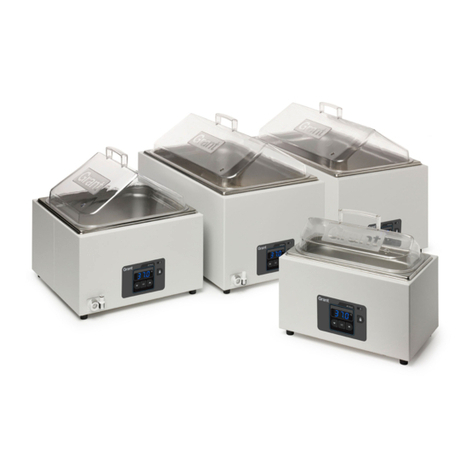
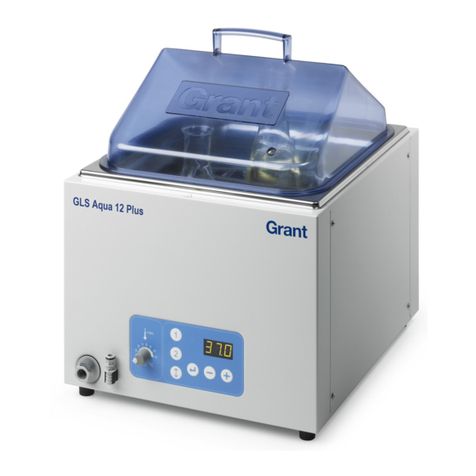
Grant SUB Aqua Plus User manual

FR
EN
DE
IT
ES
Unstirred Water Baths
SUB Aqua Plus,
JB Aqua Plus & SBB
Aqua Plus
Operating Manual

Grant Instruments,based near Cambridge, England, is an independent,
privately owned company, founded in 1951 by Peter Ward and Cecil Chapman.
Grant is a world leader in the manufacture and design of equipment for sample
preparation, scientific analysis, data acquisition and data analysis providing
solutions to the global scientific and industrial markets.
Standards Compliance and Quality
Grants’ brand and reputation are based around quality, reliability and accuracy.
We ensure our products stringently meet all necessary international safety
standards.
We pay particular attention to the safety testing of products and remain at the
forefront of the product safety standard for laboratory equipment IEC 61010-1.
The company is committed to operating its safety test laboratory in accordance
with the requirements of ISO 17025.
Grant operates a Quality Management System that complies with the
requirements of BS EN ISO 9001:2008.
Beyond compliance to the standard, Grant is committed to continually improving
in everything we do; with particular emphasis on understanding what matters to
our customers and suppliers, and designing our systems and work to meet their
needs.
If you have any feedback on Grant’s products or services we would like to hear
from you. Please send all feedback to:
Quality Manager
Grant Instruments (Cambridge) Ltd
Shepreth
Cambridgeshire
SG8 6GB
UK
Tel: +44 (0) 1763 260 811
Fax: +44 (0) 1763 262 410

SUB, JB & SBB Aqua Plus 29825 V4
Operating Manual Page 2
www.grantinstruments.com
EN
Contents
1.0 Use of products 3
2.0 How to use this operating manual 3
3.0 Safety information 3
3.1 Safety compliance 3
3.2 Safety symbols 4
3.3 Safety warnings 4
4.0 Operating instructions 5
4.1 Unpacking instructions 5
4.2 Assembly of the equipment and components 5
4.3 Installation 5
4.4 Electrical supply 5
5.0 Operating procedures 6
5.1 Operation 6
5.1.1 Water level 6
5.1.2 Operation above 60°C 6
5.1.3 Flat bottomed vessels 6
5.1.4 Emptying the baths 6
5.2 Using the JB Aqua Plus 7
5.2.1 Bath controls 7
5.2.2 Indicator lamps 7
5.2.3 Setting the control temperature) 7
5.2.4 Setting the sample protection thermostat 8
5.2.5 Calibration of the temperature control knob 8
5.3 Using the SUB Aqua Plus 9
5.3.1 Bath controls 9
5.3.2 Setting the control temperature 9
5.3.3 Setting the sample protection thermostat 10
5.3.4 Configuring a bath preset 10
5.3.5 Running a bath preset 10
5.3.6 Setting a countdown period 11
5.3.7 Cancelling the timer 11
5.3.8 Locking & unlocking the control panel 11
5.3.9 Single point calibration 11
5.3.10 Twin point calibration 12
5.4 Using the SBB Aqua Plus 13
5.4.1 Bath controls 13
5.4.2 Indicator lamps 13
5.4.3 Setting a controlled boil 13
5.4.4 Setting the constant level device 13
5.4.5 Resetting the over temperature cut-out devices 14
6.0 Technical specifications 14
7.0 Technical Tips 15
7.1 Which water should you use in your bath? 15
7.2 How to prevent rust in water baths 15
7.3 How to prevent algae and bacteria? 16
8.0 Warranty information 16
9.0 Maintenance and service 17
9.1 Cleaning 17
9.2 Fuses 17
9.2.1 Replacing fuses on JB Aqua Plus & SUB Aqua Plus(except SUB Aqua 34
Plus) 17
9.2.2 Replacing fuses on SBB Aqua Plus & SUB Aqua 34 Plus 18
9.2.3 Routine safety tests 18
9.3 Service 18
10.0 Optional accessories 18
11.0 Troubleshooting 18
12.0 Contact Grant Instruments 19
13.0 Compliance 19

29825 V4 SUB, JB & SBB Aqua Plus
Page 3 Operating Manual
www.grantinstruments.com
1.0 Use of products
The following products are covered by this operating manual:
JB Aqua (2, 2 Shallow, 5, 12, 18, 26 & Dual) Plus
SUB Aqua (2, 2 Shallow, 5, 12, 18, 26, 34 & Dual) Plus
SBB Aqua (5, 12, 18 & 26) Plus
The products listed above are a general purpose series of thermostatically controlled
unstirred water baths designed for indoor laboratory use by a professional user.
2.0 How to use this operating manual
This operating manual will allow you to unpack, set-up and operate this water bath
correctly and safely. Important safety information, symbols and warnings are listed below
and should be read carefully. Section 4 gives information about how to unpack and install
the product correctly. Section 5 gives generic operating information in the first section
followed by specific operating details for the JB Aqua Plus, SUB Aqua Plus and SBB
Aqua Plus baths respectively. Product technical specifications and tips are provided in
the sections 6 and 7. The warranty for this water bath is detailed in section 8 but to
register you should return the warranty card or complete the on-line registration form at
www.grantinstruments.com.
If there is a technical matter that this operating manual does not address, or any other
question concerning this product please contact Grant Instruments or your local
distributor who will be able to provide any additional information.
A laminated quick start guide is provided with the SUB Aqua Plus and JB Aqua Plus
water baths as quick reference guide but should not be used until the full user manual
has been read.
3.0 Safety information
3.1 Safety compliance
Grant water baths meet the requirements of international safety standard IEC 61010:
Safety requirements for electrical equipment for measurement, control, and laboratory
use. They also comply with the equivalent national standards including:
EN 61010-2-010
UL 61010A-2-010
CAN/CSA-C22.2 NO. 61010-2-010-04.

SUB, JB & SBB Aqua Plus 29825 V4
Operating Manual Page 4
www.grantinstruments.com
EN
3.2 Safety symbols
The symbols below are marked on the equipment to indicate:
Caution: Surfaces and water can be hot during and after use
Read this manual before using the bath
Important safety warning
3.3 Safety warnings
Read the whole of these instructions. Safety may be impaired if they are not
followed.
If the equipment has been transported or stored in cold or humid conditions,
condensation may form inside it. If that could have happened, allow time (at
least 2 hours at room temperature) for the condensation to evaporate before
using the equipment.
Do not use the bath to heat any material that could cause a fire or any other Do
not use the equipment in an area where there are aggressive or explosive
chemical mixtures.kind of hazard.
If a potentially hazardous liquid is spilt onto the equipment, disconnect it from
the power supply and have it checked by a competent person. It is the user’s
responsibility to carry out appropriate decontamination if hazardous material is
spilt on the equipment.
Before emptying a bath, allow the water temperature to fall to a safe level. For
18 and 26 litre baths, empty the bath before moving it.
The bath is for use only with water as the bath liquid. Make sure that it cannot become
contaminated by other liquids. We recommend the use of de-ionised water.
Before first switching on the bath please remember to fill the bath with water. Switching
the bath on dry will damage the heater and could invalidate the product warranty.

29825 V4 SUB, JB & SBB Aqua Plus
Page 5 Operating Manual
www.grantinstruments.com
4.0 Operating instructions
4.1 Unpacking instructions
Standard equipment includes:
Thermostatic bath
Mains cord with plug
Gabled polycarbonate lid (all baths except SUB Aqua 34 Plus)
Polycarbonate base tray(s) (SBB Aqua Plus baths have a metal base tray)
Operating manual
Quick start guide (JB Aqua Plus and SUB Aqua Plus baths only)
Remove packing materials carefully, and retain them for future shipment or storage of the
equipment.
4.2 Assembly of the equipment and components
The water bath has three main components, the bath, the lid and the base tray. The base
tray fits into the bath with the feet downward so that it creates a gap between the bottom
of the tank and the tray. The lid should only be lifted by the handle provided as other
parts can become hot during use. It also has a vent/thermometer hole - this hole should
not be sealed as pressure could build up inside the bath.
4.3 Installation
Place the water bath on a level, non-combustible surface. Ensure that the mains plug
and the switch are easily accessible.
4.4 Electrical supply
Check that the supply voltage marked on the serial number label, and the type of mains
plug, are correct for your mains supply outlet, which must have a ground connector.
To disconnect the equipment from the mains supply, remove the mains plug from the
mains supply outlet.

SUB, JB & SBB Aqua Plus 29825 V4
Operating Manual Page 6
www.grantinstruments.com
EN
5.0 Operating procedures
5.1 Operation
5.1.1 Water level
Ensure that the baths are used with the appropriate base tray and that the water always
covers the tray. The maximum water level should not be higher than the swage line
around the top of the bath or around 2.5cm from the top. These criteria apply both when
there are no vessels in the bath and with the maximum contents.
Avoid letting the bath run dry. In the event this does happen, the safety cutout will trip
and disconnect the heater. If this does happen, unplug the bath and have the cut-out re-
set by a competent person.
5.1.2 Operation above 60°C
The lid must be used above 60°C to maintain proper temperature control and to ensure
that the water temperature reaches the set point
The lid will also prevent excessive evaporation that requires the bath to be filled more
often and will save energy.
5.1.3 Flat bottomed vessels
Do not place flat-bottomed vessels or other objects directly on the bottom of the tank.
Always use the base tray. This avoids possible damage to the heater mounted under the
tank. The base tray also improves temperature control.
5.1.4 Emptying the baths
Before emptying any bath allow the water temperature to fall to a safe level and take
reasonable precautions to prevent accidental spillage.
Drain taps are included in 12L and above JB Aqua Plus and SUB Aqua Plus baths to
allow convenient emptying. These baths should be emptied using the drain tap prior to
moving.
To empty the bath using the drain tap, push the supplied drain insert into the drain tap
(see picture below). Note that the water will begin to empty as soon as the drain insert is
fully engaged. A length of hose can be added to the barbed end of the drain insert if
required.

29825 V4 SUB, JB & SBB Aqua Plus
Page 7 Operating Manual
www.grantinstruments.com
5.2 Using the JB Aqua Plus
5.2.1 Bath controls
5.2.2 Indicator lamps
There are three indicator lights:
1. Power on (green).
2. Heater on (orange). Marked .
3. Warning (orange). Marked indicates that the temperature is being controlled by the
sample protection thermostat.
5.2.3 Setting the control temperature ()
The water temperature of the bath can be set using the larger temperature control knob.
1. Turn the knob of the sample protection thermostat fully to maximum.
2. Turn the knob of the temperature control to the desired temperature.
3. Turn on the unit using the switch on the rear of the bath and wait until the
temperature has stabilised.
4. Measure the temperature with a thermometer and adjust the temperature control
knob if necessary to obtain the desired temperature.
5. Set the sample protection thermostat as detailed below if needed.
Sample
protection
thermostat
Power on light
Heater on light
Temperature control
Warning light

SUB, JB & SBB Aqua Plus 29825 V4
Operating Manual Page 8
www.grantinstruments.com
EN
5.2.4 Setting the sample protection thermostat
The bath is fitted with an adjustable sample protection thermostat to protect the sample.
This device is not a safety feature. The sample protection thermostat can be set to be a
few degrees above the bath set temperature.
1. Wait for the bath to stabilise at the correct temperature (can be checked with external
thermometer if needed).
2. Turn the sample protection thermostat control knob slowly anti-clockwise until an
audible ‘click’is heard (and the heater lamp goes off if it was on) and then turn it
clockwise until another audible ‘click’is heard.
In the unlikely event of failure of the primary temperature control system, the sample
protection thermostat will maintain the water in the bath at a temperature a few degrees
above the control temperature. This will be indicated by the two orange lamps cycling on
and off. If this happens, first check that the sample protection thermostat is not set to a
lower temperature than the primary control system. If that is not the reason, the main
control thermostat is not operating correctly. The bath can continue to be used without
compromising the safety of persons or the surroundings until current work is completed.
However, it is recommended to have the bath checked by a competent person as soon
as conveniently possible.
5.2.5 Calibration of the temperature control knob
If the control temperature does not match the actual water temperature measured with a
thermometer then a calibration of the control knob is required.
1. Carefully remove the temperature control knob marker to expose the adjustment
screw.
2. Use the 1.5mm Allen key supplied with the bath to loosen the adjustment screw so
that the knob can rotate on the shaft.
3. Set the knob at the bath temperature as measured by the thermometer then tighten
the adjustment screw.
4. Carefully replace the temperature control knob marker.

29825 V4 SUB, JB & SBB Aqua Plus
Page 9 Operating Manual
www.grantinstruments.com
5.3 Using the SUB Aqua Plus
5.3.1 Bath controls
5.3.2 Setting the control temperature ()
The water temperature of the bath can be set using the control keys.
1. Turn the knob of the sample protection thermostat to maximum.
2. Whilst the display is showing the bath temperature press either the ‘+’or ‘-’key. This
will cause the display to flash indicating that it can be set.
3. Use the ‘+’or ‘-’to set the desired temperature.
If no key is pressed for 4 seconds then the display will revert back to showing the bath
temperature and the set temperature will remain at its original value.
4. Press the enter key to store the requested value and the display will revert to showing
the bath temperature.
The water temperature will change to the new set value - during heating or cooling to
the set point the last digit will change to a rising or falling bar until the actual
temperature is within one degree of the set value
5. When the temperature has stabilised measure the temperature with a thermometer
and adjust the set temperature again if necessary.
6. Set the sample protection thermostat as detailed below if needed.
Sample
protection
thermostat
Preset keys
Display
Control keys

SUB, JB & SBB Aqua Plus 29825 V4
Operating Manual Page 10
www.grantinstruments.com
EN
5.3.3 Setting the sample protection thermostat
The bath is fitted with an adjustable sample protection thermostat to protect the sample.
This device is not a safety feature. The sample protection thermostat can be set to be a
few degrees above the bath set temperature.
1. Turn the knob of the sample protection thermostat to maximum.
2. Set the control temperature to 2°C above the desired operating temperature and wait
for the temperature to stabilise.
3. Turn the knob of the sample protection thermostat slowly anti-clockwise until a click is
heard and ‘’is displayed.
The audible alarm will sound continuously to warn you that the bath is controlling
using the sample protection thermostat.
4. Re-set the control temperature to the desired temperature using the ‘+’and ‘-’keys.
The audible alarm will sound continuously until the primary control system is re-
activated.
In the unlikely event of failure of the primary temperature control system, the sample
protection thermostat will maintain the water in the bath at a temperature a few degrees
above the set temperature and with greater fluctuations. The display will cycle between
‘’and the actual bath temperature and the audible alarm will sound intermittently. If
this happens, first check that the sample protection thermostat is not set to a lower
temperature than the primary control system. If that is not the reason, the bath can
continue to be used without compromising the safety of persons or the surroundings until
current work is completed. However, it is recommended to have the bath checked by a
competent person as soon as conveniently possible.
5.3.4 Configuring a bath preset
Each bath contains three presets which can be configured to different set temperatures
to allow the bath to be conveniently run at frequently used temperatures. Use the method
below to configure preset 1; other presets can be set in a similar manner.
1. Press preset key ‘1’to activate the preset. The display will flash ‘ ’and then the
current preset set temperature.
2. Use the ‘+’or ‘-’to set the desired temperature.
If no key is pressed for 8 seconds then the display will revert back to showing the
bath temperature and the set temperature will remain at its original value.
3. Press preset key ‘1’to save the preset temperature.
5.3.5 Running a bath preset
To run bath preset 1:
1. Press preset key ‘1’to activate the preset. The display will flash ‘’and then the
current preset set temperature.
2. Press the enter key to run the preset; the bath will heat (or cool) to the requested
temperature.

29825 V4 SUB, JB & SBB Aqua Plus
Page 11 Operating Manual
www.grantinstruments.com
5.3.6 Setting a countdown period ()
The bath includes a countdown timer in minutes which triggers an audible alarm on
completion.
1. Press the enter key to show ‘’.
2. Use the ‘+’or ‘-’keys to navigate to ‘’.
3. Press ‘enter’key to select the countdown timer; the display will flash ‘’.
4. Use the ‘+’or ‘-’keys to set the countdown timer in minutes.
5. Press the enter key to confirm the countdown timer.
If a timer has been set then a dot in the bottom right corner of the display will flash
during the countdown.
When the countdown timer reaches zero the audible alarm will sound and the display will
alternate between the water temperature and zero. The alarm can be accepted by
pressing the enter key.
5.3.7 Cancelling the timer
The countdown timer can be cancelled by using the instructions above but using the ‘-’
key to reset the value to zero. Use the enter key to confirm that you wish to clear the
timer.
5.3.8 Locking & unlocking the control panel
The keys on the front panel can be locked to prevent settings being accidentally changed
or modified. The front panel will display ‘’if any buttons are pressed and the control
panel is locked.
The control panel can be locked by pressing the enter and ‘+’keys simultaneously for at
least 3 seconds. The display will show ‘’to confirm that the keypad has locked. The
control panel can be unlocked by pressing the enter and ‘-’keys simultaneously for at
least 3 seconds. The display will show ‘’to confirm that the keypad is operational.
5.3.9 Single point calibration ()
The display of set temperature and actual temperature is accurate to within 1°C at 37°C
but may be up to 5°C out at maximum temperature. Single point calibration allows the
bath to be adjusted to be accurate to ±0.1°C at a single temperature.
1. Set the bath to the calibration temperature and allow the bath to stabilise for 20
minutes, indicated by the display not fluctuating by more than 0.2°C.
2. Measure the temperature of the water with a calibrated thermometer and make a
note of this reading.
3. Press the enter key to enter the menu. The display will show ‘’.
4. Use the ‘+’or ‘-’keys to navigate to ‘’.
5. Press enter key to select calibration; the display will flash with the current offset
value.
6. Use the ‘+’or ‘-’keys to set an offset correction value (positive or negative) as
measured by the thermometer.
If no key is pressed for 8 seconds then the display will revert back to showing the
bath temperature and the calibration will remain at its original value.
7. Press the enter key to store the new corrected set temperature.
The display will show the corrected bath temperature.

SUB, JB & SBB Aqua Plus 29825 V4
Operating Manual Page 12
www.grantinstruments.com
EN
5.3.10 Twin point calibration ()
The bath can also be calibrated using a twin point method to give you a linear correction
over the full temperature range. The process consists of three steps:
1. Set low point calibration value.
2. Set high point calibration value.
3. Confirm calibration settings.
The bath is not calibrated until all three steps have been completed. The greater the
difference between the low and high points, the better the calibration will be.
Low calibration point ()
1. Set the bath to a temperature between 20°C and 40°C and allow the bath to stabilise
for 20 minutes, indicated by the display not fluctuating by more than 0.2°C.
2. Measure the temperature of the water with a calibrated thermometer and make a
note of this reading.
3. Press the enter key. The display will show ‘’.
4. Use the ‘+’or ‘-’keys to navigate to ‘’and press the enter key.
5. Use the ‘+’or ‘-’keys to navigate to ‘’and press the enter key.
6. Using the ‘+’or ‘-’keys adjust the display until the value displayed is the same as the
reading taken earlier.
7. Press the enter key to confirm the value and the bath will display ‘’. Wait for the
bath to return to normal mode.
High calibration point ()
1. Set the bath to a temperature between 70°C and 90°C, allow the bath to stabilise, for
20 mins, indicated by the display not fluctuating by more than 0.2°C.
2. Measure the temperature of the water with a calibrated thermometer and make a
note of this reading.
3. Press the enter key. The display will show ‘’.
4. Use the ‘+’or ‘-’keys to navigate to ‘’and press the enter key.
5. Use the ‘+’or ‘-’keys to navigate to ‘’and press the enter key.
6. Using the ‘+’or ‘-’keys adjust the display until the value display is the same as the
reading taken earlier.
7. Press the enter key to confirm the value and the bath will display ‘’. Wait for the
bath to return to normal mode.
Setting the calibration ()
1. Press the enter key. The display will show ‘’.
2. Use the ‘+’or ‘-’keys to navigate to ‘’and press the enter key.
3. Use the ‘+’or ‘-’keys to navigate to ‘’and press the enter key to apply the new
low and high calibration values.
The bath is now calibrated and the display will read the corrected value.
Restoring factory calibration ()
1. Press the enter key. The display will show ‘’.
2. Use the ‘+’or ‘-’keys to navigate to ‘’and press the enter key.
3. Use the ‘+’or ‘-’keys to navigate to ‘’and press the enter key to restore the
factory settings.

29825 V4 SUB, JB & SBB Aqua Plus
Page 13 Operating Manual
www.grantinstruments.com
5.4 Using the SBB Aqua Plus
5.4.1 Bath controls
5.4.2 Indicator lamps
There are three indicator lights:
1. Power on (green).
2. Heater on (orange). Marked .
3. Warning (orange). Marked indicates that one or both over temperature cut outs
have tripped.
5.4.3 Setting a controlled boil
The bath can be set to boil continuously.
1. Turn the energy control knob to the maximum position.
2. When the water is boiling, reduce the power by turning the knob to a position that
maintains the boiling at the desired level.
5.4.4 Setting the constant level device
A constant level device is fitted to the bath to maintain the required water level. To use
the constant level device, connect the inlet pipe (black) to a water supply and the outlet
pipe (white) to a drain. The water level can be adjusted by loosening the lower black nut
and raising or lowering the white tube. The position of the top of the tube determines the
water level. Re-tighten the black nut.
Constant level
device
Power on light
Heater on light
Energy control
Over temperature
warning light
Fixed over
temperature
cut-out devices

SUB, JB & SBB Aqua Plus 29825 V4
Operating Manual Page 14
www.grantinstruments.com
EN
After filling the bath adjust the water flow rate to the minimum which maintains a constant
water level when the water is boiling. Check that any relevant local water supply
regulations are complied with if connecting to a mains water supply.
5.4.5 Resetting the over temperature cut-out devices
Two fixed over temperature cut-outs prevent the heater from overheating in the case of a
low water level. The reset buttons for the over temperature cut-outs are on the side panel
and can be reset by removing the protective black cap and pressing the red button in.
The over temperature cut-outs may activate during normal operation. If this is the case
then they can be reset and the bath can continue to be used without compromising the
safety of persons or the surroundings. However, if the cut-outs are persistently activated
then it is recommended to have the bath checked by a competent person as soon as
possible.
6.0 Technical specifications
Operating conditions
Ambient Temperature
5 to 40°C
Maximum relative humidity
80% R.H. in room temperatures up to 31°C
decreasing linearly to 50 % R.H. at 40°C
Altitude above sea level
Up to 2,000 m (6,500 ft)
Operating Enviroment
Indoor use only
Electrical details
Mains supply: 230V @ 50/60 Hz or 120V @ 50/60 Hz
Polution degree: 2
Installation Category: II
Note: Mains supply voltage fluctuations are not to exceed ±10% of the nominal supply
voltage
Models
Capacity (L)
Current Rating (A)
120V
230V
SUB Aqua 2 Plus
2
1.0
0.5
SUB Aqua 2S Plus
2
2.6
1.3
SUB Aqua 5 Plus
5
2.6
1.3
SUB Aqua 12 Plus
12
5.3
2.7
SUB Aqua 18 Plus
18
7.9
5.3
SUB Aqua 26 Plus
26
7.9
5.3
SUB Aqua Dual Plus
5 & 12
7.9
4.0
SUB Aqua 34 Plus
34
10.5
8.5
JB Aqua 2 Plus
2
1.0
0.5
JB Aqua 2S Plus
2
2.8
1.3
JB Aqua 5 Plus
5
2.8
1.3
JB Aqua 12 Plus
12
5.6
2.7
JB Aqua 18 Plus
18
8.4
5.3
JB Aqua 26 Plus
26
8.4
5.3
JB Aqua Dual Plus
5 & 12
8.2
4.0

29825 V4 SUB, JB & SBB Aqua Plus
Page 15 Operating Manual
www.grantinstruments.com
Models
Capacity (L)
Current Rating (A)
120V
230V
SBB Aqua 5 Plus
5
11
6
SBB Aqua 12 Plus
12
11
7
SBB Aqua 18 Plus
18
11
9
SBB Aqua 26 Plus
26
11
9
SUB Aqua Plus bath performance
Temperature range
5°C above ambient to 99°C
Display (also used for setting)
10.0 to 99.0°C in steps of 0.1°C
Temperature stability at 37°C
± 0.2°C
JB Aqua Plus bath performance
Temperature range
5°C above ambient to 98°C
Setting scale
10 to 98°C in 2°C graduations
Temperature stability at 37°C
± 1.0°C
SBB Aqua Plus bath performance
Temperature range
100°C only
7.0 Technical Tips
7.1 Which water should you use in your bath?
For the long-term reliability of water baths it is important to use oxygenated water that is
free from ions and minerals that can cause corrosion of stainless steel. We recommend
the use of distilled water and de-ionised water from modern ion exchange systems that
do not use salt back flushing to regenerate the ion-exchange cartridges.
Stainless steel is protected from corrosion by a layer of chromium oxide. If the layer is
damaged, oxygen present in water can reform the oxide layer. If the water is still or de-
oxygenated, and the oxide layer is damaged, ions can corrode the stainless steel tank. If
a water bath has been unused for some time, or water boiled, we recommend changing
to fresh distilled water or correct de-ionised water.
Water normally contains calcium or magnesium ions. De-ionised water has most ions
removed as indicated by its conductivity level; the purer the water the lower the
conductivity. It is important to use only de-ionised water from an ion exchange system
with replaceable cartridges. Do not use de-ionised water generated from an ion-
exchange system that incorporates a salt back-flush system to regenerate the ion-
exchange resin as this can leave sodium ions that are very corrosive to stainless steel.
7.2 How to prevent rust in water baths
Most Grant tanks, as well as immersed parts, are made from type 304 stainless steel, an
extremely versatile general purpose grade of stainless steel. It is the excellent forming
characteristic that has made this grade dominant in the manufacture of laboratory and
industrial water baths, as well as domestic sinks and saucepans. Type 304 stainless
steel is highly suitable for applications where hygiene is important; it exhibits good heat
resistance and excellent resistance to corrosion.

SUB, JB & SBB Aqua Plus 29825 V4
Operating Manual Page 16
www.grantinstruments.com
EN
However, despite resistance to general surface corrosion, stainless steel is susceptible to
specific types of corrosion, in particular pitting (small pin hole style corrosion) and stress
corrosion cracking. It can also undergo general corrosion in specific environments, such
as one containing hydrochloric or sulphuric acids.
Stainless steel is protected by its high content of alloying elements, primarily chromium
and nickel. Chromium is the most important with respect to corrosion resistance,
although the nickel assists in allowing the chromium to do its job. The chromium forms an
oxide layer on the surface of the steel, which inhibits further oxidation. This layer adheres
extremely well to the metal substrate, but it is essential that it remains intact, and must be
protected from various forms of damage.
If the surface chromium oxide layer becomes damaged, oxygen present in water can
partially reform the oxide layer, so it is advisable to ensure that water is always fresh and
well oxygenated. Baths that will be out of use for an extended period should be emptied,
and all moisture should be wiped from the bottom of the tank.
In some cases a brown layer may appear on the surface of a stainless steel tank. In most
of these cases this is not rust, but it may be a surface deposit of minerals from the local
water supply, or ferrous particles or salts that have fallen into the tank. These surface
deposits can usually be removed by using a household cleaner such as Duraglit or Silvo
metal polish.
7.3 How to prevent algae and bacteria?
Water baths provide the ideal environment for the growth of micro-organisms. If left
uncontrolled the growth of these organisms can result in a range of serious problems and
health risks from pathogenic bacteria.
The growth of algae on the surface of parts will cause biofouling which can reduce
performance.
Micro-organisms that produce acidic metabolic by-products can cause bio-corrosion by
depolarisation of metal surfaces.
There are a number of biocides available on the market.
8.0 Warranty information
When used in laboratory conditions according to this manual, this product is guaranteed
for THREE YEARS against faulty materials or workmanship.
Extended warranty for years four and five can be purchased by contacting our sales
department at labsales@grantinstruments.com.

29825 V4 SUB, JB & SBB Aqua Plus
Page 17 Operating Manual
www.grantinstruments.com
9.0 Maintenance and service
No routine maintenance is required except for cleaning. There are no user serviceable
parts inside the unit.
9.1 Cleaning
Clean the outside of the equipment with a damp cloth, using water only. Do not use
chemical cleaning agents. Before using any other cleaning or decontamination method,
check with Grant Instruments or your local representative to make sure that the proposed
method will not damage the equipment. Scale on immersed parts can be removed using
chemical de-scaling products designed for use on kitchen equipment that have metal
parts. De-scaling products may be toxic and manufacturer’s instructions should always
be followed.
9.2 Fuses
Fuses are Littelfuse 3AB 314 series, fast-acting, high breaking current (max breaking
current at least 750 A); dimensions are 1.25 inch long, 0.25 inch diameter. Replace fuses
only by the same type and rating (250V).
Models
Fuse Rating (A)
120V
230V
SUB Aqua 2 Plus
5
5
SUB Aqua 2S Plus
5
5
SUB Aqua 5 Plus
5
5
SUB Aqua 12 Plus
10
10
SUB Aqua 18 Plus
15
15
SUB Aqua 26 Plus
15
15
SUB Aqua Dual Plus
15
15
SUB Aqua 34 Plus
15
15
JB Aqua 2 Plus
5
5
JB Aqua 2S Plus
5
5
JB Aqua 5 Plus
5
5
JB Aqua 12 Plus
10
10
JB Aqua 18 Plus
15
15
JB Aqua 26 Plus
15
15
JB Aqua Dual Plus
15
15
SBB Aqua 5 Plus
15
15
SBB Aqua 12 Plus
15
15
SBB Aqua 18 Plus
15
15
SBB Aqua 26 Plus
15
15
9.2.1 Replacing fuses on JB Aqua Plus & SUB Aqua Plus (except SUB Aqua 34
Plus)
Disconnect the unit from the power supply
1. Remove the mains lead from the socket at the back of the bath.
2. Press down the fuse drawer catch and pull out the fuse drawer. Check the fuse(s)
and replace if necessary using the specified fuse type and rating.
3. Push back the drawer and replace the mains lead.

SUB, JB & SBB Aqua Plus 29825 V4
Operating Manual Page 18
www.grantinstruments.com
EN
9.2.2 Replacing fuses on SBB Aqua Plus & SUB Aqua 34 Plus
Disconnect the unit from the power supply
1. Remove the mains lead from the socket at the back of the bath.
2. Carefully use a screwdriver to unscrew the fuse cap from the holder. Check the
fuse(s) and replace if necessary using the specified fuse type and rating. CAUTION:
the fuse should be placed in the cap, do not attempt to put the fuse directly in the
holder.
3. Carefully replace the fuse cap in the holder and replace the mains lead.
9.2.3 Routine safety tests
If routine tests are to be made, we recommend a test of the integrity of the protective
earth conductor and an insulation test at 500 V DC. Routine flash tests are not
recommended for any electrical equipment, because repeated high voltage tests degrade
insulation materials.
9.3 Service
If service is required, switch off the unit and contact Grant Instruments or your local
representative for repairs.
Service Department
Grant Instruments (Cambridge) Ltd
Shepreth
Cambridgeshire
SG8 6GB
UK
Tel: +44 (0) 1763 260 811
Fax: +44 (0) 1763 262 410
E-mail: labse[email protected]m
10.0 Optional accessories
A full listing of product accessories and options is available in the Grant Scientific
Reference Catalogue (a copy of which is available upon request) and on the Grant
website at www.grantinstruments.com.
11.0 Troubleshooting
No lights or display - check power source, mains switch and fuses.
Water is not reaching temperature - check that the set temperature and the sample
protection thermostat are set correctly.
Display shows ‘’- check that the sample protection thermostat is set correctly.
Display temperature is different from actual temperature - use single () or twin
point calibration () to correct this.
There is no last digit on the display - allow the bath to stabilise.
Temperature of water fluctuates - check that the sample protection thermostat is set
correctly.

29825 V4 SUB, JB & SBB Aqua Plus
Page 19 Operating Manual
www.grantinstruments.com
12.0 Contact Grant Instruments
At Grant we are continuously trying to improve the performance we offer our customers.
If you have any feedback on Grant’s products or services we would like to hear from you.
Please send all feedback to:
Quality Manager
Grant Instruments (Cambridge) Ltd
Shepreth
Cambridgeshire
SG8 6GB
UK
Tel: +44 (0) 1763 260 811
Fax: +44 (0) 1763 262 410
E-mail: feedback@grantinstruments.com
13.0 Compliance
WEEE directive
Grant Instruments complies fully with the Waste Electrical & Electronic Equipment
(WEEE) regulations 2006. We are a member of the B2B compliance scheme (Scheme
Approval Number WEE/MP3338PT/SCH), which handle our WEEE obligations on our
behalf. Grant Instruments have been issued with a unique registration number by the
Environmental Agency, this reference number is WEE/GA0048TZ.
For information regarding WEEE collections in the UK please contact our B2B
Compliance Scheme directly on 01691 676 124.
For other countries please contact your equipment supplier.
For General WEEE information please visit: www.b2bcompliance.org.uk
RoHS directive
All the products covered by this manual comply with the requirements of the RoHS
Directive (Directive 2002/95/EC).
Electrical safety and electromagnetic compatibility
All the products covered by this manual comply with the requirements of the Low Voltage
Directive (2006/95/EC) for electrical safety and the EMC directive (2004/108/EC) for
electromagnetic compatibility. See the Declaration of Conformity on the inside back page
This manual suits for next models
2
Table of contents
Languages:
Other Grant Laboratory Equipment manuals
Grant
Grant Optima T100 User manual

Grant
Grant XUBA Series User manual

Grant
Grant JB Academy Series User manual

Grant
Grant SAP Series User manual

Grant
Grant Optima T100 User manual

Grant
Grant SUB User manual

Grant
Grant QBA Series User manual

Grant
Grant R Series User manual

Grant
Grant CRFT User manual
Grant
Grant HPMONOPP210G User guide
Popular Laboratory Equipment manuals by other brands

Leica
Leica CM3600 XP Instructions for use

Microscan
Microscan MicroHAWK 98-9000077-01 Accessory guide

Hexagon
Hexagon IRP60.00 operating instructions

SMC Networks
SMC Networks Rapidox SF6 6100 instruction manual

Phcbi
Phcbi MBR-705GR operating instructions

Malvern Instruments
Malvern Instruments Zetasizer uV manual