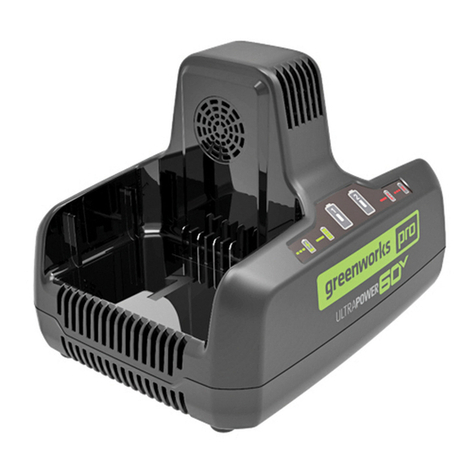
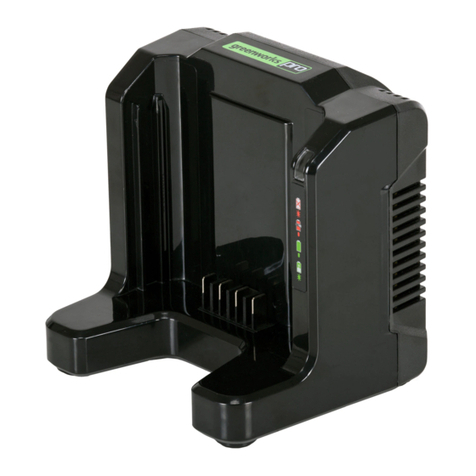
GreenWorks Pro CAB801 User manual


1 Important Safety
Instructions............4
2 Special rules for
charger................... 5
3 Proposition 65........6
4 Symbols on the
machine..................6
5 Recycle...................6
6 Operation................7
6.1 Charge procedure........... 7
6.2 Examine the charger.......9
6.3 Mount the charger...........9
7 Maintenance.........10
7.1 Clean the machine........ 10
7.2 Stow the machine......... 10
8 Troubleshooting.. 10
9 Technical data......11
10 Limited warranty..11
3
English EN

1 IMPORTANT
SAFETY
INSTRUCTIONS
• SAVE THESE INSTRUCTIONS.
• DANGER: TO REDUCE RISK
OF FIRE OR ELECTRICAL
SHOCK CAREFULLY OBEY
THESE INSTRUCTIONS.
• Confirm the voltage available
at each country location before
using the charger.
• If the shape of the plug does
not fit the power outlet, use
an attachment plug adaptor of
the proper configuration for the
power outlet.
• DO NOT probe the charger with
conductive materials.
• DO NOT allow liquid inside the
charger.
• DO NOT try to use the charger
for any other purpose than what
is presented in this manual.
• Unplug the charger and remove
the battery pack before cleaning.
• Do not try to connect two
chargers together.
• Do not use the charger in the
circumstances that the output
polarity does not match the load
polarity.
• For indoor use only.
• The cover may under no
circumstances be opened. If the
cover is damaged, the charger
may no longer be used.
• Do not attempt to recharge non-
rechargeable batteries.
• SAVE THESE INSTRUCTIONS
– This manual contains
important safety and operating
instructions for battery charger
Models CAB801/ 2901402/
GCH8020/ CAB812/ CAB813.
• Before using battery charger,
read all instructions and
cautionary markings on battery
charger, battery, and product
using battery.
• CAUTION – To reduce risk
of injury, use only BAB703
or Greenworks 80V series
approved replacement batteries.
Other types of batteries may
burst causing personal injury
and damage.
WARNING
To avoid risk of fire, electrical
shock, or electrocution:
• Do not use a damp cloth or
detergent on the battery or
battery charger.
• Always remove the battery
pack before cleaning,
inspecting, or performing any
maintenance on the tool.
4
English
EN

2 SPECIAL RULES
FOR CHARGER
This device complies with Part 15 of
the FCC Rules. Operation is subject
to the following two conditions:
• This device may not cause
harmful interference.
• This device must accept any
interference received, including
interference that may cause
undesired operation.
CAUTION
Changes or modifications not
expressly approved by the party
responsible for compliance could
void the user's authority to operate
the equipment.
NOTE
This equipment has been tested
and found to comply with the
limits for a Class B digital device,
pursuant to Part 15 of the FCC
Rules.
These limits are designed to
provide reasonable protection
against harmful interference in
a residential installation. This
equipment generates, uses and
can radiate radio frequency
energy, and if not installed and
used in accordance with the
instructions, may cause harmful
interference to radio or television
reception. The reception can
be determined by turning the
equipment off and on. The user
is encouraged to try to correct the
interference by one or more of the
following measures:
• Reorient or relocate the
receiving antenna.
• Increase the separation
between the equipment and
the receiver.
• Connect the equipment into an
outlet on a circuit different from
that to which the receiver is
connected.
• Consult the dealer or
an experienced radio/TV
technician for help.
5
English EN

3 PROPOSITION 65
WARNING
This product contains a chemical
known to the state of California
to cause cancer, birth defects or
other reproductive harm. Some
dust created by power sanding,
sawing, grinding, drilling, and other
construction activities contains
chemicals known to cause cancer,
birth defects or other reproductive
harm. Some examples of these
chemicals are:
• Lead from lead-based paints;
• Crystalline silica from bricks
and cement and other masonry
products;
• Arsenic and chromium from
chemically treated lumber.
Your risk of exposure to these
chemicals varies depending on
how often you do this type of
work. To reduce your exposure
to these chemicals, work in a
well-ventilated area, and work with
approved safety equipment, such
as dust masks that are specially
designed to filter out microscopic
particles.
Save these instructions.
4 SYMBOLS ON
THE MACHINE
You may find the below symbols
on the machine. Please study them
and learn their definitions. Correct
interpretation of these symbols allow
you to operate the tool safely.
Symbol Explanation
Class II
For indoor use only
Before charging, read
the instructions
Fuse
5 RECYCLE
Separate collection. You
must not discard with
usual household waste. If
it is necessary to replace
the machine, or if it is no
more use to you, do not
discard it with household
waste.
6
English
EN

Separate collection of
used machine and pack-
aging let you recycle
materials and use them
again. Use of the recy-
cled materials helps pre-
vent environmental pollu-
tion and decreases the
requirements for raw ma-
terials.
At the end of their useful
life, discard batteries with
a precaution for our envi-
ronment. The battery con-
tains material that is dan-
gerous to you and the en-
vironment. You must re-
move and discard these
materials separately at a
location that accepts lithi-
um-ion batteries.
6 OPERATION
6.1 CHARGE
PROCEDURE
NOTE
Before use charge the battery
pack fully to make sure that the
battery pack can get the maximum
run time. This battery pack does
not have a memory. You can
charge it all the time.
1. Connect the plug of charger (2)
to an AC power outlet.
2. Put the battery pack (1) into the
charger (2).
7
English EN
3
1
2
3
1
2

This is a diagnostic charger. The
Charger LED Light (3) illuminates in
a specified order to show the current
battery status. They are as follows:
CHARGING PROCEDURE (LED
INDICATOR)
BATTERY IS CHARG-
ING GREEN
BLINK-
ING
FULLY CHARGED GREEN
BATTERY IS TOO
WARM (REMOVE FOR
APPROX. 30 MINUTES
TO ALLOW TO COOL)
RED
DEFECTIVE BATTERY
(REMOVE AND RE-
PLACE WITH A NEW
BATTERY)
RED
BLINK-
ING
Incorrect Defect Note:
1. Put the battery pack into the
charger.
• If the status LED blinks
RED, remove the battery
pack from the charger for 1
minute.
2. Put the battery pack into the
charger again.
• If the status LED blinks
GREEN, the battery pack is
good.
• If the status LED stays
blinking RED, remove the
battery pack and disconnect
the charger.
3. Wait for 1 minute and put the
battery pack into the charger
again.
• If the status LED shows
blinks GREEN, the battery
pack is good.
• If the status LED stays
blinking RED, the battery
pack is defective and it is
necessary to replace the
battery pack.
Low voltage charging
• It can take 20 hours to fully
charge the battery if the battery
stored with no little no charger
for a long period of time.
• If the battery is not used for a
long time, the charger will go
into the recovery mode, which
8
English
EN
3
1
2

needs to get 20 hours to fully
charge the battery.
• It can extend the life of the
battery. When it is fully charged,
the next charge will get back to
standard charging.
6.2 EXAMINE THE
CHARGER
If the battery pack does not charge
correctly:
1. Examine the current of the
power outlet with different
machines. Make sure that the
outlet works.
2. Examine that the charger
contacts are not short-circuited.
3. If the charger is not under usual
room temperature, move the
charger and battery pack to a
location where the temperature
is between 6° C to 40° C (42.8°
F to 104° F) .
WARNING
If you attempt to charge the
battery pack in a warm or hot
environment, and the charger LED
light is red, remove the battery
pack and let the battery cool for
approximately 30 minutes.
6.3 MOUNT THE
CHARGER
1. Get the location of the wall to
attach the charger.
2. Use 2 wood screws to attach the
charger on the wood studs.
3. For charger 2901402/ CAB813:
Drill two holes 114.3mm on
center ensuring they are level.
4. Use wall anchors and screws to
attach the charger to the drywall.
2901402/ CAB813
4.5in./114mm
NOTE
If you do not use the battery
pack and charger for a long time,
please remove the battery from
the charger and pull out the AC
power plug.
9
English EN

7 MAINTENANCE
7.1 CLEAN THE
MACHINE
NOTE
Keep the air vent free of blockage,
saw dust, and wood dust. Do not
spray, wash, or submerge in water.
• Clear the unwanted material out
of the air vent with a vacuum.
• Clean housing and the plastic
components with a soft, dry
cloth.
IMPORTANT
Do not use strong solvents or
detergents on the plastic housing
or components.
7.2 STOW THE
MACHINE
• Remove the battery pack before
you store the charger or
disconnect the charger.
8 TROUBLESHOOTI
NG
PROB-
LEM
POSSI-
BLE
CAUSE
SOLU-
TION
Charger
doesn't
work.
Charger
shows de-
fective
mode.
(LED
flashes
Red)
Battery
pack or
charger is
defective
or there is
a bad con-
nection
between
the battery
pack and
charger.
Try to re-
move and
reinsert
the battery
pack in
the charg-
er.
Try charg-
ing a dif-
ferent bat-
tery pack.
Unplug
the charg-
er and
wait until
the red
LED goes
out, then
reconnect
the plug to
the power
supply.
10
English
EN

PROB-
LEM
POSSI-
BLE
CAUSE
SOLU-
TION
Charger
doesn't
work.
Charger
shows
evaluation
mode
(LED indi-
cates Red
solid ON).
Battery
pack is ei-
ther too
hot, or too
cold.
Allow the
battery
pack to
reach nor-
mal tem-
perature.
Charging
will begin
when the
battery
pack re-
turns to
3°C-47°C
(37°F-117
°F).
9 TECHNICAL DATA
Model GCH8020
Voltage 80 V
Input 120V AC 50/60Hz,
2.5A Max
Output 80V DC 2A
Model CAB801
Voltage 80 V
Input 120 V AC 50/60Hz,
2.5A Max
Output 80 V DC 2A
Model 2901402
Voltage 80 V
Input 120 V AC 50/60Hz, 5A
Max
Output 80 V DC 4A
Model CAB813
Voltage 80 V
Input 120 V AC 50/60Hz, 8A
Max
Output 80 V DC 6A
Model CAB812
Voltage 80 V
Input 120 V AC 50/60Hz,
10A Max
Output 80 V DC 8A
10 LIMITED
WARRANTY
M
E
I
L
L
E
U
R
D
A
N
S
S
A
C
A
T
É
G
O
R
I
E
•
M
E
J
O
R
E
N
C
L
A
S
E
B
E
S
T
I
N
C
L
A
S
S
GARANTIE OUTIL &
BATTERIE • GARANTÍA PARA
HERRAMIENTAS Y BATERÍAS
11
English EN

Greenworks hereby warranties this
product, to the original purchaser
with proof of purchase, for a period
of four (4) years against defects
in materials, parts or workmanship.
Greenworks, at its own discretion
will repair or replace any and all
parts found to be defective, through
normal use, free of charge to the
customer. This warranty is valid
only for units which have been
used for personal use that have not
been hired or rented for industrial/
commercial use, and that have been
maintained in accordance with the
instructions in the owners’ manual
supplied with the product from new.
ITEMS NOT COVERED BY
WARRANTY:
1. Any part that has become
inoperative due to misuse,
commercial use, abuse, neglect,
accident, improper maintenance,
or alteration; or
2. The unit, if it has not been
operated and/or maintained in
accordance with the owner's
manual; or
3. Normal wear;
4. Routine maintenance items such
as lubricants, blade sharpening;
5. Normal deterioration of the
exterior finish due to use or
exposure.
HELPLINE:
Warranty service is available by
calling our toll-free helpline, at
1-855-345-3934.
TRANSPORTATION CHARGES:
Transportation charges for the
movement of any power equipment
unit or attachment are the
responsibility of the purchaser. It is
the purchaser’s responsibility to pay
transportation charges for any part
submitted for replacement under
this warranty unless such return is
requested in writing by Greenworks.
USA address: Canadian ad-
dress:
Greenworks
Tools
Greenworks Tools
Canada Inc.
P.O. Box 1238 P.O. Box 93095,
Newmarket, On-
tario
Mooresville,
NC 28115
L3Y 8K3
12
English
EN

1 Instructions de
sécurité
importantes..........14
2 Règles
spéciales pour
le chargeur........... 15
3 Proposition 65......16
4 Symboles
figurant sur la
machine................17
5 Recyclage.............17
6 Utilisation............. 18
6.1 Procédure de
chargement................... 18
6.2 Contrôlez le chargeur....19
6.3 Montez le chargeur....... 20
7 Entretien...............20
7.1 Nettoyez la machine..... 20
7.2 Entreposez la
machine........................ 20
8 Dépannage........... 21
9 Données
techniques............21
10 Garantie limitée....22
13
Français
FR

1 INSTRUCTIONS
DE SÉCURITÉ
IMPORTANTES
• CONSERVEZ CES
INSTRUCTIONS.
• DANGER : POUR RÉDUIRE
LE RISQUE DE FEU OU
DE CHOC ÉLECTRIQUE
RESPECTEZ ATTENTIVEMENT
CES INSTRUCTIONS.
• Confirmez le voltage disponible
dans chaque pays avant
d'utiliser le chargeur.
• Si, de par sa forme, la fiche
ne rentre pas dans la prise,
utilisez un adaptateur de fiche
compatible avec la prise de
courant.
• N'utilisez PAS le chargeur avec
des matériaux conducteurs.
• NE permettez PAS que du
liquide entre dans le chargeur.
• N'essayez PAS d'utiliser le
chargeur pour toute autre
utilisation que celle pour laquelle
il est conçu.
• Débranchez le chargeur et
retirez le bloc-batterie avant de
procéder au nettoyage.
• N'essayez pas de brancher deux
chargeurs ensemble.
• N’utilisez pas le chargeur si la
polarité de la prise n’est pas
compatible avec la polarité de
charge.
• Pour un usage ménager
seulement.
• La protection ne doit en aucune
circonstance être retirée. Si
la protection est endommagée,
n’utilisez plus le chargeur.
• Ne tentez pas de recharger des
batteries non-rechargeables.
• CONSERVEZ CES
INSTRUCTIONS – Ce
manuel contient d’importantes
instructions de sécurité et
de fonctionnement pour les
chargeurs de batterie CAB801/
2901402/ GCH8020/ CAB812/
CAB813.
• Avant d'utiliser le chargeur
de batterie, lisez toutes les
instructions et les mises en
garde sur le chargeur de
batterie, la batterie et le produit
utilisant la batterie.
• MISE EN GARDE – Pour
réduire les risques de blessures,
utilisez uniquement des batteries
de remplacement approuvées
de la série BAB703 ou
Greenworks 80V. D'autres types
de batteries peuvent exploser et
provoquer des blessures et des
dommages.
14
Français
FR

AVERTISSEMENT
Pour éviter les risques
d'incendies, de choc électrique ou
d'électrocution :
• N'utilisez pas de chiffon
humide ni de détergent sur la
batterie ou sur le chargeur.
• Retirez toujours la batterie
avant de nettoyer, de contrôler
ou de faire l'entretien de
l'appareil.
2 RÈGLES
SPÉCIALES
POUR LE
CHARGEUR
Cet appareil est conforme aux
normes Partie 15 du FCC. Le
fonctionnement dépend des deux
conditions suivantes :
• Cet appareil ne devrait pas
causer d'interférence.
• Cet appareil doit accepter toute
interférence reçue, y compris
une interférence pouvant
provoquer une opération non
souhaitée.
ATTENTION
Tout changement ou modification
non expressément approuvé par
la partie responsable de la
conformité pourrait annuler le
droit de l’utilisateur d’utiliser
l’équipement.
15
Français
FR

REMARQUE
Cet appareil a été testé et jugé
conforme aux limites des appareils
digitaux de classe B, en vertu des
normes de la Partie 15 du FCC.
Ces limites sont conçues pour
apporter une protection contre les
brouillages préjudiciables dans un
quartier résidentiel. Cet appareil
génère, utilise et peut émettre
de l’énergie radioélectrique et,
s’il n’est pas installé et utilisé
conformément aux instructions, il
peut provoquer des interférences
nuisibles à la réception de la
radio ou de la télévision. La
réception peut être déterminée
en éteignant et en rallumant
l’appareil. Nous encourageons
l’utilisateur à essayer de corriger
l’interférence en prenant une ou
plusieurs des mesures suivantes :
• Réorientez ou déplacez
l'antenne de réception.
• Augmentez la distance entre
l'appareil et le récepteur.
• Branchez l'appareil dans une
prise ou à un réseau différent
de celui où le récepteur est
branché.
• Consultez le vendeur ou un
expert en installation radio/TV
pour obtenir de l'aide.
3 PROPOSITION 65
AVERTISSEMENT
Ce produit contient un produit
chimique connu dans l'état de
Californie comme étant une cause
de cancer, de malformations
congénitales ou d'autres
problèmes de reproduction.
Certaines poussières produites
par le ponçage mécanique,
le sciage, le meulage, le
perçage et d'autres activités
de construction contiennent
des produits chimiques connus
pour causer le cancer,
des malformations congénitales
ou d'autres problèmes de
reproduction. Voici quelques
exemples de ces produits
chimiques :
• Plomb provenant de peintures
à base de plomb;
• Silice cristalline provenant de
briques, de ciment et d'autres
produits de maçonnerie;
• Arsenic et chrome provenant
de bois traité chimiquement.
Votre risque d'exposition à
ces produits chimiques varie
selon la fréquence à laquelle
vous faites ce type de travail.
Pour réduire votre exposition
à ces produits chimiques,
travaillez dans un endroit bien
ventilé et utilisez un équipement
de sécurité approuvé, comme
des masques anti-poussière
spécialement conçus pour filtrer
les particules microscopiques.
16
Français
FR

Conservez ces instructions.
4 SYMBOLES
FIGURANT SUR
LA MACHINE
Vous pourriez voir les symboles
suivants sur la machine. Veuillez
les étudier et apprendre leur
signification. Une interprétation
adéquate de ces symboles vous
permettra d’utiliser l’outil de manière
sécuritaire.
Symbole Explication
Classe II
Pour un usage mé-
nager seulement
Avant de charger, li-
sez les instructions
Fusible
5 RECYCLAGE
Collecte séparée. Vous
ne devez pas jeter ces
déchets avec les ordures
ménagères habituelles.
S'il est nécessaire de re-
mplacer la machine, ou si
elle ne vous est plus utile,
ne la jetez pas avec les
déchets ménagers.
La collecte séparée des
machines et des embal-
lages usagés vous per-
met de recycler les maté-
riaux et de les réutiliser.
L'utilisation de matériaux
recyclés contribue à la
prévention de la pollution
de l'environnement et à la
réduction des besoins en
matières premières.
À la fin de leur durée de
vie utile, jetez les batter-
ies en prenant des pré-
cautions pour l'environne-
ment. La batterie contient
des matières dangereu-
ses pour les humains
et pour l'environnement.
Vous devez retirer et jet-
er ces matériaux séparé-
ment à un emplacement
qui accepte les batteries
aux ions de lithium.
17
Français
FR

6 UTILISATION
6.1 PROCÉDURE DE
CHARGEMENT
REMARQUE
Avant utilisation, chargez la
batterie à 100 % afin de vous
assurer un temps maximum
d'utilisation. Cette batterie n'a pas
de mémoire. Vous pouvez la
charger à tout moment.
1. Branchez la prise du chargeur
(2) à une prise de courant c.a.
2. Placez la batterie (1) dans le
chargeur (2).
Ceci est un chargeur avec
diagnostic. Le témoin lumineux
DEL (3) s'allume dans un ordre
spécifique pour montrer le niveau
de charge de la batterie. Ils sont
comme suit :
PROCÉDURE DE CHARGEMENT
(INDICATEUR DEL)
BATTERIE EN
CHARGE CLIGNO
TEMENT
VERT
CHARGE COMPLÈTE VERT
18
Français
FR
1
2
3
3
1
2
3
1
2

LA BATTERIE EST
TROP CHAUDE (RE-
TIREZ DURANT EN-
VIRON 30 MINUTES
POUR LAISSER RE-
FROIDIR)
ROUGE
BATTERIE DÉFEC-
TUEUSE (RETIREZ-
LA ET REMPLACEZ
PAR UNE NOUVELLE
BATTERIE)
CLIGNO
TEMENT
ROUGE
Note de défaut incorrect :
1. Placez la batterie dans le
chargeur.
• Si le témoin DEL clignote en
ROUGE, retirez la batterie
du chargeur durant 1 minute.
2. Replacez la batterie dans le
chargeur.
• Si le témoin DEL clignote en
VERT, la batterie est bonne.
• Si le témoin DEL continue à
clignoter en ROUGE, retirez
la batterie et débranchez le
chargeur.
3. Attendez 1 minute et replacez la
batterie dans le chargeur.
• Si le témoin DEL clignote en
VERT, la batterie est bonne.
• Si le témoin DEL continue
à clignoter en ROUGE, la
batterie est défectueuse et
il faut la remplacer par une
autre.
Charge basse tension
• Cela peut prendre 20 heures
pour charger complètement la
batterie si elle est stockée sans
chargeur pendant une longue
période de temps.
• Si la batterie n'est pas utilisée
pendant une longue période,
le chargeur passe en mode
de récupération, qui nécessite
20 heures pour charger
complètement la batterie.
• Il peut prolonger la durée de
vie de la batterie. Lorsqu'il est
complètement chargé, la charge
suivante est rechargée à la
charge standard.
6.2 CONTRÔLEZ LE
CHARGEUR
Si la batterie ne se charge pas
correctement :
1. Contrôlez la prise avec différents
appareils. Assurez-vous que la
prise fonctionne.
2. Vérifiez que les contacts du
chargeur ne sont pas court-
circuités.
3. Si le chargeur n’est pas à
température ambiante, déplacez
le chargeur et le bloc-batterie
dans une pièce où la
température se situe entre 6 °C
et 40 °C (42,8 °F à 104 °F).
19
Français
FR

AVERTISSEMENT
Si vous essayez de charger
le bloc-batterie dans un
environnement chaud et que le
témoin DEL du chargeur est
rouge, retirez le bloc-batterie et
laissez la batterie refroidir pendant
environ 30 minutes.
6.3 MONTEZ LE
CHARGEUR
1. Localisez le mur sur lequel le
chargeur sera branché.
2. Utilisez 2 vis en bois pour
attacher le chargeur aux
montants en bois.
3. Pour le chargeur 2901402/
CAB813: Percez deux trous
parallèles de114.3 mm au centre.
4. Utilisez les ancrages muraux et
les vis pour fixer le chargeur
dans la plaque de plâtre.
2901402/ CAB813
4.5in./114mm
REMARQUE
Si vous n'utilisez pas la batterie
et le chargeur pendant une longue
période, veuillez retirer la batterie
du chargeur et retirer la prise AC.
7 ENTRETIEN
7.1 NETTOYEZ LA
MACHINE
REMARQUE
Préservez la ventilation de tout
blocage, de poussière et de
sciure. N’aspergez pas, ne lavez
pas et ne submergez pas dans
l’eau.
• Enlevez les matières
indésirables de l'évent d'air à
l'aide d'un aspirateur.
• Nettoyez le boîtier et les
composants en plastique avec
un chiffon doux et humide.
IMPORTANT
N'utilisez pas de solvants ou de
détergents puissants sur le boîtier
ou les composants en plastique.
7.2 ENTREPOSEZ LA
MACHINE
• Retirez la batterie avant de
ranger le chargeur ou de le
débrancher.
20
Français
FR
Other manuals for CAB801
1
This manual suits for next models
4
Table of contents
Languages:
Other GreenWorks Pro Batteries Charger manuals

GreenWorks Pro
GreenWorks Pro 60DPC10A User manual

GreenWorks Pro
GreenWorks Pro CH60A00 User manual

GreenWorks Pro
GreenWorks Pro CAG801 User manual

GreenWorks Pro
GreenWorks Pro CAC801 User manual

GreenWorks Pro
GreenWorks Pro CH60A00 User manual

GreenWorks Pro
GreenWorks Pro 2941207AU User manual

GreenWorks Pro
GreenWorks Pro Ultapower 60V CAC801 User manual

GreenWorks Pro
GreenWorks Pro CAB801 User manual