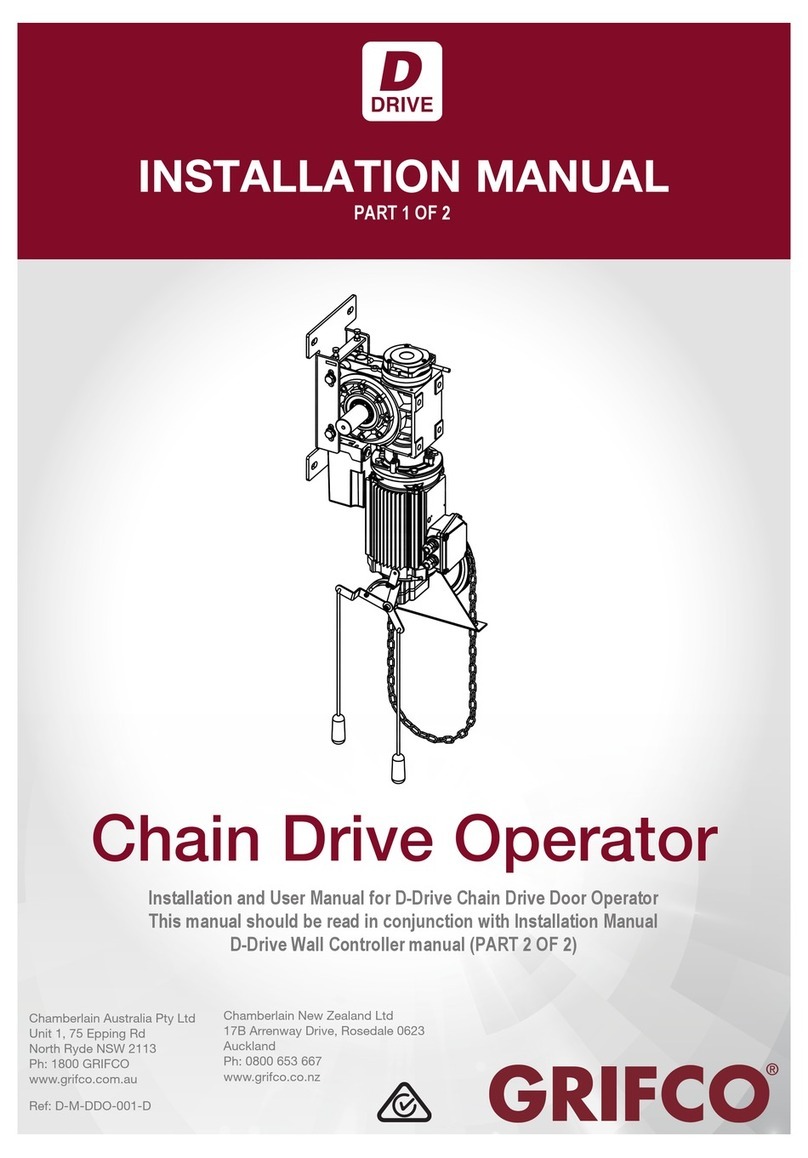
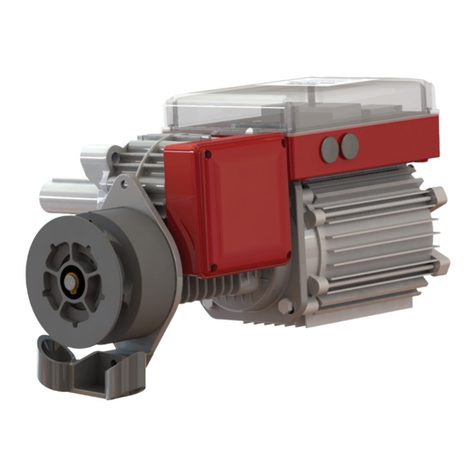
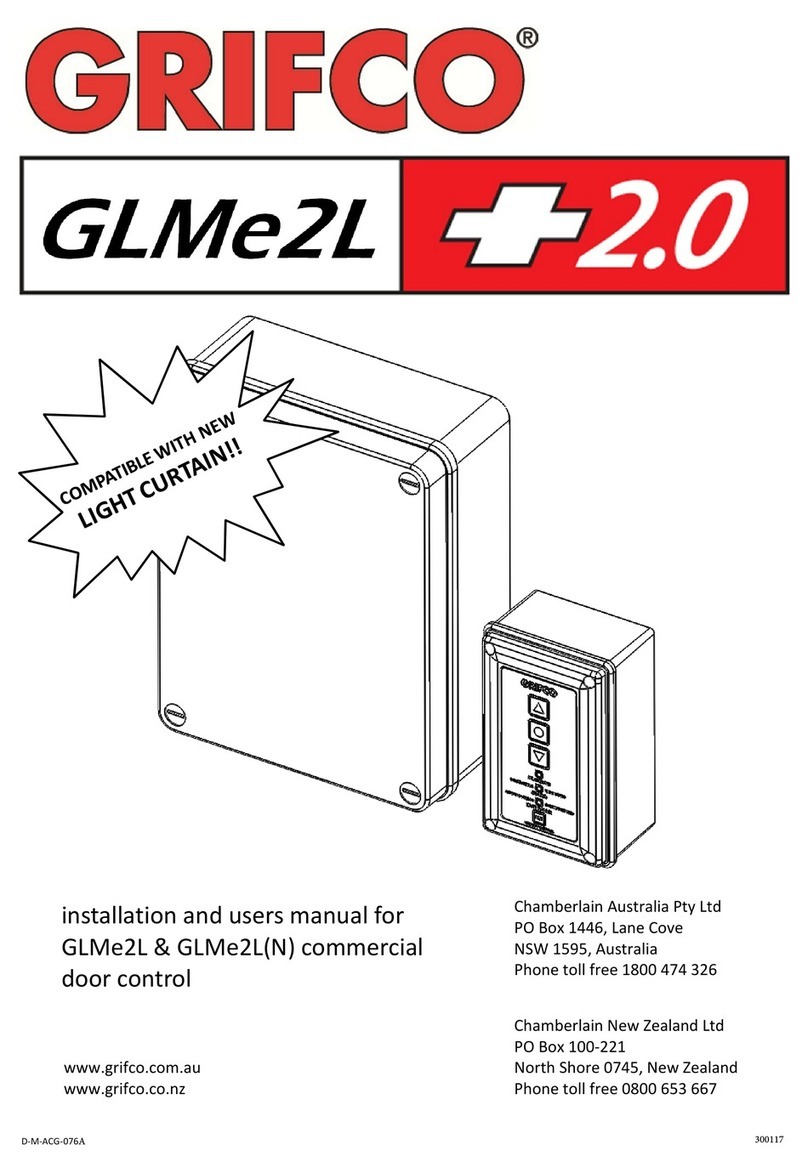
Grifco LiftMaster 75004A406 User manual

ﻟ دﻟﯾلاﻟﻣﺳﺗﺧدمﺔﯾﻋﺎﻧﺻﻟا باوﺑﻷا ﺢﺗﻓ زﺎﮭﺟﻲﻛﯾﻧﺎﻛﯾﻣﻟا
قﺎﺷﻟا مادﺧﺗﺳﻼﻟﺔطﺳاوﺑ ﻊﻧُﺻ
Chamberlain Australia Pty Ltd
Unit 1/75 Epping Road
North Ryde, NSW 2113 Australia
www.grifco.com.au
دﱢروﻣﻟا
D-M-RSO/035A-B 514051
HEAVY DUTY Mechanical Industrial
Door Opener

2
Safety 3sno
Introduc 4no
4renepOruoygniyf
4gninnalP
no 5-8
•Moun ng 5-6
•Electrical on 7
•ble Logic Control 7
•Limit Switch ons 8
8tnemtsujdAdnaputeS
ecnanetniaM 9
9setoN
User ons (Arabic) 10-11
TABLE OF CONTENTS

3
Safety symbol and signal word review
This commercial door opener has been designed and tested to oer safe service provided it is installed, operated, maintained
and tested in strict accordance with the instruons and warnings contained in this manual.
WARNING
WARNING
CAUTION
Mechanical
Electrical
When you see this Signal Word on the following pages, it will
alert you to the possibility of damage to your commercial
door and/or the commercial door opener if you do not
comply with the caonary statements that accompany it.
When you see these Safety Symbols and Signal Words on the
following pages, they will alert you to the possibility of
serious injury or death if you do not comply with the
warnings that accompany them. The hazard may come from
something mechanical or from electric shock.
SAFETY SYMBOL AND SIGNAL WORD REVIEW
WARNING: Important safety instons. It is important for the
safety of persons to follow all instons. SAVE these instrons.
Keep commercial door balanced. cking or binding doors must be
repaired. Commercial doors, door springs, pulleys, brackets and
their hardware are under extreme tension and can cause serious
personal injury. Do not empt to loosen, move or adjust them. Call
for commercial door service.
Disengage all exing commercial door locks to avoid damage to commercial door.
Install the wall control (or any addional push bons) in a locon where the
commercial door is visible during operon . Do not allow children to operate push
bon(s) or remote control(s). Serious personal injury from a closing commercial door
may result from misuse of the opener.
Do not wear rings, watches or loose clothing while installing or
servicing a commercial door opener.
Permanently fasten all supplied labels adjacent to the wall control as a convenient
reference and reminder of safe operng procedures.
To avoid serious personal injury from entanglement, remove all
ropes connected to the commercial door before installing the door
opener.
Avate opener only when the door is in full view, free of obstruons and opener is
properly adjusted. No one should enter or leave the building while the door is in
mo on.
THESE ARE IMPORTANT SAFETY INSTRUCTIONS. FOLLOW ALL INSTRUCTIONS AS INCORRECT
INSTALLATION CAN LEAD TO SEVERE INJURY OR DEATH
Inon and wiring must be in compliance with your local
building and electrical codes. Connect the power supply cord only to
properly earthed mains.
An electrician must disconnect electric power to the commercial door opener before
making repairs or removing covers.
Moisture and water can destroy the electronic components. Make
sure under all circumstances that water moisture or storage
moisture cannot penetrate the electronics. The same applies for
openings and cable entries.
If the supply cord is damaged, it must be replaced by the manufacturer or its service
agent or a similarly qued person in order to avoid a hazard
A disconneon device incorporated in thexed wiring must be provided in
accordance with the wiring rules of the country in which it is installed.
er the inon anal test of the full funon of the system
and the full funon of the safety devices must be done.
The actung member of a biased-oswitch is to be located within direct sight of the
door but away from moving parts. Unless it is key operated, it is to be installed at a
minimum height of 1500mm and not accessible to the public.
When operng a biased-oswitch, make sure that other persons
are kept away.
Make sure that people who install, maintain or operate the door follow these
instruons. Keep these instruons in a safe place so that you can refer to them
quickly when you need to.
The opener cannot be used with a driven part incorporng a
wicket door (unless the opener cannot be operated with the wicket
door open).
If the opener is installed at a height less than 2.5 metres fromoor level or any other
level from which the unit can be accessed (eg mezzanine) the installer is responsible
tot guards to the opener to prevent access to the chain drive.
Ensure that entrapment between the driven part and the
surroundingxed parts due to the opening movement of the driven
part is avoided
This appliance is not intended for use by persons (including children) with reduced
physical, sensory or mental capabes, or lack of experience and knowledge, unless
they have been given supervision or instruon concerning use of the appliance by a
person responsible for their safety. Children should be supervised to ensure that they
do not play with the appliance.
Motor may become hot during operon. Appropriate clearance
and/or shielding should be supplied by the installer to ensure any
cabling, wiring and/or other items cannot come in contact with the
motor. If temperature rise exceeds 50C axed wiring insulon
must be protected, for example, by insulng sleeving having an
appropriate temperature rng.
Use the commercial door opener for its intended purpose. Openers in this manual are
designed for operng spring balanced roller shers, spring balanced roller doors
and counterweighted bi-fold and cal doors.

4
Congratuons on your purchase of the Heavy Duty Roller Sher Operator. For more than 50 years, we have been producing
industrial mechanical operators that are well known for their proven reliability & robust design.
INTRODUCTION
IDENTIFYING YOUR OPERATOR
L hand unit shown above # Operator appearance may vary depending on model
Motor terminal box
Limit enclosure
Chain guide
ACEM
chain wheel
Output sha
Motor
Gearbox
WEIVPOTWEIVTNORF
Breather plug
fy the type and dimensions of your commercial door. A survey of the applica on is
recommended to see if any of the requirements below are not applicable with your installon.
Installer is to check that the temperature range marked on the drive is suitable for the loon.
Based on “standard sher”:
•The er is correctly spring balanced
•The er has1.0mm x100mm slats
•The er has no wind-locks
•A 4:1 sprocket ra o is used
If any condons above are not met, some on should be given to increasing the sprocket ro, or operator size. The
operator should be installed on the correct side of the commercial door. Select the side that meets the requirements.
•Must have minimum distance of 15mm between moung plate and door drum sprocket
•Must have minimum distance of 200mm between limit housing and imposing structure
•Must have minimum clearance of 200mm from the terminal box
Before installing the operator, check that the commercial door is in good mechanical condon, correctly balanced and open &
closes properly.
PLANNING
Opener Build Rated Load
(Nm)
Duty
Ra ng (%)
Phase Door size
(m2)*
kW Amp
75004A406 150 30 3 80 1.57 2.8

5
INSTALLATION
Mng plate slots allow the chain tension to
be adjusted through vecal movement of the
operator (see right)
Alignment of door sprocket to output of operator
(see l)
Moun ng the Unit
The Heavy Duty operator is typicallyag mounted below the door drum
so that the operator points toward the door opening and lies
beneath the sprocket of the door drum. For moung you will need to
either secure the operator to the roller er head plate with
prepared holes or slots, or use a ng plate that will xing via
a wall angle or similar exingxture.
Note: The chain guide must not be reposioned.
It is strongly recommended a strap be used to raise the operator to
necessary height, shown right.
The top end of the strap should be connected to a secure support beam
above the door axle.
When assessing and selng an appropriate moung loon, the
following considons should be made:
Mng Plate slots
Distance between moung
plate and door drum sprocket
Min 15mm - Max 100mm
Drive Chain
1
2
Clear path for manual chain to hang downward (refer pg 6 image no. 5)
Mng Plate
ACTUAL APPERANCE MAY VARY

6
Mounting the Unit (continued)
Side room to imposing structures (see l)
Note: The operator limit housing requires adequate clearance to allow
seng of limit cams during installaon. 150mm is the minimum recom-
mended clearance between wall and lid.
Room needed for safe chain on
3
Ensure the moung poon allows the hand chain to
hang free of obstruons (see right)
Ensure hand chain is not twisted when making the
join!
150mm Minimum
4
The drive sprocket must be aligned with the door sprocket,
and locked using 2 x M8 hi-tensile grub scrghtened to
min 20Nm. Grub screws must be set between 900and 1200
apart, with one grub screw lying over the drive key.
Chain tension should be set between 10-20kgs, ensuring
both sides of the linkage are taught. Where cable, use
the weight of the operator as a preload, theghten
ng bolts. ½’ x 1 ¼’ fasteners should be between to
80-90Nm min.
5
Breather plug must be
removed er installa-
INSTALLATION

7
CAUTION
The operator must:
•be connected via an approved electrical isolon device
•be connected via a suitable circuit breaker that disconnects all live conductors
•be connected in accordance with the wiring rules of the country in which it is installed
•not have control enclosures l open for extended periods (excess dust will void warranty)
It is recommended to run all cable through nonexible conduit and use appropriate conduit entries.
However if aexible cable and cable gland are used, addi onal caes / strain relief must beed inside the enclosures to pre-
vent the cable from slipping.
Electrical ons
Motor connec on
3 phase
CAUTION
When Securing the Heavy Duty Operator with the 4 x ½’ x 1 ¼’ long fasteners (based on a 12mm ng plate) and spring
washers provided, it is cal to ensure that the applied torque is between 80-90Nm. When moung through thicker seons,
ensure a minimum of 20mm of screw thread is engaged with the female thread. Use of incorrect fasteners or torque may cause
serious product damage and/or personal injury. Whenxing through a sled plate, ensure that the slots are no wider than
14mm as a spring washer may not be adequate in outside diameter to support the hexagon head.
INSTALLATION
For compliant ons we recommend using the
For on details and user ons refer to the GLMe2HS manual.
COMPATIBLE LOGIC CONTROL

8
Limit Switch
WARNING
Limits are extremely senve, a small cam movement may correspond to a large amount of er travel
INSTALLATION
SETUP AND ADJUSTMENT
Limit procedure
• ISOLATE MAINS POWER BEFORE SETTING LIMITS
• AVOID CRAMMING WIRES INTO LIMIT
ENCLOSURE AS IT MAY AFFECT CAM MOVEMENT
1. Manually pothe door in the centre of the opening.
2. Poson one cam to depress a switch and the other so
that it is well clear of the switch (note which switch it is
that you have depressed).
For controls with up and down funcons:
• Supcontrol in the upward dion.
• If the door travels up, then the limit switch which is engaged by the cam is the CLOSED limit.
• If the door doesn't move it is at the OPEN limit
• nue to Step 3 below .
For single buon controls:
• Supply power and push the b
• If the door travels up, then the limit switch which is engaged by the cam is the CLOSED limit.
• If the door travels down, then the limit switch which is engaged by the cam is the OPEN limit.
• nue to Step 3 below
3. Isolate power and adjust the limit cams to depress the switches when the shhes its OPEN and CLOSED posons.
4. Supply power and cycles the door between the OPEN and CLOSED posons. Adjust cam poif necessary.
Limit switches are pre-wired to the motor terminal box
for easy access. The limit switches must be connected
to the controller via the NORMALL CLOSED (N/C) and
COMMON (COM) terminals located inside this motor
terminal box as shown.
The limit cams are located in the limit enclosure box
shown.
WARNING:

9
MAINTENANCE
Monthly
•Check chain alignment and tension. Adjust if required *
•Check PE / IR beam/s and bump edge func onality where applicable
Quarterly
•Check ghtness xing bolts and (sprocket) grub screws. Adjust if required * refer page 6
•Check correct electrical operon
•Check manual on via hand chain
•Lubricate the drive chain *
•Check door balance. Adjust if required *
•Conduct door maintenance in accordance with door manufactures guidelines. This will include door balance *
*SERVICE MUST BE CARRIED OUT BY A QUALIFIED TECHNICIAN
Notes
The patented ACEM features allows the use of the hand chain in the event of a power failure. Simply pull on
the hand chain in either dion to operate the door manually.
Warning! Ensure power is isolated when using this feature.
The ACEM label (see right)
must bxed in close proximity to the controller e.g. on the door track.
c Chain Engagement Mechanism (ACEM)
نﻣ برﻘﻟﺎﺑ بﺎﺑﻠﻟ يدﺎﺷرﻹا لﯾﻟدﻟا ﻖﺻﻟا
ﺔﯾودﯾﻟا ﺔﻠﺳﻠﺳﻟا
لطﻋ ثودﺣ وأ رﺎﯾﺗﻟا عﺎطﻘﻧا ﺔﻟﺎﺣ ﻲﻓ
:لﯾﻐﺷﺗﻠﻟ ﻲﻟﺎﺗﻟا عﺎﺑﺗا ﻰﺟرﯾ ،ﻲﺋﺎﺑرﮭﻛ
مادﺧﺗﺳا لﺑﻗ ﻲﺋﺎﺑرﮭﻛﻟا رﺎﯾﺗﻟا ردﺻﻣ ﻖﻠﻏأ
ﺔﯾودﯾﻟا ﺔﻠﺳﻠﺳﻟا
ﺔﺳﻼﺳﺑ ﺔﻠﺳﻠﺳﻟا بﺣﺳا يودﯾﻟا لﯾﻐﺷﺗﻠﻟ
ﻊﺑﺎﺗﺗﻣ لﻛﺷﺑ دﯾ قوﻓ اًدﯾ
دﻧﻋ ﺔﻠﺳﻠﺳﻟا نﻋ كﯾدﯾ دﻌﺑأ :رﯾذﺣﺗ
ﺎًﯾﻧورﺗﻛﻟإ لﯾﻐﺷﺗﻟا

ﮫﯾﺑﻧﺗﻟا تﺎﻣﻠﻛو ﺔﻣﻼﺳﻟا زوﻣر ﺔﻌﺟارﻣ
قﯾﻗدﻟا قﻓاوﺗﻟﺎﺑ هرﺎﺑﺗﺧاو ﮫﺗﻧﺎﯾﺻو ﮫﻠﯾﻐﺷﺗو ﮫﺑﯾﻛرﺗ مﺗﯾ نأ طرﺷﺑ ﺔﻧﻣآ ﺔﻣدﺧ مﯾدﻘﺗﻟ اذھ يرﺎﺟﺗﻟا باوﺑﻷا ﺢﺗﻓ زﺎﮭﺟ رﺎﺑﺗﺧاو مﯾﻣﺻﺗ مﺗ
.بﯾﺗﻛﻟا اذھ ﻲﻓ ةدوﺟوﻣﻟا تارﯾذﺣﺗﻟاو تﺎﻣﯾﻠﻌﺗﻟا ﻊﻣ
زوﻣر ىرﺗ ﺎﻣدﻧﻋكﮭﱢﺑﻧﺗ ﻲﮭﻓ ،ﺔﯾﻟﺎﺗﻟا تﺎﺣﻔﺻﻟا ﻲﻓ هذھ ﮫﯾﺑﻧﺗﻟا تﺎﻣﻠﻛو ﺔﻣﻼﺳﻟا
دﻗ .ﺎﮭﺑﺣﺎﺻﺗ ﻲﺗﻟا تارﯾذﺣﺗﻠﻟ لﺛﺗﻣﺗ مﻟ اذإ توﻣﻟا وأ ةرﯾطﺧﻟا ﺔﺑﺎﺻﻹا ﺔﯾﻟﺎﻣﺗﺣﺎﺑ
.ﺔﯾﺋﺎﺑرﮭﻛﻟا ﺔﻣدﺻﻟا نﻣ وأ ﻲﻛﯾﻧﺎﻛﯾﻣ ءﻲﺷ نﻣ رطﺧﻟا ﻲﺗﺄﯾ
ﺑكﮭﱢﺑﻧﺗ ﻲﮭﻓ ،ﺔﯾﻟﺎﺗﻟا تﺎﺣﻔﺻﻟا ﻲﻓ ةدوﺟوﻣ هذھ ﮫﯾﺑﻧﺗﻟا ﺔﻣﻠﻛ ىرﺗﺎﻣدﻧﻋﺔﯾﻟﺎﻣﺗﺣﺎ
لﺛﺗﻣﺗ مﻟ اذإ يرﺎﺟﺗﻟا باوﺑﻷا ﺢﺗﻓ زﺎﮭﺟ وأ/ويرﺎﺟﺗﻟا كﺑﺎﺑﻟ ررﺿ ثودﺣ
.ﺎﮭﺑﺣﺎﺻﺗ ﻲﺗﻟا ﮫﯾﺑﻧﺗﻟا تارﺎﺑﻌﻟ
وأ ةدﯾدﺷﻟا ﺔﺑﺎﺻﻹا ﻰﻟإ يدؤﯾ دﻗ ﺢﯾﺣﺻﻟا رﯾﻏ بﯾﻛرﺗﻟا نأ ثﯾﺣ تﺎﻣﯾﻠﻌﺗﻟا ﻊﯾﻣﺟ عﺎﺑﺗا ﻰﺟرﯾ ،ﺔﯾﺎﻐﻠﻟ ﺔﻣﺎھ ﺔﯾﻟﺎﺗﻟا ﺔﻣﻼﺳﻟا تﺎﻣﯾﻠﻌﺗ
توﻣﻟا
بﺎﺑﻟا نوﻛﯾ نأ بﺟﯾبﺎﺑﻟا تﺎﻛرﺑﻧزو ﺔﯾرﺎﺟﺗﻟا باوﺑﻷا ﻊﻘﺗ .ةروﺷﺣﻣﻟا وأ ﺔﻘﻟﺎﻌﻟا باوﺑﻷا حﻼﺻإ بﺟﯾ .ﺎًﻧزاوﺗﻣ يرﺎﺟﺗﻟا
وأ ﺎﮭﱠﻛﻓ لوﺎﺣﺗ ﻻ.ﺔﻐﻟﺎﺑﻟا ﺔﯾﺻﺧﺷﻟا تﺎﺑﺎﺻﻹا بﺑﺳﺗ نأ نﻛﻣﯾو دﯾدﺷ طﻐﺿ تﺣﺗ ﺎھدﺎﺗﻋو تﺎﻔﯾﺗﻛﻟاو تارﻛﺑﻟاو تﻼﺑﺎﻛﻟاو
ﺔﯾرﺎﺟﺗﻟا باوﺑﻷا ﺔﻣدﺧﺑ لﺻﺗا .ﺎﮭﻠﯾدﻌﺗ وأ ﺎﮭﻛﯾرﺣﺗ
ﻔﺗﺣا(ةزﮭﺟأ) زﺎﮭﺟ وأ لﯾﻐﺷﺗﻟا (رارزأ) رزﺑ بﻌﻠﻟﺎﺑ لﺎﻔطﻸﻟ ﺢﻣﺳﺗ ﻻ.لﺎﻔطﻷا لوﺎﻧﺗﻣ نﻋ اًدﯾﻌﺑ ﺔﯾﻓﺎﺿﻹا تﺎﻘﺣﻠﻣﻟﺎﺑ ظ
قﻼﻏإ بﺑﺳﺑ ثدﺣﺗ دﻗ ﻲﺗﻟا ﺔﻐﻟﺎﺑﻟا ﺔﯾﺻﺧﺷﻟا ﺔﺑﺎﺻﻹا بﺎﺑﻟا ﺢﺗﻓ زﺎﮭﺟﻟ ﺊطﺎﺧﻟا مادﺧﺗﺳﻻا نﻋ ﺞﺗﻧﯾدﻗ .دﻌُﺑنﻋ مﻛﺣﺗﻟا
تﺎﺑﺎﺻإ بﺑﺳﯾ دﻗ بﺎﺑﻟا نأ ثﯾﺣ .يرﺎﺟﺗﻟا بﺎﺑﻟاصﺎﺧﺷﻸﻟ طﻘﻓ ﺢﻣﺳُﯾ.ﺔﻣﻼﺳﻟا ةزﮭﺟأ رﻓاوﺗ نودﺑ ﮫﻗﻼﻏإ دﻧﻋ ةرﯾطﺧ
اﻟﻣدرﱠﺑﯾنﺑﺎﺳﺗﺧدامﺟﮭﺎزﻓﺗﺢاﻟﺑﺎب.
مﺗ دﻗ بﺎﺑﻟا ﺢﺗﻓ زﺎﮭﺟ نوﻛﯾ نأو قﺋاوﻌﻟا نﻣ ٍلﺎﺧو لﻣﺎﻛ لﻛﺷﺑ ﺎًﯾﺋرﻣ بﺎﺑﻟا نوﻛﯾ ﺎﻣدﻧﻋ طﻘﻓ بﺎﺑﻟا ﺢﺗﻓ زﺎﮭﺟ لﱢﻐﺷ
ﻰﻧﺑﻣﻟا ٌدﺣأ ردﺎﻐﯾ وأ لﺧدﯾ ﻻأ بﺟﯾ .ﺢﯾﺣﺻ لﻛﺷﺑ ﮫطﺑﺿ.ﺔﻛرﺣﻟا ﻊﺿو ﻲﻓ بﺎﺑﻟا نوﻛﯾ ﺎﻣدﻧﻋ
ﺔﻟازإ وأ تﺎﺣﻼﺻإ يأ ءارﺟإ لﺑﻗ يرﺎﺟﺗﻟا بﺎﺑ ﺢﺗﻓ زﺎﮭﺟ نﻋ ﻲﺋﺎﺑرﮭﻛﻟا رﺎﯾﺗﻟا لﺻﻔﺑ ءﺎﺑرﮭﻛﻟا ﻲﯾﻧﻓدﺣأ موﻘﯾ نأ بﺟﯾ
.ﺔﯾطﻏﻷا
ﻣﯾ ﻻنﯾزﺧﺗﻟا ﺔﺑوطر وأ ءﺎﻣﻟاو ﺔﺑوطرﻟا نأ دﻛﺄﺗ .ﺔﯾﻧورﺗﻛﻟﻹا تﺎﻧوﻛﻣﻟا فﻠﺗ ﻰﻟإ ءﺎﻣﻟاو ﺔﺑوطرﻟا يدؤُﺗنأ نﻛﻣﯾﺎﮭﻧﻛ
تﻼﺑﺎﻛﻟا لﺧادﻣو تﺎﺣﺗﻔﻟا ﻰﻠﻋ قﺑطﻧﯾ ءﻲﺷﻟا سﻔﻧو .فورظﻟا لﻛ تﺣﺗ تﺎﯾﻧورﺗﻛﻟﻹا قارﺗﺧا
.نﯾدﯾﻌﺑ نﯾرﺧﻵا صﺎﺧﺷﻷا نأ دﻛﺄﺗ ،يزﺎﯾﺣﻧا حﺎﺗﻔﻣﻛ لﯾﻐﺷﺗﻟا دﻧﻋ
ﺔﯾﻧﺎﻣﺳﺟﻟا تاردﻘﻟا ﻲﻓ صﻘﻧ مﮭﯾدﻟ نﯾذﻟا (لﺎﻔطﻷا كﻟذ ﻲﻓ ﺎﻣﺑ) صﺎﺧﺷﻷا لﺑِﻗنﻣ ﮫﻣادﺧﺗﺳﻻ ﺎًﺻﺻﺧﻣ سﯾﻟ زﺎﮭﺟﻟا اذھوأ
مھدﺎﺷرإ وأ مﮭﯾﻠﻋ فارﺷﻹﺎﺑ مﮭﺗﻣﻼﺳنﻋ لوؤﺳﻣ ﻎﻟﺎﺑ ٌصﺧﺷ مﺎﻗ اذإ ﻻإ ،ﺔﯾاردﻟاو ةرﺑﺧﻟا مﮭﺻﻘﻧﺗ وأ ،ﺔﯾﻠﻘﻌﻟا وأ ﺔﯾﺳﺣﻟا
.زﺎﮭﺟﻟﺎﺑ ثﺑﻌﻟا مدﻋ نﺎﻣﺿﻟ لﺎﻔطﻷا ﺔﺑﻗارﻣ بﺟﯾ .زﺎﮭﺟﻟا مادﺧﺗﺳا ﺔﯾﻔﯾﻛ نﻋ

ﯾﻣﺻﺗ مﺗ .ﺎﮭﻟ ﺔﺻﺻﺧﻣﻟا ضارﻏﻷا ﻲﻓ مﻛﺣﺗﻟا ةزﮭﺟأو يرﺎﺟﺗﻟا بﺎﺑﻟا لﻐﺷﻣ مدﺧﺗﺳا لﯾﻐﺷﺗﻟ مﻛﺣﺗﻟا ةزﮭﺟأو بﺎﺑﻟا لﻐﺷﻣ م
باوﺑﻷاو ﻲطﻟا ﺔﯾﺋﺎﻧﺛ لﻘﺛﻟا ﺔﻧزاوﺗﻣ باوﺑﻷاو تﺎﻛرﺑﻧزﺑ ﺔﻧزاوﺗﻣﻟا ﺔﻓﺎﻔﻠﻟا باوﺑﻷاو تﺎﻛرﺑﻧزﺑ ﺔﻧزاوﺗﻣﻟا ﺔﻓﺎﻔﻠﻟا ﻊﯾرﺎﺻﻣﻟا
.يدوﻣﻌﻟا ﻊﻓرﻟا تاذ
:رﯾذﺣﺗ.تﺎﻣﯾﻠﻌﺗﻟا ﻊﯾﻣﺟعﺎﺑﺗا صﺎﺧﺷﻷا ﺔﻣﻼﺳﻟ مﮭﻣﻟا نﻣ .ﺔﻣﻼﺳﻠﻟ ﺔﻣﺎھ تﺎﻣﯾﻠﻌﺗظﻔﺗﺣا.تﺎﻣﯾﻠﻌﺗﻟا هذﮭﺑ
مﻗ .روﻔﻟا ﻰﻠﻋ رﺷﺣﻧﺗ وأ قﻠﻌﺗ ﻲﺗﻟا باوﺑﻷا حﻼﺻإ بﺟﯾ .مﺋاد لﻛﺷﺑ ﺔﺳﻼﺳﺑ لﻣﻌﯾبﺎﺑﻟا نأ دﱡﻛﺄﺗﻟا مﮭﻣﻟا نﻣ
.كﺳﻔﻧﺑ ﮫﺣﻼﺻإ اًدﺑأ لوﺎﺣﺗ ﻻو ،بﺎﺑﻟا حﻼﺻﻹ ؤﻔﻛ ﻲﻧﮭﻣ ءﺎﻋدﺗﺳﺎﺑ
لﯾﻐﺷﺗﻟا
بﺎﺑﻟا لﯾﻐﺷﺗﻟ
) ﻰﻠﻋأ رز طﻐﺿاUPرز طﻐﺿاو ،بﺎﺑﻟا ﺢﺗﻔﻟ مﻛﺣﺗﻟا زﺎﮭﺟ ﻲﻓ () لﻔﺳأDOWN.قﻼﻏﻺﻟ رارﻣﺗﺳﻻا ﻊﻣ (
بﺎﺑﻟا لﯾﻐﺷﺗﻟ،مﻛﺣﺗﻟا زﺎﮭﺟ لﯾﺻﺎﻔﺗرظﻧا
يودﯾﻟا لﯾﻐﺷﺗﻟا
) ﺔﻠﺳﻠﺳﻠﻟ ﻲﺋﺎﻘﻠﺗﻟا قﯾﺷﻌﺗﻟا ﺔﯾﻟآACEM(
) ﺔﻠﺳﻠﺳﻠﻟ ﻲﺋﺎﻘﻠﺗﻟا قﯾﺷﻌﺗﻟا ﺔﯾﻟآ تازﯾﻣ كﻟ ﺢﻣﺳﺗACEMمادﺧﺗﺳﺎﺑ عارﺗﺧﻻا ةءارﺑ ﻰﻠﻋ ﺔﻠﺻﺎﺣﻟا (
رﮭﻛﻟا رﺎﯾﺗﻟا لطﻌﺗ ﺔﻟﺎﺣ ﻲﻓ ﺔﯾودﯾﻟا ﺔﻠﺳﻠﺳﻟانﯾھﺎﺟﺗﻻا دﺣأ ﻲﻓ دﯾﻟا ﺔﻠﺳﻠﺳ بﺣﺳا ﺔطﺎﺳﺑﺑ .ﻲﺋﺎﺑلﯾﻐﺷﺗﻟ
.ﺎًﯾودﯾ بﺎﺑﻟا
ﺔﯾودﯾﻟا ﺔﻠﺳﻠﺳﻟا مادﺧﺗﺳا يدؤﯾ دﻗ .ةزﯾﻣﻟا هذھ مادﺧﺗﺳا دﻧﻋ ً
ﻻوزﻌﻣ رﺎﯾﺗﻟا ردﺻﻣ نأ دﻛﺄﺗ !رﯾذﺣﺗ
ردﺻﻣ قﻼﻏإ نﻣ دﻛﺄﺗ .مدﺧﺗﺳﻣﻟا ﺔﺑﺎﺻإ وأ زﺎﮭﺟﻟا فﻠﺗ ﻰﻟإ ﻲﺋﺎﺑرﮭﻛﻟا رﺎﯾﺗﻟﺎﺑ بﺎﺑﻟا لﯾﻐﺷﺗ لﻼﺧ
لﺑﻗ رﺎﯾﺗﻟا.ﺔﯾودﯾﻟا ﺔﻠﺳﻠﺳﻟا مادﺧﺗﺳا
) ﺔﻠﺳﻠﺳﻠﻟ ﻲﺋﺎﻘﻠﺗﻟا قﯾﺷﻌﺗﻟا ﺔﯾﻟآ قﺻﻠﻣ ﻊﺿو مﺗﯾACEMﻰﻠﻋ رظﻧا) (رﺎﺳﯾﻟازﺎﮭﺟ نﻣ برﻘﻟﺎﺑ (
.بﺎﺑﻟا رﺎﺳﻣ ﻰﻠﻋ ،لﺎﺛﻣﻟا لﯾﺑﺳ ﻰﻠﻋ مﻛﺣﺗﻟا
ﺔﻣﺎﻌﻟا ﺔﻧﺎﯾﺻﻟا
.ﺔﻧﺎﯾﺻﻟا ﺔﯾﻠﻣﻋ ﻲﻓ ﺔﯾرﺎﺟﺗﻟا باوﺑﻷا ﻊﺋﺎﺑ تﺎﻣﯾﻠﻌﺗ عﺎﺑﺗاﻰﺟرﯾ
نﻣ برﻘﻟﺎﺑ بﺎﺑﻠﻟ يدﺎﺷرﻹا لﯾﻟدﻟا ﻖﺻﻟا
ﺔﯾودﯾﻟا ﺔﻠﺳﻠﺳﻟا
لطﻋ ثودﺣ وأ رﺎﯾﺗﻟا عﺎطﻘﻧا ﺔﻟﺎﺣ ﻲﻓ
:لﯾﻐﺷﺗﻠﻟ ﻲﻟﺎﺗﻟا عﺎﺑﺗا ﻰﺟرﯾ ،ﻲﺋﺎﺑرﮭﻛ
مادﺧﺗﺳا لﺑﻗ ﻲﺋﺎﺑرﮭﻛﻟا رﺎﯾﺗﻟا ردﺻﻣ ﻖﻠﻏأ
ﺔﯾودﯾﻟا ﺔﻠﺳﻠﺳﻟا
ﺔﺳﻼﺳﺑ ﺔﻠﺳﻠﺳﻟا بﺣﺳا يودﯾﻟا لﯾﻐﺷﺗﻠﻟ
ﻊﺑﺎﺗﺗﻣ لﻛﺷﺑ دﯾ قوﻓ اًدﯾ
دﻧﻋ ﺔﻠﺳﻠﺳﻟا نﻋ كﯾدﯾ دﻌﺑأ :رﯾذﺣﺗ
ﺎًﯾﻧورﺗﻛﻟإ لﯾﻐﺷﺗﻟا

NOTES
Table of contents
Other Grifco Door Opening System manuals
Popular Door Opening System manuals by other brands

Manaras
Manaras Opera-MH Installation instructions manual

B&D
B&D Roll-A-Door 2 Series installation instructions

DH2 Solutions
DH2 Solutions Abloy DA460 Information

Dormakaba
Dormakaba UNIVERSAL PT 60 Mounting instructions

Hydro
Hydro digidoor 6 Installation instructions and user guide

Spacepro
Spacepro Contour Assembly instructions