Griots Garage 91582 Installation guide

7-In-1 MultI-PurPose Workbench
User manual and care instructions.
Have fun in your garage!®
Thank you for selecting this quality Griot’s Garage product.
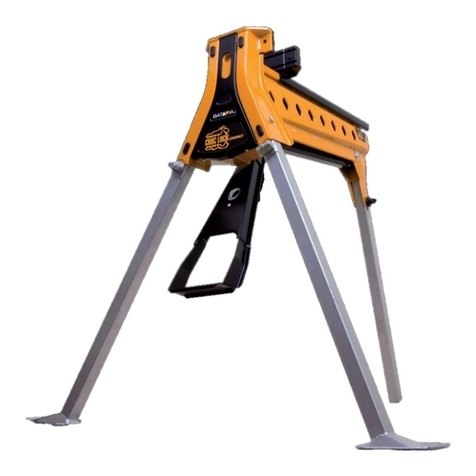
Your 7-In-1 MultI-PurPose Workbench is a portable workbench, a scaffold, a
sawhorse, a mobile cart, a dolly, a creeper, and a hand truck. This product can be
changed easily between different modes by following the instructions in this manual.
Towing Hole
Tool Tray Angle Guide
2-In-1 Handle Grounded Outlets
& USB Ports
Self-Adjusting
Feet
Fixed
Casters
Locking
Swivel
Casters
Extendable,
Aluminum Legs
Ruler

2
WARNING!
PLEASE READ ALL INSTRUCTIONS AND ASSEMBLY DIRECTIONS AND SAVE FOR FUTURE
REFERENCE. FAILURE TO FOLLOW THESE SAFETY PRECAUTIONS AND INSTRUCTIONS
COULD RESULT IN DAMAGE TO THE PRODUCT AND/OR SERIOUS INJURY TO YOU.
GENERAL SAFETY RULES
CAUTIONS & WARNINGS
Warning: This product is designed for certain applications only. Griot’s Garage
cannot be responsible for issues arising from modification. We strongly
recommend this product not be modified and/or used for any application other
than that for which it was designed.
Caution: Do not allow persons to operate or assemble this product until they
have read this manual and have developed a thorough understanding of how the
product works.
Caution: The warnings, cautions, and instructions discussed in this instruction
manual cannot cover all possible conditions or situations that could occur. It must
be understood by the operator that common sense and caution are factors which
cannot be built into this product, but must be supplied by the operator.
IMPORTANT SAFETY CONSIDERATIONS
• Make sure all moving parts are free from interference.
• Keep hands clear of all moving parts.
• Ensure 7-in-1 Multi-Purpose Workbench is used in a dry place protected from
rain. Do not store outdoors or in a moist environment. (If used for car washing,
please ensure power is NOT connected.)
• Keep work area well lit.
• Be aware of your balance. When using this product in all modes, please keep your
body or heavy object in the center of the work surface to avoid loss of balance
which may result in personal injury.
TOOLS NEEDED FOR ASSEMBLY
• #3 Phillips Head - or - 12mm Socket or Universal Socket
TECHNICAL SPECIFICATIONS
DIMENSIONS: LOAD CAPACITIES:
Total Workbench Size 42
3
⁄
4
” x 21
1
⁄
2” Workbench/Sawhorse 220 lbs
Work Surface Board Size 42
1
⁄
2” x 21
3
⁄
8” Scaffold/Platform 440 lbs
Workbench Height 30
3
⁄
4
” Creeper & Dolly 220 lbs
Scaffold Height 20
3
⁄
8” Hand Truck 220 lbs
Accessory Charging 2 USB ports Net Weight 29.8 lbs
Electrical Outlets 2 grounded 120V, 15-amp surge protector
3
• When transporting in a vehicle always tie the 7-in-1 Multi-Purpose Workbench
down to prevent movement and possible damage.
• Check to make sure that all fixing screws and knobs are tight and all legs are
locked into position before operating the 7-in-1 Multi-Purpose Workbench.
• Don’t use Scaffold Mode with legs fully extended. Always use this product on a
stable, level surface. Failure to properly position or overloading the product may
result in serious personal injury.
• The product must be used only for its prescribed purpose. Any use other than those
mentioned in these instructions will be considered a case of misuse. Griot’s Garage
shall not be liable for any damage or injury resulting from such cases of misuse.
• Griot’s Garage shall not be liable for any changes made to the tool nor for any
damage resulting from such changes.
INTENDED USE
This versatile 7-in-1 Multi-Purpose Workbench can serve as a workbench, sawhorse,
scaffold, platform, car creeper, dolly, and hand truck. It can be transformed easily
between different modes by following the instruction manual. This product is intended
for DIY and light trade use.
ASSEMBLY
Your 7-in-1 Multi-Purpose Workbench comes fully assembled, just take it out of the
packaging, install the wheels, and follow the simple set-up steps. You’ll soon be ready
to tackle all your projects.
Workbench Mode Sawhorse Mode Scaffold Mode
Hand Truck ModeCreeper & Dolly ModePlatform Mode

4
HAND TRUCK MODE / CAR CREEPER & DOLLY MODE
Please follow the following steps to install the wheels to achieve Car Creeper & Dolly
Mode and Hand Truck Mode. The four wheels and all pertinent fasteners are packed
separately in the master carton. There are two universal/steering wheels plus two
fixed wheels in the set, and each wheel type has its own position. Please refer to the
accompanying schematic drawing. Please note that the steering wheels with brakes
must be installed on the truck handle end of the workbench and the fixed wheels
must be installed on the opposite end.
Hand Truck Mode
Pull the handle up from the platform until you hear it click into place. The product is
ready to perform in Hand Truck Mode. To convert from Hand Truck Mode push the two
handle buttons in and swing the handle back into the platform.
Wheel Installation quick reference
Universal, swivel
wheels with brakes
Fixed wheels

5
Scaffold & Platform Mode
Release all legs from their locking position, then swing each pair of legs until they are
perpendicular to the platform. See diagram above. To ensure stability, engage gusset
braces by pulling them until they are flat and locked in place. Repeat for all the other
gusset braces. See diagram above.
WARNING: DON’T USE SCAFFOLD/PLATFORM MODE WITH
LEGS FULLY EXTENDED. The inner legs are not designed to
be used in this function.
For Platform Mode, simply pull the handle up from the platform
until it’s fully extended then release the tool tray from its locking position. You can put
the tool tray on the top of the handle, forming a platform.
NOTE: THE WEIGHT CAPACITY FOR THE TOOL TRAY IS 4.5 POUNDS IN THIS MODE.
Hang the hook on the handle, where it can be used to hold tool bags while working on
the platform.

6
Workbench & Sawhorse Mode
Begin by setting up the legs by following the same steps detailed within Scaffold
Mode section. Then, push the snap buttons on the side of each leg to release them,
then pull the inner legs out to the workbench height. When legs are fully extended
they will snap into place.
NOTE: DO NOT step on the workbench while the legs are fully extended.
Quick Clamp Installation (Clamps not supplied with workbench)
Remove the small plastic part of your quick clamp (Figure 1) then insert the steel
bar into our connector (Figure 2) and put a pin into the lock hole, make sure they
are connected firmly (Figure 3). Put the connector into the sawhorse hole on the
workbench surface and rotate at least 30 degrees (Figure 4). With the help of the 2
vice pegs on the workbench, Sawhorse Mode is completed.
POWER & CONNECTIVITY
Your 7-in-1 Multi-Purpose Workbench is equipped with 2 grounded 120V electrical
outlets to power your projects. Plug in saws, sanders, our random orbitals whatever
tool you need. The plug array also has 2 USB ports to charge your mobile devices and
features a 15-amp surge protector for added peace of mind.
(Clamps not included with workbench.)
3. 4.
Press snap button
Legs release
& extend
1. 2.

7
MAINTENANCE
Wipe away dirt and dust from the workbench on a regular basis. It is recommended
that the general condition of any workbench be examined before it is used. Keep
your workbench in good repair by adopting a program of conscientious repair and
maintenance. Have necessary repairs made by qualified service personnel.
ANSWERS TO YOUR QUESTIONS
Should you have any comments or questions about the use of your
7-in-1 Multi-Purpose Workbench (Item # 91582), our Customer Service Department
can be reached by phone or email. For a complete selection of products or to receive
a free Griot’s Garage Handbook, please call us or visit us at griotsgarage.com.
Customer Service Department
800-345-5789

Item# 91582
Have fun in your garage!®
Griot’s Garage, Inc. • 3333 South 38th Street • Tacoma, WA 98409
800-345-5789 • griotsgarage.com
©2020 Griot’s Garage Inc.
8
Table of contents