manuals.online logo
Brands
  1. Home
  2. •
  3. Brands
  4. •
  5. Grohe
  6. •
  7. Bathroom Fixture
  8. •
  9. Grohe 36252000 User manual

Grohe 36252000 User manual

I
Please pass these instructions on to the end user of the fitting!
S.v.p remettre cette instruction à l'utilisateur de la robinetterie!
Bitte diese Anleitung an den Benutzer der Armatur weitergeben!
II
8
9
6
11
7
x+24 L
10
1 2
3 4
5 6
3
GB
Safety notes
• Installation is only possible in frost-free rooms.
• The control electronics are only suitable for indoor use.
• In the case of damage to the external connection cable
of the control unit, the cable must be replaced by the
manufacturer or his customer service department or an
equally qualified person, in order to prevent a hazard.
• When cleaning the fitting (of the wash basin) it must be
ensured that the tile frame behind which the electronics are
installed is not sprayed directly with water.
• In order to provide optimum water protection, the tile frame
must be sealed.
• Use only genuine replacement parts and accessories.
The use of other parts will result in voiding of the warranty
and the CE identification.
Technical data
• Flow rate at 3 bar flow pressure Approx. 6 l/min
• Supply voltage: 230 V AC, 50/60 Hz
(transformer 230 V AC/12 V AC)
• Power consumption: 3.2 VA
• Automatic safety shut-off
(factory setting): 60 s
• Cleaning mode (factory setting): 3 min
• Automatic flushing (factory setting deactivated)
• Reception range according to Kodak Gray Card,
grey side, 8 x 10", landscape (factory setting): 22cm
• Run-on time: 2 s
The test for electromagnetic compatibility (interference
emission test) was performed at the rated voltage and rated
current.
Approval and conformity
The conformity declarations can be obtained from the following
address:
GROHE Deutschland Vertriebs GmbH
Zur Porta 9
D-32457 Porta Westfalica
Special accessory
Infrared remote control (Prod. no. 36 206) for changing the
factory settings and selecting special functions.
Installation
Preparations, see fold-out page II, Fig. [1].
1. Remove cover (A).
2. Open isolating valve (B).
Flush pipes thoroughly before and after installation
(observe EN 806).
Important: the water must be directed from the spout into the
room during flushing.
3. Close isolating valve (B).
Installing solenoid valve, see Fig. [2].
• Replace spacer (C) with solenoid valve (D) together with
seals (D1).
Important: install solenoid valve in flow direction.
Installing transformer, see Figs. [3] and [4].
1. Fit upper part (E) of the transformer to base (E1), see Fig. [3],
remove protection first.
2. Establish plug-in connection between solenoid valve
cable (F1) and solenoid valve (D), see Fig. [4].
3. Connect electronics cable (F2) to connecting wire of
transformer (E2).
Installing infrared electronics, see Figs. [5] to [8].
1. Cut off inspection chamber (G) flush with tiles, see Fig. [5].
2. Pull electronics cable (F2) and solenoid valve cable (F1) out
of the opening, see Fig. [6].
3. Connect infrared electronics cable (H) to electronics
cable (F2) and solenoid valve cable (F1).
4. Align infrared electronics (H) horizontally and fasten to
inspection chamber (G) using screws (K), see Fig. [7].
5. Position escutcheon (J) on the infrared electronics and
fasten using a 2mm allen key, see Fig. [8].
Installing spout, see Figs. [9] to [11].
1. Fasten spout (M) to escutcheon (N) using a 2mm allen key,
see Fig. [9].
2. Determine dimension "X" from upper edge of elbow union to
face of tiles, see Fig. [10].
3. Cut connection nipple (L) so that the installation dimension
is "X"+24mm.
4. Using a 12mm allen key, screw connection nipple (L) into
the elbow union until the installation dimension is 6mm,
see Fig. [11].
5. Attach spout (M) to connection nipple (L) using a 2.5mm
allen key.
Adjusting
Only in conjunction with wall-mounting box 38 892.
Check the temperature of the water at the spout with a
thermometer, see Fig. [12]. If the desired temperature has not
been reached, proceed as follows:
1. Remove cap (O), see Fig.[13].
2. Remove stop ring (P) and scale ring (Q).
3. The temperature can be adjusted, using a 3mm allen key in
the hexagon aperture on the thermostatic cartridge (R).
4. After reaching a temperature of 40 °C, attach scale ring (Q),
so that the 40 °C marking aligns with the red pin (S) of the
thermostatic cartridge (R).
5. Attach stop ring (P), so that the red pin (S) is located in the
aperture (P1).
Temperature adjustment
For operation with the thermostat, the mixed water
temperature is pre-adjusted at the thermostatic cartridge (R),
see Fig. [13].
The cap (O) and the stop ring (P) must be removed to adjust
the temperature. The temperature can now be adjusted using
the 3mm allen key. Turn clockwise (to decrease temperature),
turn anti-clockwise (to increase temperature), see also indicator
on the scale ring (Q). Reinstall stop ring (P) and cap (O).
Caution:
To prevent self-adjustment of the temperature, operation only
with installed cap (O).
Operation
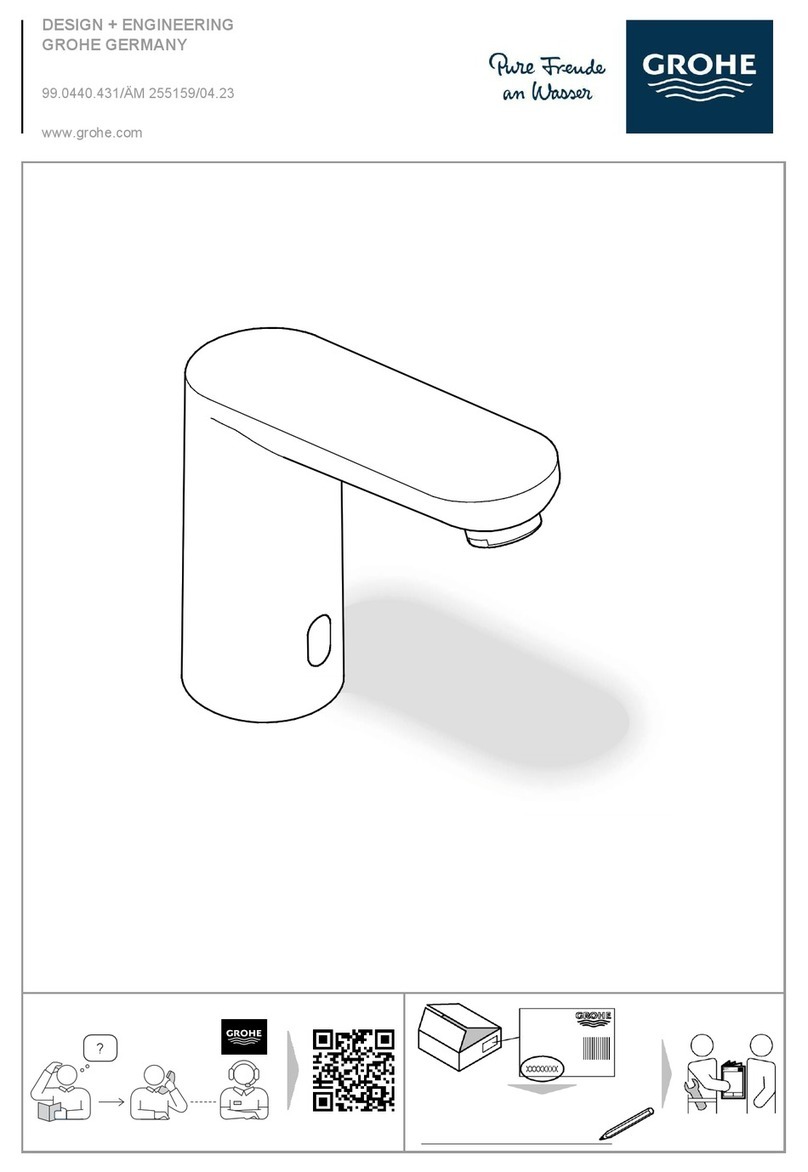
The infrared electronics emit invisible, pulsed light.
The infrared-electronics are adjusted so that water flow is
initiated when the hands approach the vicinity of the spout.
When the hands are withdrawn from the vicinity of the spout,
water flow is stopped after 2 s (factory setting).
The range of the sensor system is dependent upon the
reflective properties of the detected object.
This product conforms to the requirements of the
relevant EU guidelines.
4
Cleaning mode
Cleaning mode is activated when the hand is held for 5 s at
a distance of 3 - 7 cm in front of the sensor system. Water flow
is interrupted for 3 minutes.
When a user enters the detection zone again for 5 s or after
the time has elapsed, the water flow is initiated again.
Automatic safety shut-off
After 60 s (factory setting) of continuous detection of an object,
the infrared electronics automatically stop the water flow.
Automatic flushing (factory setting: not activated)
Automatic flushing serves to ensure water hygiene in the event
of long-term non-utilisation of the fitting. and activates water
flow for 1 - 10 minutes, 1 or 3 days after the last use.
Safety note:
Ensure free draining in the case of activated automatic
flushing.
Maintenance
Inspect and clean all components and replace if necessary.
Shut off the water supply and switch off the voltage
supply.
I. Transformer, see fold-out page III, Fig. [14].
1. Remove cover (A), see fold-out page II, Fig. [1].
2. Disconnect plug-in connector between transformer (E) and
electronics, see fold-out page III, Fig. [14].
3. Detach upper part (E) of transformer from base (E1).
Assemble in reverse order.
II. Solenoid valve, see fold-out page III, Figs. [15] and [16].
1. Remove cover (A), see fold-out page II, Fig. [1].
2. Disconnect plug-in connector between solenoid valve (D)
and electronics, see fold-out page III, Fig. [15].
3. Remove solenoid valve (D).
4. Remove and clean filter (D2), see Fig [16].
Assemble in reverse order.
III. Electronic, see fold-out page III, Fig. [17].
1. Remove escutcheon (J).
2. Remove screws (K), pull out electronics (H) and disconnect
the plug-in connectors.
Assemble in reverse order.
IV. Remove mousseur (13 943) using a spanner and clean,
see fold-out page I.
Assemble in reverse order.
Replacement parts, see fold-out page I (* = special
accessories).
Care
For directions on the care of this fitting, please refer to the
accompanying Care Instructions.
Fault/ cause/ remedy
Fault Cause Remedy
Water not flowing • Water supply interrupted - Open isolating valve.
• Filter in solenoid valve blocked - Clean filter, see Solenoid valve
maintenance
• Plug-in connector without contact - Attach plug-in connector
• The detection zone of the sensor system
is set too low
- Increase detection zone using
remote control (special accessory,
Prod. no.: 36 206)
• Solenoid valve defective - Replace solenoid valve, see Solenoid
valve maintenance
• No voltage - Switch on power supply or check plug-in
connectors
• Electronics defective - Replace electronics, see Electronics
maintenance
• Transformer defective - Replace transformer, see Transformer
maintenance
Water flowing continuously • Solenoid valve defective - Replace solenoid valve, see Solenoid
valve maintenance
Undesired water flow • The detection zone of the sensor system
is set too high
- An opposing object is detected. Reduce
detection zone using remote control
(special accessory, Prod. no.: 36 206)
Flow rate too low • Filter or mousseur dirty - Clean or replace, see Solenoid valve
and mousseur maintenance
• Isolating valve not fully open - Open isolating valve fully
• Water supply restricted - Check supply lines, open isolating valve

Other Grohe Bathroom Fixture manuals

Grohe Eurowing User manual

Grohe

Grohe Eurowing User manual

Grohe Allure Brilliant 20 346 User manual

Grohe

Grohe Allure Brilliant 20 346 User manual

Grohe Euphoria User manual

Grohe

Grohe Euphoria User manual

Grohe Eurofresh 19200 User manual

Grohe

Grohe Eurofresh 19200 User manual

Grohe SOMERSET 19 320 User manual

Grohe

Grohe SOMERSET 19 320 User manual

Grohe Chiara 19 206 User manual

Grohe

Grohe Chiara 19 206 User manual

Grohe Rainshower SmartControl 34 718 User manual

Grohe

Grohe Rainshower SmartControl 34 718 User manual

Grohe 27 032 User manual

Grohe

Grohe 27 032 User manual

Grohe Rainshower System 27 641 User manual

Grohe

Grohe Rainshower System 27 641 User manual

Grohe 49 113 User manual

Grohe

Grohe 49 113 User manual

Grohe TECTRON 37 421 User manual

Grohe

Grohe TECTRON 37 421 User manual

Grohe RAINSHOWER 310 SMARTCONNECT User manual

Grohe

Grohe RAINSHOWER 310 SMARTCONNECT User manual

Grohe Minta 32 918 User manual

Grohe

Grohe Minta 32 918 User manual

Grohe ATRIO 19 169 User manual

Grohe

Grohe ATRIO 19 169 User manual

Grohe EUROSMART COSMOPOLITAN T 36321 User manual

Grohe

Grohe EUROSMART COSMOPOLITAN T 36321 User manual

Grohe EUROSMART COSMOPOLITAN E 36 465 User manual

Grohe

Grohe EUROSMART COSMOPOLITAN E 36 465 User manual

Grohe EUROECO COSMOPOLITAN E 36324001 User manual

Grohe

Grohe EUROECO COSMOPOLITAN E 36324001 User manual

Grohe BauEdge 20474000 User manual

Grohe

Grohe BauEdge 20474000 User manual

Grohe Parkfield 20 390 User manual

Grohe

Grohe Parkfield 20 390 User manual

Grohe RETRO-FIT SHOWER SYSTEM 26 190 User manual

Grohe

Grohe RETRO-FIT SHOWER SYSTEM 26 190 User manual

Grohe Grohtherm F 35 029 User manual

Grohe

Grohe Grohtherm F 35 029 User manual

Grohe Allure E 36235 User manual

Grohe

Grohe Allure E 36235 User manual

Grohe Aquatower 1000 User manual

Grohe

Grohe Aquatower 1000 User manual

Grohe Aquatower 3000 User manual

Grohe

Grohe Aquatower 3000 User manual

Popular Bathroom Fixture manuals by other brands

abi CYRUS 100131 quick start guide

abi

abi CYRUS 100131 quick start guide

Sanela SLZA 29T Instructions for use

Sanela

Sanela SLZA 29T Instructions for use

Bradley 400 Series Installation

Bradley

Bradley 400 Series Installation

Zodi Hot Tap 6170 instructions

Zodi

Zodi Hot Tap 6170 instructions

Gerber Parma D461728 Assembly

Gerber

Gerber Parma D461728 Assembly

Decor Star PL-002-GS installation instructions

Decor Star

Decor Star PL-002-GS installation instructions

Geberit Ifo SIGN Operating and maintenance instructions

Geberit

Geberit Ifo SIGN Operating and maintenance instructions

Franke MIRANIT F5ST2025 Installation and operating instructions

Franke

Franke MIRANIT F5ST2025 Installation and operating instructions

Glacier bay 20015-0304 Use and care guide

Glacier bay

Glacier bay 20015-0304 Use and care guide

DURAVIT Happy D.2 Plus HP 4944 L Mounting instructions

DURAVIT

DURAVIT Happy D.2 Plus HP 4944 L Mounting instructions

Schell PETIT SC MOUNTING AND INSTALLATION INSTRUCTION

Schell

Schell PETIT SC MOUNTING AND INSTALLATION INSTRUCTION

VINNOVA Bilbao 701272G installation instructions

VINNOVA

VINNOVA Bilbao 701272G installation instructions

sanindusa MARINA Assembly instructions

sanindusa

sanindusa MARINA Assembly instructions

jokey Marno quick start guide

jokey

jokey Marno quick start guide

Graff E-11557 L1 Series Instructions for assembly and use

Graff

Graff E-11557 L1 Series Instructions for assembly and use

Twyford Hydr8 instruction manual

Twyford

Twyford Hydr8 instruction manual

Rubi ABYSS RAB22D Installation

Rubi

Rubi ABYSS RAB22D Installation

Project Source F5120021CP manual

Project Source

Project Source F5120021CP manual

manuals.online logo
manuals.online logoBrands
  • About & Mission
  • Contact us
  • Privacy Policy
  • Terms and Conditions

Copyright 2025 Manuals.Online. All Rights Reserved.